
Making your own wind chimes is a fun hobby that offers a unique approach to improving your living area with peaceful sounds by combining artistry with a little engineering. This do-it-yourself project lets you play about with wood, beads, and metal tubes to produce a unique work that appeals to both melodic sounds and visual appeal.
Read our complete guide on how you can make your own wind chimes at home!
Contents
Making Wind Chimes
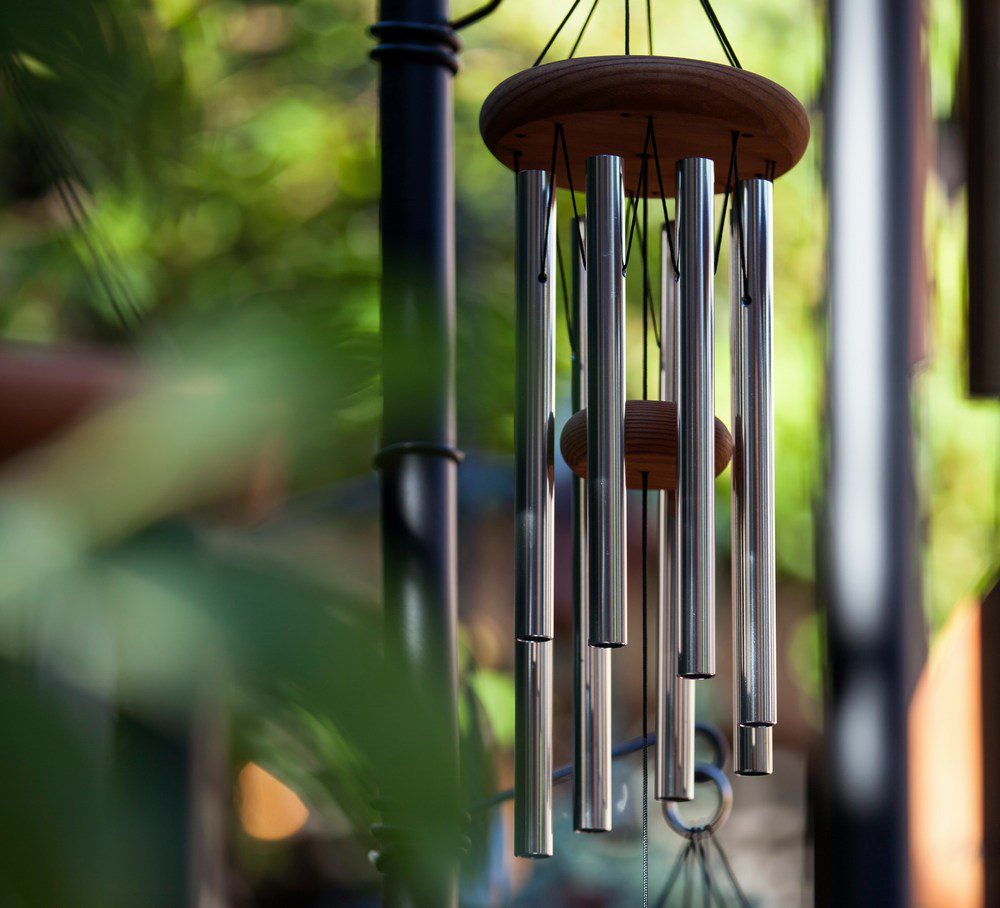
Start your wind chime project by gathering all the necessary materials and tools. For this DIY, you’ll need metal tubes for chimes, a sturdy piece of wood for the top suspension platform, a string or fishing line for hanging, beads for decoration, and essential tools.
Materials
- Metal Tubes: Select tubes of varying lengths for diverse sound pitches.
- Wood Piece: For the top suspension platform; choose a durable type suitable for outdoor use.
- String or Fishing Line: To hang the chimes and wind catcher.
- Beads: For decorative purposes and to act as strikers.
- Wind Catcher Material: Wood or metal, cut into a shape that will catch the breeze.
Required Tools
- Parallel-Pliers: Essential for bending metal tubes or making precise adjustments.
- Saw: For cutting the metal tubes and the wood for the suspension platform.
- Drill: To create holes in the wood for hanging the chimes and the wind catcher.
- Ruler or Measuring Tape: To measure and ensure accurate lengths of tubes and strings.
- Sandpaper: For smoothing rough edges on metal tubes and wooden parts.
- Scissors: To cut strings or fishing lines.
Instructions
Step 1: Design Your Wind Chime
Lay out your design on paper. Decide the number of tubes you want to use and their lengths. Longer tubes produce deeper tones, while shorter tubes create higher pitches. This design phase will guide all subsequent steps.
Step 2: Cut and Shape the Chimes
Measure and mark your metal tubes according to your design specifications. Use a saw to cut them to the desired lengths. Smooth any rough edges with sandpaper. If any bending of the metal is required, use parallel-pliers to carefully shape the tubes without crimping them.
Step 3: Create the Suspension Platform
Cut your chosen wood into a circular or square shape, depending on your design. Drill holes evenly spaced around the perimeter for the chimes, and one in the center for hanging the entire structure. Sand any rough edges for a smooth finish.
Step 4: Assemble the Chimes
Cut strings or fishing lines to hang the metal tubes. Thread each string through a bead before attaching it to a tube, securing it with a knot at one end. The beads act as strikers and enhance the wind chime’s appearance. Attach the other end of each string through the holes in the suspension platform, adjusting for even spacing and balance. Secure each string with a knot at the top.
Step 5: Add a Wind Catcher
Create a wind catcher by cutting a shape out of a lightweight material like wood or metal. Attach it to the center of the suspension platform with a longer string, ensuring it hangs below the chimes. The wind catcher will help catch the breeze and set your chime in motion.
Step 6: Hang Your Wind Chimes
Choose a location that receives gentle breezes and doesn’t expose the chimes to harsh elements. Hang the wind chime from a hook or a tree branch, adjusting its position to find the perfect sound and movement.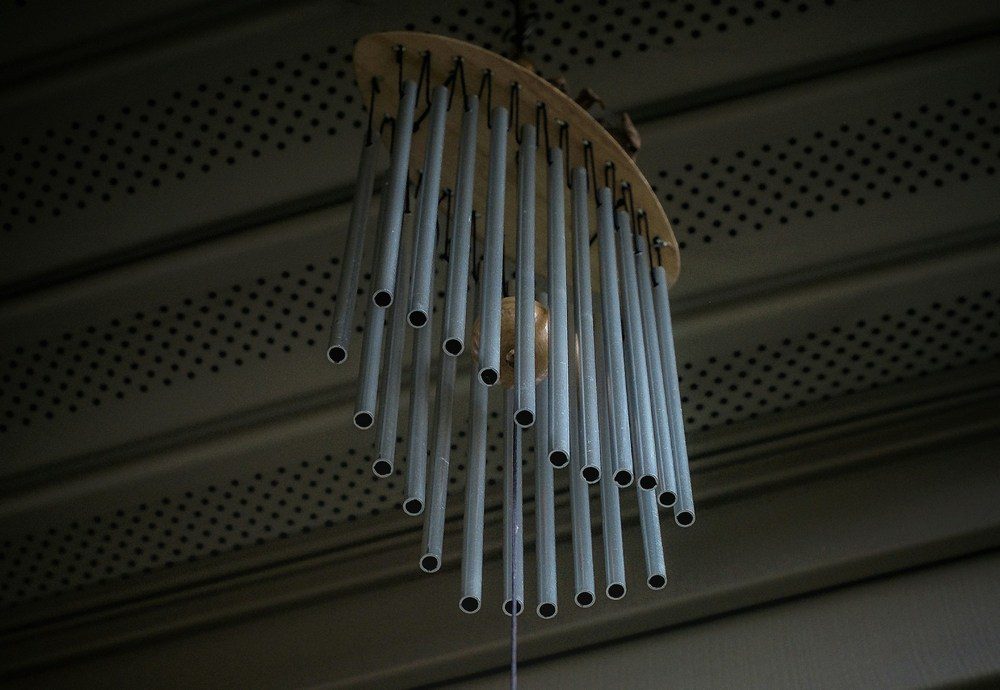
Tuning Wind Chimes for Harmony
Creating harmoniously tuned wind chimes is both an art and a science, transforming simple materials into instruments that produce soothing, melodious sounds. Tuning your wind chimes correctly can enhance any space, creating an ambiance of peace and tranquility. This guide will walk you through the fundamental principles of tuning wind chimes to achieve perfect harmony, ensuring that every breeze brings a delightful auditory experience.
Understanding the Basics of Sound in Wind Chimes
Wind chimes produce sound through vibrations in suspended tubes or rods, which resonate to emit specific musical notes. The pitch of the sound produced by each chime is determined by its length, diameter, thickness, and the material it is made of. Learning how these factors influence sound will help you create chimes that not only look beautiful but also sound harmonious.
Calculating Length for Specific Notes
- Frequency and Length Relationship: The fundamental frequency of a tube is inversely proportional to its length. To produce a desired note, you can use the formula: L=v2fL = \frac{v}{2f}L=2fv, where LLL is the length of the tube, vvv is the speed of sound in the material, and fff is the frequency of the note.
- Material Impact: Different materials transmit sound at different speeds. For example, metal tubes have a different sound speed compared to bamboo or glass, affecting the length needed for the same note.
Choosing Materials and Their Impact on Sound Quality
Select materials based on the type of sound you desire:
- Metal Tubes: Offer clarity and can be precisely tuned. Popular choices include aluminum and copper for their resonant properties.
- Wood or Bamboo: Produce warmer, softer tones but are less precise in tuning.
- Glass or Ceramic: Create bright, clear tones, ideal for higher pitches and decorative aesthetics.
Tuning Techniques
- Accurate Measuring: Use precise measuring tools to ensure the correct length of your chimes based on your calculations.
- Fine-Tuning: After cutting your chimes to an approximate length, hang them up and use a tuner to check each note. You can make fine adjustments by slightly shortening the tubes until the desired tone is reached.
Assembly for Optimal Resonance
- Suspension Method: How you suspend the chimes affects their resonance. Hang each chime by its nodal point (typically 22.4% from the top of a cylindrical tube) to minimize damping and maximize sound resonance.
- Uniform Spacing: Ensure chimes are evenly spaced to prevent acoustic shadowing, where one chime blocks the sound of another.
Final Adjustments and Installation
Once tuned, install your wind chimes in a location free from obstructions, where they can catch gentle breezes from multiple directions. This placement ensures that your wind chimes will have the opportunity to play their full range of harmonies, providing a serene auditory landscape.
These guidelines will help you design a set of wind chimes that not only look great but are also precisely tuned to produce harmonic melodies improving any living area.
Conclusion
Making your own wind chimes lets you personalize your environment and combine art with the calming sounds of nature. Every chime may be adjusted to generate harmonic tones that improve the ambiance of every space. This do-it-yourself activity provides a satisfying approach to expressing your imagination while appreciating the relaxing power of your handcrafted wind chimes.