Building a DIY playhouse for your kids is a rewarding experience. It offers a special space for imagination to flourish.
You can create a fun and safe playhouse with basic tools and planning. Below are some helpful tips and a guide to building a safe playhouse for your children.
Contents
- 1 DIY Playhouse Building Tips
- 2 Tips for Creating a Safe Playhouse
- 3 Steps in Building a DIY Playhouse
- 4 Frequently Asked Questions
- 4.1 What type of wood should I use for the playhouse?
- 4.2 Do I need a permit to build a playhouse?
- 4.3 How do I make sure the playhouse is safe?
- 4.4 How important is ventilation?
- 4.5 Can I add electricity to the playhouse?
- 4.6 How do I maintain the playhouse?
- 4.7 How long will it take to build the playhouse?
- 4.8 Do I need special tools to build a playhouse?
- 5 Conclusion
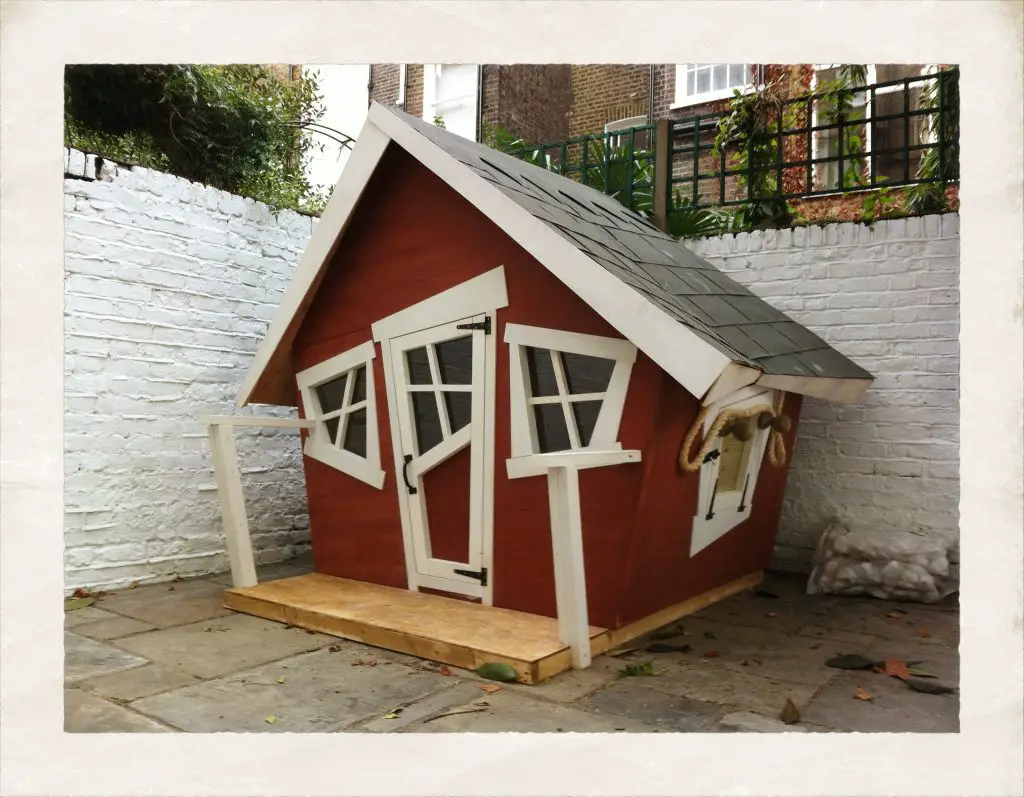
DIY Playhouse Building Tips
Building a DIY playhouse can be an exciting project. Your children will greatly appreciate the private spot built just for them. Below are some helpful tips when building your DIY play space for your kids.
Start with a Plan
Before you hammer the first nail, have a plan. Having the layout of your playhouse and the materials you intend on using cuts down the time it takes to build it. It also helps you avoid mistakes that could lead to redoing work.
Select Quality Materials
The playhouse should last for years, so choose quality materials. Opt for treated wood that can withstand the elements. While it might be tempting to go cheap, remember that quality pays off in the long run. You want sturdy materials if you plan on building any type of play space, such as a treehouse.
Get the Kids Involved
Involving your kids makes the process more enjoyable. They can help with simple tasks or even give design ideas. It’s a great way to teach them basic skills and the value of hard work.
Invest in Good Tools
Good tools make a difference. Invest in quality hammers, saws, and drills. Good tools speed up the process and ensure a more secure construction.
Measure Twice, Cut Once
This old carpenter’s adage holds. Always double-check your measurements before making cuts. Mistakes in measurements can lead to a waste of material and time.
Think About Future Growth
Kids grow fast. Build the playhouse with some room for them to grow into. It might mean making the door a little taller or the interior more spacious.
Prioritize Safety
When building, think about safety first. Use screws instead of nails for a more secure structure. Make sure there are no sharp edges or corners. Always follow the safety guidelines for each tool you use.
Test the Paint
If you’re painting the playhouse, choose child-friendly, non-toxic paints. Always test a small area first to see how it looks when it dries. And remember, lighter colors can help make the inside of the playhouse feel more spacious.
Flooring Matters
Don’t forget the floor. Whether you choose wood, carpet, or even rubber mats, make sure it’s safe and comfortable. Consider materials for your playhouse that are easy to clean and maintain.
Check the Roof
A leaky roof can ruin the fun. Make sure the roofing material you use is weather-resistant. Properly seal any seams and make sure the roof is securely attached.
Inspect and Celebrate
Before your kids start playing, do a thorough inspection. Check for any issues like loose screws or rough edges. Once everything checks out, take a moment to celebrate. You’ve just built a playhouse where countless memories will be made.
Building a DIY playhouse is not just about the result. The process itself is rewarding. You get to learn, create, and spend time with your family. With these tips, you’re better prepared to tackle the challenge and build a playhouse your kids will love.
Tips for Creating a Safe Playhouse
Safety is a top priority when building a playhouse for children. You want to create a space where they can let their imagination run wild without worrying about injuries or hazards. This section delves into crucial safety aspects and how to address them effectively.
Sturdy Construction
The foundation of safety is a well-built structure. Don’t cut corners by using weak or inferior materials. Opt for quality lumber, like pressure-treated wood, that can withstand the elements and energetic play. When assembling, screws are more reliable than nails because they offer greater holding power.
While building, it’s essential to ensure all pieces are secure. It means double-checking that screws are tightly in place and that there are no unsafe parts. A playhouse that’s built to last not only provides a safe environment but also stands up to the test of time.
Smooth Surfaces and Rounded Edges
Children are prone to trips and falls, and the last thing you want is for them to get hurt on a jagged edge or rough surface. All wood should be properly sanded to prevent splinters. It includes the exterior walls, interior surfaces, and especially the floor.
Opt for rounded edges instead of sharp corners when designing elements like windows and railings. This reduces the risk of injury from running into a hard, pointed edge. Invest time in smoothing out every surface that a child could potentially touch.
Secure Railings and Barriers
Railings are necessary if your playhouse design includes a raised platform or a second floor. These should be strong enough to withstand pressure and not have openings wide enough for a child to slip through. The general guideline is that spaces in railings should be under four inches wide.
Barriers like gates or even simple latches on doors can add an extra layer of safety to the playhouse. These prevent younger children from wandering into areas that might be unsafe for them. Always choose durable fixtures and fastenings securely attached to the playhouse structure.
Non-Toxic Materials and Paints
While the aesthetic appeal of a playhouse is important, it should never come at the cost of safety. Choose paints and finishes that are non-toxic and child-friendly. The materials are not limited to wall paint but apply to any stains or sealants you might use on the wood.
The importance of non-toxic materials also extends to the inside of the playhouse. If you’re adding furniture or decor, ensure they are also made from safe materials for kids. Always read labels and do your research before making your choices.
Adequate Ventilation
Stuffy spaces are uncomfortable and can even be hazardous. Good ventilation is key, particularly in the hot summer months. Windows that open and close easily are one solution. Screens on these windows can keep bugs out while letting air in. Consider also adding vents or a small skylight to help with air circulation.
Thorough Safety Checks
Once the playhouse is built, it’s vital to do a comprehensive safety review. Look for any loose screws, nails, or other elements that could pose a danger. Walk around and inside the playhouse, testing each part to ensure it’s secure and stable. Repeating these safety checks periodically is a good idea, especially after extreme weather conditions.
Building a safe playhouse is more than just a construction project; it’s a commitment to the well-being of your children. Attention to these details sets the stage for a secure environment where countless happy memories can be created.
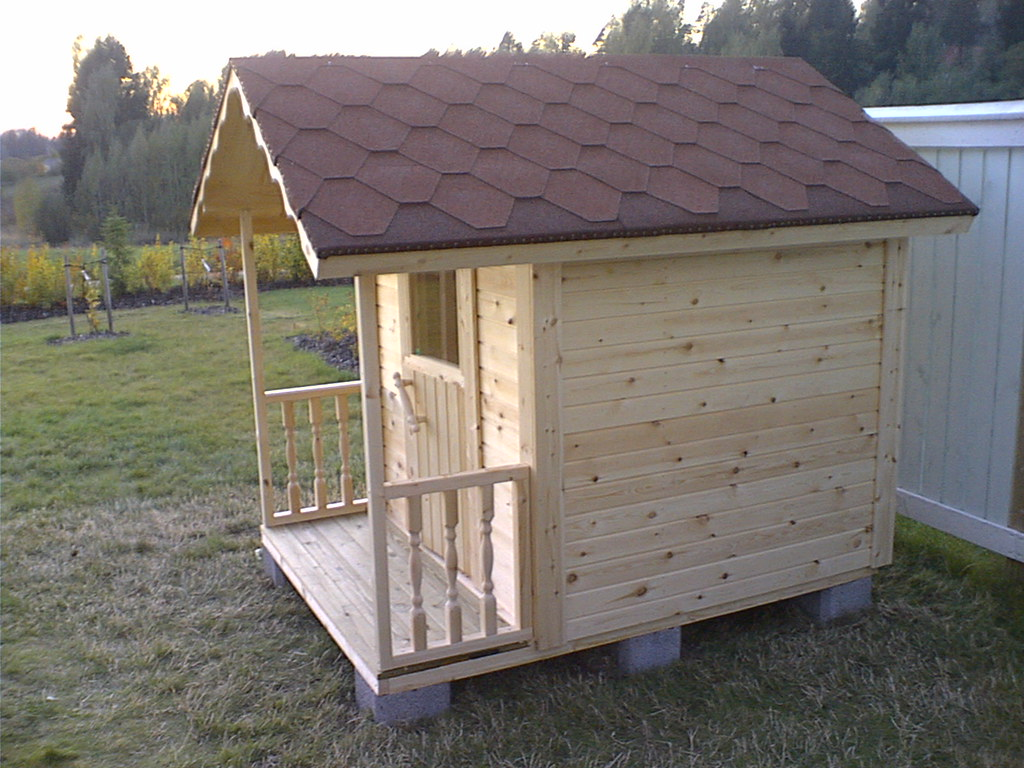
Steps in Building a DIY Playhouse
Creating a DIY playhouse can be a fulfilling project that brings joy to the whole family. Here, we outline the basic steps for building a playhouse that is both fun and safe. Remember the tips from earlier sections as you work through these steps.
Choose a Location
Picking the right location is crucial for the success and safety of your DIY playhouse. Your chosen spot should be easily accessible, not far from the house. It makes it easier to supervise your children as they play.
Consider the natural elements as well. Is the area prone to flooding or strong winds? If so, you might want to look elsewhere. Also, think about shade. A spot with some natural shade from trees is great, but make sure the branches are strong and healthy to avoid the risk of falling limbs.
Prepare the Site
Once you’ve chosen the perfect location, it’s time to prepare the site. Start by clearing away all debris, such as rocks, roots, or other objects that could interfere with construction. The ground should be level to ensure a stable foundation for your playhouse. If not, you may need to use soil to even it out.
Some prefer laying down a weed barrier cloth to prevent unwanted growth underneath the playhouse. On top of this, you can lay your foundational material, be it concrete blocks or pressure-treated lumber, to add another layer of stability.
Build the Base
The base is the cornerstone of your playhouse, setting the stage for a sturdy and reliable structure. To build a strong base, opt for high-quality, pressure-treated wood that can withstand both the weight of the playhouse and the elements.
Lay out the perimeter first, using screws for better holding power. Make sure the corners are square, and the sides are straight. Once the perimeter is secure, add joists inside for extra support. These will help distribute weight and provide a solid platform for the flooring material you choose, whether that’s more wood, composite boards, or even rubber mats for added safety.
Construct the Walls
Building strong and secure walls is vital for the playhouse’s overall stability. Cut your lumber according to the dimensions specified in your plan. Each wall should be assembled on the ground first before being erected. Use screws for better durability, especially in corners and junctions where multiple boards meet.
Ensure your walls are straight; use a carpenter’s level to confirm. Once the walls are assembled and upright, double-check that they are securely connected to the base. Remember to leave proper openings for windows and doors, considering safety considerations like rounded edges.

Install Windows and Doors
Windows and doors serve multiple functions. They offer an exit and entry point, let in light, and provide ventilation. When installing them, ensure they fit snugly into the openings left in the walls. Use durable hinges and fasteners to attach them securely.
Ensure the windows and doors can open and close easily for added safety. This is crucial for ventilation and in case of emergencies. Window screens can be a good addition to keep bugs out while letting air in. Always prioritize safety by choosing windows without sharp edges and door fixtures that are easy for a child to operate.
Assemble the Roof
The roof is an important element that protects the playhouse from weather elements. Start by constructing the roof frame, ensuring it fits well with the walls. Use screws for a secure fit. Once the frame is stable, lay your chosen roofing material on top. Depending on your design, this could be anything from shingles to corrugated metal.
Ensure that the material is weather-resistant and durable. Seal any seams or joints to make the roof waterproof. Double-check that the entire structure is securely fastened to the walls to withstand wind and other elements.
Paint and Seal
After building the structure, the next step is to add color and protection through paint or stain. It’s not just about making the playhouse look good; this layer also adds a protective barrier against weather. Choose non-toxic, child-friendly paints or stains to ensure safety. Apply the paint or stain with a brush or roller, covering all exterior and interior surfaces. Make sure to get into all the nooks and crannies for complete coverage.
Once the first coat is dry, apply a second coat to make your playhouse walls durable. Finish up by sealing any exposed wood with a non-toxic sealant. This extra step helps make your playhouse weather-resistant and long-lasting.
Install Railings and Barriers
Suppose your playhouse has multiple levels or raised platforms. In that case, railings are necessary for safety. Use strong, durable materials to construct the railings and secure them tightly to the walls or floor. The gaps in the railings should be no more than four inches wide to prevent children from slipping through.
You may also want to install barriers or gates at the entry points of these elevated areas. A simple latch or lock can keep younger kids from venturing into potentially risky spots. As with all other playhouse parts, ensure these elements are firmly attached and undergo regular safety checks.
Frequently Asked Questions
What type of wood should I use for the playhouse?
Pressure-treated wood is often recommended because it’s durable and can withstand weather elements. Just make sure it’s safe for children and pets.
Do I need a permit to build a playhouse?
Permit requirements vary by location. Always check with your local government or homeowners association to determine if you need a playhouse permit.
How do I make sure the playhouse is safe?
Focus on sturdy construction using quality materials. Smooth out all surfaces, use non-toxic paint, and include safety features like railings and rounded edges.
How important is ventilation?
Ventilation is crucial, especially in hot weather. Ensure to include windows that can be easily opened and closed or install vents.
Can I add electricity to the playhouse?
Adding electricity involves additional safety concerns and may require a permit. If you’re not experienced with electrical work, it’s best to consult a professional.
How do I maintain the playhouse?
Regular safety checks are key. Look for loose screws or nails, chipped paint, and any wear and tear that needs to be addressed.
How long will it take to build the playhouse?
The time can vary depending on the design’s complexity and your experience level. It could take anywhere from a weekend to several weeks.
Do I need special tools to build a playhouse?
Basic carpentry tools like a hammer, screws, a drill, and a saw are generally sufficient for a simple playhouse. It pays to use high-end power tools to make the DIY project safe and efficient, as the DEWALT circular saw. The saw runs on a 20V Lithium-ion battery, letting you extensively cut wooden walls or flooring materials.
Conclusion
Building a DIY playhouse is more than just a weekend project; it invests in your child’s happiness and creativity. Following our tips and instructions, ensure your children’s playhouse becomes a safe and fun space.
Your efforts will pay off in countless hours of imaginative play for your little ones, making it a worthwhile endeavor for the whole family.