Last Updated on 2025-10-13 by Team Ideas24
Food carving is an art that has been around for ages. It is a creative way of presenting food in a visually appealing manner, where the food is transformed into various shapes, designs, and patterns. Its origins can be traced back to ancient civilizations in China, Japan, and Thailand.
The art form found its way to Europe in the 16th century and gained popularity among the aristocracy and wealthy families. Today, food carving is admired by millions worldwide for its artistic intricacy and beauty.
Contents
The Craft of Food Carving
In this blog post, get to explore the artistic flavours of food carving and the different techniques used to create stunning and edible masterpieces. Also, delve into the history of food carving and how it has evolved over time.
Whether you are a professional chef or a home cook looking to impress your guests, this post will provide you with tips and inspiration to elevate your food presentation to the next level. So sit back, grab a snack, and prepare to be amazed by the artistic flavours of food carving.
Food carving, also known as culinary or fruit carving, is a fascinating craft that involves carving and sculpting various types of food to create decorative and visually appealing displays. It is an ancient art form that has been practised in different cultures for centuries, showcasing the creativity and skill of the artist.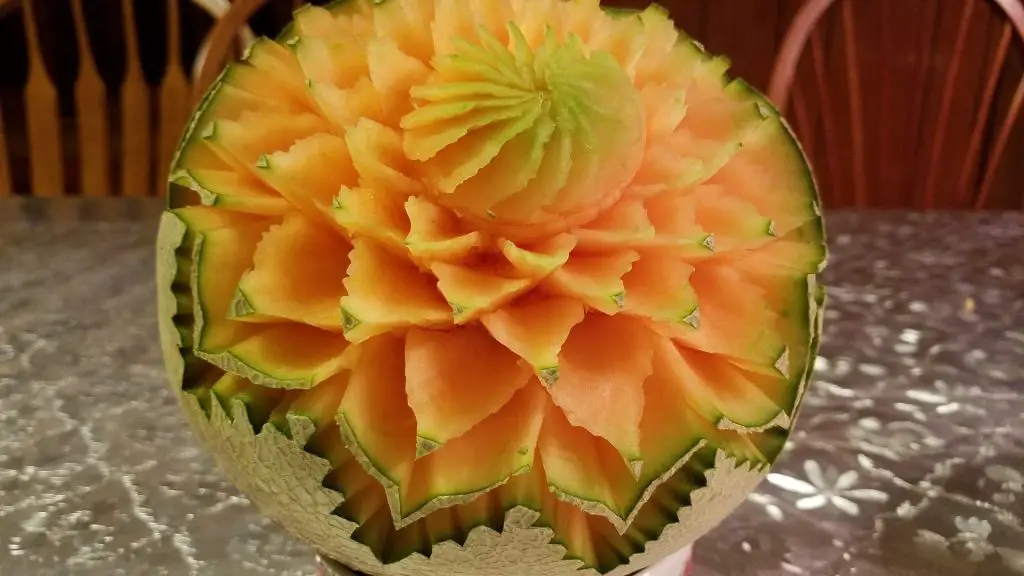
The art of food carving primarily focuses on fruits and vegetables due to their vibrant colours, varied shapes, and textures. However, it can also include other food items like butter, cheese, and even chocolate.
The main objective of food carving is to transform ordinary ingredients into extraordinary edible masterpieces that not only delight the senses but also serve as centrepieces or garnishes for special occasions and events.
Tools and Techniques
To master the craft of food carving, a variety of tools and techniques are employed. Let’s explore some of the essential aspects of food carving:
Knife Selection
Choosing the right knife is crucial for achieving precise and clean cuts when carving food. Specialized carving knives with thin, sharp blades are commonly used. Different blade shapes and sizes cater to specific carving needs, such as creating intricate patterns or making deep cuts.
The most common types of knives used in food carving include:
- Paring Knife: This small knife with a pointed tip is perfect for intricate detailing and precise cuts on smaller fruits and vegetables.
- Chef’s Knife: A versatile knife with a wide blade, ideal for larger fruits and vegetables and for making general cuts and shaping.
- U-V Knife: This knife features a U-shaped blade that is useful for creating curved and rounded shapes in fruits and vegetables.
- V-Cutting Knife: With a V-shaped blade, this knife is suitable for making deeper and wider cuts, allowing for more intricate designs.
- Serrated Knife: The serrated edge of this knife provides better grip and control when working with tougher ingredients, such as melons or pineapples.
It’s important to keep the knives sharp and maintain them properly to ensure precise and safe carving.
Basic Techniques
Mastering basic carving techniques is essential for beginners in food carving. Here are some fundamental techniques to get started:
- Peeling: Start by peeling the skin off the fruit or vegetable, creating a smooth surface to work on.
- Scooping: Use a small spoon or melon baller to scoop out the flesh or seeds from the fruit or vegetable, creating cavities for intricate designs or fillings.
- Incising: Make shallow incisions on the surface of the ingredient to outline the design or create patterns.
- Cutting: Use careful and controlled knife strokes to carve away layers of the fruit or vegetable, gradually shaping it according to the desired design.
- Shaping: Use knives, peelers, or specialized tools to shape the ingredient, creating curves, angles, or specific forms.
- Detailing: Pay attention to small details by adding fine lines, textures, or delicate patterns to enhance the overall appearance of the carving.
Remember to practice the techniques patiently and gradually increase the complexity of your carvings as you gain more experience.
Advanced Techniques
Once you have a good grasp of the basic techniques, you can explore more advanced methods to bring your food carving skills to the next level. Here are some advanced techniques commonly used by professional food carvers:
- Layering: Carve multiple layers into the ingredient, creating depth and dimension in the design.
- Hollowing: Create hollow sections within the carving, allowing for creative presentations and possibilities, such as filling the carving with other ingredients or using it as a container.
- Negative Space Carving: Carve around the shape of the design, leaving the desired form intact while removing the surrounding material.
- Stacking: Combine multiple carved pieces together, creating elaborate structures or three-dimensional sculptures.
- Translucent Carving: Create thin and delicate layers in fruits or vegetables, allowing light to pass through and creating a beautiful translucent effect.
- Colouring: Use natural food dyes or edible paints to enhance the visual appeal of the carving, adding vibrant colours and highlighting specific details.
These advanced techniques require patience, precision, and artistic vision. Experiment with different techniques to develop your unique style and expand your repertoire as a food carver.
Types of Food Carving to Elevate Your Meals
Food carving encompasses various types, each with its unique characteristics and materials used. Now, explore some of the most prominent forms of food carving:
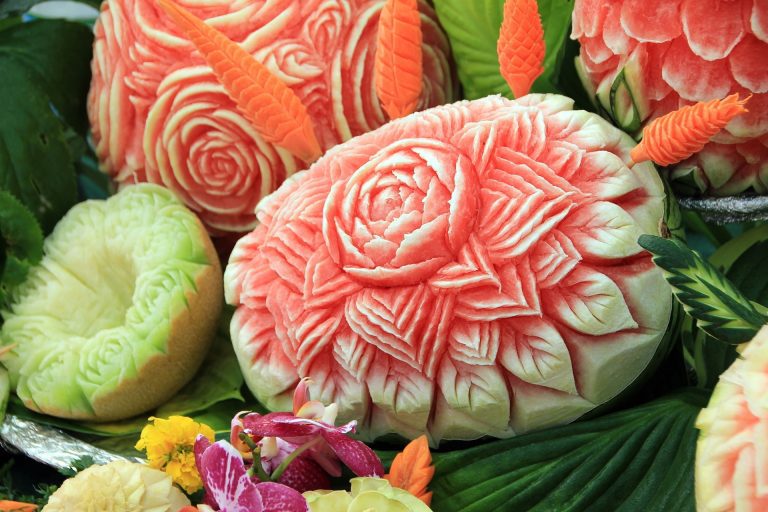
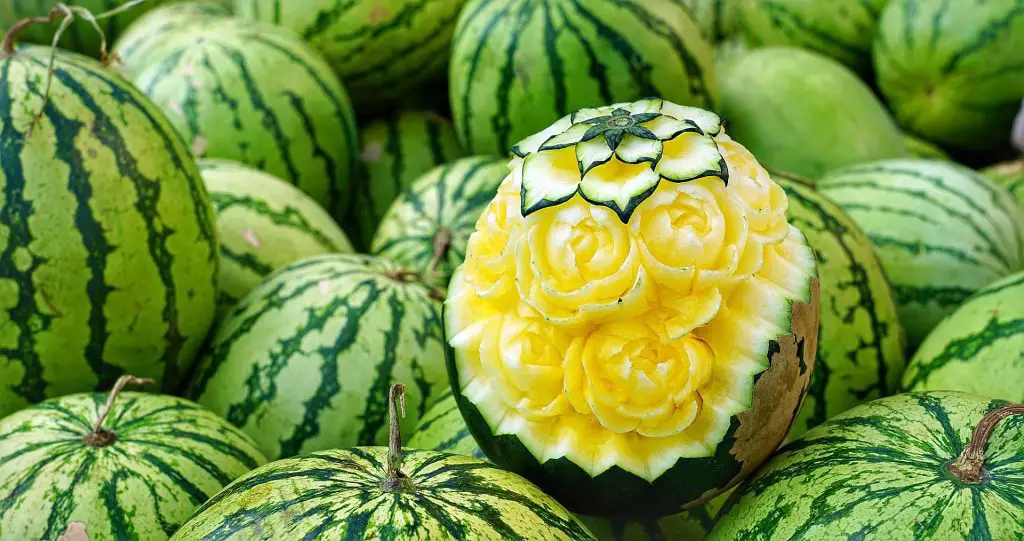
1. Fruit Carving
Fruit carving is a captivating art form that allows you to transform ordinary fruits into stunning edible sculptures. With a combination of creativity, precision, and a few basic tools, you can create intricate designs that will impress and delight both yourself and others.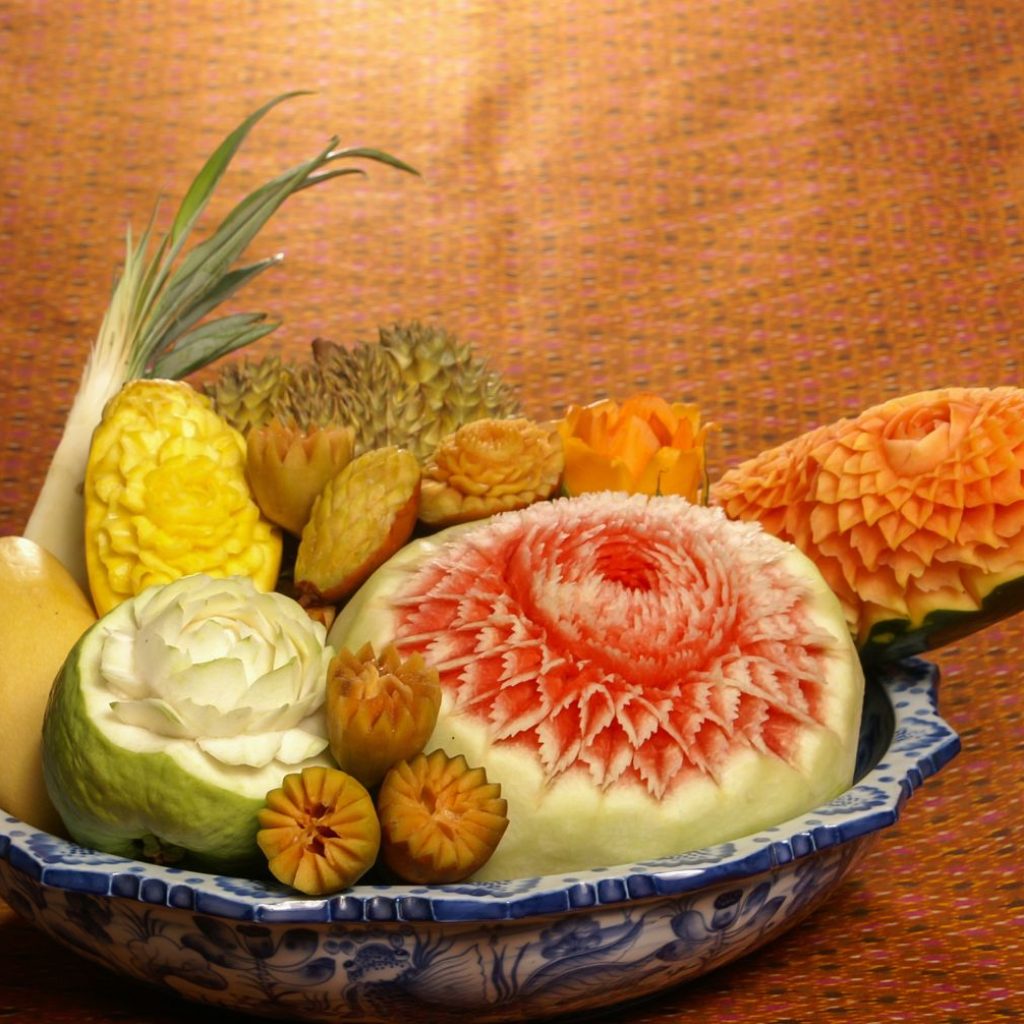
Choosing the right fruit is essential for successful fruit carving. Opt for fruits that are firm, ripe, and have a solid structure. Watermelons, pineapples, cantaloupes, papayas, apples, and citrus fruits are commonly used due to their size, texture, and durability.
Fruit carving is a delightful and rewarding activity that allows you to unleash your creativity and transform fruits into remarkable works of art. Whether you’re creating simple designs or intricate masterpieces, the joy and satisfaction of fruit carving are boundless.
2. Vegetable Carving
Vegetable carving allows you to unleash your creativity and explore the artistic possibilities that lie within vegetables. From simple designs to intricate sculptures, humble vegetables become the canvas for your imagination.
Carrots, radishes, cucumbers, and bell peppers are popular choices due to their versatility and ease of carving. With these vegetables, you can create a wide range of shapes, patterns, and textures that will captivate the eyes and enhance the overall dining experience.
Vegetable carvings serve as exquisite adornments that enhance the visual appeal of any dish. They add a touch of elegance, sophistication, and artistic flair to your culinary creations. From simple garnishes to elaborate centrepieces, vegetable carvings captivate the eyes and entice the taste buds.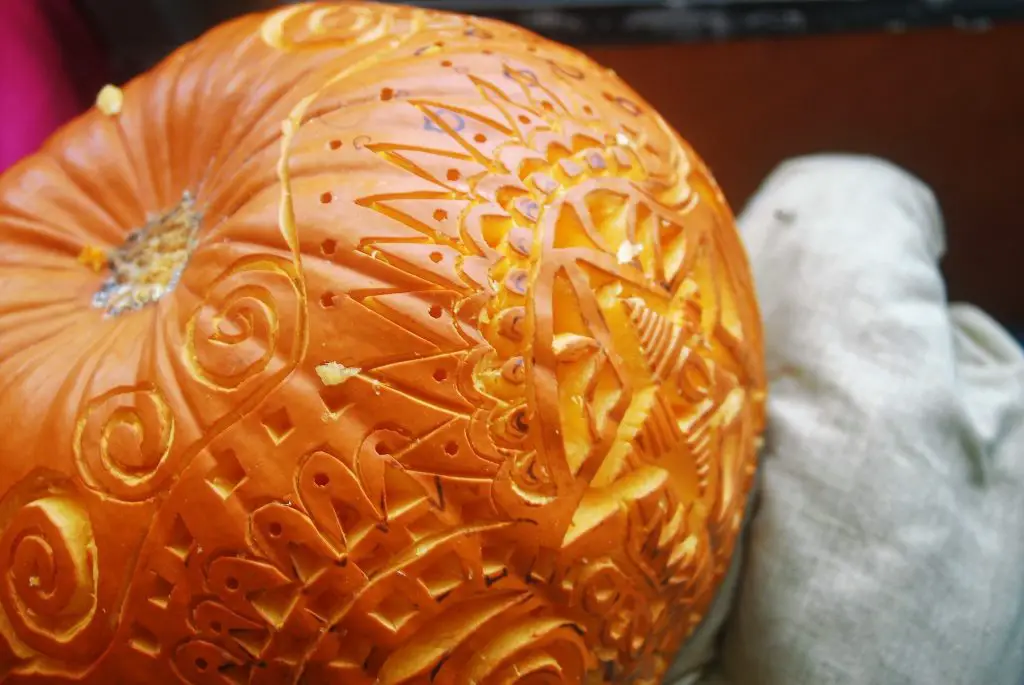
3. Butter Carving
Butter carving is a unique form of food carving that focuses on sculpting butter into intricate shapes and designs. While less commonly known compared to fruit and vegetable carving, butter carving requires a high level of skill and precision.
Butter sculptures are typically created using blocks of chilled butter or margarine. Carvers use specialized tools, including knives, sculpting tools, and shaping moulds, to carve out delicate details and shapes. Butter sculptures often depict animals, human figures, or objects, and they can be found as exhibits in state fairs, culinary exhibitions, and cultural events.
Butter carving serves both as an art form and a showcase of culinary talent. The intricate details and craftsmanship involved in butter carving make it a fascinating and unique addition to the world of food art.
Extra tip: if you frequently host parties at your crib, try out some creative home bar ideas to make your hangout spot more stylish and functional.
Simple Steps to Perfect Food Art
Food carving is an art that requires patience, creativity, and practice. Whether you’re a beginner or aspiring to refine your skills, here are the basic steps to get started with food carving:
1. Gather the Necessary Supplies and Tools
Assemble all supplies and tools for food carving. Choose fresh and firm fruits or vegetables for carving. Opt for produce with smooth and unblemished surfaces, as it will be easier to carve and maintain the shape of the design.
While essential tools include specialized carving knives with different blade shapes and sizes, paring knives, scoops, peelers, and sculpting tools. Ensure that the knives are sharp for precise cuts.
2. Plan and Sketch Your Design
Before carving, visualize and plan your design. Consider the shape and size of the ingredient, and think about the details you want to incorporate. Sketching the design on paper or directly on the ingredient can help you outline the carving pattern and guide your work.
3. Start with Basic Cuts
Begin by making basic cuts to establish the overall shape of your carving. Use a paring knife or a larger carving knife to remove the skin or create a flat surface for your design. Gradually carve away excess material, working your way towards the desired shape.
4. Carve the Details
Once the basic shape is established, focus on adding intricate details to your carving. Use smaller knives or specialized carving tools to create patterns, textures, and finer elements. Pay attention to the depth and angle of your cuts to bring out the desired effect.
5. Refine and Smooth the Surface
Smooth the surface of your carving by using a peeler or a gentle scraping motion with a knife. This step helps to remove any imperfections and gives a polished appearance to the carving.
6. Preserve and Display
To preserve your food carving, keep it in a cool environment or refrigerate it until ready for display. Spritzing the carving with water or storing it in a sealed container can help maintain its freshness. When displaying the carving, consider using garnishes, platters, or stands to enhance its presentation.
Food carving is a skill that improves with practice. Start with simple designs and gradually challenge yourself with more complex carvings. Experiment with different fruits, vegetables, and techniques to discover your own unique style and develop your carving expertise.
Choosing the Best Ingredients for Food Carvings: Color, Crunch, and Carvability
Choosing the right produce makes food carvings sharper, longer lasting, and vibrant. Focus on firmness, shape, color, ripeness, and structure to achieve clean cuts, defined details, and striking, edible centerpieces.
Firmness and Texture
For food carvings, seek produce that offers crisp resistance without splitting. Carrots, daikon, turnips, and green papaya hold edges and micro-details, while well-chilled melons support broader forms. Avoid overripe fruit that bruises or weeps under pressure. Test a shallow guiding cut; the blade should glide cleanly with minimal tearing. Balanced, fine-grained textures preserve petals, scrolls, and relief work, sustaining structure throughout transport and display.
Shape and Size
Uniform shapes simplify layout and symmetry in food carvings. Oval watermelons, straight cucumbers, and evenly tapered carrots make repetitive motifs faster and cleaner. Large melons give beginners forgiving practice space, while small, consistent radishes excel for quick rosettes. Select pieces with natural flat spots or trim a stable base to prevent rolling. Predictable geometry reduces waste, improves knife control, and keeps patterns aligned across multiple components.
Color and Contrast
High-contrast pairings make food carvings read clearly from a distance. Dark rinds framing pale flesh, as in watermelon or honeydew, produce dramatic outlines. Citrus peels offer saturated exteriors with bright pith for a refreshing sensation. Combine beets, peppers, daikon, and herbs to create a layered hue without dyes. Consider venue lighting: cool LEDs mute greens; warm bulbs intensify reds and oranges. Plan a cohesive palette that complements plating and theme.
Ripeness and Shelf Life
Slightly underripe produce generally carves cleaner and holds form longer. Fully ripe fruit may leak or slump, softening fine edges and lines. Match ripeness to purpose: display centerpieces benefit from firmer textures, while edible garnishes can be nearer peak flavor. Pre-chill to firm tissues, never freeze. Track ambient temperature and time-on-display, rotating sensitive pieces earlier to maintain a crisp, polished presentation throughout service.
Water Content and Structure
High-moisture items like cucumbers and zucchini can weep, causing cuts to swell and blur detail. Denser choices, such as carrot, daikon, and green papaya, hold micro-textures and sharp facets. Well-chilled melons offer a middle ground for large-scale patterns. Aim for tissue that cuts cleanly without pooling juice. When using watery produce, opt for bold geometry over filigree, and stage frequent blotting to preserve edges and prevent staining of neighboring components.
Skin, Rind, and Surface Qualities
Skins and rinds are natural canvases in food carvings. Smooth, waxy exteriors on apples, citrus, and melons shine with reflective highlights, while patterned surfaces like cantaloupe nets require selective removal or thoughtful integration.
Avoid deep scars and pits that crumble under shallow relief. Prefer uniform coloration and consistent texture to keep motifs cohesive. When needed, lightly polish or dampen surfaces to reveal contrast without adding oils or coatings.
Acidity, Browning, and Pretreatments
Enzymatic browning quickly dulls pale cuts on apples, pears, and bananas. A brief dip in cold water with lemon juice or ascorbic acid protects surfaces; pat dry to maintain crisp edges. Saline rinses can enhance snap in some vegetables. Work in small batches and cover between steps to limit air exposure. Keep pretreatments light if guests will eat the food carvings, preserving natural flavor and aroma.
Specialty Media: Butter, Cheese, and Chocolate
Temperature control governs precision in non-produce food carvings. Work butter when chilled yet pliable to prevent smearing and maintain facets. Firm cheeses carve best cold and slightly dry to the touch.
Chocolate requires low humidity and cool rooms for clean snaps and glossy planes. If pieces are edible, align flavors with the menu; for purely decorative displays, prioritize structural stability and safe display conditions.
Seasonality, Sourcing, and Budget
Seasonal, locally sourced produce often arrives firmer and less bruised, improving predictability in food carvings. Farmers’ markets provide sturdy, characterful specimens, while supermarkets offer uniformity that speeds repetition and symmetry.
Balance cost against expected waste and practice needs by purchasing extras. When premium fruit is scarce, rely on roots and gourds for reliable structure. Consistent size and availability are critical for multi-piece centerpieces that demand matched proportions and continuous color.
Sustainability and Edibility
Plan food carvings with reuse in mind. Turn offcuts into stocks, slaws, chutneys, smoothies, or dehydrated snacks, and compost what remains. Favor edible garnishes when guests will consume the display; reserve inedible elements for extended exhibits. Choose patterns that minimize waste and pre-plan yields before cutting to ensure optimal use of materials. Clearly label allergens and separate decorative pieces only. Responsible ingredient choices keep presentations beautiful, practical, and aligned with your event’s values.
Summary
To sum it up, food carving is an art form that requires precision, creativity and a keen eye for detail. Whether it’s fruit, vegetables, or even ice, the possibilities for creating beautiful and intricate designs are endless. The next time you sit down to a meal, take a moment to appreciate the beauty of the food presentation. Remember, not only is it a feast for the stomach, but also for the eyes.