The growth of social media has lead to the evolution of the bento box. It is no longer just a lunch box that packs a person’s meal. Bentos are art pieces that has captured the imagination of foodies and content creators across the globe. Its a canvas splashed with the colors of white rice, protein, and vegetables.
Create a practical bento box for your family or friends that fits your wallet and still bring in lots of likes or engagement with our guide.
Contents
Key Takeaways
- A balanced bento box centers around rice, protein, and colorful vegetable sides that taste great at room temperature.
- Tight, thoughtful packing prevents shifting, sogginess, and keeps every component visually appealing.
- Core Japanese recipes like tamagoyaki, karaage, and miso salmon create an authentic bento foundation.
- With simple planning and batch cooking, homemade bento boxes become an easy, healthy everyday habit.
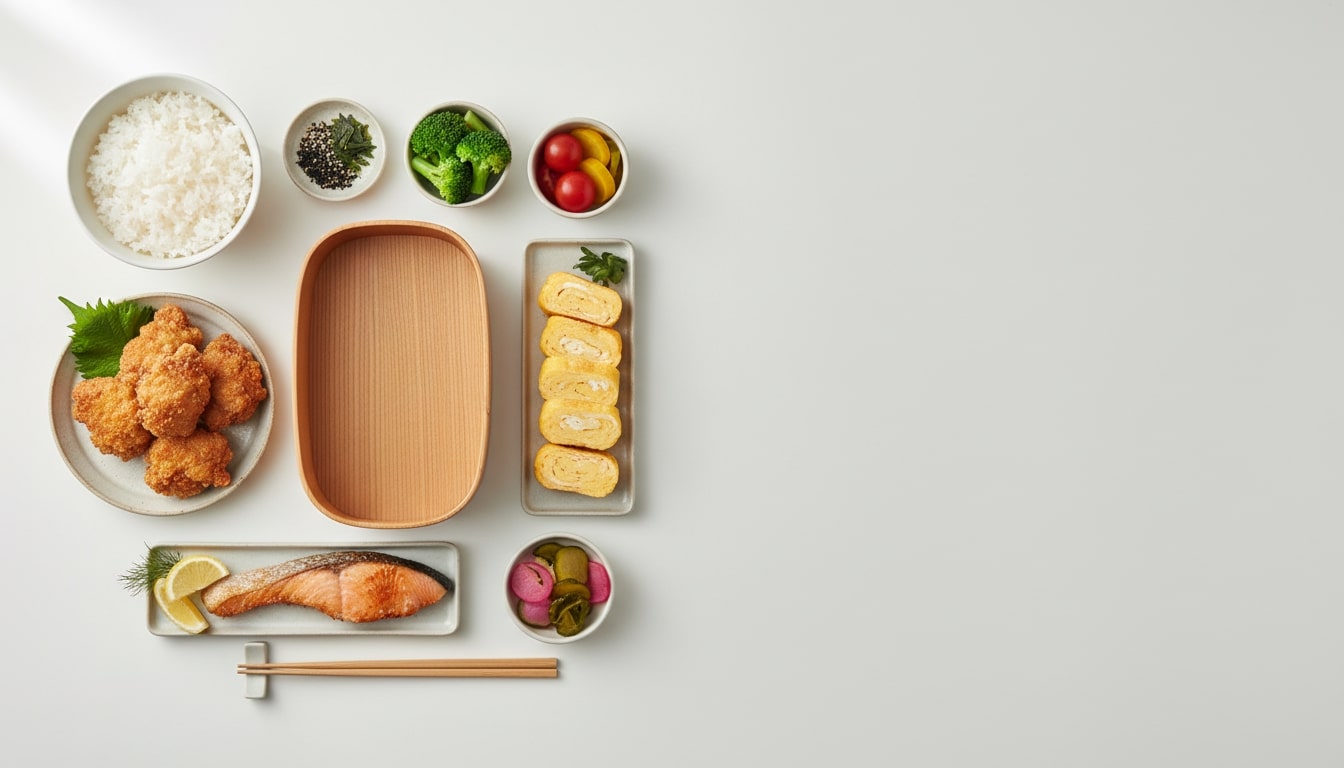
Core Japanese Bento Box Recipes (Step-by-Step)
If you get a handful of classic bento staples down, packing lunch gets a lot easier. These recipes are popular for a reason: they taste good at room temperature, travel well without falling apart, and give you a nice mix of carbs, protein, and veggies without overthinking it.
Simple Japanese Steamed Rice
Ingredients
- 2 cups Japanese short-grain rice (sushi rice/Japonica)
- 2¼ cups water
- Optional (sushi rice style): 1 tbsp rice vinegar + 1 tsp sugar
Tools
- Rice cooker or medium pot with a tight lid
- Fine-mesh strainer
- Rice paddle or wooden spoon
Steps
- Rinse the rice. Rinse under cold water, gently swishing with your hand, until the water is mostly clear. This usually takes 3–4 rinses and helps keep the rice fluffy instead of sticky and gummy.
- Soak the rice. Add the measured water and let it soak for 20–30 minutes. This small step helps the grains cook more evenly.
- Cook.
- Rice cooker: Press cook and let it finish.
- Stovetop: Bring to a boil, drop to the lowest heat, cover tightly, then simmer 12–15 minutes without lifting the lid.
- Rest and steam. Turn off the heat and let the rice sit, covered, for 10 minutes. This is where the texture really settles in.
- Fluff and cool. Fluff with a slicing-and-folding motion, then spread on a plate or tray so it cools to room temp before packing.
- Optional sushi rice version. Stir vinegar and sugar until dissolved, then gently fold into warm rice. Fan while mixing for that glossy, classic finish.
Onigiri (Japanese Rice Balls)
Ingredients
- 2 cups cooked Japanese short-grain rice (warm or room temp, not hot)
- ½ tsp salt
- Fillings (pick one or mix):
- Tuna + mayo
- Flaked salted salmon
- Umeboshi (pitted pickled plum)
- Kombu tsukudani (simmered kelp)
- Nori sheets, cut into strips
Tools
- Small bowl of water with a pinch of salt
- Plastic wrap or an onigiri mold (optional)
- Clean hands
Steps
- Wet your hands. Dip your hands in salted water first so the rice doesn’t glue itself to you, and so the outside gets lightly seasoned.
- Portion the rice. Scoop about ⅔ cup rice and flatten it into a thick disc in your palm.
- Add the filling. Make a small dent in the center and add 1–2 tsp filling.
- Shape gently. Add a little rice on top, then shape into a triangle, ball, or log. Press firmly enough to hold together, but don’t crush it into a brick.
- Add the nori. Wrap a strip around the middle or bottom. If you want it crisp in a bento, pack the nori separately and wrap right before eating.
- Cool before packing. Let the onigiri cool fully so you don’t trap steam inside the lunchbox.
- Cleaner method: Use plastic wrap in your hand, add rice and filling, twist closed, then shape through the wrap.
Chicken Karaage (Japanese Fried Chicken)
Ingredients
- 1 lb (450g) boneless, skinless chicken thighs, cut into 2-inch pieces
- 2 tbsp soy sauce
- 1 tbsp sake (or dry sherry)
- 1 tbsp grated ginger
- 2 cloves garlic, grated or minced
- ½ tsp sesame oil
- ¾ cup potato starch or cornstarch
- Oil for frying (about 2–3 cups)
- Lemon wedges (optional)
Tools
- Mixing bowl
- Deep pot or wok
- Thermometer
- Wire rack + baking sheet
- Tongs or slotted spoon
Steps
- Marinate. Mix soy sauce, sake, ginger, garlic, and sesame oil. Toss in chicken, cover, and marinate at least 30 minutes (overnight is even better).
- Heat the oil. Let the chicken sit at room temp for about 10 minutes, then heat oil to 340°F / 170°C.
- Coat. Dredge chicken in starch and press lightly so it sticks. Shake off extra.
- First fry (lower temp). Fry 4–5 pieces at a time for 90 seconds to 2 minutes, just until set and pale. Rest on a rack.
- Rest. Let the chicken sit 3–4 minutes. This helps the inside finish cooking and makes the crust crispier later.
- Second fry (higher temp). Raise oil to 350–360°F / 175–180°C and fry again 45–60 seconds until deep golden and crunchy.
- Cool for bento. Drain on a rack and let cool to room temp before packing. It stays crisp surprisingly well.
Tamagoyaki (Japanese Rolled Omelette)
Ingredients
- 4 large eggs
- 2 tbsp dashi (or water)
- 1 tbsp sugar
- 1 tsp soy sauce
- 1 tsp mirin
- Pinch of salt
- Oil for cooking
Tools
- Bowl + whisk/fork
- Tamagoyaki pan (or small nonstick skillet)
- Silicone spatula or chopsticks
- Paper towels
- Plate or cutting board
Steps
- Mix the eggs. Whisk everything together until combined. Try not to whip in too much air. Straining is optional, but it gives a smoother, more “clean” texture.
- Oil the pan lightly. Medium-low heat. Use a folded paper towel dipped in oil and wipe the surface.
- Cook in thin layers. Pour about ¼ of the egg mixture, tilt to spread, then roll when the bottom is set but the top is still slightly wet.
- Keep building the roll. Push the roll to one side, re-oil, pour more egg, lift the roll so the new egg slides underneath, then roll again.
- Finish and shape. Once all the egg is used, wrap the roll in plastic wrap or a bamboo mat for 5 minutes to help it hold shape.
- Slice for bento. Cut into thick slices and cool completely before packing.
Quick Miso-Marinated Salmon
Ingredients
- 2 salmon fillets (5–6 oz each)
- 3 tbsp miso (white or red)
- 2 tbsp mirin
- 1 tbsp sake (or water)
- 1 tbsp sugar
- 1 tsp sesame oil
- Sesame seeds (optional)
Tools
- Small bowl
- Shallow dish or resealable bag
- Lined baking sheet
- Oven or toaster oven
Steps
- Make the marinade. Mix miso, mirin, sake, sugar, and sesame oil until smooth.
- Marinate. Coat salmon and refrigerate 30 minutes to 4 hours. Avoid going past 8 hours or it can get too salty.
- Bake. Heat oven to 400°F / 200°C. Scrape off excess marinade (too thick will burn), then bake 12–15 minutes until flaky.
- Cool and portion. Let cool to room temp, then pack as chunks or neat pieces.
- Storage note. Keeps 2–3 days in the fridge and still tastes good cold.
Sesame Spinach (Horenso no Goma-ae)
Ingredients
- 10 oz (280g) spinach
- 2 tbsp toasted sesame seeds
- 1½ tbsp soy sauce
- 1 tbsp sugar
- 1 tsp dashi (or water)
- ½ tsp sesame oil
Tools
- Pot of boiling water
- Bowl of ice water
- Mortar and pestle (or grinder)
- Mixing bowl
- Clean towel or paper towels
Steps
- Blanch quickly. Boil spinach 30–60 seconds until bright green, then shock in ice water.
- Squeeze out water. This is important. Extra water makes the dressing watery and the bento soggy.
- Cut. Slice into 1½-inch lengths.
- Make dressing. Crush sesame seeds into a coarse paste, then mix in soy sauce, sugar, dashi, and sesame oil.
- Toss and rest. Mix spinach with dressing and let sit 5 minutes.
- Pack neatly. Squeeze out excess liquid and portion into small mounds, ideally in silicone cups.
Soy-Glazed Carrots and Green Beans
Ingredients
- 1 large carrot, sliced thin or cut into matchsticks
- 6 oz (170g) green beans, trimmed and cut into 2-inch pieces
- 1½ tbsp soy sauce
- 1 tbsp mirin
- 1 tsp sugar
- 1 tsp oil
- Sesame seeds (optional)
Tools
- Skillet
- Spatula/wooden spoon
- Small bowl
Steps
- Mix glaze. Stir soy sauce, mirin, and sugar until dissolved.
- Stir-fry veggies. Heat oil, cook carrots 2–3 minutes, then add beans and cook 3–4 minutes until tender-crisp.
- Glaze. Pour sauce in and toss 1–2 minutes until glossy and clingy.
- Cool before packing. Sprinkle sesame seeds if you like, then cool fully.
- Easy swap. Bell peppers, snap peas, or broccoli work with the same glaze.
Quick Japanese Pickles (Cucumber or Radish)
Ingredients
- 1 Japanese cucumber (or 2 Persian cucumbers), thinly sliced
- or 6–8 radishes, thinly sliced
- 1 tsp salt
- 2 tbsp rice vinegar
- 1 tbsp sugar
- Optional: red pepper flakes or ginger
Tools
- Small bowl
- Resealable bag or container
- Plate or small weight
Steps
- Salt first. Toss slices with salt and let sit 10 minutes to draw out water.
- Rinse and squeeze. Rinse off excess salt, then squeeze out moisture so the pickles stay crisp.
- Make the quick brine. Mix vinegar and sugar until dissolved. Add ginger or chili if you want.
- Pickle. Add veggies + brine to a bag/container and massage gently.
- Wait. 15–20 minutes at room temp works, or chill 1–2 hours for stronger flavor.
- Drain before packing. Pat dry and pack in a silicone cup so the liquid doesn’t soak everything else.
- Storage. Keeps up to 5 days in the fridge, so it’s great for meal prep.
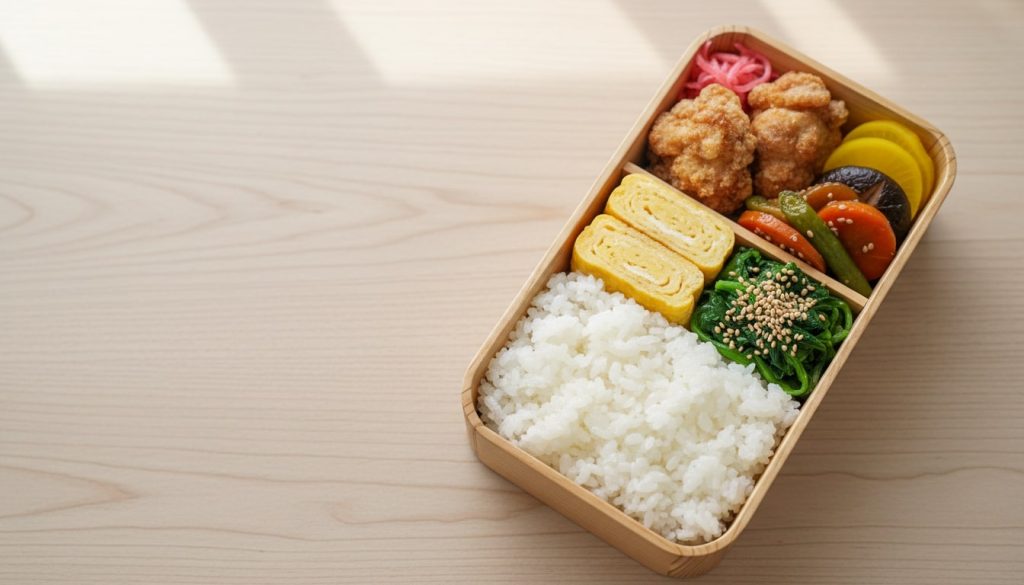
Arranging Your Bento Box
A bento doesn’t need fancy tricks to look good. A little planning with placement, color, and snug packing is enough to keep everything neat, balanced, and still appetizing when you open the lid at lunch.
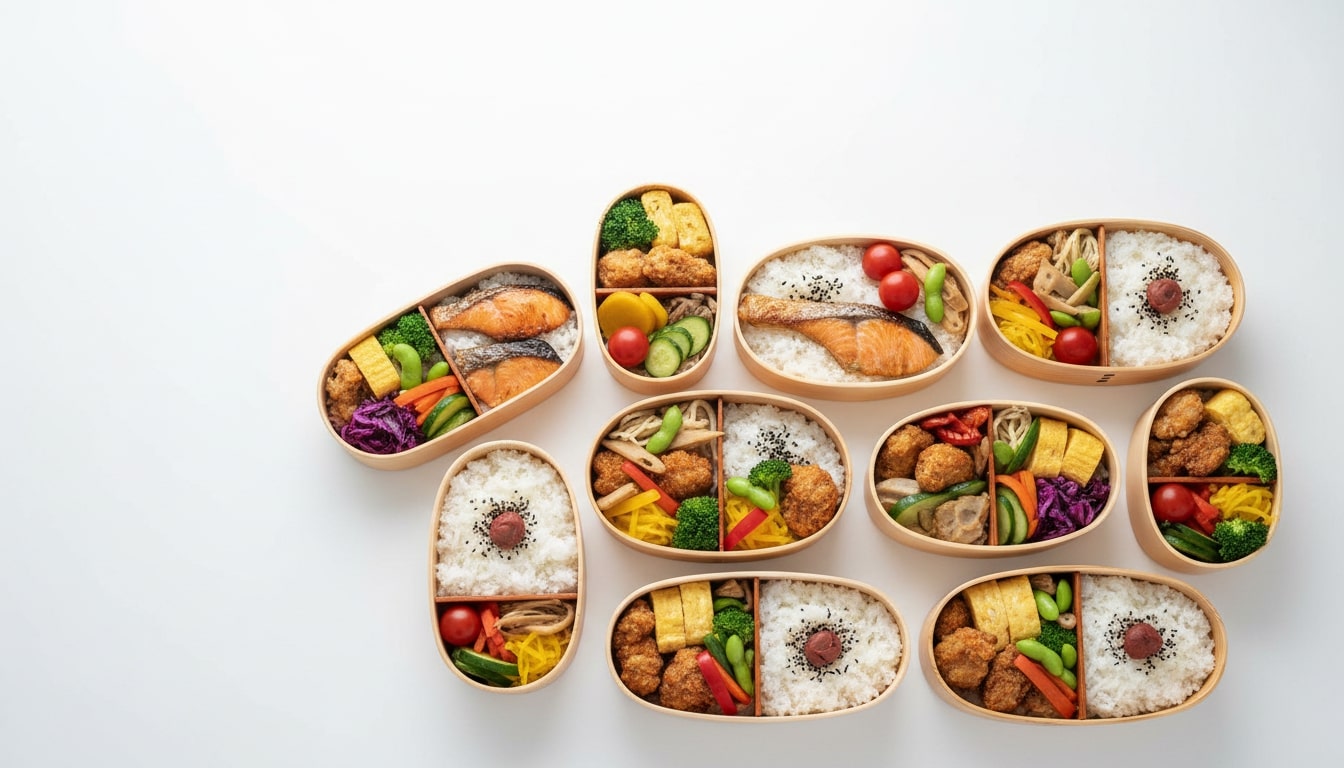
Start with the main layout
Think of your bento as a few simple zones instead of random compartments. A common balance looks like this:
- 1 part protein
- 1 part vegetables and sides
- 1–2 parts rice or grains
Put rice in the biggest section first since it’s usually the base of the meal. Then place your main item, like karaage, tamagoyaki, or salmon, where it’s easy to see and grab.
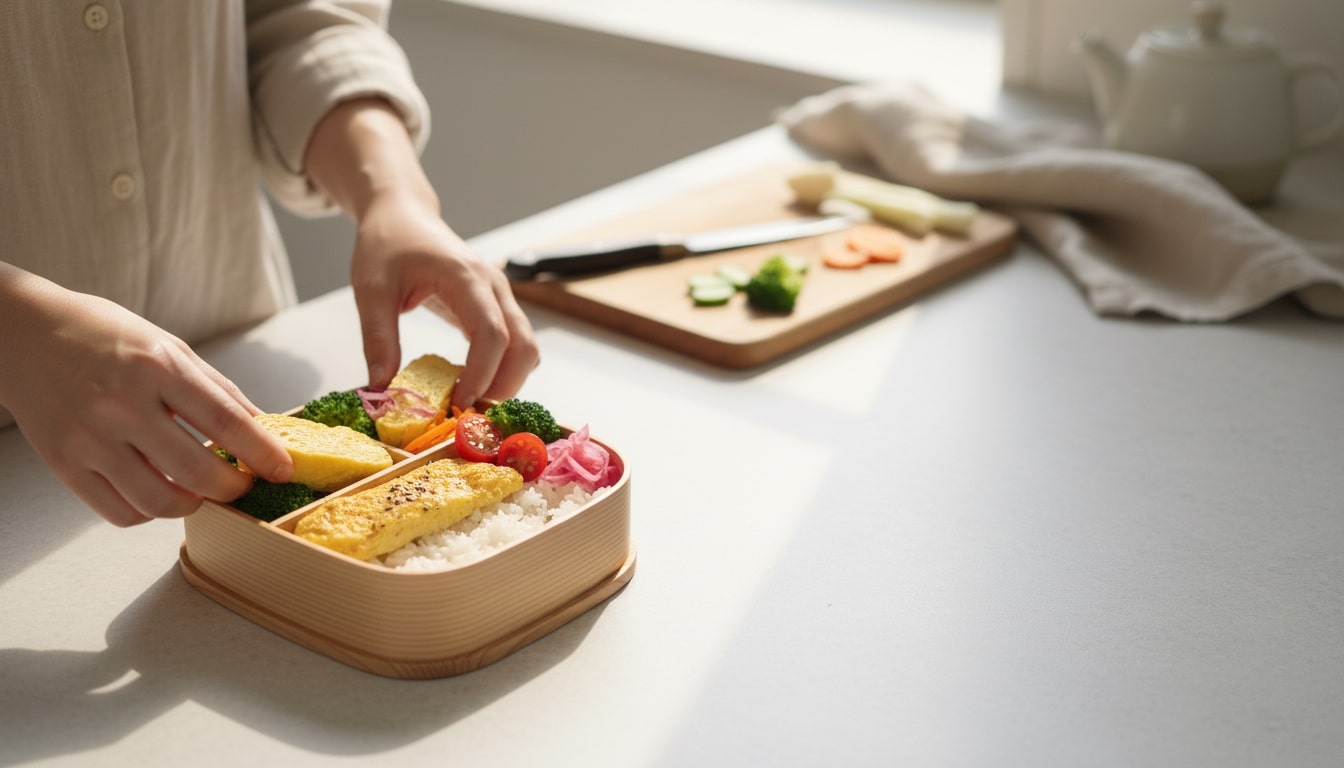
Pack it tight so nothing slides around
Bento food looks best when it stays in place. Gaps are what cause shifting, smashed edges, and messy sauces.
- Fill empty spaces with small items like cherry tomatoes, pickles, or extra veg.
- Use silicone cups or small dividers to keep wetter foods from coming into contact with dry items.
- Press things together gently so they sit snug, but don’t mash delicate items.
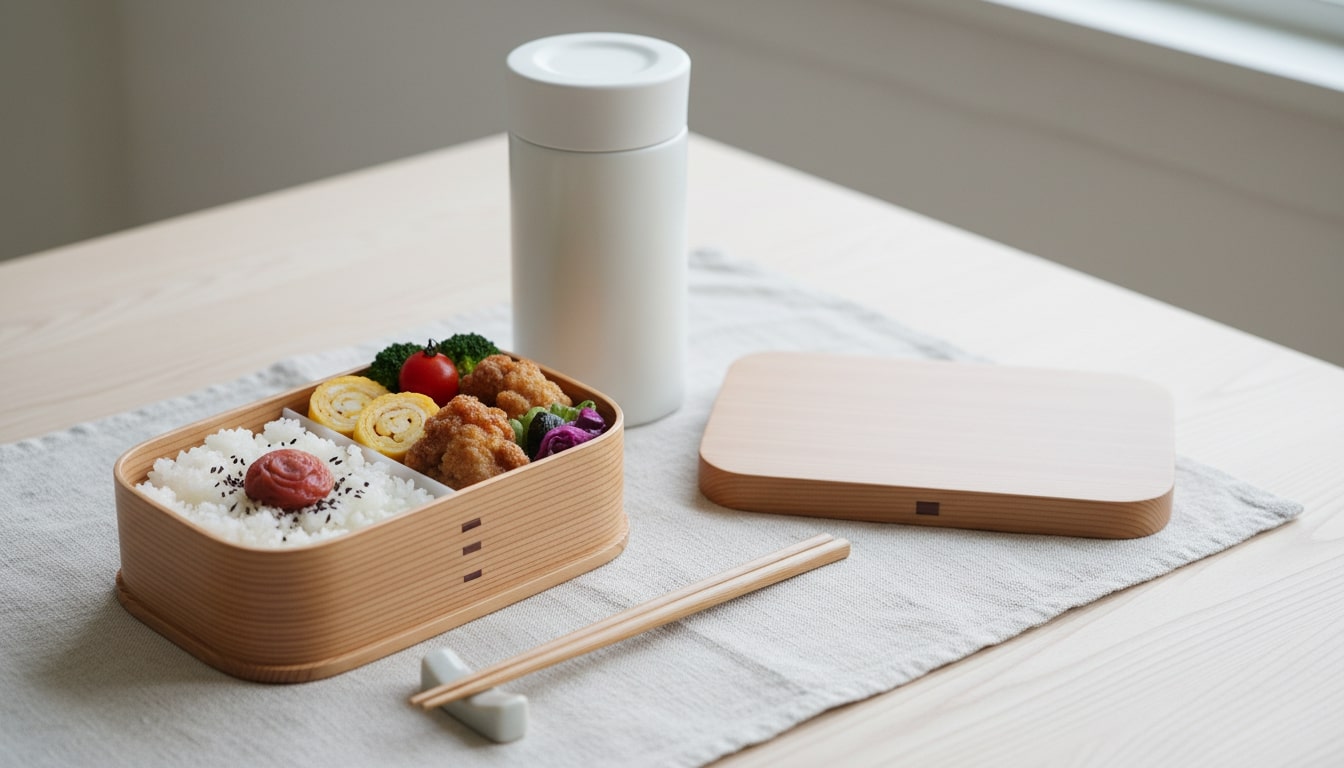
Balance the colors so the box looks “alive”
A colorful bento almost always looks more appetizing, even if the recipes are simple. Try to hit 4–5 colors:
- White: rice
- Brown: meats, karaage, seared edges
- Green: spinach, beans, cucumbers
- Red/Orange: carrots, tomatoes, umeboshi
- Yellow: tamagoyaki, corn, bell pepper
Put contrasting colors next to each other. Green spinach beside white rice, or orange carrots next to golden chicken, makes the whole box look brighter without doing extra work.
Use height and shapes for variety
Flat, spread-out food can look dull. A few upright pieces make a big difference.
- Stand onigiri triangles, carrot sticks, or omelette slices slightly upright.
- Slice proteins and tamagoyaki evenly and line them up in tidy rows.
- If you want a cute look for kids, use simple cutters for vegetables or nori instead of adding more dishes.
Keep wet foods away from dry foods
Moisture is what ruins texture in a packed lunch, especially for rice and fried items.
- Put pickles and sauced vegetables in cups or tiny containers.
- Keep sauces in small sealed bottles instead of pouring them over food ahead of time.
- Don’t let wet pickles touch rice or karaage, or they’ll soften everything they sit against.
Cool everything before you close the lid
This is a small habit that prevents a lot of bento problems.
- Let rice, proteins, and sides cool to room temperature before packing.
- If you still see steam, leave the lid slightly open for a minute or two.
- Steam turns into condensation, and condensation turns crispy food limp fast.
Final touches that make it look finished
You don’t need much, just one or two details.
- Sprinkle furikake on rice or place an umeboshi in the center for a classic look.
- Add sesame seeds, a strip of nori, or a small lemon wedge beside your protein.
- A leaf of lettuce or shiso under fried food can add color and also help block moisture.
Pack with transport in mind
Before you toss it in your bag, do a quick check.
- Give the closed box a gentle shake. If you feel movement, open it and tuck in a few fillers.
- Keep the bento flat while carrying it so your layout stays intact.
- Use an elastic bento band if the lid isn’t very tight, especially if the box will get jostled.
Conclusion
Putting together a traditional Japanese bento is a simple way to make lunch feel more intentional. You end up with a meal that’s balanced, filling, and genuinely nice to look at, even if you’re eating at a desk or on the go. Once you get comfortable with a few staples like tamagoyaki and karaage, it’s easy to mix and match parts and build a rotation that still tastes good at room temperature.
The biggest “secret” is really just balance, a mix of colors and textures, and packing everything snug so it doesn’t slide around. After a bit of practice, packing a bento stops feeling like extra work and starts feeling like a small, satisfying part of your morning.
We have more ways you can taste “Japan.” Check out our guide on how to host a Japanese snack party next!
FAQ: Creating a Traditional Bento Box
- How do I keep my bento box from getting soggy by lunchtime?
- Let everything cool to room temperature before you close the lid. That one step prevents steam from turning into condensation, which is what makes rice gummy and fried food soft. It also helps to separate wetter items, like pickles or sauced vegetables, using silicone cups, cupcake liners, or even a small leaf of lettuce as a barrier.
- Do I need a special Japanese bento box to get started?
- No, not at all. A sturdy container that seals well is enough, and compartments are helpful but not required. You can create sections using small dividers, silicone cups, or paper liners. If you end up packing bento often, a proper bento box can be a nice upgrade for portioning and keeping food neatly separated, but it’s not a requirement.
- Is a bento box healthy for daily meal planning?
- It can be, especially if you follow the traditional balance of rice or grains, a protein, and a few vegetable sides. That structure naturally supports portion control and variety, and it pushes you to include more colorful produce instead of relying on processed foods. The main thing is what you pack, but the bento format makes it easier to build a well-rounded meal consistently.