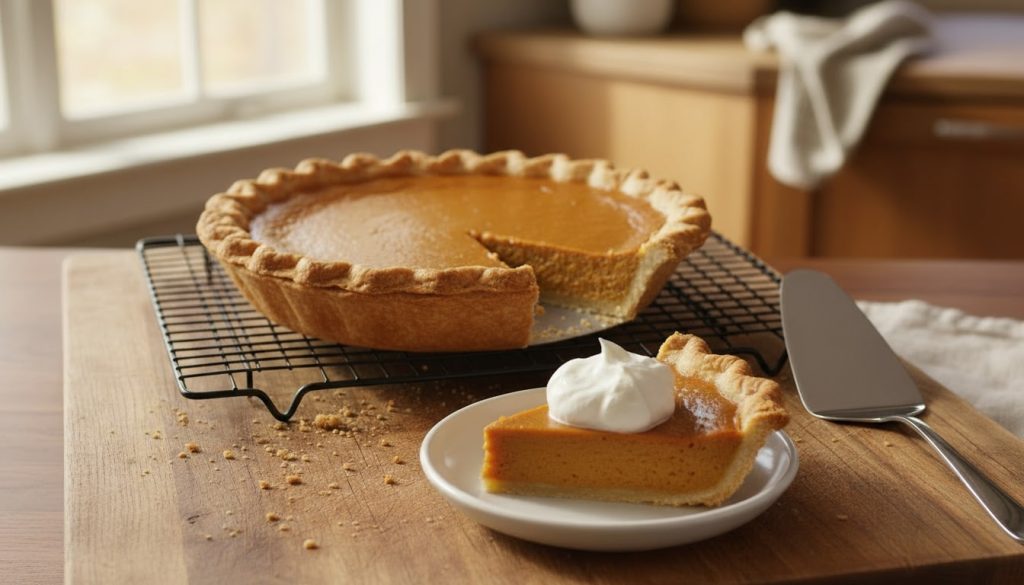
This pumpkin pie has a smooth custard and a crisp crust. You can make your pumpkin pie unique when you bake it at home while saving money. The steps to bake a fresh pie are easy to follow. When the holidays or Thanksgiving come, there is no better dessert than this sweet and decadent pie.
Contents
Key Takeaways
- Pumpkin pie is a dessert staple when autumn comes. You can control the amount of spice and sugar in your own homemade pie.
- Choose your dairy to shape texture, with evaporated milk for a reliable set and heavy cream for extra richness.
- Keep the pie safe by refrigerating after cooling, limiting room temperature serving to two hours, and eating leftovers within four days.
Pumpkin Pie Recipe
This pumpkin pie recipe is a classic that can fit into any party or special occasion. Follow the guide for that delicious, sweet dessert after dinner. If you are missing any ingredients, find them at Amazon Grocery!
Ingredients
- 9-inch pie crust (unbaked)
- Pumpkin puree
- Large eggs
- Evaporated milk or heavy cream
- Brown sugar
- Granulated sugar (optional)
- Ground cinnamon
- Ground ginger
- Ground nutmeg
- Ground cloves
- Salt
- Vanilla extract
Kitchenware
- 9-inch pie plate
- Mixing bowls
- Whisk
- Measuring cups and spoons
- Rolling pin (if making crust)
- Foil or pie shield
- Baking sheet
- Cooling rack
- Knife or toothpick
- Instant-read thermometer (optional)
Steps:
- Position a rack in the middle of the oven and preheat to 425°F (220°C).
- Fit a 9-inch pie crust into a pie plate and crimp the edge.
- Freeze the crust for 15 minutes to help it hold its shape.
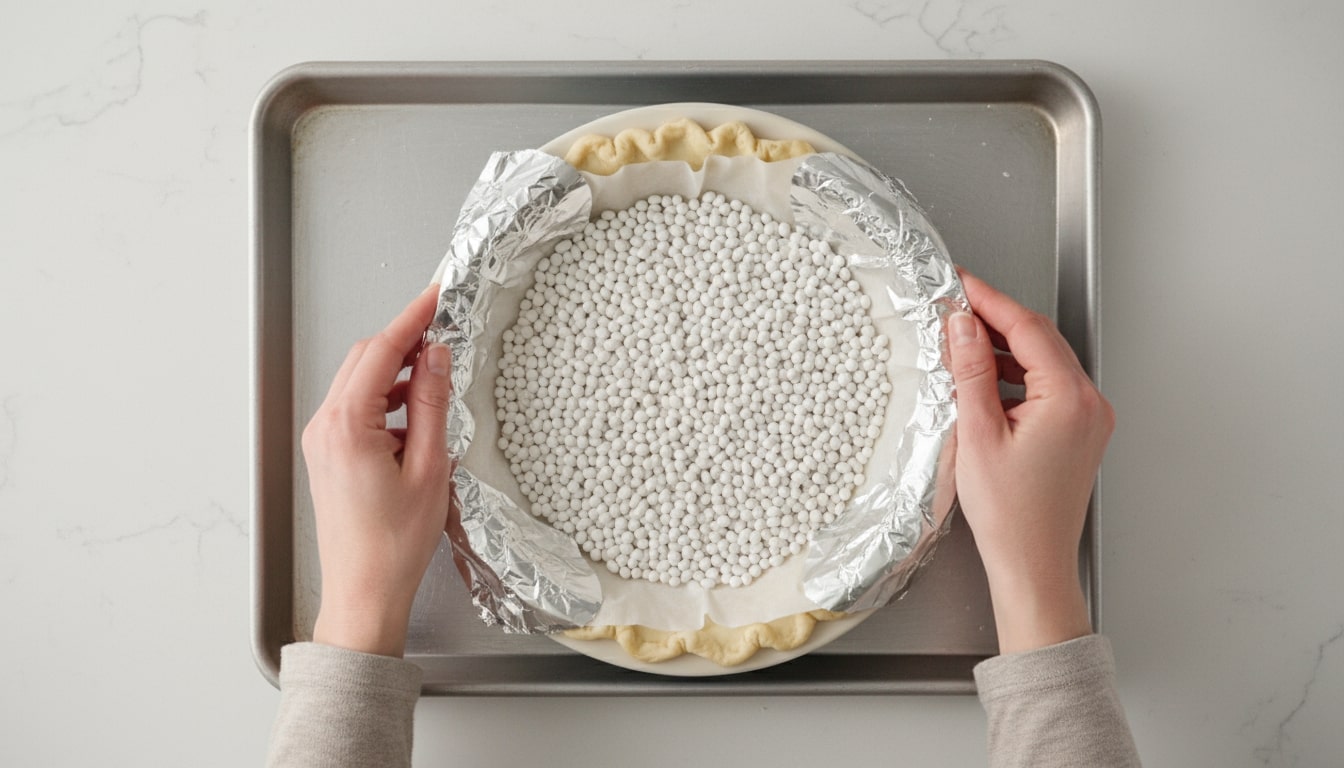
- Line the cold crust with parchment and fill with pie weights or dried beans.
- Blind bake for 12 to 15 minutes, remove the parchment and weights, then bake 3 to 5 minutes more until the bottom looks dry.
- Start the filling by whisking the eggs with the brown and granulated sugar until glossy.
- Whisk in the pumpkin purée, cinnamon, ginger, nutmeg, cloves, salt, and vanilla until evenly blended.
- Whisk in evaporated milk or cream until the mixture is smooth, then tap the bowl to release air bubbles.
- Set the warm crust on a baking sheet and pour in the filling.
- Bake at 425°F for 15 minutes, then reduce the oven to 350°F and continue baking for 30 to 40 minutes.
- Shield the edge with foil if it browns too quickly during baking.
- The pie is ready when the center wobbles slightly and an instant-read thermometer reads about 175°F in the middle.
- Cool the pie on a rack to room temperature, then chill for at least 4 hours before slicing and serving.
The Science of Pumpkin Custard: Why 175°F Matters
Pumpkin pie is a baked egg custard that sets with gentle heat. As the temperature rises, egg proteins unfold and link into a soft gel. Sugar and dairy slow this process and raise the temperature needed for a proper set. Hitting the right center temperature gives you a smooth slice that holds together.
Pull the pie when the center reaches 175°F, which is about 79°C. At that point the middle is set yet tender, while the hotter edges finish the set during carryover heat. Stopping here helps you avoid curdling, surface cracks, and watery pockets. After chilling, the pie slices cleanly and keeps neat edges.
If you bake much hotter, usually above 185°F or 85°C, the protein network tightens and squeezes out liquid. Steam then escapes through the top and can split the surface. The texture turns grainy, and the crust may soften as moisture migrates.
Use an instant‑read thermometer if possible, inserting the tip in the center without touching the pan. Aim for 175°F and recheck after a minute if you are close. Without a thermometer, look for a gentle two‑inch wobble in the middle while the outer ring looks set and matte. A knife slipped near the edge should come out mostly clean.
To hit 175°F reliably, preheat the oven for at least twenty minutes and use the middle rack. Verify the reading with an oven thermometer because many ovens run hot or cold. Start at a higher temperature to set the crust, then lower the heat to finish the custard gradually. Shield the rim if it darkens too fast, and fill the crust while it is warm. Tap the pan to release bubbles, then cool on a rack before chilling.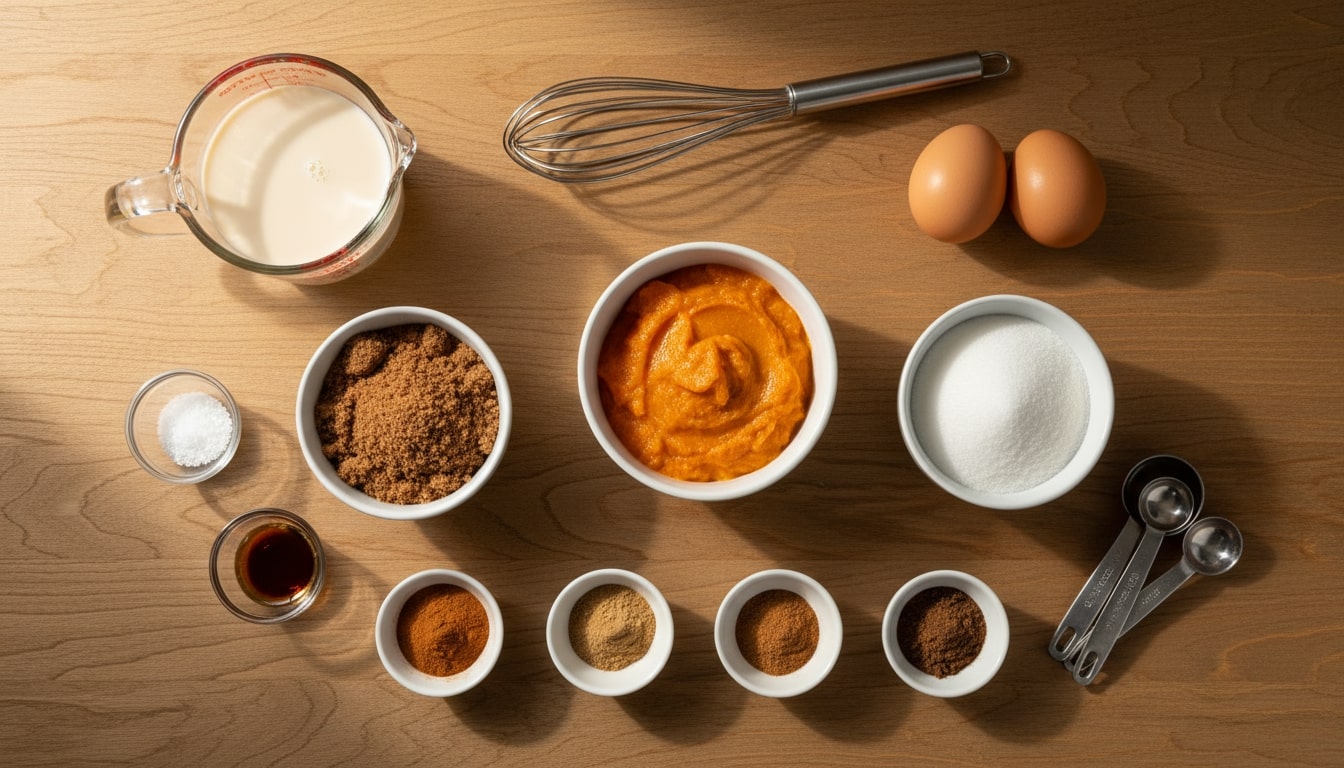
As the pie climbs past 160°F on the way to 175°F, the custard meets egg safety guidelines. Avoid trusting a perfectly clean knife from the center, since that cue often means the pie is already overbaked.
Dairy Choices Compared
Your dairy pick shapes texture, sweetness, and stability. Each option changes protein and water balance, which affects set and slice. Choose based on desired richness and slice neatness at home.
- Evaporated milk: The classic choice for a smooth custard with balanced richness. Low water and cooked milk solids help the custard set cleanly and reduce the risk of curdling or cracks.
- Heavy cream: Delivers the richest texture and a plush mouthfeel. Sets a bit softer, so pull right at 175°F and chill well if you want very tidy slices.
- Half-and-half: Offers a middle ground with good body and moderate richness. You get a reliable set that feels lighter than cream but sturdier than milk.
- Whole milk: Makes a lighter pie with a looser set because of higher water. Add one extra egg yolk or a tablespoon of cornstarch to keep moisture in check and slices neat.
- Sweetened condensed milk: Lovely and already thick, yielding a dense, ultra smooth custard. Replace the other sugars and bake at a slightly lower temperature to prevent deep browning.
- Coconut milk (full fat): A dairy-free alternative that still brings creaminess and structure. Choose full-fat for a stable set and chill thoroughly before slicing to avoid soft edges.
- Sour cream or crème fraîche (partial swap): Adds gentle tang and thicker body when used as part of the dairy. Swap in about one-third to get a firmer, cheesecake-like texture without turning the pie heavy.
Food Safety and Serving Window
Pumpkin pie is a custard dessert made with eggs and dairy, so time and temperature control keep it safe. Use these guidelines for cooling, serving, storing, freezing, and handling leftovers.
Cooling and Refrigeration
Cool the pie on a rack until it reaches room temperature, which usually takes about two hours. Do not leave it out longer than two hours. Move it to the refrigerator as soon as it is cool. Chill uncovered for thirty minutes to prevent condensation, then cover loosely. Keep the pie at or below 40°F to limit bacterial growth and preserve texture.
Room-Temperature Serving Window
Serve slices straight from the refrigerator or let the pie sit at room temperature for up to two hours during service. If a buffet runs longer, return the pie to the fridge between rounds. Keep the table cool, shade the dessert away from the heat, and replace small portions rather than leaving the whole pie out. Discard any pie left out beyond two hours.
Leftovers and Reheating
Refrigerate leftovers within two hours and store them in a covered container to prevent drying. Keep the pie for three to four days in the refrigerator. Serve cold for the cleanest slices, or warm individual pieces gently in a 300°F oven for ten minutes. Microwave on low power in short bursts if needed. Avoid high heat, which can curdle the custard and push liquid into the crust.
Freezing and Thawing
Freeze the whole pie or wrapped slices for best quality up to two months. Chill the pie completely before wrapping. Use two layers of plastic and a final layer of foil to prevent freezer burn. Thaw overnight in the refrigerator. Do not thaw on the counter. To refresh the crust, warm the thawed pie at 325°F for ten minutes before serving.
Toppings and Add-Ons
Keep whipped cream, crème fraîche, and other dairy toppings chilled until serving. Spoon them onto individual slices rather than the whole pie if the event lasts a while. Return toppings to the refrigerator between rounds.
Store leftover whipped cream in a covered container and use within twenty four hours. For meringue toppings, refrigerate the pie and serve it within one day for best quality.
Safe Handling and Transport
Wash your hands and tools before slicing, and use a clean knife for each cut. Cover the pie during transport and keep it cold with ice packs if the trip exceeds one hour. Place the pie in a level box to avoid spills. Upon arrival, refrigerate promptly. Replace serving utensils that touch plates, and wipe crumbs from the cut edge to slow drying.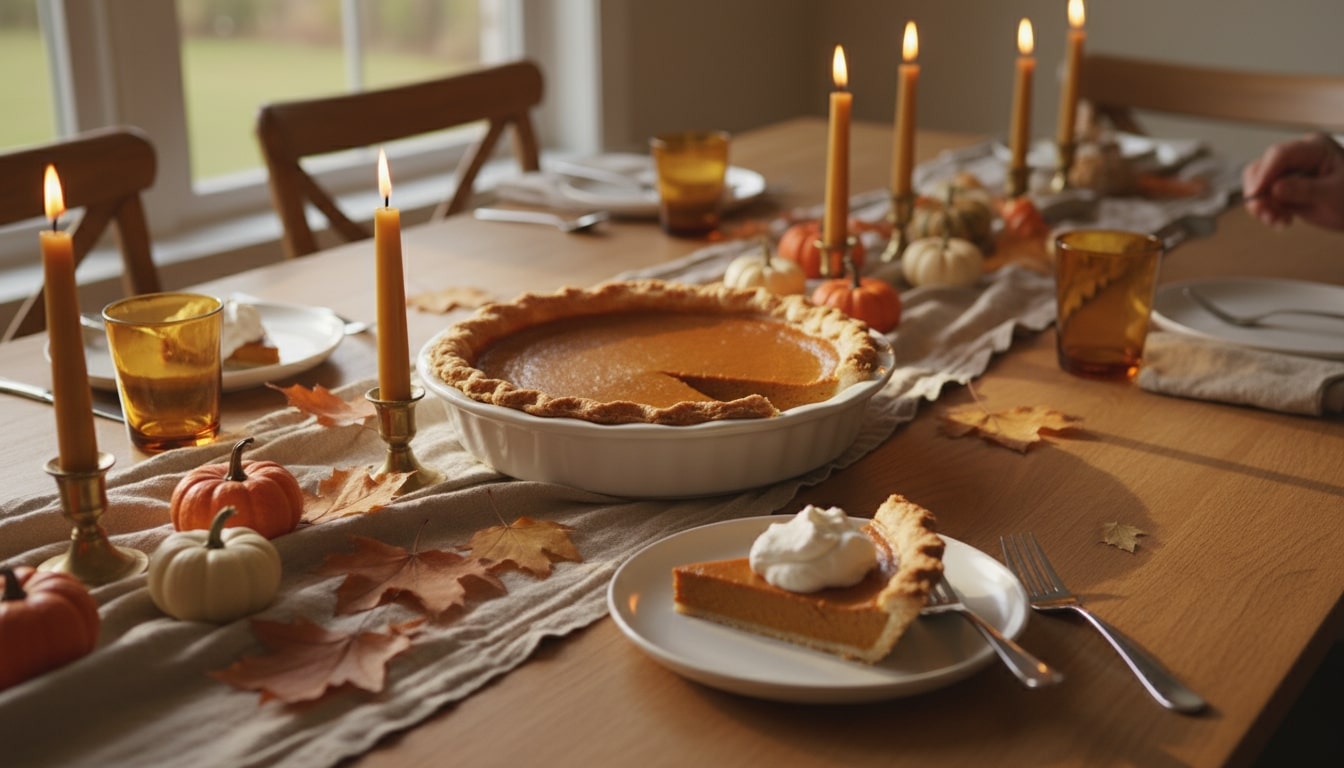
Conclusion
Baking pumpkin pie at home lets you control flavor and texture. A careful blind bake and a 175°F center give you clean slices. Cool and chill to set the custard and keep the crust crisp. With a little practice you will beat any store pie and be the hero of Thanksgiving with this pie.
FAQ
- Can I use a convection oven for pumpkin pie?
- Yes, but adjust the heat. Reduce the temperatures by 25°F, so bake at 400°F to start, then finish at 325°F. Use the middle rack and a low fan setting. Shield the rim earlier, and begin checking doneness 5 to 10 minutes sooner. Pull at a 175°F center for the same texture.
- How do I prevent crust shrinkage and slumping?
- Do not stretch the dough in the pan, and leave a small overhang to anchor the edge. Rest the lined pan in the fridge for at least 30 minutes, or freeze for 15 minutes. Press parchment and weights up to the rim during blind bake. Keep sides thicker than the base, and add a teaspoon of vinegar to the dough to relax gluten.
- How can I deepen pumpkin flavor without adding more spice?
- Cook canned puree in a skillet for 5 to 10 minutes to drive off water and caramelize notes. Warm the spices with a little butter or cream to bloom their aroma. Add a tablespoon of maple syrup or molasses for depth. For fresh pumpkin, roast the puree on a sheet pan to concentrate flavor.
- Can I skip blind baking and still get a crisp bottom?
- You can, with tradeoffs. Preheat a baking steel or stone for 30 minutes and set the pie plate directly on it. Brush the raw crust with beaten egg white before filling to seal it. Bake on the lowest rack and avoid glass if your oven runs cool. Expect a slightly softer bottom than with partial blind baking.
- Is it okay to add alcohol to the filling?
- Yes, bourbon or dark rum works well. Use 1 to 2 tablespoons and reduce the dairy by the same amount to keep the set firm. Alcohol can slow the set, so watch the center temperature closely. For flavor without alcohol, simmer the spirit for a minute to burn off most of it before adding.