This guide lets you create a universal base for many wood tripod plans. Build it once. Add the head you need for lamps, cameras, plants, or a trellis. The geometry stays the same. Hardware and finish changes are made to fit the job you need for a specific tripod.
Contents
Creating the Universal Wood Tripod
A universal wood tripod can be turned into a camera mount, a planter, and even an art easel. After making this, you can accomplish a wide range of wood tripod plans for any applications. Here is how you make one:
Materials
- 3 hardwood leg blanks 25×25 mm or 1×1 in length 30–60 in
- Hub blank hardwood or laminated plywood about 38–50 mm thick
- 3 bolts 1⁄4-20 x 2–2.5 in with washers and locknuts or threaded inserts
- Paracord or light chain for a spreader plus a cord lock
- Rubber feet for floors or steel spikes for soil
- Optional tray spreader 1⁄2 in plywood with small screws
- Wood glue where fixed parts are needed
- Finish oil wax for indoor or exterior oil spar varnish for outdoor
- Optional camera or lamp hardware 1⁄4-20 and 3⁄8-16 studs or a lamp rod with strain relief
Tools
- Miter saw or handsaw
- Drill press or hand drill with 1⁄8 in 1⁄4 in 3⁄8 in bits plus countersink
- Combination square bevel gauge and protractor
- Block plane or chamfer bit
- Random orbit sander or sanding block
- Clamps
- Measuring tape pencil a,nd marking awl
Steps
- Mill three legs to a true 1×1 profile. Pick a length that suits the final build. Ease the long edges.
- Laminate plywood for the hub to your target thickness. Lay out an equilateral triangle about 3.5–4.5 in per side. Cut and smooth the faces.
- Strike a centerline on each hub face. Mark pivot holes the same distance from the top edge. Drill 1⁄4 in pivot holes square to each face.
- Mark each leg 40–50 mm from the top. Drill matching 1⁄4 in pivot holes through the legs.
- Bolt each leg to a hub face with washers and locknuts. Tighten until movement is snug but smooth.
- Stand the tripod. Set the footprint wide and even. Tie a paracord spreader between legs at roughly one third of leg height. Add a cord lock for repeatable setup.
- Check clearance as the legs swing. Adjust cord length until the stance feels planted and the splay looks even.
- Add feet. Press on rubber caps for floors. Pre-drill and install spikes for soil.
- Cut an optional triangular tray from 1⁄2 in ply. Slot each corner so it slips over the legs. Fix with short screws once the height is set.
- Add a top interface. Install a 1⁄4-20 or 3⁄8-16 threaded insert in the hub for cameras and fixtures. Use a lamp rod and strain relief for lamp builds. Add a tie-off cap for trellises.
- Sand through the grits. Break sharp edges. Seal with your chosen finish suited to indoor or outdoor use.
- Load test. Place the intended device or a sandbag of similar weight. Re-tighten locknuts. Trim and melt paracord ends.
Find the Equipment for Wood Tripod Plans at Tools Today
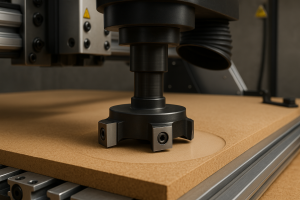
A universal base needs clean cuts, square holes, and repeatable setups. Tools Today stocks pro gear that makes this easy. You’ll find what you need to turn wood tripod plans into durable builds.
Pro-Grade Cutting and Shaping Gear
Start with sharp, reliable cutters so joints fit and faces finish clean. Tools Today carries premium router bits, brad-point and Forstner bits, and table-saw blades that hold an edge. You can shape hubs, taper legs, and drill coaxial holes with confidence. Fewer burn marks. Less tear-out. Better fit right off the tool. That’s how wood tripod plans turn into stable, handsome projects.
Hardware, Workholding, and Measuring That Keep You Accurate
Precision isn’t luck. It’s clamps that don’t slip, squares that read true, and layout tools that repeat. Tools Today offers inserts, threaded studs, countersinks, and jigs that help hubs align and legs splay evenly. Add reliable hold-downs and bench accessories to keep parts steady while you drill and route. Consistent setup shortens the path from layout to glue-up on any set of wood tripod plans.
Expert Resources and Fast Fulfillment
You’re not guessing alone. Product pages and guides explain use cases in plain language so you match the bit to the task. Live support helps you pick the right profile or diameter before you buy. Orders move fast, which keeps momentum on your bench. That helps you complete wood tripod plans on schedule and move straight to finishing.
Ready to build with fewer headaches and cleaner results? Head to Tools Today and load your cart with the cutters, hardware, and layout tools that bring your wood tripod plans to life.
Projects You Can Build With One Universal Wood Tripod
Start with one strong base, then bolt on the head you need. These adaptable builds show how the same geometry becomes fixtures for home, studio, and garden with simple swaps.
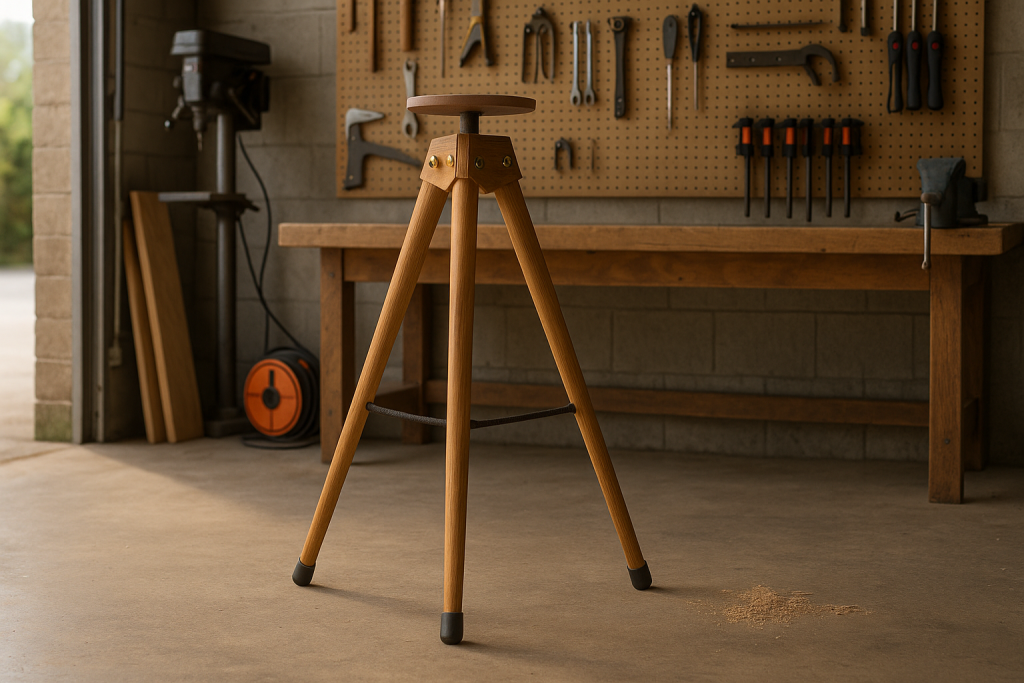
Floor Lamp Tripod
Built for living rooms and studios, this floor lamp tripod uses a tall, wide stance that resists bumps and shade wobble. The hub conceals a lamp rod and proper strain relief, so cords look clean and safe. Subtle leg tapers lighten the silhouette while keeping weight down low for balance. Felted feet protect hardwoods and quiet moves across tile. It’s a timeless element in wood tripod plans that adds warm, sculptural light to any room.
Steps:
- Mill three straight legs to 60–66 in, plane a gentle taper from mid-leg to the feet for a lighter look that still feels planted.
- Cut a 1.5–2 in thick hub blank, mark three equal faces, and drill pivot holes square so leg motion stays smooth.
- Drill the hub center for a lamp rod, add a metal strain-relief bushing, and test that the cord passes freely without scraping.
- Bore matching pivot holes near the top of each leg, then bolt legs to the hub with washers and locknuts tightened to a smooth, snug swing.
- Route or chisel a shallow cord channel down the back of one leg so the wire seats flush and doesn’t snag during setup.
- Tie a paracord or chain spreader one-third down the legs, adjust length until the stance is wide and repeatable, and lock it with a cord stop.
- Press rubber feet for hardwood floors, add thin felt pads under the caps, and verify that the tripod doesn’t creep when bumped.
- Mount the socket, test the switch and polarity, then fit a heavier shade that lowers the center of gravity and calms wobble.
- Sand to 220 grit, break sharp edges, and finish with a durable oil-varnish blend that resists fingerprints and routine handling.
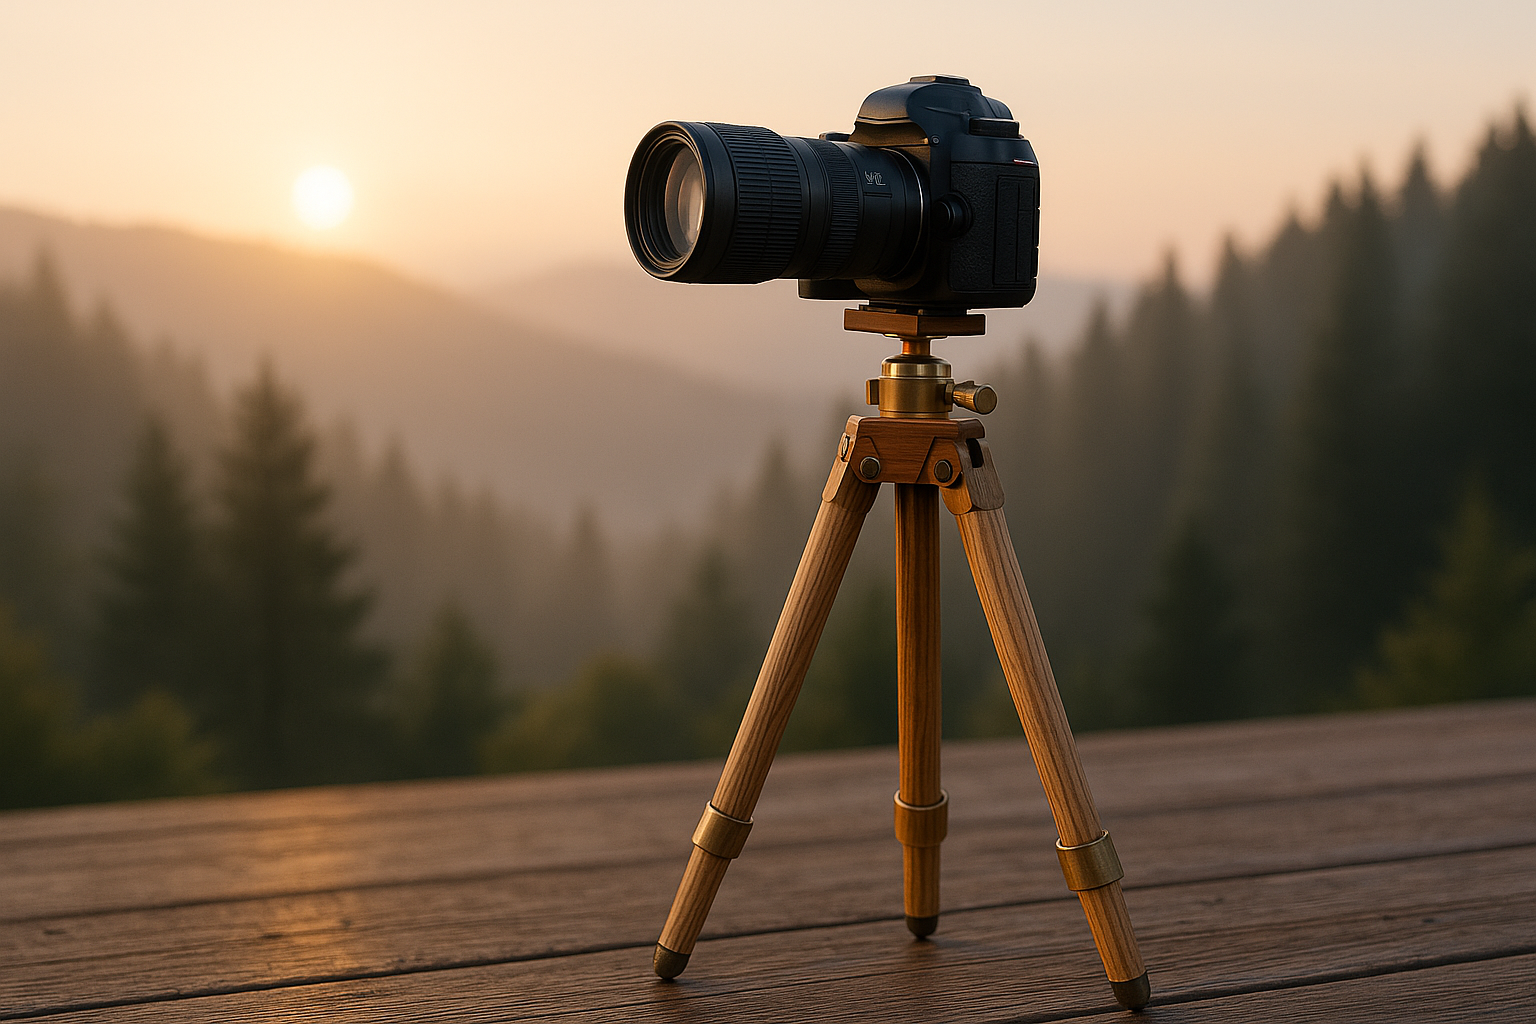
Camera Tripod
A classic three-leg wooden support that damps vibration naturally. The plan yields a wide-stance platform with standard camera-mount compatibility for video, long exposures, and macro. It blends studio-worthy looks with field-ready toughness, making it a satisfying build that upgrades both your images and your workspace.
Steps:
- Mill stout legs to 55–65 in and keep tapers minimal so the structure resists vibration when focusing at high magnification.
- Build a rigid hub with thicker cheeks or side plates, glue carefully, and reinforce with bolts so nothing shifts under eyepiece loads.
- Drill and tap the hub top for your mount’s bolt pattern or add an adapter plate that centers directly over the triangle of the legs.
- Cut a thick triangular tray, add three slotted leg keys to lock spacing, and bore eyepiece holes that keep lenses upright and within reach.
- Fit rubber feet for patios or removable spikes for soil, and verify the tripod doesn’t creep on smooth concrete during slow slews.
- Tie or chain a fixed-length spreader so leg angles repeat exactly, then mark each leg for your preferred observing height.
- Add a hook under the tray for counterweight, load with a small bag, and check that damping time after a tap is under a couple of seconds.
- Seal with an outdoor-capable finish and label azimuth reference marks so alignment routines run quickly in the dark.
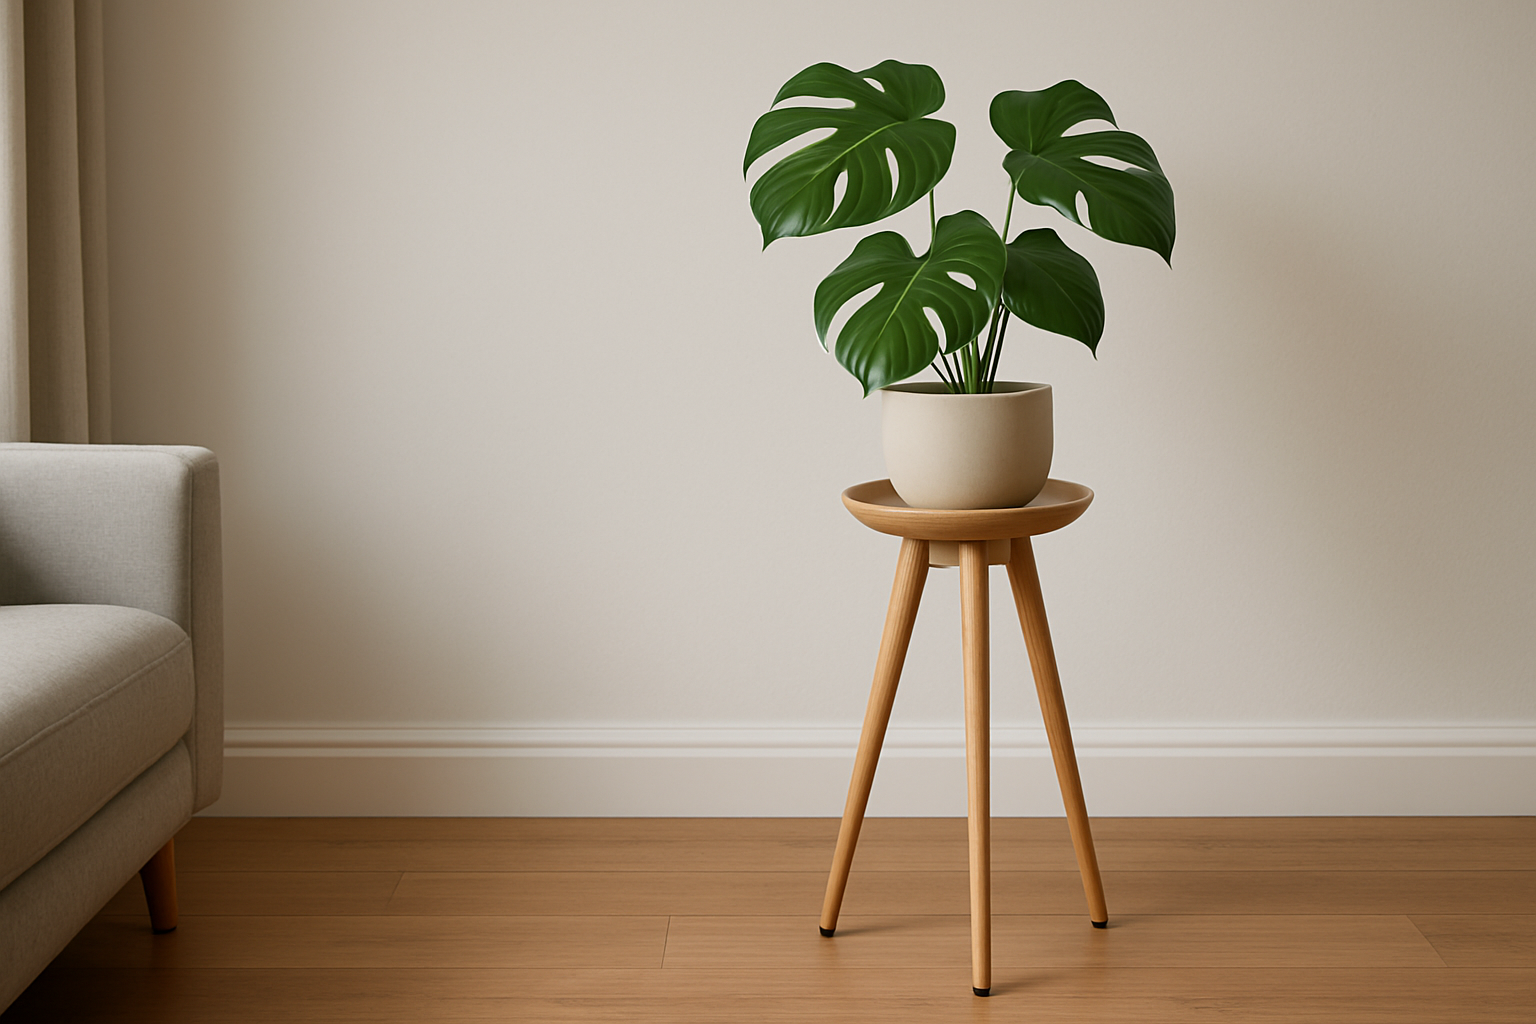
Plant Stand Tripod
A clean, minimal tripod that lifts pots for airflow and easier watering while keeping floors protected. The shallow dish silhouette frames foliage and catches stray drips without bulk, so it works in living rooms, patios, and styled photo backdrops. Modular sizing and timeless lines let you rotate pots through the seasons, turning a simple stand into a high-impact décor piece.
Steps:
- Cut slim legs to 24–36 in depending on pot height, keep profiles elegant, and round the edges so the stand reads light in a living space.
- Use a simple hub with hidden screws or tight dowels, keep the top surface flat, and confirm leg angles match so the stand looks symmetrical.
- Make a shallow dish or ring top sized to your favorite pot, add a tiny back lip for safety, and drill hidden holes for discreet mounting.
- Add a thin cork or rubber liner in the dish to prevent pot creep and to cushion ceramic bases from micro-vibrations.
- Fit felt pads or soft rubber feet and test on tile, wood, and carpet so the stand sits level across surfaces.
- Finish with exterior oil or spar varnish if the stand will see sun and humidity, and choose a tone that complements foliage.
- Test with a water-filled pot at full weight, check that the center of mass sits well inside the footprint, and tighten any hardware after the load settles.
- Keep a second, larger dish top with the same bolt pattern so you can swap sizes seasonally without rebuilding the base.
Conclusion
A universal wood tripod plan gives you one base that solves many builds. The geometry stays consistent, so accuracy improves with every project. Swap tops to make lamps, camera supports, plant stands, or trellises. You save time, reduce waste, and build cleaner work. Now turn your wood tripod plans into finished pieces with confidence.
We have more wood project you can tackle at home. Check out our wood pallet projects next!