Origami is a peaceful, portable craft that turns a single square of paper into delightful shapes, an owl is a perfect first project. This guide walks you through every fold clearly and simply, with tips for common mistakes and ideas for personalization. You’ll need only one square sheet of paper and a few minutes of focused folding time. By the end, you’ll have a cute paper owl suitable for decoration, gifts, or a quick creative break.
Contents
Key Takeaways
- Origami owls can be folded from a single square sheet in about 10 to 15 minutes using a simple six-step method that is beginner friendly.
- Choosing the right paper size and weight changes the final look and durability, with thin paper giving sharp detail and thicker paper providing sturdiness for 3D shapes.
- Common problems are easy to fix by unfolding to the last good crease, re‑creasing layers individually, and using a bone folder or fingernail for crisp, even folds.
Origami Owl Folding Guide
Follow these clear steps to fold a charming origami owl from one square sheet, perfect for beginners. Allow about ten to fifteen minutes and a surface, no scissors or glue required. If you plan on teaching more than one kid for a homeschool class, you can find supplies at Discount Supply School.
Materials & tools
- One square sheet of paper (origami paper 15–20 cm / 6–8 in recommended)
- Flat workspace (table or desk)
- Bone folder or the back of a fingernail (optional for crisp creases)
- Pencil or marker for eyes (optional)
- Small ruler or scissors only if you must trim a non-square sheet (not required if you start with a square)

Step-by-step folding instructions
Step 1: Initial Diagonal Fold
- Start with your square paper. Fold it in half diagonally to form a triangle.
Step 2: Creasing the Center
- Crease the center as this will be needed for the upcoming fold.
Step 3: Create the Kite Base
- With the triangle’s long edge at the bottom, fold the left and right bottom corners upwards, aligning their outer edges with the center line. This forms a kite or diamond shape.
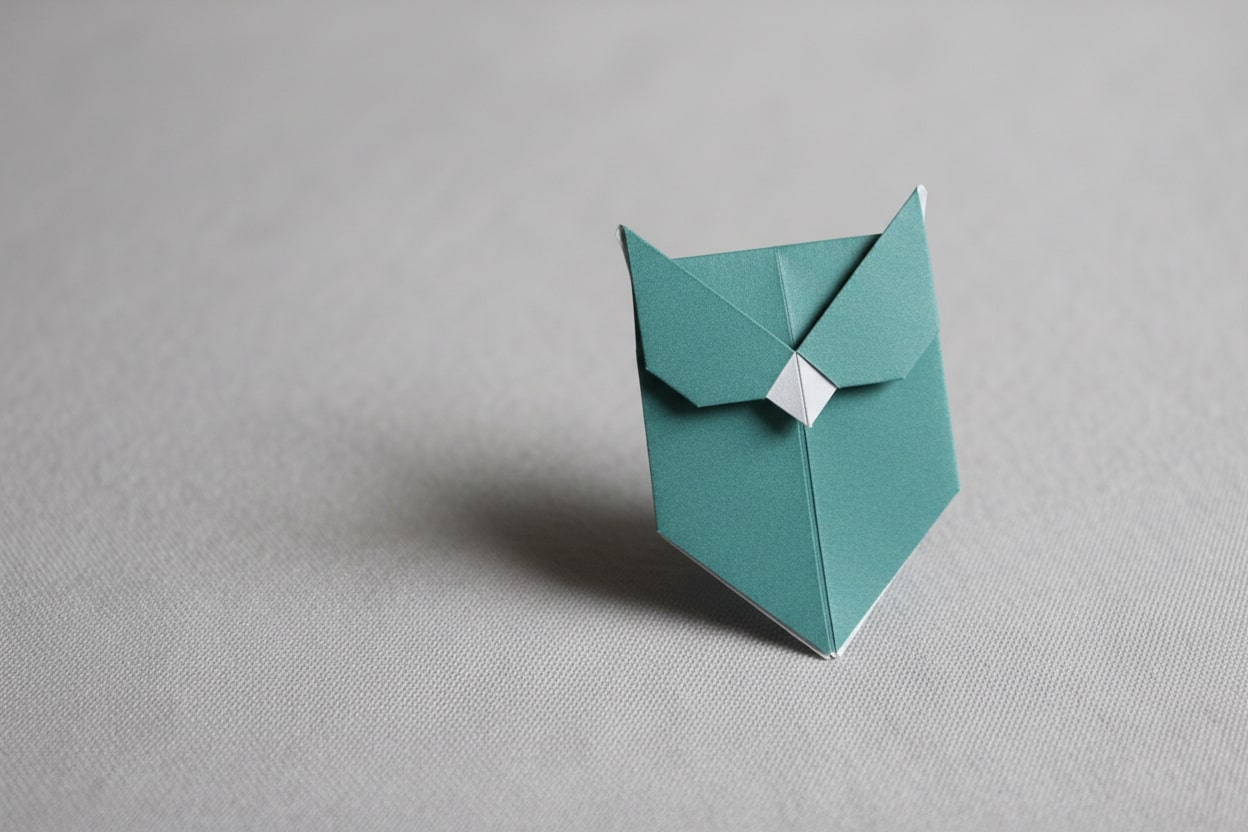
Step 4: Fold Down the Head
- Flip the paper over. Take the top point of the kite and fold it downwards, about one-third of the way, to create the owl’s head. Crease well.
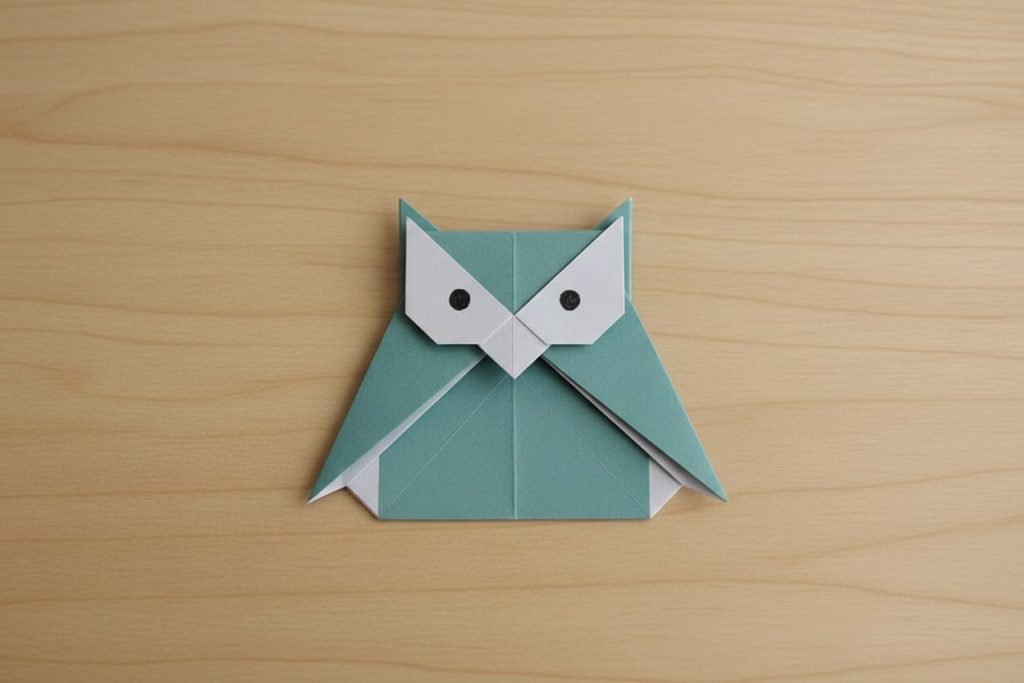
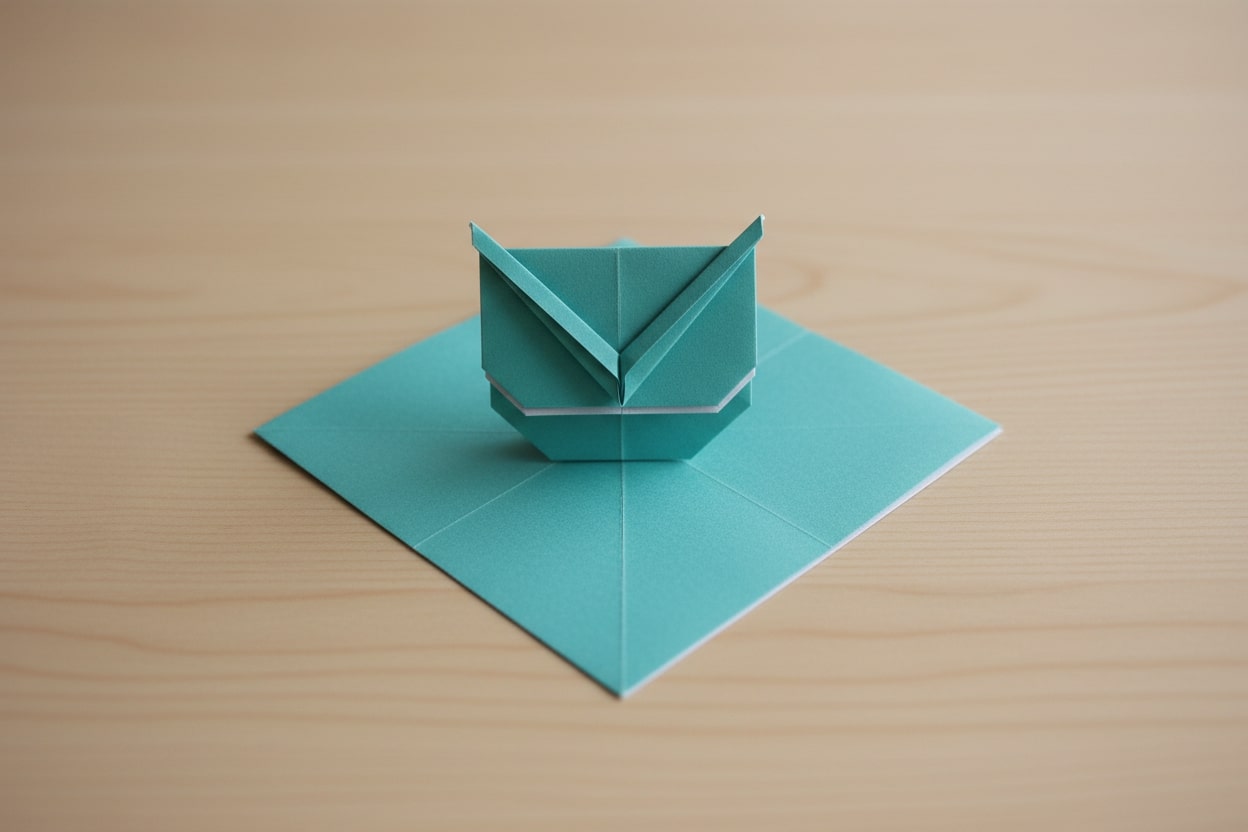
Step 5: Form the Beak and Ear Tufts
- At the tip of the folded-down head, make a small forward fold to create a beak. Then, fold small triangular tips at the top corners of the head outwards to form the ear tufts.
Step 6: Shape the Wings
- On each side of the owl’s body, fold the outer layered flaps downwards and slightly outwards to form the wings. Crease firmly.
- Fold the bottom tip of the paper upwards behind the body to create a small tail. Gently open and adjust the wings and head to give the owl a three-dimensional shape. Add eyes if desired.
Troubleshooting Common Folding Problems
Troubleshooting helps you fix common origami mistakes like misaligned creases, bulky centers, uneven wings, and fragile paper so you can rescue your owl quickly and learn techniques to avoid repeat problems.
Misaligned creases
This short guide shows how to realign layers and re-crease precisely so folds meet evenly and the model stays tidy without undoing more than necessary.
- Gently unfold to the last correctly aligned crease and re-position all layers before re-creasing.
- Work from the center outward so edges meet evenly at each fold.
- Use a flat surface and press creases with a bone folder or fingernail for more accuracy.
- Make small corrective folds rather than forcing a large adjustment that creates bulk.
Bulky center and tight layers
Use these steps to reduce bulk at the model center and refine layered areas so the owl holds shape and looks clean.
- Partially unfold the bulky area and re-crease each layer one at a time.
- Flatten overlapping layers and re-fold with shallower angles where possible.
- Press each layer with a ruler or bone folder to remove trapped air and tighten creases.
- If bulk persists try a slightly larger sheet next time so layers stack with less thickness.
Uneven wings or asymmetry
Follow this advice to match wing angles and restore symmetry so the owl looks balanced from the front.
- Reverse the last wing fold and realign using the center crease as a guide.
- Re-crease both wings while the model is flat to ensure matching angles and depths.
- Minor tweaks such as adjusting wing tips or smoothing one side often correct appearance without undoing earlier steps.
- Check the model under good light to spot small misalignments and fix them early.
Tears, weak creases, and paper damage
These quick fixes stabilize torn or weakened paper and prevent further damage during folding.
- Flatten torn edges and re-crease the area to help fibers lie flat and stabilize the tear.
- For weak creases, press firmly with a bone folder to sharpen them, working gradually to avoid new tears.
- If the paper is too fragile, start again with slightly heavier origami paper to avoid repeating the problem.
- Avoid overworking the same spot and keep folds gentle when the paper shows stress.
Paper Choices & How They Affect the Result
Choosing the right paper changes how your origami owl looks and holds shape. These notes explain tradeoffs so you can pick the best paper for detail, durability, and the final use.
Thin vs thick paper
- Thin paper gives sharp creases and fine detail but can tear if folded repeatedly.
- Thicker paper resists tearing and holds shape for three dimensional models but may bulk up in layered centers.
- Match paper weight to the model complexity and your skill level for best results.
- For practice use heavier paper for sturdiness, then switch to thin paper for finer details.
Paper size and scale
- Larger sheets make precise folding easier and create bolder finished owls.
- Smaller sheets increase challenge and produce delicate figures suitable for tiny decorations.
- Standard 15 cm squares are versatile for most uses, while 20 to 25 cm sheets work well for demos or larger displays.
- Scale your design to the intended use such as bookmarks, ornaments, or standalone decorations.
Color, pattern and two tone effects
- Single color paper gives a clean look and emphasizes form over pattern.
- Two tone or white-backed paper highlights edges and layered faces for visual contrast.
- Orient patterned paper so motifs appear on the visible faces when the model is complete.
- Use color strategically to make wings, belly, or beak stand out.
Specialty papers and finishes
- Washi adds fiber strength and a soft finish that looks elegant on finished models.
- Foil-backed paper holds shapes well and suits sculptural or three dimensional forms but can crease permanently.
- Textured or handmade paper looks beautiful but may hide crisp crease lines and resist tight folds.
- Test unfamiliar papers on practice folds before using them for a final piece.
Conclusion
Folding an origami owl is a quick, satisfying project that builds confidence with each try. Small changes in paper choice and crease technique produce very different looks, so experiment freely. Use the 6-step infographic for clear visuals and the troubleshooting tips when folds go wrong. Share your finished owls or try a variation to keep improving your skills.
FAQ: Origami Owl
- How long does it take to fold one owl?
- For a beginner expect about 10 to 20 minutes from start to finish. With practice most people can fold a clean owl in 5 to 10 minutes. Complex variations or larger paper may take longer.
- Can I use glue or tape to make the owl more durable?
- Yes, use small amounts sparingly. Apply a tiny dot of white PVA glue or a glue stick on hidden interior layers such as behind the head or under the tail to secure bulky folds. Avoid visible glue on the front and press gently until dry.
- How do I turn the owl into an ornament or garland?
- For an ornament punch a small hole near the top of the head and thread thin ribbon or nylon cord. For a garland attach a loop of thread to each owl or clip them onto string with tiny clothespins. Space owls about 5 to 8 centimeters apart for a balanced look.
- What is the best way to store or mail finished owls?
- To flatten for mailing place the owl between two sheets of tissue paper and then between heavy books for 24 hours. For 3D display pieces nest them gently in tissue inside a shallow box to avoid crushing. Label the box as fragile to prevent rough handling.
- Can young children make this model and how can I simplify it?
- Yes, children can enjoy a simplified version. Use larger paper such as 25 centimeter squares and pre-crease main folds for them. Omit the tiny beak and ear tuft details and let kids decorate with stickers or markers for eyes. Supervise any cutting or hole punching.