
Paper airplanes are a timeless and fun activity that both kids and adults love. If you’re a parent looking for an easy, hands-on project, learning how to make a paper airplane is a perfect choice. It’s inexpensive, requires only simple materials, and encourages creativity and curiosity in children. In this guide, we’ll walk you through the process step by step, explore different paper types, and share tips to help your paper airplane fly longer.
Contents
How to Make a Paper Airplane
First, gather your materials and then follow these simple steps to create your own paper airplane. This basic design is a classic dart shape that’s perfect for beginners.
Tools and Materials Needed
- Paper: One letter-size (8.5 x 11 inch) or A4 sheet of paper. Regular printer paper works best for a standard plane, but you can experiment with other types.
- Flat surface: A table or hard surface to fold on will help you make crisp folds.
- Optional – Ruler: Useful for making straight creases or measuring fold lines, though not required.
- Optional – Markers or crayons: For decorating your airplane after folding (fun for kids, but decorations are not needed for flight).
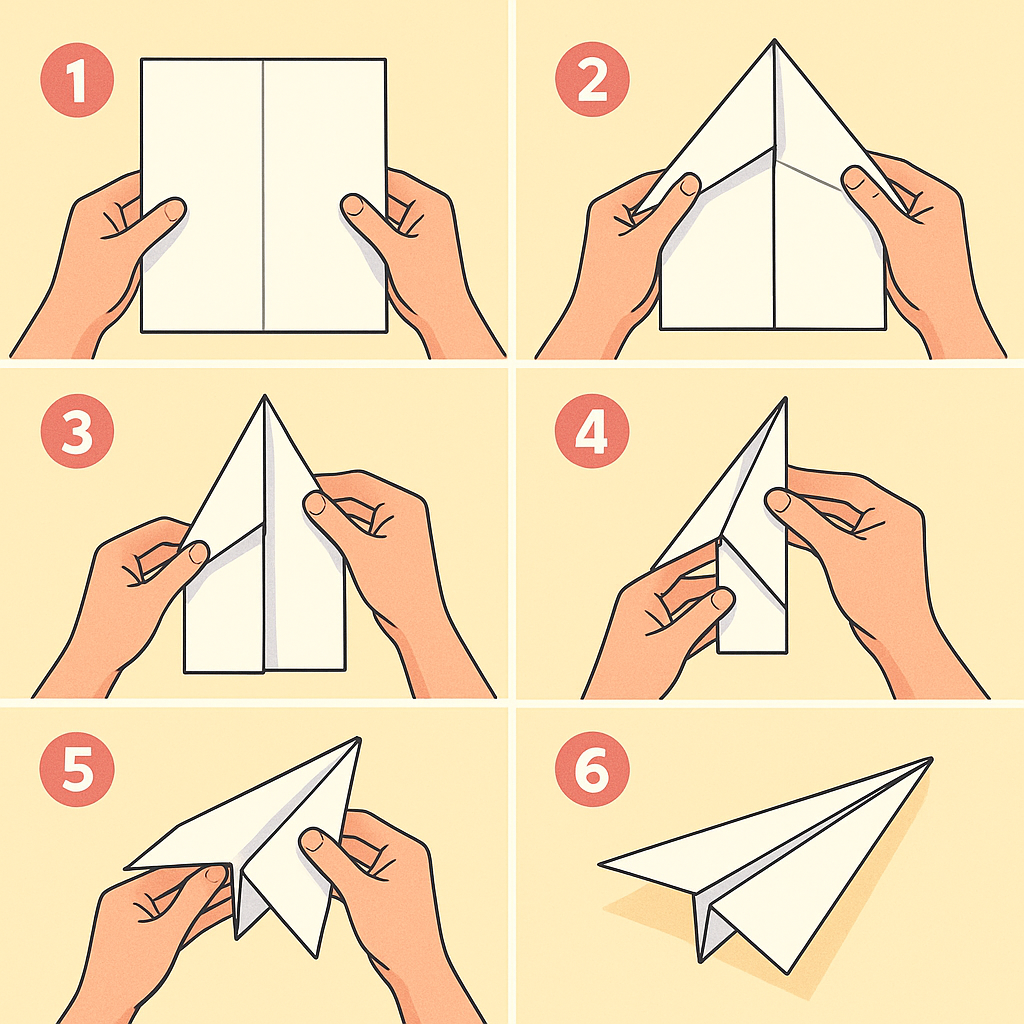
Step-by-Step Instructions: Basic Paper Airplane (Classic Dart)
- Fold in half lengthwise: Take your paper and fold it in half lengthwise (along the long side), then unfold. This creates a long center crease down the middle of the paper. The crease will be a guideline for the next folds. Make sure the fold is straight and sharp – a clean crease makes the airplane more balanced.
- Fold the top corners to the center: With the paper laid flat (portrait orientation), bring the top-left corner down toward the middle crease. Do the same with the top-right corner. The two top edges should align along the center line, forming a triangle point at the top of your paper. Try to keep these folds as even and symmetrical as possible. The better the symmetry, the straighter your airplane will fly.
- Fold the paper in half along the center: Now, refold the paper in half along the original center crease, this time folding the previous corner flaps inside. You should end up with the long, narrow triangle shape on the outside. Make sure the pointed nose is sharp and the edges of the wings line up neatly. Press the fold firmly so the plane’s body is crisp.
- Fold down the wings: Keep the paper folded in half and place it on the table with the folded side (the plane’s “spine”) facing up. To create the wings, take the top flap and fold it down so that its edge runs along the bottom fold (the plane’s belly). In other words, you’re folding the first wing down toward the outside of the plane. The wing should start about an inch from the bottom. Crease the wing firmly.
- Fold the second wing: Flip the airplane over to the other side. Fold the second wing down to match the first wing exactly. It’s important that both wings are the same size and shape so the plane is balanced and doesn’t tip to one side. Take a moment to ensure the wing folds line up with each other. If the wings aren’t equal, adjust the folds as needed for symmetry.
- Unfold wings and finish: Gently pull the two wings open so that they extend out horizontally from the plane’s body. The plane should now have a pointed nose, a straight body, and two large wings. Congratulations – you have made a basic paper airplane! At this point, you have a functional paper plane ready to fly. You can optionally add small upward folds at the back of each wing (wing tips) for stability, but this isn’t required. Now it’s time to test your new paper airplane.
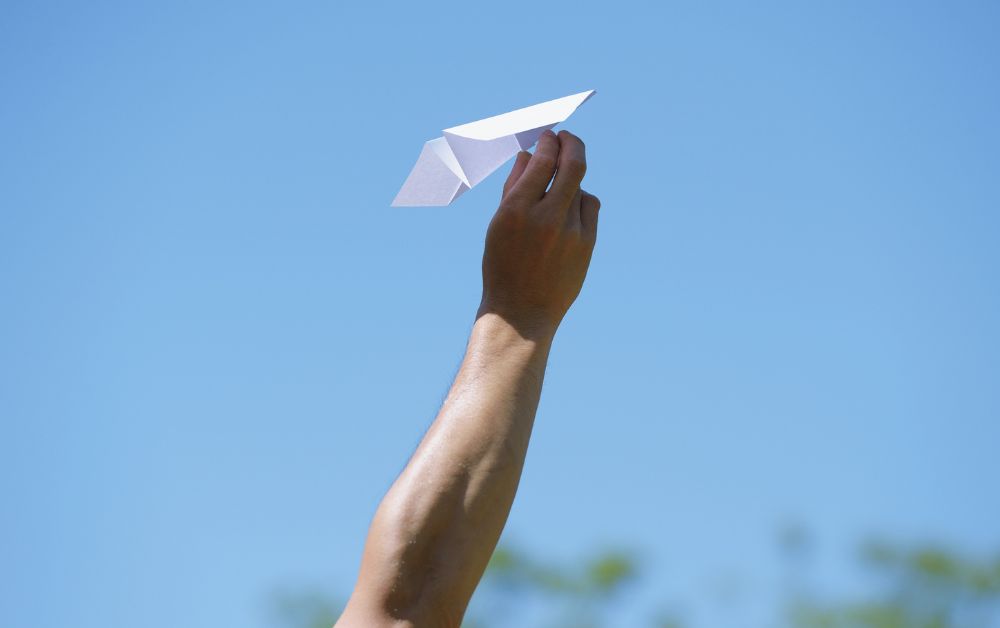
Tip: When flying your plane, stand in an open area and give it a smooth toss. For this basic dart design, a medium force throw at a slight upward angle works well.
Different Types of Paper for Paper Airplanes and Their Characteristics
One of the great things about paper airplanes is you can make them from almost any paper. The type of paper you use will affect how easy it is to fold and how your airplane flies. Here’s a look at several common paper types and their characteristics:
- Printer Paper (Copy Paper): This is the standard 20-pound bond (75–80 gsm) paper found in most home printers. It’s ideal for paper airplanes – it’s thin enough to fold easily and light enough to glide, yet sturdy enough to hold its shape.
- Origami Paper: Origami paper is usually smaller (often 6×6 inches) and a bit thinner than printer paper. It folds very crisply, which is great for precise designs. Because it’s lightweight, an origami paper airplane might stay aloft well, but the smaller size means it won’t fly as far.
- Construction Paper: Construction paper is thicker and heavier than printer paper, and it has a rougher texture. Planes made from construction paper will be sturdier and can handle bumps or crashes without crumpling easily. However, the extra weight can cause them to descend faster and require a harder throw to fly well.
- Cardstock or Index Card: Cardstock is quite heavy and stiff (think of a greeting card or postcard). Folding a paper airplane from cardstock is harder, but it will be very rigid. Due to the weight, a cardstock plane generally needs a strong throw to get lift. It will fly very straight and fast because of its rigidity, but it also tends to fall faster if it loses speed.
- Newspaper or Lightweight Paper: Newspaper is thin and very lightweight. You can make large paper airplanes from a full sheet of newspaper, and they will be quite light. The benefit is a light plane experiences less gravitational pull; in theory it could stay up longer if designed well.
Which paper is best? For most people, regular printer paper is the best choice to start. The design and how you throw the plane matter more than minor paper weight differences. Feel free to try different papers with the same folding pattern – you and your kids might enjoy seeing the differences.
For example, fold the same plane out of printer paper, construction paper, and magazine paper to see which goes farthest or stays up longest. This can be a great mini science experiment on its own!
Tips to Make a Paper Airplane Stay in the Air Longer
Once you’ve mastered how to fold a paper airplane, the next challenge is keeping it in the air as long as possible. For reference, the world record for a paper plane staying aloft is 29.2 seconds – nearly half a minute! You probably don’t need to break any records at home, but a few adjustments can greatly improve your airplane’s flight time. Here are some tips for making and flying a paper airplane that stays in the air longer:
Choose a Glider-Style Design
The classic dart is great for speed and distance, but a glider design with wider wings will typically float longer. Wide wings increase lift, helping the plane stay up. You can experiment by folding the wings a bit larger on your next plane or trying a known glider pattern. A slightly longer wingspan and a blunt nose will make the plane glide slowly instead of dropping quickly.
Use Lighter Paper (Within Reason)
A lighter plane can potentially stay up longer because it has less weight pulling it down and needs less lift to keep flying. If your plane is too heavy, gravity will win faster. Try slightly lighter paper for longer flights, but avoid extremely thin paper that can’t hold its shape. Regular printer paper is usually your safest bet, and you should also avoid unnecessary weight like paper clips or tape if your goal is maximum hang time.
Fold Carefully and Symmetrically
Symmetry and clean folds are crucial. A balanced design will fly straighter and smoother, while uneven wings or folds can cause the plane to roll or dive. Make sure both wings are identical and the body is straight. Even small misalignments can throw off the plane’s flight path. Take your time with folds—clean, precise creases make a big difference in how well the plane glides.

Add a Small Upward Tilt to the Back of the Wings
Slightly bend the trailing edge of each wing upward. These small flaps act like elevators on a real airplane, creating lift and improving stability. They help the plane fly slower and reduce nose-dives. Start with very slight bends and adjust based on performance—flatten them if the plane stalls or add a tiny weight to the nose for better balance.
Launch Gently at an Upward Angle
The way you throw your airplane affects how long it stays in the air. Avoid fast, direct throws. Instead, aim for a smooth toss with an upward arc. One strategy is to launch the plane straight up so it can glide down slowly from a greater height. More altitude gives it more time to glide, especially if the design is balanced for long flight.
Fly in Calm Conditions
Wind can shorten your plane’s flight or send it veering off course. Fly indoors or wait for a calm day outside. Even a slight breeze can flip or stall your plane. If you do fly outdoors, try to face away from any breeze so it helps carry your plane forward instead of pushing it back or down.
Practice and Tweak
Experimentation is part of the fun. Encourage your kids to observe how the plane behaves and make adjustments. If it dives, tweak the wings. If it stalls, adjust the flaps or add nose weight. With every tweak, they’ll learn about balance, force, and flight—plus they’ll improve their designs over time.
By applying these tips, you’ll notice your paper airplanes flying noticeably longer. Watching your plane catch some air and gently glide for several seconds is incredibly satisfying. Now that you know the secrets, see how long you can keep your paper creations soaring!
Conclusion
Now that you’ve learned how to make a paper airplane, you can enjoy hours of fun with just a simple sheet of paper. This activity is not only entertaining but also a great way for parents and kids to spend quality time together and explore basic principles of flight. We’ve covered everything from choosing the right paper to step-by-step folding and even pro tips for longer flights. With a bit of practice and creativity, you can even design your own unique planes that fly farther or stay up longer.
We have more fun projects with craft paper. Check out our origami lily project next!


