
Last Updated on April 9, 2025 by Team Ideas24
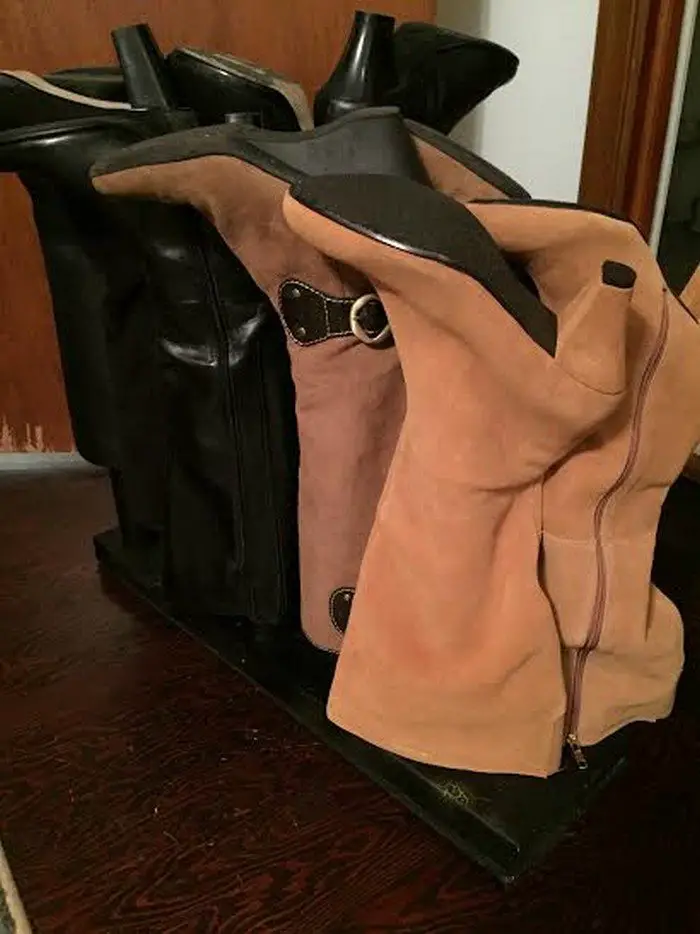
Whether it’s for your welly boots, leather boots or just regular shoes, this boot rack is a great way to store them all!
This boot rack DIY project keeps dirty shoes off the floor and reduces clutter while maintaining the form/shape of all your footwear.
You can use PVC or wooden dowels to build one depending on your preference. And if you’ve got numerous boots to store, you can simply put dowels of different lengths so that all shoes can be stored properly.
Is this the kind of shoe storage you need at home?
Contents
Boot Rack DIY Project Guide
You’ll need these materials:
- (1) 2 x 4 x 96″
- (1) 1 x 4 x 64″
- 4 pcs 1.5″ Wood Screws
- 8 pcs 3 1/8″ Wood Screws
- (3) 10′ long 3/4″ Inner Diameter PVC (1 1/8″ OD)
- (1) Exterior Spray Paint
And these tools:
- Table Saw
- Tape Measure
- Pencil
- Miter Saw
- Drill Press or Power Drill with 1 1/8″ Paddle Bit and a 1/8″ Drill Bit
- Screw Gun
- Two Gripping Clamps
- Hammer
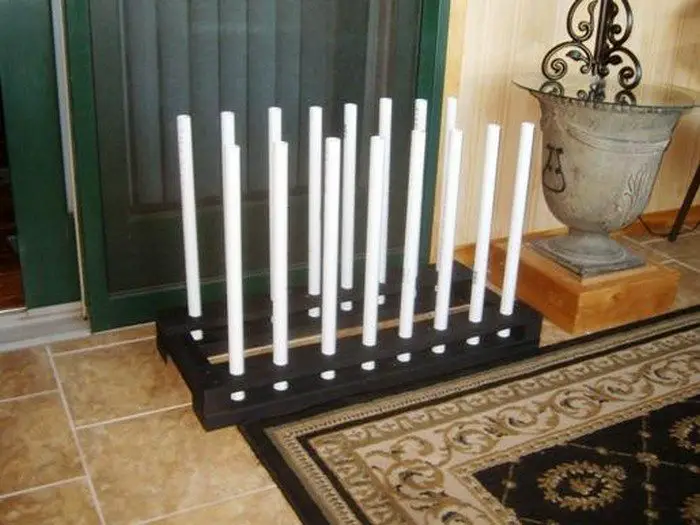
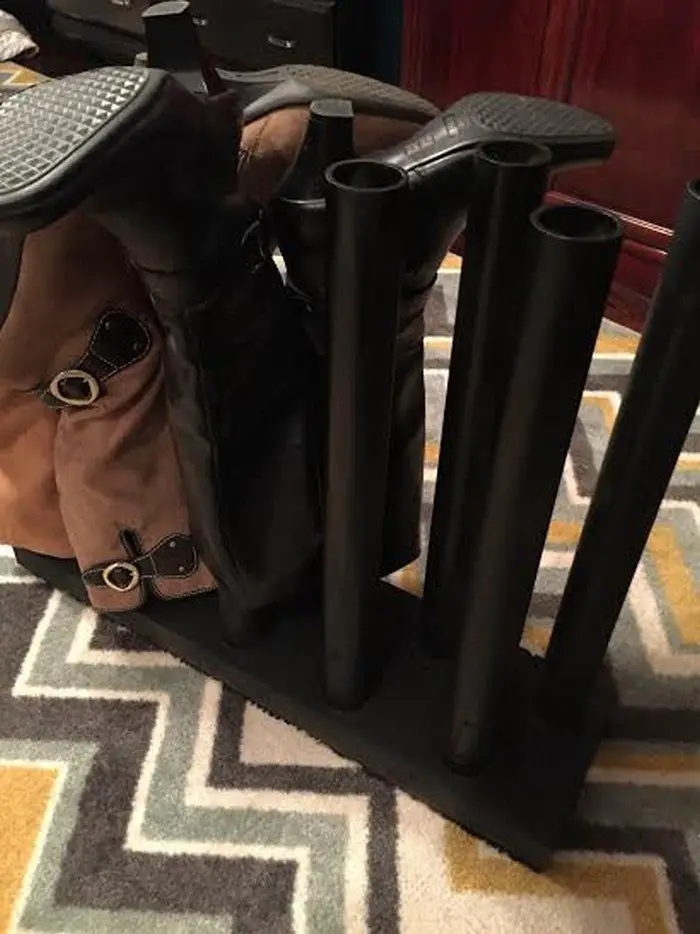
Step 1: Cut the Base and Support Frame
Measure and cut the 2×4 board into two 32″ pieces. These will serve as the base.
Cut the 1×4 board into two 32″ pieces. These will act as cross braces for the top of the base. Use the miter saw for clean, straight cuts.
Step 2: Prep the PVC Boot Holders
Take the three 10-foot-long PVC pipes. Cut them into twelve 30″ sections. These will hold each boot upside down and help them air out. If you need shorter or taller posts for different boots, vary the lengths slightly.
Step 3: Drill Holes for the PVC Pipes
Mark 6 evenly spaced spots along each 2×4 base piece using your pencil and tape measure. Leave at least 2–3 inches from the ends and between each mark.
Use your drill press or power drill with the 1 1/8″ paddle bit to drill all 12 holes. Drill straight through the 2x4s. These holes will hold the PVC pipes upright.
Step 4: Assemble the Frame
Place one 2×4 (with holes) flat on a workbench. Align a 1×4 across the front edge, standing vertically. This forms an L-shaped base. Clamp them together, then drill pilot holes using the 1/8″ drill bit.
Secure the brace to the base using four 1.5″ wood screws. Repeat this step on the other side.
Step 5: Attach Both Sides
Now connect both 2×4 sections using the remaining piece of the 1×4. This will tie the two sides together and add more stability. Position it across the tops of the 1×4 braces. Screw it in with the longer 3 1/8″ wood screws.
Step 6: Insert and Secure the PVC Pipes
Fit each PVC pipe into the holes you drilled earlier. If the fit is snug, you can tap them in with a hammer. For extra hold, apply a dab of wood glue or adhesive before inserting the pipes.
Make sure each pipe stands straight and level.
Step 7: Paint and Finish
Spray paint the entire rack, including the PVC pipes, with exterior paint. This helps protect it from moisture and dirt, especially if you’ll place it in a mudroom or outside. Let the paint dry thoroughly before using.
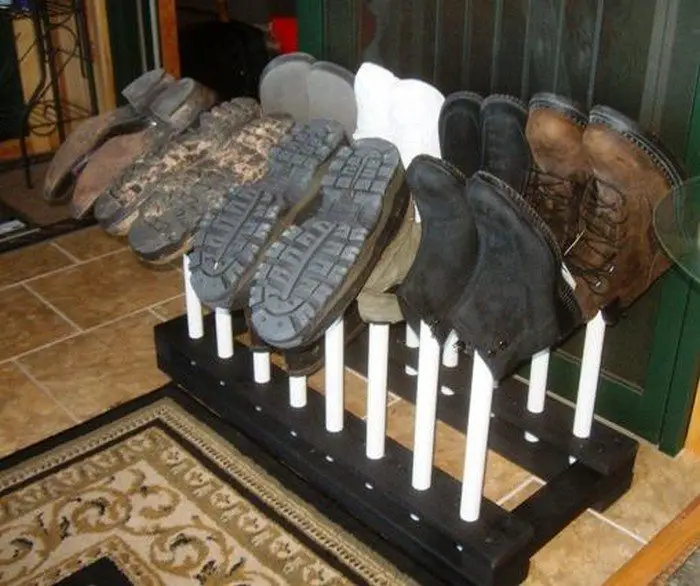
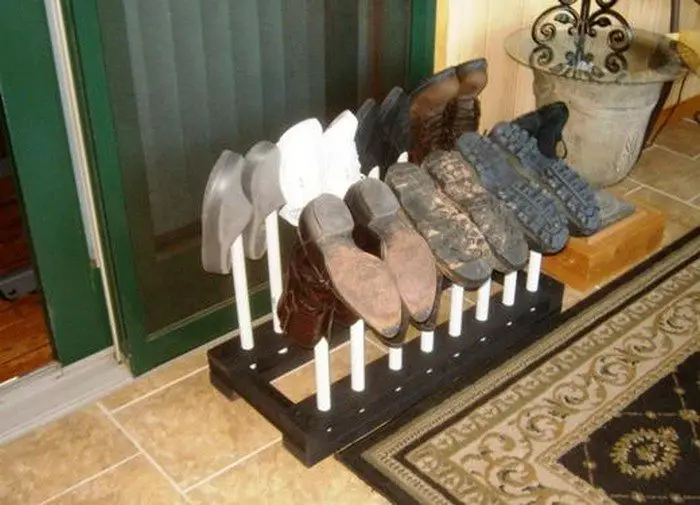
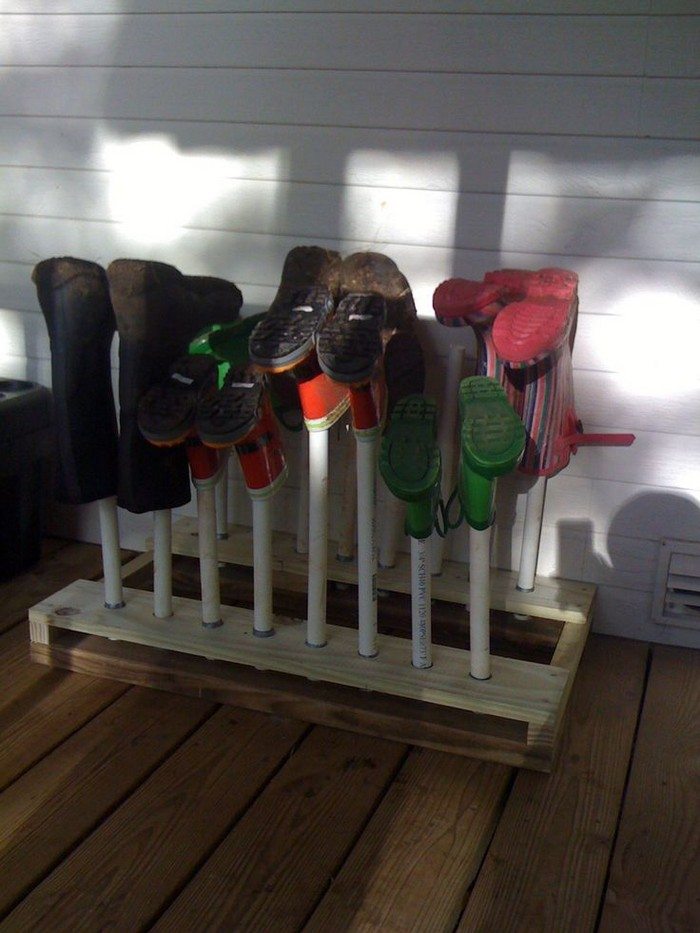
Step 8: Place and Use
Once the rack is dry, set it in your entryway, garage, or porch. Slide boots upside down onto the pipes to keep them off the floor and well-ventilated.
Benefits of a DIY Boot Rack vs Store-Bought Options
If you’re tired of muddy boots crowding your entryway, a boot rack DIY project might be the solution. Store-bought boot racks can seem convenient, but they often fall short in terms of customization, durability, and cost-effectiveness. Building your own rack lets you tailor the design to fit your space, footwear, and style. It’s also a rewarding weekend project that can help keep your home cleaner and more organized.
Built to Last
Most store-bought boot racks are made from thin metal tubing or plastic parts that flex or break over time. A boot rack DIY project allows you to choose solid, durable materials like wood or thick PVC. When you build it yourself, you’re in control of quality. You can make a sturdy rack that won’t wobble or tip over, even when it’s holding heavy work boots or winter footwear.
Custom Fit for Your Space
Every home is different. A store-bought rack might be too large for a small entryway or not tall enough for high boots. With a boot rack DIY project, you can measure your space and build to exact dimensions. If you have an awkward corner or a narrow mudroom, it’s easy to create a design that fits without compromise. You can even build a multi-level unit or wall-mounted rack if floor space is tight.
Adapted for Your Boots
Some commercial racks can’t accommodate tall boots, wide soles, or multiple pairs per person. When you build your own, you can choose the spacing and pipe height that works for your entire family’s footwear. This means no more floppy boots or overcrowded shelves. You can make each section the right height, so your boots dry properly and keep their shape.
Lower Cost
Buying a rack can be surprisingly expensive, especially for something that doesn’t hold much. A basic rack might run $40 or more, and sturdier models often cost double that. A boot rack DIY project can cost less than half, depending on the materials you already have at home. Scrap wood, leftover PVC, and an hour or two of your time could give you a better, more personalized solution for a lot less money.
A Chance to Personalize
Store-bought racks usually look generic. With a DIY project, you can paint it to match your walls, stain it to blend with your furniture, or even add hooks and labels for a more functional finish. A custom rack doesn’t just hold boots. It becomes part of your home’s personality.
Satisfaction of Doing It Yourself
There’s something satisfying about solving a problem with your own hands. A boot rack DIY project gives you that sense of accomplishment. It’s not just about saving money or having better storage—it’s about creating something useful and lasting. And when guests ask where you got it, you get to say, “I built it myself.”
If you want boot storage that works for your life, skip the flimsy store racks. Build something better. A boot rack DIY project offers better value, stronger materials, and a smarter use of space.
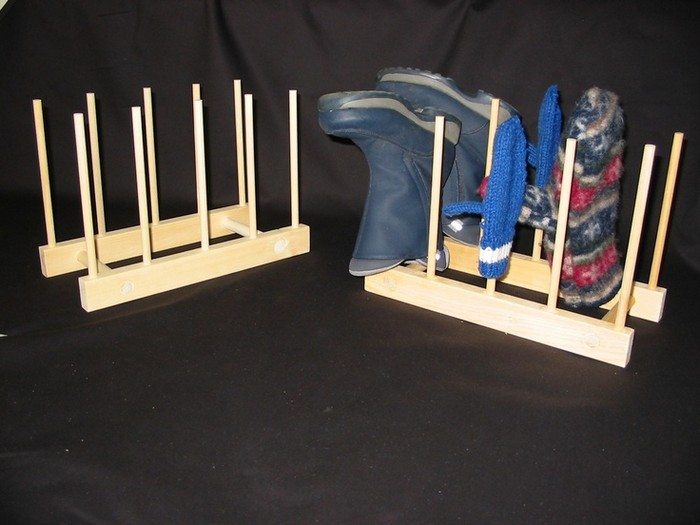
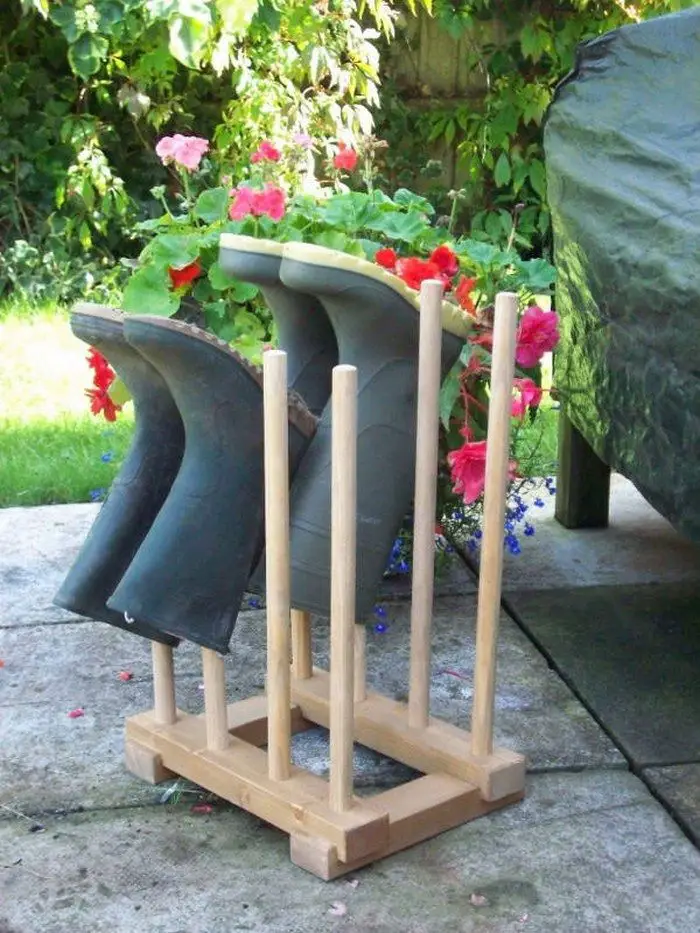
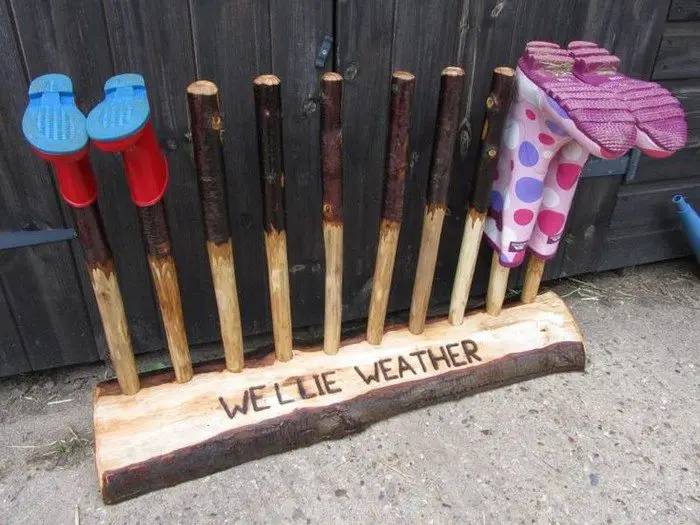
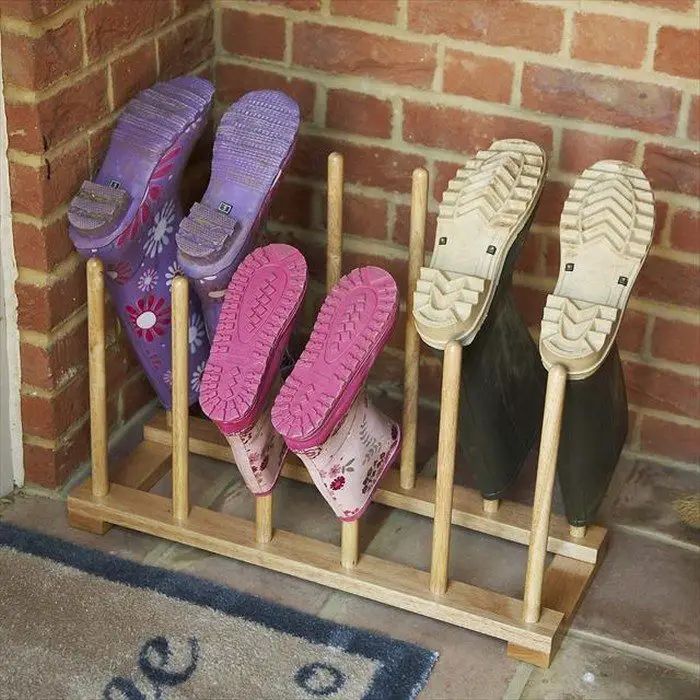
Boot Rack DIY Project Gallery
Click on any image to start lightbox display. Use your Esc key to close the lightbox.![]()

Design Variations for Different Needs
When it comes to organizing your footwear, one size doesn’t fit all. A boot rack DIY project can be easily adjusted to suit different needs, from space limitations to specific boot types. Whether you’re storing muddy work boots, tall riding boots, or tiny pairs for the kids, the right design makes a big difference. Here are some common design variations to consider as you plan your build.
Wall-Mounted Boot Rack
If you’re tight on floor space, a wall-mounted design is a great alternative. This version secures the base directly to the wall and uses angled PVC or wooden pegs to hold boots upside down. It’s ideal for garages or entryways where every inch matters. Mount it higher for tall boots or lower if kids will use it. Add a shelf above it for even more storage options.
Vertical Rack for Compact Spaces
A vertical rack stacks boots in columns, using tall support poles or multi-level pegs. This is a smart design for apartments, sheds, or mudrooms with minimal floor area. You can build it as a freestanding tower or tuck it into a corner. Just make sure to balance the structure with a wide enough base to prevent tipping.
Bench with Built-In Boot Storage
For a more polished look, combine seating and storage in one piece. This design includes a bench top for sitting while putting on shoes, with boot-holding pipes or slots underneath. It’s a stylish and practical option for entryways, especially in homes with kids or older adults who appreciate a place to sit. You can even cushion the top for extra comfort.
Covered Outdoor Boot Rack
If you often leave boots outside, consider building a rack with a roof or overhang. It keeps footwear dry while still letting them air out. Use treated lumber and outdoor-grade paint or sealant to ensure it holds up to rain and sun. A slatted or raised base also allows for drainage and better air circulation.
Rotating Boot Rack
A carousel-style boot rack might take a little more effort to build, but it offers high capacity with easy access. Attach a rotating base under a central pole, then place multiple tiers of pegs or pipes around it. This style works well in large closets or utility rooms where you want to store many boots without spreading them across the floor.
Kid-Sized Boot Rack
If your household includes little ones, create a scaled-down version just for them. Lower the height and use shorter pipes to suit smaller boots and shoes. Let them decorate their own section with paint, stickers, or name tags. This encourages kids to keep things tidy while giving them something fun and functional to use.
Double-Sided Boot Rack
Need serious storage? A double-sided rack gives you twice the capacity in the same footprint. Set pipes or dowels on both sides of a central frame. It works well in open spaces like garages or utility rooms. You can even angle the posts slightly outward for better boot support.
Each of these options can be built with basic tools and a little creativity. The real advantage of a boot rack DIY project is that you can modify the design based on your space, your family’s needs, and your personal style.
Conclusion
A boot rack DIY project is a simple yet effective way to organize your entryway and protect your boots. It’s customizable, affordable, and built to last. With just a few materials and basic tools, you can create a rack that suits your space and style perfectly.
We have more creative boot rack projects. Check out our horseshoe boot rack guide!


