Last Updated on October 7, 2025 by Team Ideas24
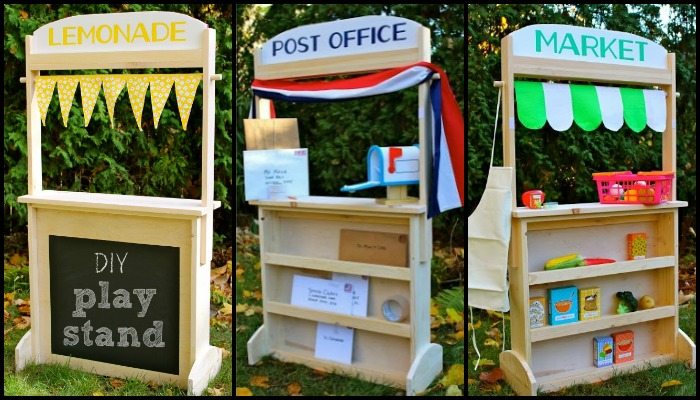
This play stand can be anything your kids want it to be. They will never get bored with this DIY play equipment!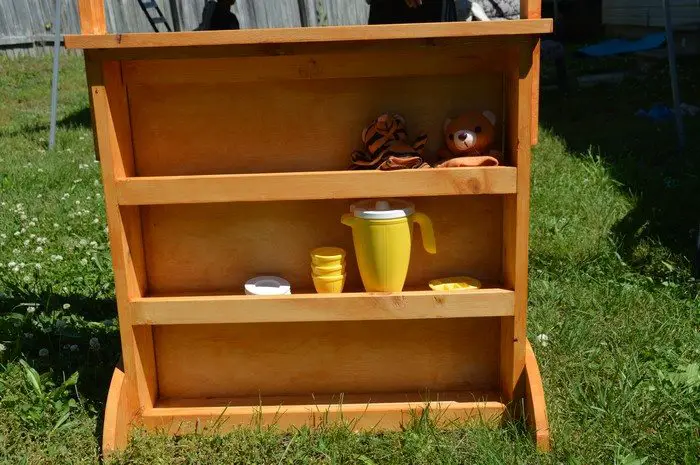
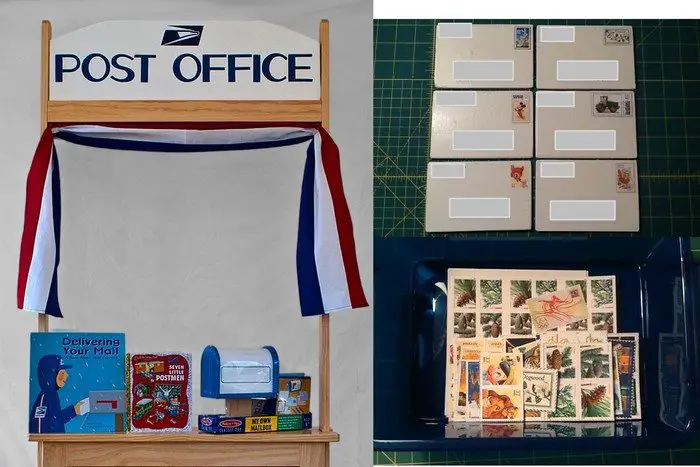
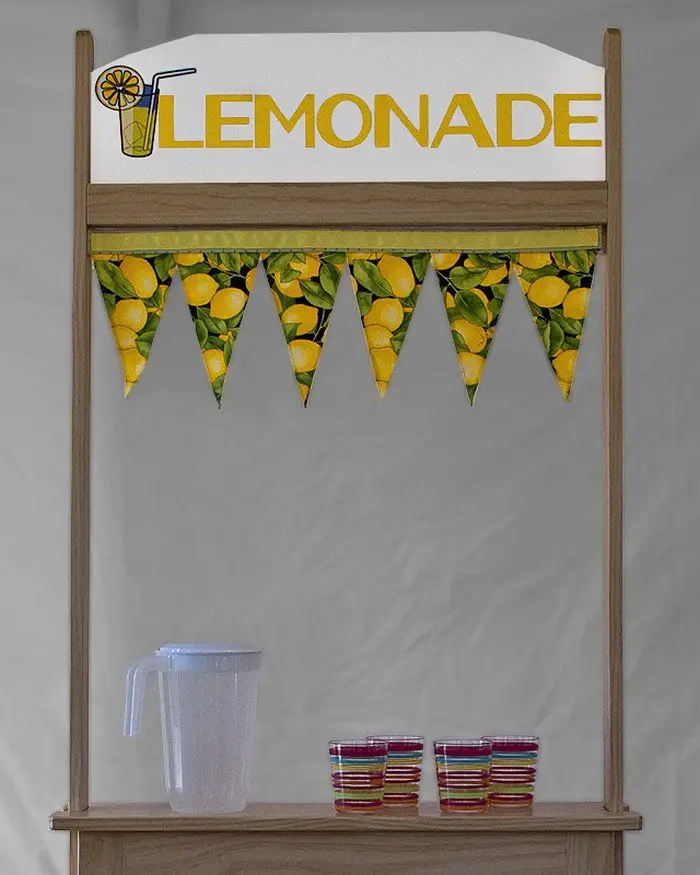
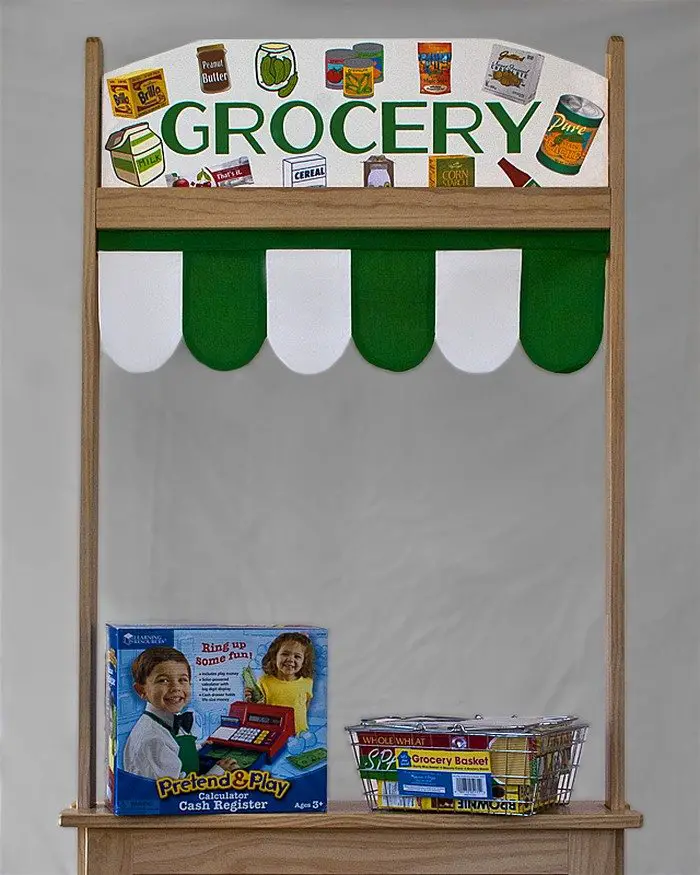
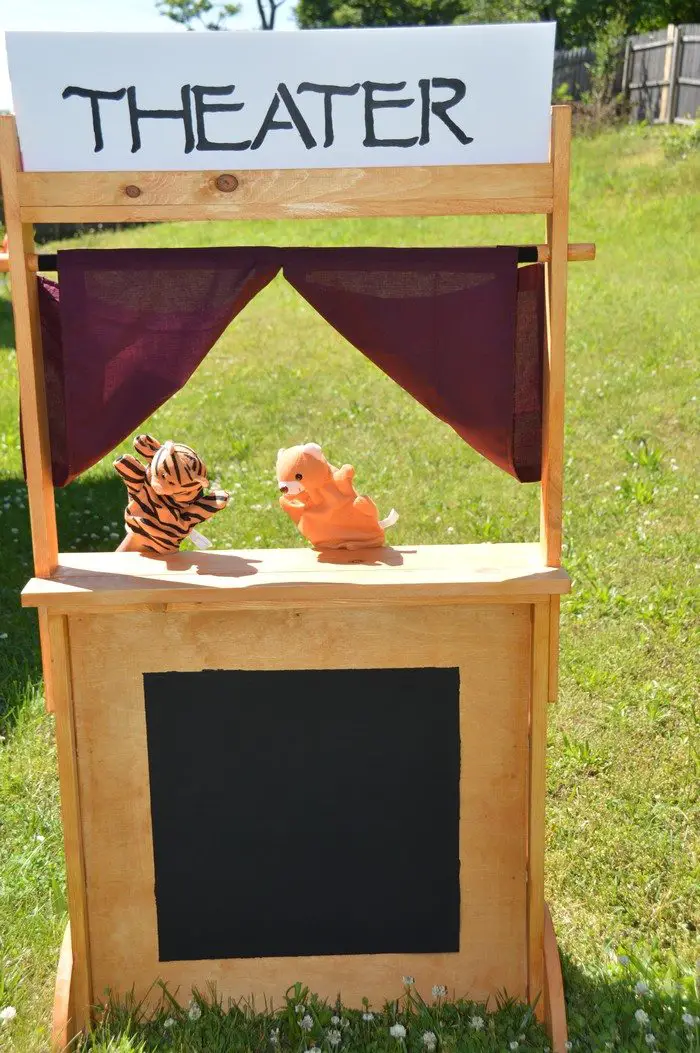
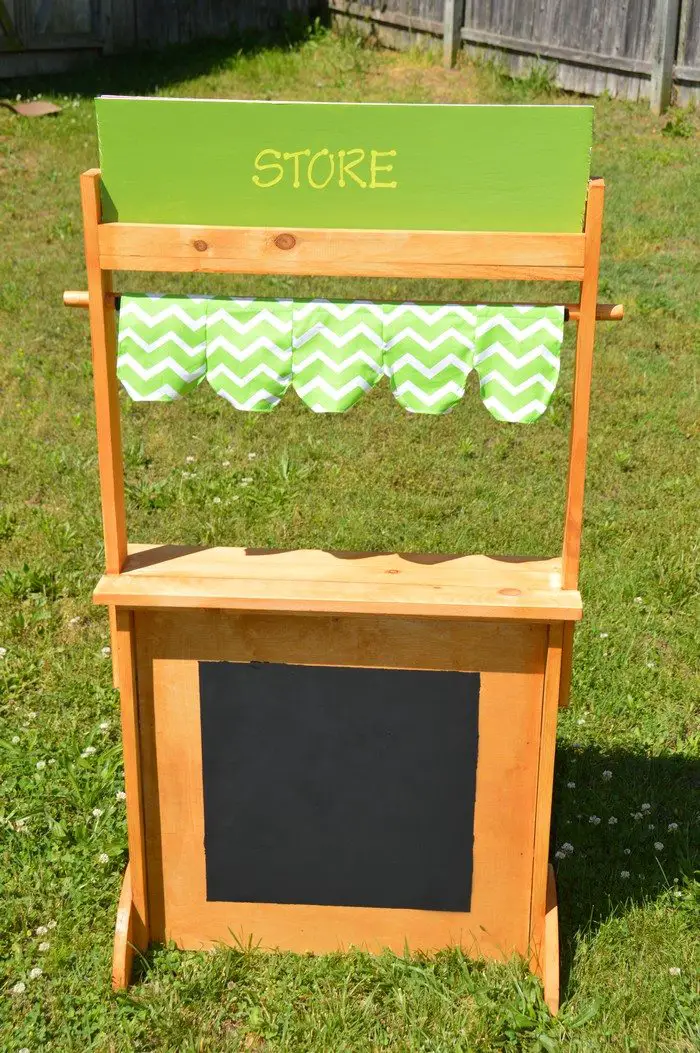
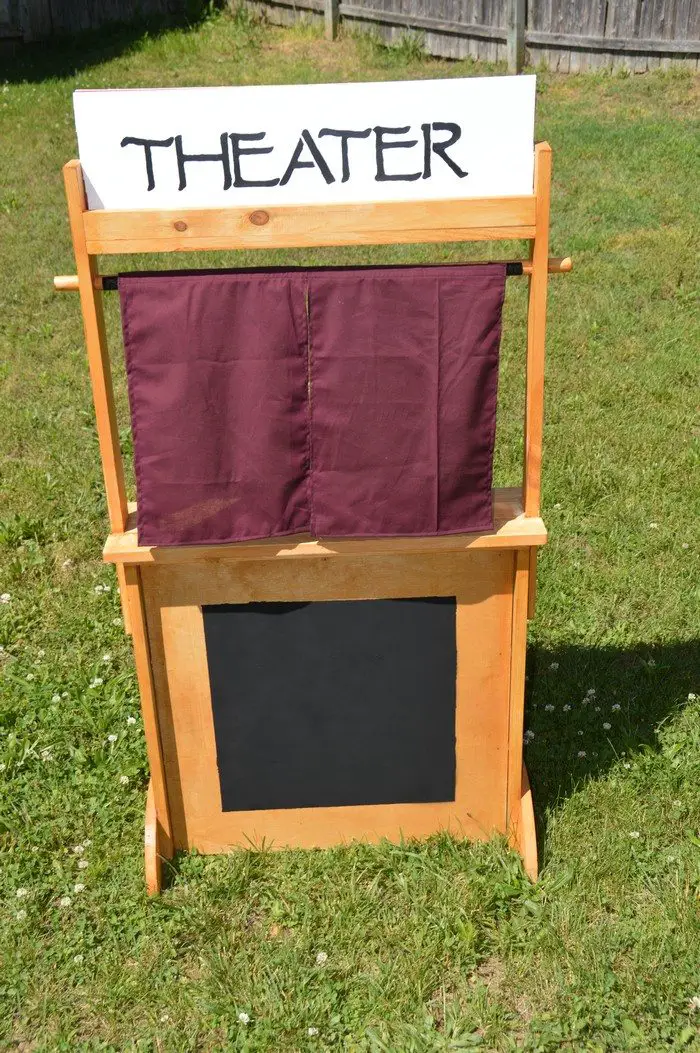
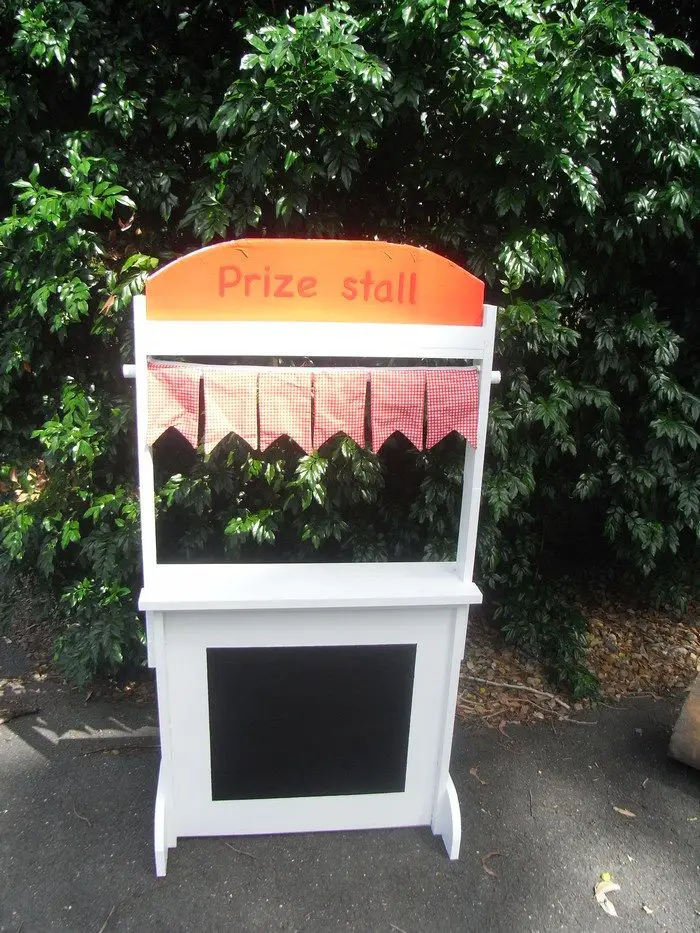
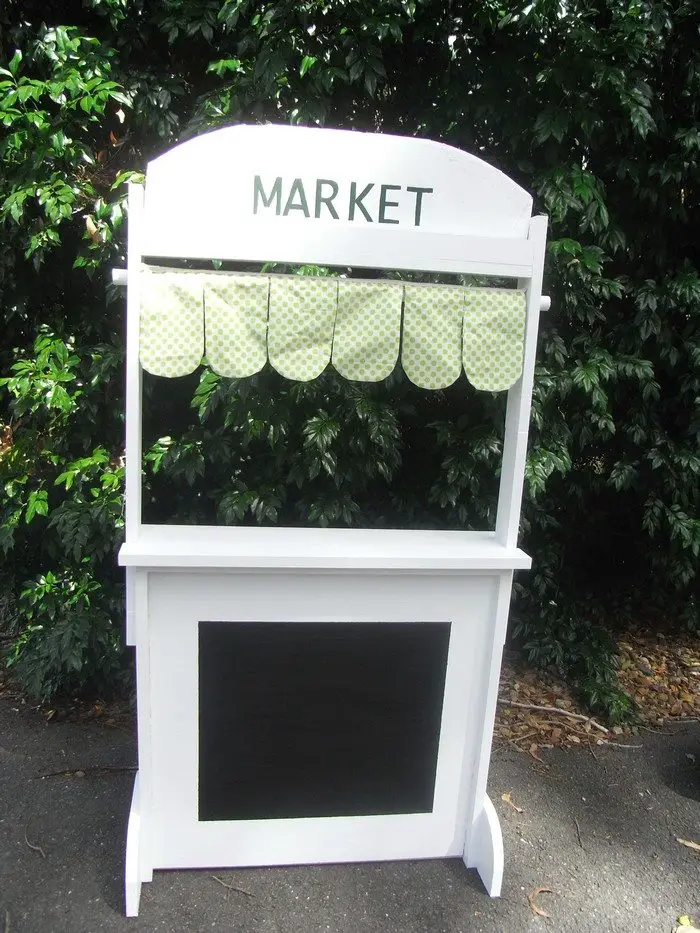
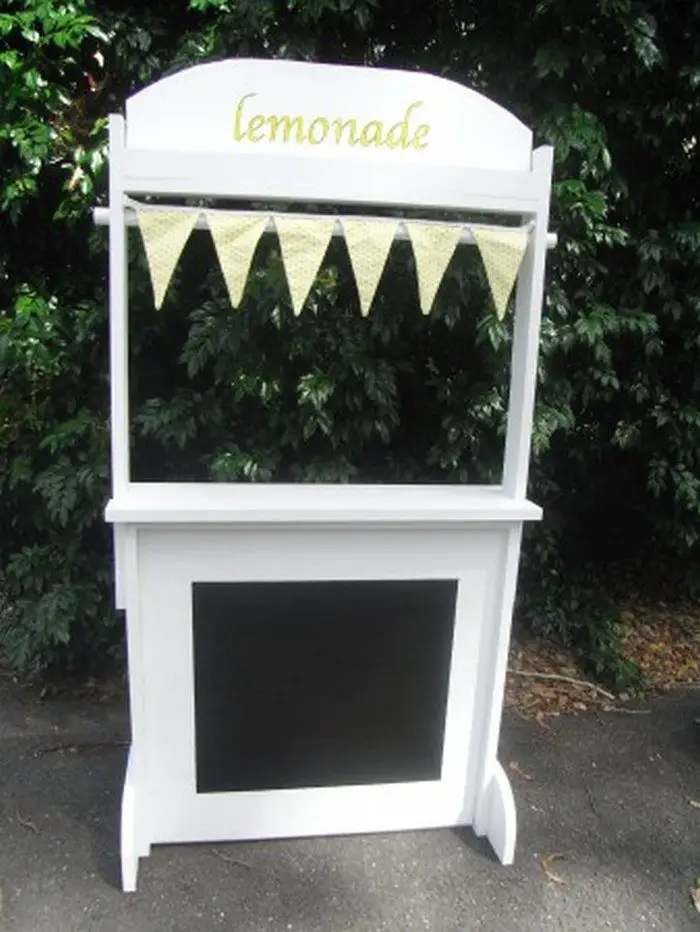
This DIY play stand can be a lemonade stand, a post office, a market, a puppet theater, or anything else your child can imagine!
But the way you can use this little setup doesn’t stop there! You can also ‘repurpose’ this as a small shelf in the bedroom or play area. :)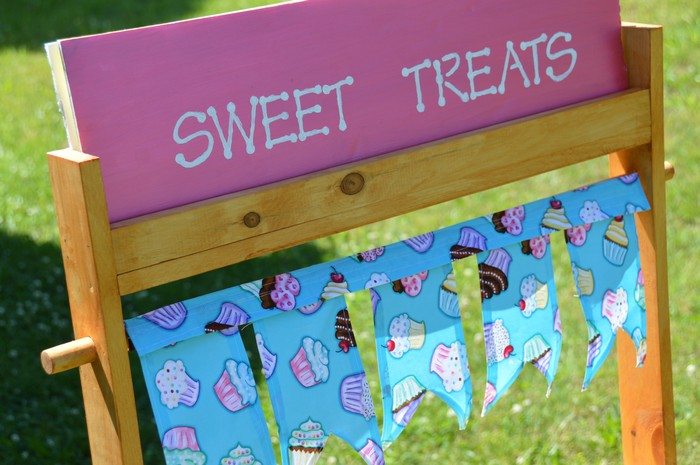
Is this going to be your next weekend project?
Contents
Constructing a DIY Play Stand
Materials:
- 1 – 1×6 @ 10 feet long
- 2 – 1×2 @ 8 feet long
- 1 – 1×4 @ 8 feet long
- 2 – 1×3 @ 8 feet long
- 1 – 1/4” Plywood 24” x 24”
- 1 – 3/4” Dowel 30” long
- Cardboard or Foam Board (for signs)
- 1 1/4” Finish Nails
- Chalkboard paint (or Chalkboard Decal)
- 1-1/4″ Pocket Hole Screws
- Wood Glue
Tools:
- Measuring Tape
- Square
- Pencil
- Safety Glasses
- Hearing Protection
- Kreg Jig
- Drill
- Jigsaw
- Miter Saw
- Brad Nailer
Steps:
Step 1 – Measure and mark cuts
Put on safety glasses and hearing protection. Use a measuring tape, square, and pencil to mark all pieces on the 1×6, 1×4, 1×3, and 1×2 boards according to your plan for height, shelf depth, and side rails.
Step 2 – Cut the lumber
Set the miter saw to 90 degrees for straight cuts. Cut the boards to length. Use the jigsaw for any curved trim pieces you want on the roof line or side panels.
Step 3 – Drill pocket holes
Clamp each cut piece in a Kreg Jig. Drill 1-1/4″ pocket holes on the ends of rails and shelves so hidden screws will pull joints tight and keep the play stand frame strong.
Step 4 – Assemble the side frames
Lay two 1×3 uprights on a flat surface. Position cross rails from the 1×2 stock at the top, middle, and bottom. Apply wood glue at each joint, then drive pocket-hole screws with your drill.
Step 5 – Join the side frames with shelves
Stand the finished sides upright. Slip the 1×4 shelf boards between them, flush with pocket holes facing down. Glue and screw through pre-drilled holes to lock everything square.
Step 6 – Attach the front counter
Rip or cut the 1×6 to the desired counter depth if needed. Secure it across the front with glue and pocket-hole screws so kids have a sturdy surface for sales or puppet shows.
Step 7 – Install the plywood back
Cut the 24 × 24-inch, ¼-inch plywood panel to fit between the uprights above the counter. Tack it in place with 1¼-inch finish nails using the brad nailer. The thin panel keeps the frame rigid.
Step 8 – Add the sign dowel
Drill ¾-inch holes centered in the top rails of both side frames. Slide the 30-inch dowel through. This dowel holds changeable cardboard or foam-board signs.
Step 9 – Sand all edges
Lightly sand boards, edges, and any corners to remove splinters. Kids grip these surfaces often, so smooth wood prevents little scrapes.
Step 10 – Paint or seal
Brush on chalkboard paint where you want writable menu space, or stick on a chalkboard decal. Finish exposed wood with child-safe, water-based polyurethane or bright colors that fit your theme.
Step 11 – Create interchangeable signs
Cut cardboard or foam board to fit the dowel width. Paint or draw “Lemonade,” “Market,” or “Puppet Show.” Slide a sign on the dowel whenever your kids switch games.
Step 12 – Final safety check
Inspect for loose screws, sharp nail tips, or wobble. Tighten fasteners, add felt pads under legs if the play stand sits on hardwood, and invite the kids to start their first pretend store.
Choosing Kid-Safe Lumber and Finishes
Picking the right boards and coatings protects kids from splinters, toxins, and surprise repairs. These tips focus on health, durability, and a smooth building experience.
Understanding Wood Grades and Health
Select boards labeled “Select” or “Premium” because fewer knots mean fewer weak points and hidden pockets where mold can grow. Clear grain also reduces the chance of splinters slicing small fingers. Check for stamps showing kiln-dried status. Heat treatment kills pests without chemicals so it’s safer than pressure treatment.
Run your hand along every edge in the store. If you feel rough spots, grab another board. A smooth starting surface shortens sanding time and keeps dust to a minimum when you get home, which makes for a cleaner, safer shop.
Hardwood vs Softwood Durability
Softwoods like pine cost less and cut easily but dent faster under toy traffic. A dropped metal car will leave a crater in minutes. Hardwoods such as maple resist those dents yet weigh more and need sharper blades. Balance price with lifespan by mixing both.
Use pine for non-load surfaces like decorative trim and install maple wherever kids lean or climb. This blend keeps the stand light enough to move yet tough enough to shrug off the fifth lemonade spill of the week.
Pressure-Treated Boards: Safe or Not?
Modern pressure-treated lumber uses copper azole, a compound safer than the old arsenic formulas, yet copper can still leach if boards stay damp. Indoors it rarely dries out. For a child’s play stand, stick with untreated stock and add your own sealer.
If you must use treated lumber outside for ground contact legs, coat every cut edge with a copper-free preservative. Then prime and paint to lock in chemicals. This extra layer blocks direct skin contact and prevents the greenish bleed-through that stains bright colors.
Natural Oils and Water-Based Sealers
Linseed and tung oils penetrate deep and emphasize grain while staying food-safe once cured. They need yearly touch-ups, though. Water-based polyurethanes form a harder film that resists crayons, juice, and sudden rain showers.
Look for formulas marked “toy safe” or “meets ASTM F963” so they pass the same standards as commercial play furniture. Dab a test coat on off-cut scraps first. Oils can darken pine more than expected while clear poly leaves a near-natural tint. Choose the look you love before committing an entire quart.
Zero-VOC Paints for Vibrant Play
Kids chew, lick, and rub their cheeks against bright surfaces. Zero-VOC paints release almost no fumes during application or curing, keeping indoor air fresh. Many brands now offer bold primary shades in these eco lines.
Apply two thin coats instead of one thick coat. You’ll avoid drips and get a more durable shell. Lightly sand with 320-grit between coats to knock down fibers that rise in water-based products. The result feels as silky as store-bought furniture and cleans up with a damp cloth.
Finishing Tips for Long-Term Safety
Start with 150-grit sanding on raw faces, then shift to 220-grit on corners to round them. Sharp edges chip and invite splinters. Vacuum dust, then wipe with a barely damp rag so raised grain appears before finishing.
Seal or paint within one hour to stop airborne grit from sticking. Let every layer cure fully, usually 24 hours, before adding the next. Rushing traps moisture that later blisters. Finally, set the stand in a ventilated room for a week to off-gas before handing it to the kids.
Unique DIY Play Stand Gallery
Click on any image to start the lightbox display. Use your Esc key to close the lightbox.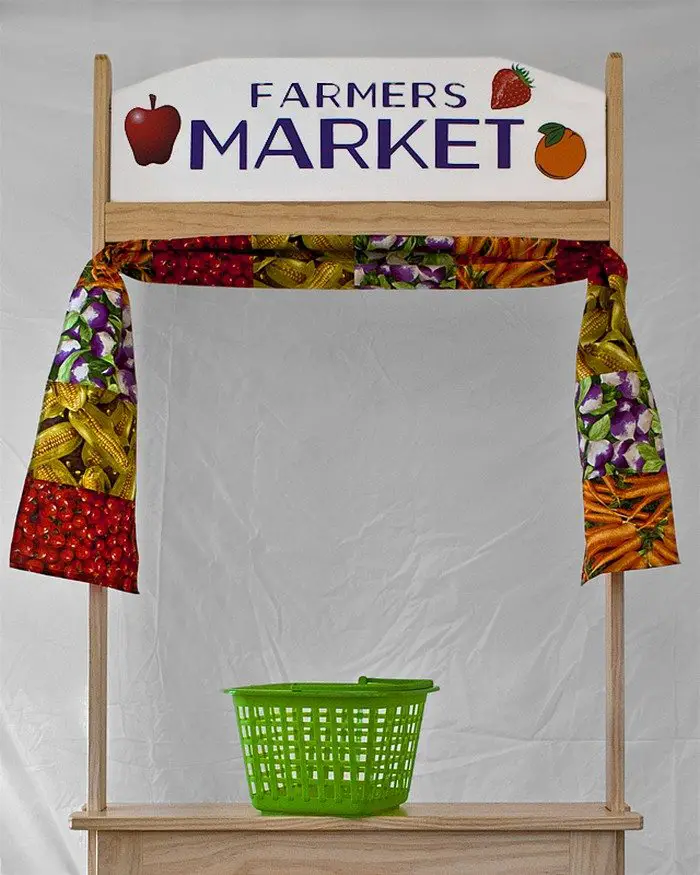
Pocket-Hole Assembly: Fast, Strong Joints Anyone Can Master
Pocket holes let beginners build sturdy frames without clamps that cost a fortune. Follow these guidelines for crisp alignment, hidden screws, and joints that stay tight for years.
How Pocket-Holes Work
A pocket-hole jig drills a stepped hole at a precise angle, creating a pocket for the screw head and an exit point in the mating edge. When the screw drives, its threads bite the second board while the head pulls the first board tight, forming a powerful lap joint.
The built-in shoulder of the bit drills the perfect seat, so there’s no guesswork about depth. This self-aligning action means fewer slipped joints and no messy glue squeeze-out visible on the finished face.
Setting Up Your Kreg Jig Correctly
Match bit collar position to material thickness—usually ¾ inch for standard 1-by boards. Slide the fence so the pilot hole centers on board thickness, then lock it. Always clamp the stock firmly to the jig.
Even a slight slide during drilling widens the pocket and weakens the joint. Use a fresh square-drive bit in your drill for driving screws because rounded bits cam-out and strip heads. Keep speed moderate; high RPM melts wood fibers and dulls the stepped drill faster.
Choosing Screws and Wood Combinations
Select coarse-thread screws for softwoods like pine and fine-thread for hardwoods such as maple. Coarse threads bite aggressively into soft fibers, while fine threads prevent hardwood splitting. Zinc-coated screws work indoors.
For an outdoor play stand, upgrade to Blue-Kote or stainless types that resist corrosion. Length matters too. A 1¼-inch screw is standard for two ¾-inch boards. Longer screws risk breakthrough; shorter ones reduce holding power. Keep extras sorted by size in a small organizer so you grab the right length every time.
Aligning Parts Without C-Clamps
Pocket holes pull joints together, yet boards can still shift under torque. Use a face-frame clamp that inserts a round pad into one pocket while its flat jaw grips the adjoining surface. This holds edges flush.
If you lack specialty clamps, drive a temporary screw through scrap into the workpiece to act as a stop. Remove it after assembly. Always assemble on a level bench. Crooked surfaces twist frames so they never sit flat, forcing extra sanding later to remove a frustrating rocking motion.
Hidden Joints for Clean Design
Pocket holes most often hide on the inside face, but you can angle them toward edges that later accept trim. For a reversible play stand, place holes on the bottom of shelves and the underside of the counter so both child and parent sides look seamless.
Drill holes where props or baskets sit so they vanish behind storage. Fill visible pockets with pre-made plugs or a dab of matching wood filler. Sand smooth before finishing and the repair disappears under paint or poly.
Common Mistakes and Quick Fixes
Over-tightening screws strips threads. If a screw spins, back it out, dab in wood glue, insert a hardwood dowel, and re-drill. Splits along board edges signal the fence set too close or using fine-thread screws in softwood. Adjust depth and swap screws.
Pocket holes that peek through the face mean the material was thinner than the jig setting; glue a thin veneer patch over the mistake or hide it with a decorative strip. A little patience here saves the frame without costly lumber replacement.
Conclusion
Building a DIY play stand nurtures creativity for both kids and adults. You save money while tailoring size, colors, and features to your exact space. Hands-on construction builds confidence and practical skills that transfer to future projects. Quality materials and kid-safe finishes ensure durability and peace of mind. Most important, the finished stand becomes a versatile stage for endless pretend scenarios that support healthy, imaginative play.
What do you think of the idea? You can post your comments, ideas, and even photos below :)
We have more fun projects for your kids. Check out our cardboard play dome next!


