
A GFCI outlet is one of the easiest upgrades you can make to reduce the risk of electric shock at home. If you like doing your own projects, learning to install one safely can save you money and make a real difference in areas where moisture is common, like kitchens, bathrooms, garages, and outdoor outlets. This guide explains what a GFCI outlet does, how it works, what tools you’ll need, and how to swap out a standard receptacle step by step.
Contents
Key Takeaways
- Installing a GFCI outlet is one of the easiest and most effective upgrades you can make to significantly reduce the risk of electric shock in your home.
- Learning to install these outlets safely can save you money on professional fees while providing essential protection in high-moisture areas like kitchens and bathrooms.
- A GFCI outlet acts as a rapid-response safety net, cutting power in milliseconds if it detects electricity leaking where it shouldn’t.
- By following a methodical step-by-step process and performing regular monthly tests, you can ensure your home’s electrical system remains up to code and safe for your family.
What Is a GFCI Outlet?
A GFCI outlet, short for Ground Fault Circuit Interrupter, is a special type of receptacle made to protect people from electric shock. A standard outlet just delivers power. A GFCI does something extra in the background. It constantly checks the electricity flowing out on the hot wire and compares it to what’s coming back on the neutral wire.
If those two numbers don’t match, even by a tiny amount, the outlet assumes electricity is leaking somewhere it shouldn’t. That leak could be traveling through water, metal, or a person. When it senses a difference as small as about 4–5 milliamps, it trips and shuts off power almost instantly.
That quick shutoff is why GFCI outlets are required in places like bathrooms, kitchens, garages, and outdoor areas. These are the spots where water and electricity are more likely to meet, like a hair dryer falling into a sink or a power tool getting wet. In those situations, electricity looks for the easiest path to ground. Without protection, that path can be your body.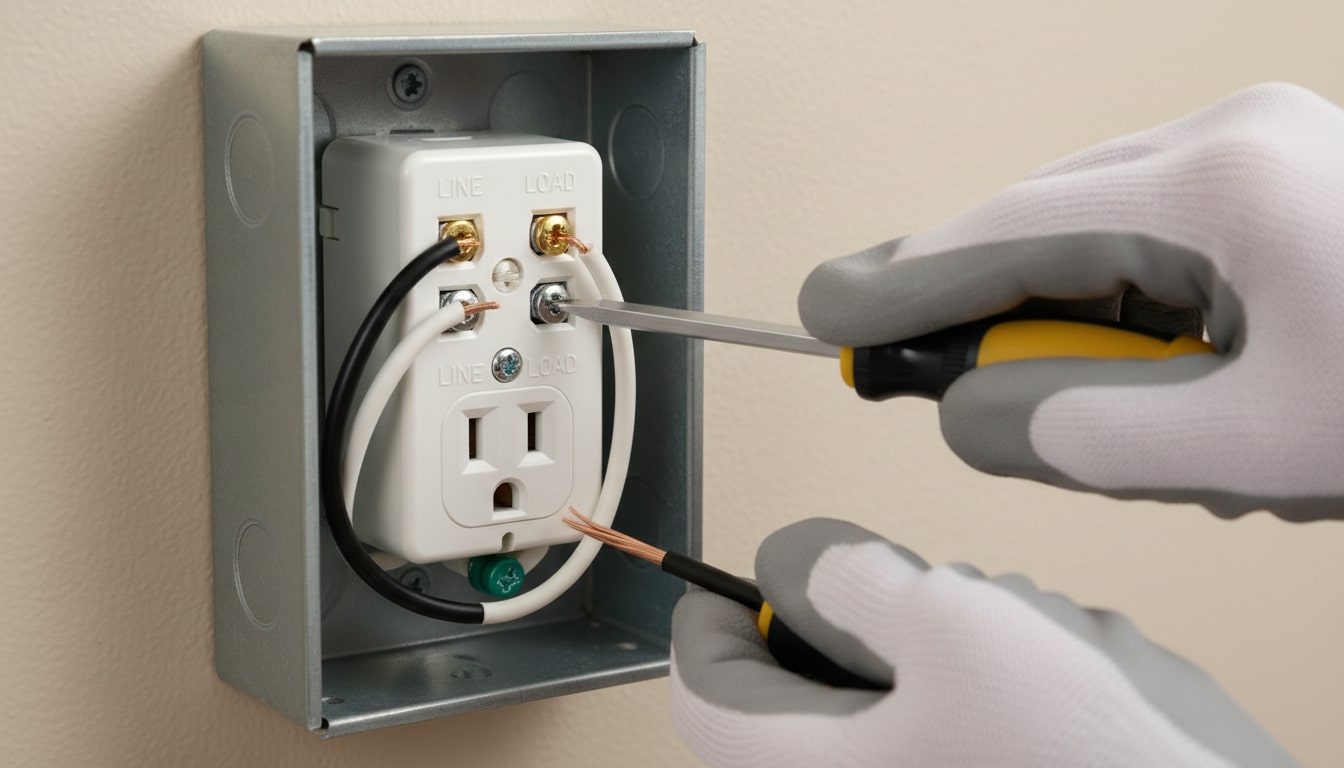
How to Replace a Standard Outlet With a GFCI Outlet
Swapping a standard outlet for a GFCI is one of the most practical safety upgrades you can do, especially in kitchens, bathrooms, garages, and outdoor areas. The job itself is pretty straightforward, but take the safety checks seriously. If anything about the wiring looks unusual, or you’re not fully sure what you’re seeing, it’s smart to stop and call a licensed electrician.
Materials and Tools Needed
- GFCI outlet (15-amp or 20-amp to match your circuit)
- Flathead screwdriver
- Phillips screwdriver
- Non-contact voltage tester (and a multimeter if you have one)
- Wire stripper/cutter
- Needle-nose pliers
- Flashlight or headlamp
- Electrical tape
- Wire nuts (handy for capping unused wires)
- New wall plate (standard or decorator)
- Safety glasses
Step-by-Step Installation Guide
Step 1: Turn off power at the breaker panel
Go to your electrical panel and switch off the breaker that controls the outlet. If the panel isn’t labeled, plug in a lamp or radio, then flip breakers until it shuts off. Put a piece of tape over the breaker as a reminder, and let anyone at home know you’re working on that circuit.
Step 2: Remove the old outlet cover plate
Remove the wall plate screw and set the plate and screw aside. You’ll now see the outlet held to the electrical box with two mounting screws.
Step 3: Confirm the power is off
Before touching anything, use a non-contact voltage tester to confirm there’s no power at the outlet and in the box. Check both the top and bottom receptacles, and test near the wiring as well. If the tester still alerts, you’re on the wrong breaker.
Step 4: Unscrew and pull out the old outlet
Remove the two mounting screws and gently pull the outlet out of the box. Work slowly here since older wires can be stiff and packed tightly.
Step 5: Identify and disconnect the wires
Most outlets will have:
- Black wire (hot)
- White wire (neutral)
- Bare copper or green wire (ground)
Loosen the terminal screws and disconnect the wires. Taking a quick photo before you remove anything can save you time if you need to double-check where a wire was landed.
Step 6: Figure out line vs load (if there are two cables)
This part matters because a GFCI has two sets of terminals: LINE (incoming power) and LOAD (optional protection for outlets downstream).
- If you only have one cable entering the box, you’ll use LINE only and leave LOAD unused.
- If you have two cables entering the box, one is LINE and one is LOAD.
Safest approach: identify LINE by testing which cable is hot, then shut power back off before continuing. If you’re not comfortable turning power on briefly for this test, it’s better to call a pro. Once you know which cable is LINE, mark it with tape so you don’t mix it up.
Step 7: Prep the wire ends
Check the copper ends. If they’re nicked, bent up, or corroded, cut back to clean copper and strip about ½ to ¾ inch of insulation. If you’re using the side screws, use needle-nose pliers to bend each wire into a small hook so it wraps neatly around the screw.
Step 8: Connect the LINE wires to the GFCI
Find the terminals labeled LINE (usually clearly marked on the back). Then connect:
- Black (hot) to the brass LINE screw
- White (neutral) to the silver LINE screw
- Ground to the green ground screw
Wrap hooks clockwise so tightening the screw pulls the wire in, not out.
Step 9: Connect the LOAD wires (only if you want downstream protection)
If you want this GFCI to protect other outlets “down the line,” connect the second cable to LOAD:
- Black to brass LOAD
- White to silver LOAD
If you’re not using LOAD, keep those wires capped with wire nuts and tucked safely into the back of the box. Never land the incoming power on LOAD by mistake or the outlet won’t behave correctly.
Step 10: Fold the wires back into the box
Gently fold the wires back in so nothing is pinched. Aim for a neat accordion fold and make sure no bare copper is exposed outside the terminals.
Step 11: Mount the GFCI outlet
Line up the outlet and tighten the top and bottom mounting screws evenly. Make it snug, but don’t crank down so hard that you crack the device or warp it.
Step 12: Install the wall plate
Attach the wall plate and make sure it sits flat against the wall. Overtightening the plate screw can crack some plastic plates, so stop when it’s secure.
Step 13: Restore power
Turn the breaker back on, then return to the outlet.
Step 14: Test the GFCI
Press Reset first (you’ll usually feel a click). Plug in a lamp or small device to confirm it has power. Then press Test. The lamp should shut off and the reset button should pop out. Press Reset again to restore power.
If the test and reset don’t behave the way they should, turn the breaker off and recheck your wiring, especially LINE vs LOAD. If it still doesn’t make sense, that’s a good point to bring in an electrician.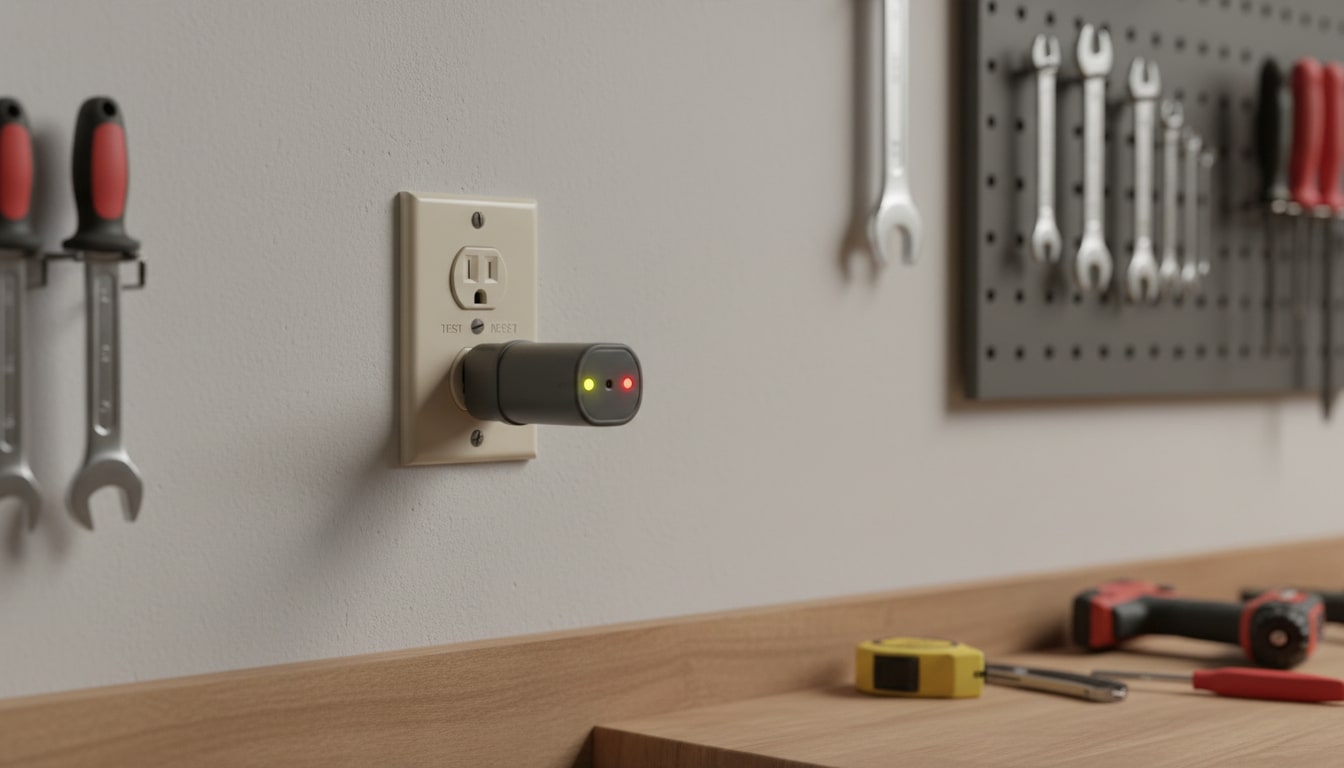
Testing and Troubleshooting Your New GFCI Outlet
Once the outlet is installed and the breaker is back on, take a few minutes to test it. A GFCI that isn’t wired right, or isn’t tripping when it should, won’t give you the protection you’re installing it for.
Using the “TEST” and “RESET” Buttons on the GFCI Outlet
Start with the outlet’s built-in buttons since they’re the quickest check. Press RESET first. You should feel or hear a solid click, and a status light (if your model has one) should turn on. Plug in a lamp or small device to confirm the outlet has power.
Next, press TEST. The outlet should trip right away, the lamp should shut off, and the RESET button should pop out. That’s the outlet doing its job. Press RESET again to restore power. It’s a good habit to run this test about once a month since GFCIs can wear out over time, especially in damp or high-use areas.
Using a Plug-In GFCI Tester
If you want a clearer read on wiring and grounding, use a plug-in GFCI tester. It’s a small tool with indicator lights that tell you if the outlet is wired correctly and grounded. Plug it into the GFCI and compare the light pattern to the tester’s guide.
Most testers also have a button that simulates a fault. Press it and the GFCI should trip immediately, just like it did with the built-in TEST button. If the outlet doesn’t trip, or the lights point to a wiring problem, shut off the breaker and recheck your connections before using the outlet.
Common Wiring Mistakes (Reversed Line/Load, Loose Connections, No Ground)
A few common issues can stop a GFCI from working the way it should:
- Line and load reversed: This is the big one. If the incoming power is landed on the LOAD terminals instead of LINE, the outlet often won’t reset or won’t protect anything properly.
- Loose connections: A slightly loose terminal screw can cause flaky behavior, random trips, or an outlet that only works sometimes. Tighten everything firmly.
- Ground wire issues: A GFCI can still protect you without a ground, but a tester may show “open ground,” and you should still connect the ground if the box has one available.
Also take a quick look for exposed copper outside the terminals. If you see bare wire sticking out, redo the connection so everything is tucked in neatly.
What to Do If the GFCI Outlet Won’t Reset
If you press RESET and it won’t stay in, don’t force it. Work through the likely causes in a safe order:
- Check the breaker first. Some breakers look “on” even when they’re tripped. Flip it fully off, then back on.
- If that doesn’t fix it, shut off power and confirm the LINE wires are on the LINE terminals (not LOAD). Swap them if needed.
- Unplug everything on that circuit, including anything connected to downstream outlets if your GFCI protects other receptacles. Then try resetting again. A bad appliance, moisture in a box, or damaged wiring can trip it immediately.
If it still won’t reset after those checks, treat it as a real wiring or circuit problem. The outlet could be defective, but it could also be a fault you can’t see in the wall. At that point, getting a licensed electrician involved is the safest move.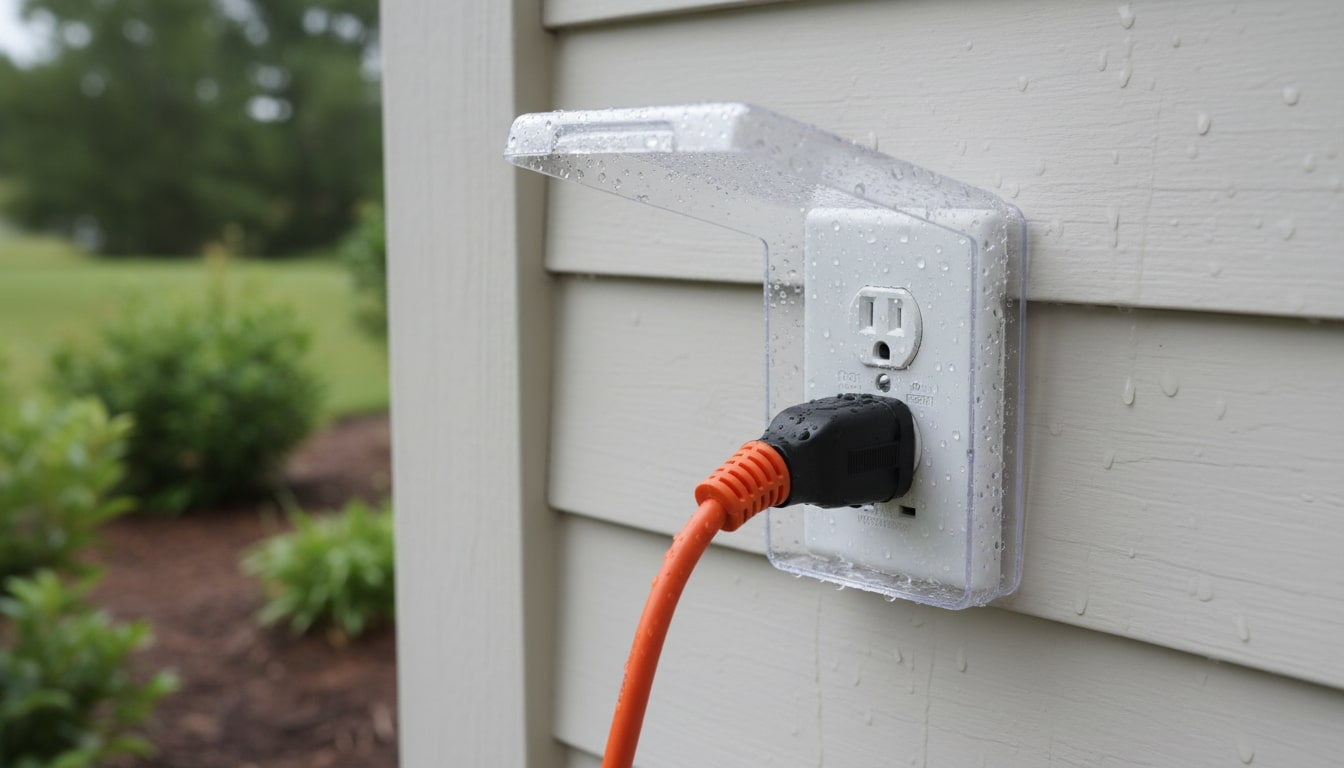
Conclusion
Installing a GFCI outlet is one of those small upgrades that makes a real difference in day-to-day safety, especially in places like kitchens, bathrooms, garages, and outdoor areas. If you take your time, shut off the right breaker, and double-check your wiring, it’s a project many homeowners can handle with basic tools. Don’t treat it like a race, though. Electricity is the kind of thing you respect every time. If the wiring looks questionable, you’re not sure what you’re seeing, or the outlet won’t test and reset properly, it’s worth handing it off to a licensed electrician.
FAQ: GFCI Outlets
- Can I install a GFCI outlet myself, or do I need an electrician?
- You can install a GFCI outlet yourself if you’re comfortable working at the breaker panel, checking for power with a tester, and matching wires to the correct terminals. The moment things look odd, like brittle insulation, a crowded box, mixed-up colors, or extra wires you can’t identify, stop and get help. If the GFCI won’t reset or won’t trip during testing, that’s also a sign to call a licensed electrician so you don’t leave a hidden hazard behind.
- Do all kitchen and bathroom outlets need to be GFCI outlets?
- Codes usually require GFCI protection anywhere water is likely, so kitchens and bathrooms are the big ones, plus laundry areas, garages, unfinished basements, and outdoor receptacles. That doesn’t mean every outlet must be a GFCI device. One GFCI can often protect other outlets on the same circuit downstream, as long as it’s wired correctly. The key point is protection, not the physical outlet style.
- Why does my GFCI outlet keep tripping?
- A GFCI trips when it senses electricity leaking off the normal path, which can happen with moisture, a failing appliance, a damaged cord, or a wiring issue. If it keeps happening, treat it like a warning, not an annoyance. Unplug everything on that circuit, reset the outlet, then plug items back in one at a time to see what triggers it. If it trips with nothing plugged in, the problem is more likely in the wiring or in a downstream outlet.
- Can one GFCI outlet protect multiple outlets?
- Yes. If you use the LOAD terminals correctly, the GFCI can protect outlets farther down the line on that same circuit. It’s a common setup because it saves money and keeps you from replacing every outlet in the room. The catch is that line/load wiring has to be right. If it’s reversed, you can end up with an outlet that looks fine but doesn’t protect the way you think it does, so testing matters.
- How often should I test my GFCI outlets?
- Once a month is a solid routine. Press TEST to make sure it trips and cuts power, then press RESET to bring power back. It’s quick, and it helps you catch a failed GFCI before you actually need it. If the outlet won’t trip, won’t reset, or feels inconsistent, replace it or have an electrician take a look.


