Last Updated on November 6, 2025 by Team Ideas24
A tray ceiling can add depth and drama to any room. Tray ceiling ideas can transform a flat ceiling into a design focal point. You’re enhancing visual interest and architectural detail. Each style brings its own character and mood. This guide previews top design options and styles to suit every home.
Contents
Key Takeaways
- Tray ceilings create a recessed focal plane that adds perceived height and depth, elevating room design without altering the roof line.
- Design options range from classic single-level and ornate crown-molding styles to minimalist shadow-gap and integrated LED cove trays, plus multi-level and coffered variations for greater drama.
- Choosing DIY versus hiring a pro hinges on complexity, tools/skills, and code/electrical requirements, which together drive cost, timeline, and finish quality.
Introduction to Tray Ceilings
A tray ceiling lifts the center section of your ceiling above the surrounding plane. It adds depth without altering roof lines. You’re creating an elegant focal point overhead with simple framing techniques. Many homeowners choose trays to make rooms feel larger. These ceilings work in living rooms, dining areas, and bedrooms alike.
Tray ceilings can follow a square, rectangular, or even circular outline. Framing involves building a lowered border around the edge. You then install drywall or paneling across the recessed center. That recess creates shadow lines that catch light. You can finish the tray with paint, trim, or lighting.
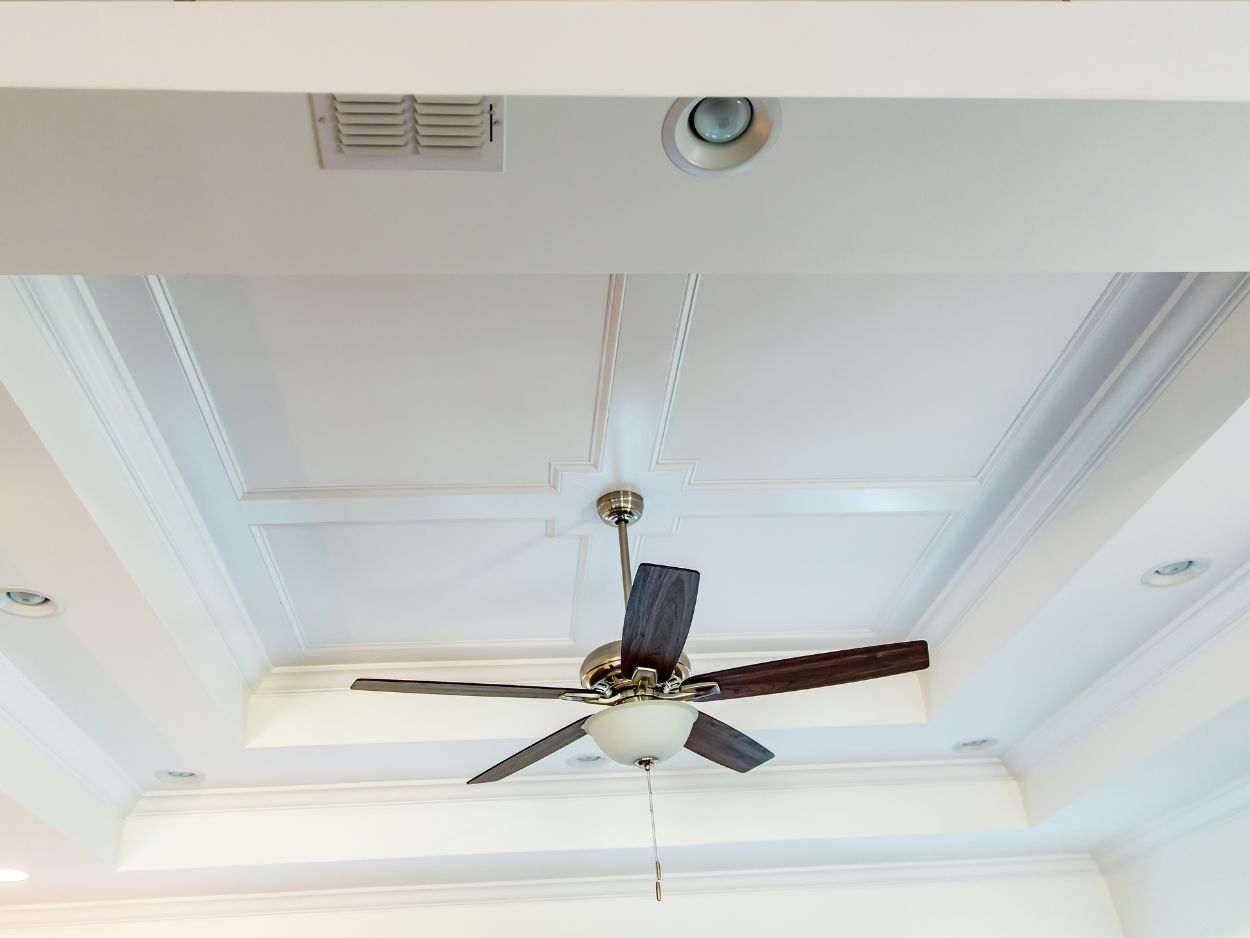
These ceilings suit both classic and contemporary homes. You’re free to embrace ornate moldings or clean, minimalist lines. Trays help highlight chandeliers, ceiling fans, or art glass. They also mask structural beams or HVAC runs. With proper planning, any homeowner can tackle a tray ceiling project.

Traditional Tray Ceiling Styles
Traditional tray ceiling styles bring classic elegance to any space. These looks often rely on rich moldings and layered recesses. Here are three popular traditional approaches:
Classic Single-Level Tray
Classic single-level trays feature a simple raised border along the ceiling edges. This design offers subtle depth. It highlights room proportions without drawing too much attention. Designers often use crown molding along the inner edge. That adds a refined finish. You can paint the recessed center a contrasting color. This technique frames artwork or chandeliers.
Classic single-level trays complement traditional and transitional interiors. They require minimal framing and drywall work. Their clean lines create a timeless look that adapts to various decor.
Inverted Tray Ceiling
Inverted tray ceilings flip the design so the center panel sits above the surrounding border. This creates a vaulted effect without a pitch. The raised center draws the eye upward. It can make rooms feel taller and more spacious. Builders frame the center with deeper joists or framing members.
That adds architectural drama. Paint or stain the border to accentuate the raised portion. You can install lighting above or within the recess. Inverted trays suit modern and traditional homes alike. They add elegance and height without complex roof work.
Ornate Crown-Molding Tray
Ornate crown-molding trays blend tray construction with elaborate trim details. Moldings with curves and patterns follow the tray’s border. That adds a touch of classic elegance. Craftsmen often choose materials like polyurethane or wood for these profiles. You’re free to paint them to match wall colors or create contrast.
The detailed trim highlights the depth of the tray. It also frames chandeliers or ceiling medallions beautifully. Ornate trays suit formal dining rooms, living rooms, or grand entryways. They require precise measurements and cutting. But the finished result feels truly luxurious.

Modern and Minimalist Designs
Modern tray ceiling designs focus on clean geometry and uncluttered lines. They rely on subtle depth rather than heavy ornamentation. Here are three minimalist approaches:
Clean Shadow Gap Tray
Shadow gap trays incorporate a small recess between the ceiling and wall. This creates a clean floating effect. That effect works in contemporary spaces. It pairs well with neutral palettes. Installers build a thin reveal around the border.
You’re left with crisp lines. It’s perfect for showcasing LED strip lighting. That lighting adds an ambient glow without visible fixtures. Shadow gap trays require precise framing. You can finish them in a single color to maintain minimalism. The result feels modern and uncluttered.
Monochrome Flat Tray
Monochrome flat trays feature a single planar depth with no ornate moldings. Installers cut a shallow recess into the ceiling. That adds dimension while maintaining a uniform look. You can paint the tray and border in the same color. This approach creates a seamless ceiling surface. It works well in spaces with large windows.
Natural light plays across the slight depth variation. You’re left with a calm, understated statement. Monochrome flat trays suit modern Scandinavian or Japanese-inspired interiors. They require minimal finishing touches. That simplicity appeals to fans of clean design.
Integrated LED Cove Tray
Integrated LED cove trays hide lighting within a recessed border. You can install LED strips behind the ceiling’s inner lip. That casts a soft glow upward. The indirect light bounces off the ceiling. It creates a warm and inviting ambiance. Many owners choose color-changing LED options. You’re free to adjust hue and brightness.
Framers build the tray with space for wiring and channels. Electricians then tuck cables behind the drywall. That keeps fixtures out of sight. Integrated LED cove trays work in living rooms, kitchens, and bedrooms. They blend form and function seamlessly.
Multi-Level and Coffered Variations
Multi-level and coffered trays take ceiling design to a new level. They layer depth and architectural detail overhead. Here are three striking multi-tiered styles:
Double-Level Tray Ceiling
Double-level trays add two recessed tiers within the ceiling. This builds dramatic depth in the room. The first recess sits closer to the walls. Then a smaller second recess follows. Framers nail joists at two different heights. That outlines each tier precisely.
You can paint each level in contrasting shades. It highlights the layered effect. Designers often install lighting between the tiers. You can add crown molding on each ledge for extra definition. That details each tier beautifully.
Grid-Style Coffered Ceiling
Grid-style coffered ceilings feature sunken panels arranged in a geometric pattern. Beams intersect at 90-degree angles to form square or rectangular coffers. You’ll often see these in formal dining rooms or libraries.
The beam profiles can be simple squares or detailed moldings. You can stain wood beams for contrast or paint them to match the ceiling. Each coffer adds a sculptural element overhead. That grid pattern adds rhythm and order to the space. Installation requires careful planning of beam layout and joist reinforcement. The result delivers classic elegance and a sense of permanence.
Layered Step Coffers
Layered step coffers combine the tray and coffer techniques. Each coffered section steps down in successive levels. Carpenters install multiple frames with varying depths. That approach creates dramatic shadows and visual interest. You can accentuate each step with different paint hues. Mixing colors highlights the architecture overhead.
Step coffers suit high-ceiling foyers and entrance halls. They draw attention upwards. Lighting placed at the ledge edges adds a subtle glow. Installation is more complex and often requires professional craftsmen. But the effect feels striking and custom-tailored.

DIY Installation vs. Hiring a Professional
Taking on your own tray ceiling installation can cut costs and give you full control. Hiring a professional tradesperson offers guaranteed quality and saves time.
Evaluating Project Scope and Complexity
Assess the size and shape of your room before you begin. A simple rectangular tray may be within DIY reach. Complex multi-level or coffered designs demand advanced framing skills. You’ll need to map joist locations and verify ceiling height. Professionals can spot hidden issues like sagging drywall or uneven joists. That expertise prevents costly mistakes. If your design stays basic, DIY may work. More elaborate patterns often call for a pro.
Gathering Materials and Tools
DIYers must source lumber, drywall, screws, and molding. You’ll also need framing squares, levels, a circular saw, and a drill. Professionals bring specialty tools like laser levels and drywall lifts. They carry all fasteners, tapes, and finishing compounds. Renting tools adds to your budget and time. A hired crew arrives fully equipped. You won’t waste weekends hunting equipment. Professionals often secure bulk discounts on materials too.
Step-by-Step DIY Installation Process
First, mark your tray outline on the existing ceiling. Then attach furring strips or framing members at measured heights. Install drywall on the new framework and finish seams with joint compound. Sand smooth and add corner beads for clean recesses. Finally, fit trim or crown molding along the border. Lighting channels or wiring come next. Follow manufacturer guidelines for safe electrical work. Take your time at each step. Rushing leads to uneven edges and gaps.
Time Commitment and Scheduling
DIY installation can stretch over weekends or evenings. You must factor drying times for mud and paint. A straightforward single-level tray may take one to two weekends. Complex multi-tier designs could demand three to four weekends. Professionals often complete similar work in two to three days. Their team can work uninterrupted. That minimizes disruption. You won’t live under dust and plastic sheets for weeks.
Cost Comparison and Budgeting
DIY projects save on labor costs but add tool rentals and material overages. Expect to spend on framing lumber, drywall, compound, and trim. Renting a drywall lift and scaffolding can add hundreds. Professionals charge for labor and overhead but optimize materials. Their experience cuts waste. They also carry liability insurance. That protects you if damage occurs. Compare a full DIY outlay to a contractor’s all-inclusive quote. Factor in your time value too.
Quality of Work and Aesthetic Outcomes
A professional install delivers crisp lines, consistent recesses, and seamless joints. Their finished trays look uniform under all lighting conditions. DIY work can show minor gaps, uneven corners, or drywall dimples.
Those flaws become obvious once painted. Skilled homeowners with patience can achieve pro-level results. But first-timers often need practice. Builders follow industry best practices for mud and tape. That yields clean finishes that last decades.
Ensuring Safety and Code Compliance
Working on a ceiling carries fall risks when using ladders or scaffolds. You must secure all framing correctly to support drywall weight. Improperly fastened joists can lead to ceiling failure. Electrical work for recessed or cove lighting must meet local codes.
DIYers need to pull permits in many areas. Professionals handle permits, inspections, and code adherence. That reduces liability. You’ll avoid potential fines or safety hazards.
Professional Assistance: What to Expect
Hiring a licensed contractor starts with an on-site estimate. They inspect existing structure and identify hidden issues. Your crew manages framing, drywall installation, and finish work. They coordinate electricians and painters as needed.
Expect clear timelines and milestone updates. Most include a warranty on workmanship. That covers repairs if cracks appear. Professionals clean up daily and remove debris. You simply choose finishes, colors, and lighting styles.
Conclusion
Tray ceiling ideas can bring new life to any room. They add depth and visual interest overhead. You can choose classic designs or modern minimalist styles. Simple projects suit DIYers, while complex builds may need a professional. With the right plan and finishes you’ll create an elegant focal point that lasts.
If you have an issue with renovating your ceilings due to popcorn applications, we have a guide for you. Check out our article on how to remove popcorn ceilings!
FAQ: Installing Tray Ceiling
What ceiling height works best for a tray ceiling, and how deep should the drop be?
- Rule of thumb for proportions:
- 8-foot rooms: keep the drop shallow (3–5 inches) with a 8–12 inch border.
- 9-foot rooms: 6–9 inch drop with a 12–18 inch border.
- 10-foot+ rooms: 8–12 inch drop with a 16–24 inch border.
- Keep the tray border width roughly 8–15% of the room’s smaller dimension for balanced proportions.
- Align the first step near the door/window head height for a cohesive look.
- Maintain required clear heights; in most jurisdictions, habitable rooms need about 7’0″ minimum clear height. Check your local code before framing near circulation paths.
Can I add a tray ceiling to an 8-foot room without making it feel cramped?
Yes, focus on “low-profile” or “faux” trays.
- Low-profile build: 3–4 inch drop, simple reveal, minimal or no crown.
- Faux tray (no structural recess): use picture-frame trim or shallow crown to create a shadow line; paint the center a lighter color and the border a shade darker to fake depth.
- Use slim LED coves (1.25–2 inch foam or wood molding) to hide light without sacrificing much height.
- Keep finishes light, use eggshell/satin on the center and matte on the border to enhance the effect.
How do I plan lighting inside a tray ceiling (brightness, color, wiring)?
- Brightness: choose LED strips rated 300–600 lumens per foot. For a 12×15 ft room (~54 linear feet), 300 lm/ft yields ~16,000 raw lumens—comfortable for ambient lighting once bounced and dimmed.
- Color temperature: 2700–3000K (bedrooms/living), 3000–3500K (dining), 3500–4000K (kitchens/office). Aim for 90+ CRI.
- Hardware: prefer 24V strips for longer runs, aluminum channels with opal diffusers, and drivers sized to ~80% of max load (total watts of strip ÷ 0.8).
- Controls: use ELV/TRIAC dimmers matched to the driver or 0–10V/smart controllers for smooth low-level dimming and scenes.
- Installation tips: keep strips 2–3 inches back from the lip to avoid hot spots; feed long runs from both ends to reduce voltage drop; keep drivers accessible (closet/above-cabinet), not buried inside the ceiling.
Can I integrate HVAC vents, smoke/CO detectors, or sprinklers into a tray ceiling?
- HVAC: relocate or add registers/returns so airflow isn’t trapped in the recess. Avoid blowing directly into the cove (whistling/dust lines). Balance the system if changes are significant.
- Smoke/CO detectors: don’t create “dead air” pockets; relocate as needed so they remain effective and visible. Follow manufacturer instructions and local code (often based on NFPA 72).
- Fire sprinklers: coordinate with a licensed sprinkler contractor; do not box in heads or reduce required clearances. Follow NFPA 13 and use listed trim kits if recessing.
- Electrical access: provide accessible junction boxes and driver access panels. Seal penetrations with appropriate fire/smoke-rated materials where required.
- Always verify local requirements and get permits; inspectors may require adjustments during rough-in.
How much does a tray ceiling cost, and what drives the price?
- Typical ranges (will vary by region and finish level):
- Basic single-level tray (framing + drywall + paint): roughly $8–$18 per sq ft, or $1,200–$3,500 for a mid-size room.
- Multi-level/coffered variants: roughly $25–$60 per sq ft depending on beam details and trim.
- Integrated cove lighting: add about $12–$30 per linear foot installed (LED strip, channel, driver, controls), plus electrician time for new circuits/dimmers.
- Cost drivers: ceiling height/complexity, trim profiles, paint grade vs. stain-grade, access to run wiring, and whether you DIY or hire a pro.
- Savings tips: choose a shallow single-level tray, use paint-grade MDF/poly crown, keep lighting on one continuous run, and align tray edges to existing framing to reduce labor. Get 2–3 itemized bids and confirm driver/dimmer compatibility before purchasing.