Last Updated on March 11, 2025 by Team Ideas24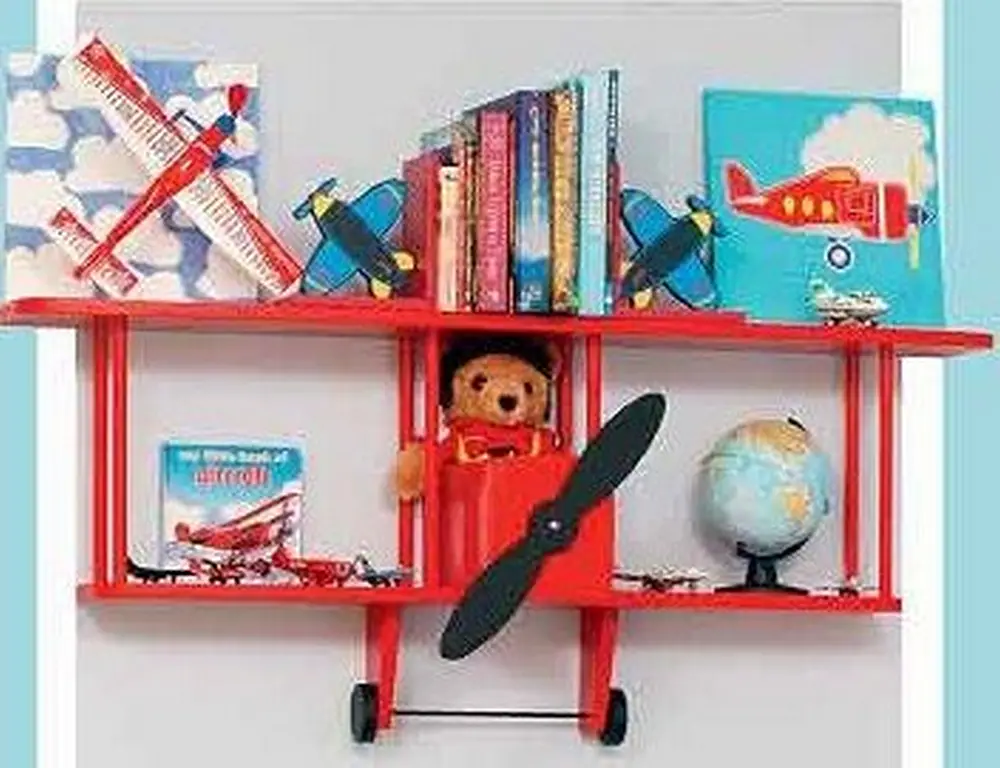
My brother and his wife are having their very first baby boy. Naturally, the father is very excited. He’s taken it upon himself to decorate the nursery. My sister-in-law is happy to step aside and let him do the work.
Fortunately, my brother is a big fan of DIY projects. He built the crib of their eldest who’s now six years old. I’m impressed that the crib is still in excellent condition despite the years. He gave it a new look for the new baby.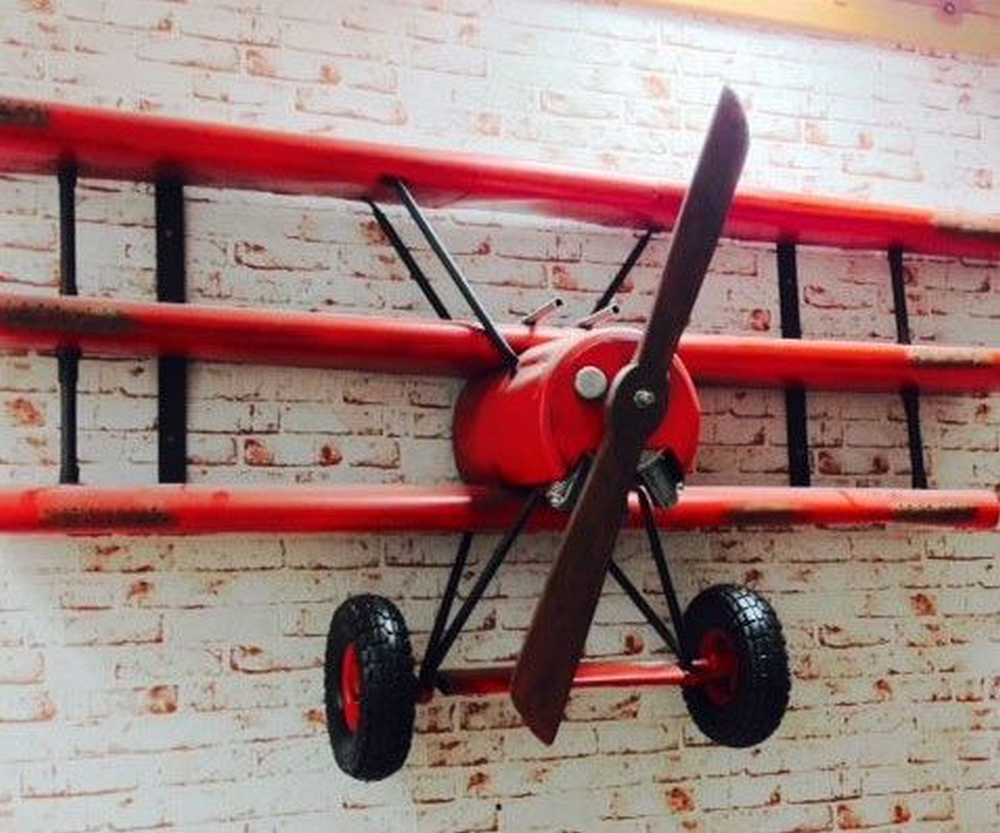
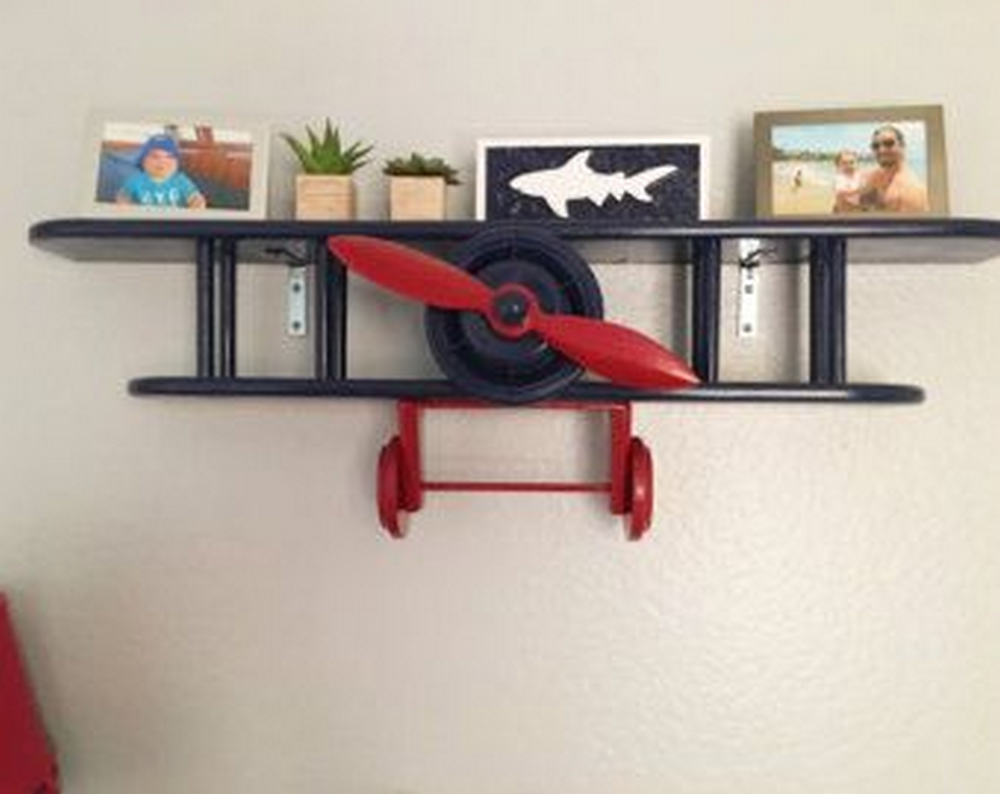
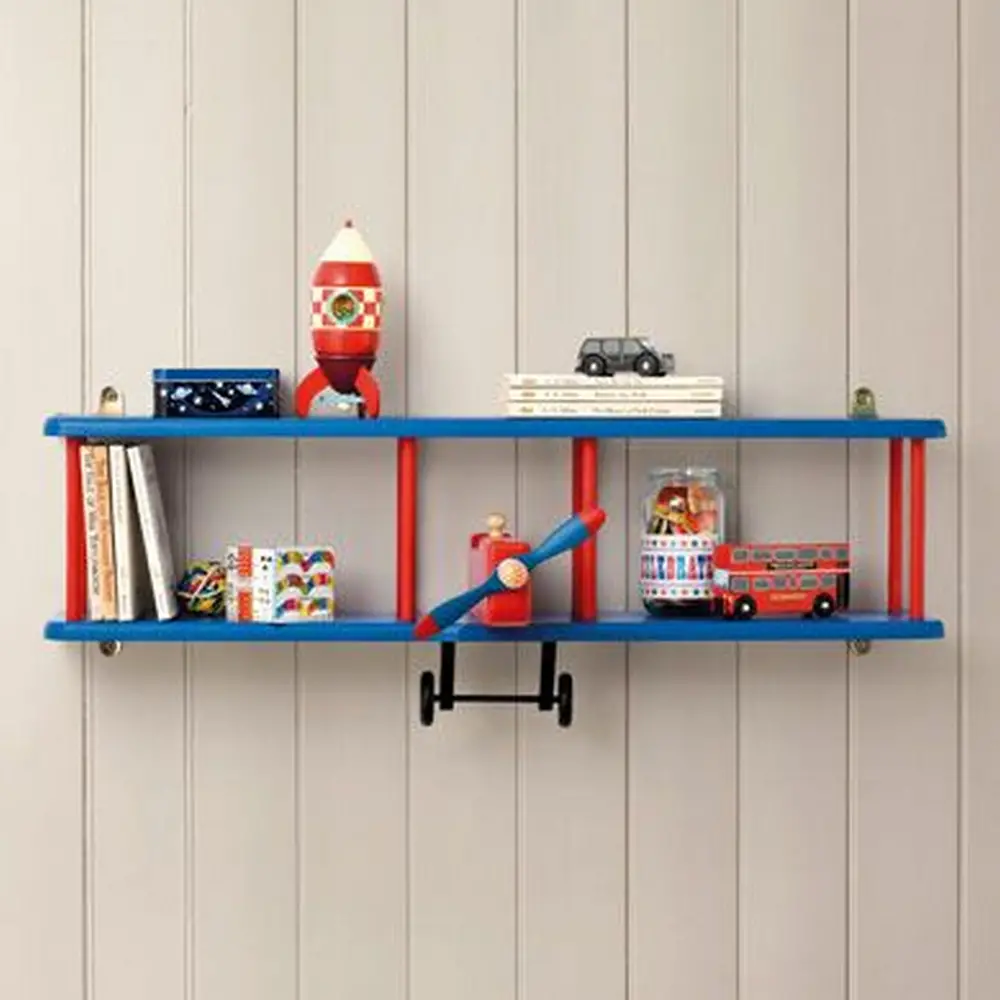
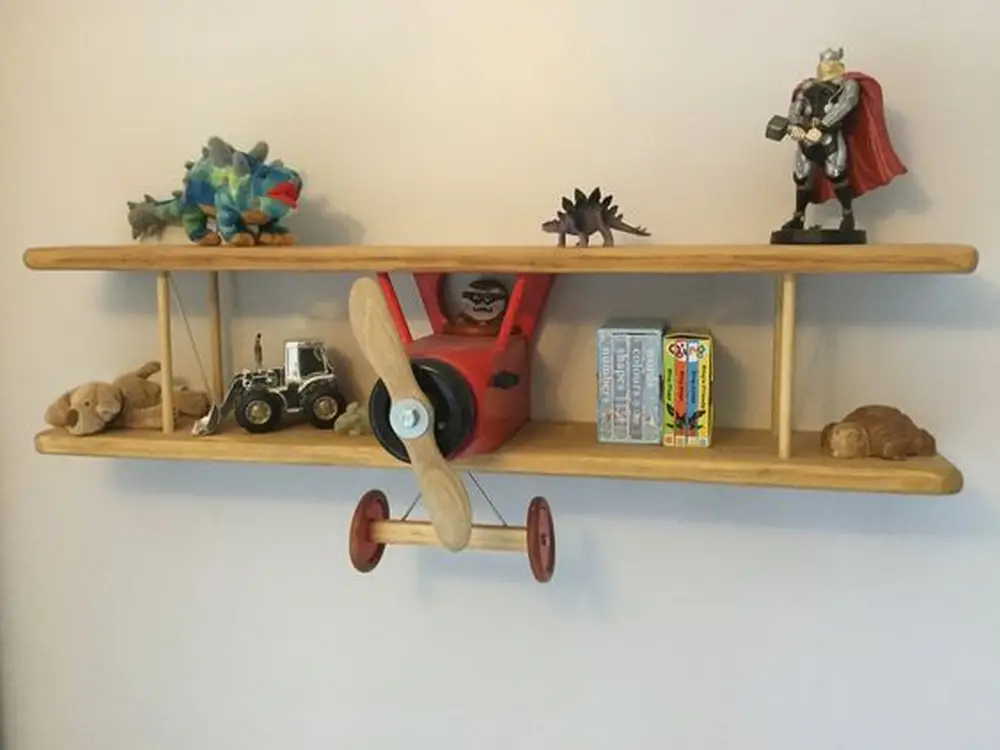
Another project that he added to the nursery was these two adorable biplane shelves. He took inspiration from a video he saw on YouTube and the finished products came out great. The details were so on point. He said he worked on them one weekend and was able to finish in no time. These are a great way to organize and display stuff, and they make great decors, too!
Contents
Building a Biplane Shelf
Materials:
- Wood
- Finish
- Wood glue
- Dowels
Tools:
- Band saw
- Sander
- Drill with drill bits
- Hand saw
- Planer
Steps:
Step 1: Prepare the Wood
Start by selecting good quality wood. Use the planer to smooth out the surface and make sure all pieces are even in thickness. This gives you a clean, flat surface to work with.
Step 2: Cut the Biplane Wings
Use the band saw to cut two identical wing pieces. These will serve as the main shelves. Keep the edges slightly rounded to mimic the shape of a real biplane wing.
Step 3: Cut the Fuselage (Body)
Cut a smaller, rectangular piece of wood for the fuselage. This will connect the two wings and act as the spine of the shelf. Make sure it’s proportionate to the wings. Sand it smooth afterward.
Step 4: Make the Tail Fins and Propeller
Cut out small tail fin shapes and a simple propeller shape using the band saw. These are decorative but give the shelf its distinct biplane look. Sand these pieces smooth.
Step 5: Drill Holes for the Dowels
Mark where the dowels will connect the two wings. These dowels will act as the struts between the upper and lower wings. Drill matching holes on both wings, making sure they align perfectly.
Step 6: Assemble the Wings and Fuselage
Apply wood glue to the holes and insert the dowels between the wings. Once the dowels are in place, glue the fuselage piece vertically to the center of the wings. Let the glue set.
Step 7: Attach the Tail Fins and Propeller
Glue the tail fins to the back end of the fuselage. Then attach the propeller to the front using a dowel or small screw through the center. You can also add a decorative button or cap to cover the dowel end.
Step 8: Sand the Entire Shelf
Once the glue has dried completely, sand the entire piece. Focus on smoothing any rough edges, especially the wing tips and tail fins.
Step 9: Apply Finish
Choose your finish—paint or wood stain. Apply it evenly across the entire shelf. You might want to use contrasting colors for the wings and fuselage to highlight the biplane look. Let it dry completely.Step 10: Mount Your Biplane Shelf on the Wall
Use screws or wall anchors to mount the shelf securely. Make sure it’s level and firmly attached.
Below is a video to give you a visual guide!
DIY Transportation-Themed Decor Ideas for Boys’ Rooms
Decorating a boy’s room can be exciting, especially when you go with a transportation theme. Planes, trains, cars, and boats create an adventurous vibe that sparks imagination and play. You don’t need to buy expensive decorations to bring this theme to life. With a few DIY projects, you can create unique pieces that are fun, functional, and personalized. Below are some easy and creative ideas to inspire your own transportation-themed decor.
Aviation-Inspired Biplane Shelf
A biplane shelf is a standout piece in any boy’s room. It works as both wall decor and a functional storage solution. You can build one using basic woodworking tools and materials like wood, dowels, and wood glue. Shape the wings with a band saw, smooth the surfaces with a sander, and connect the pieces using dowels.
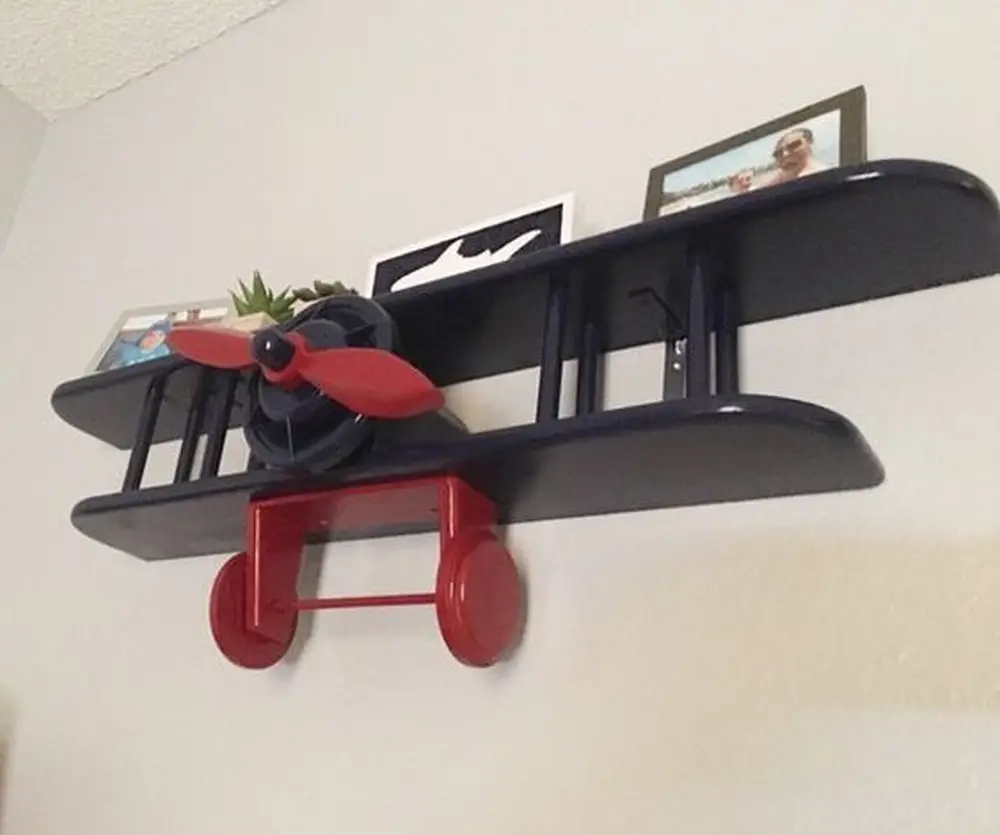
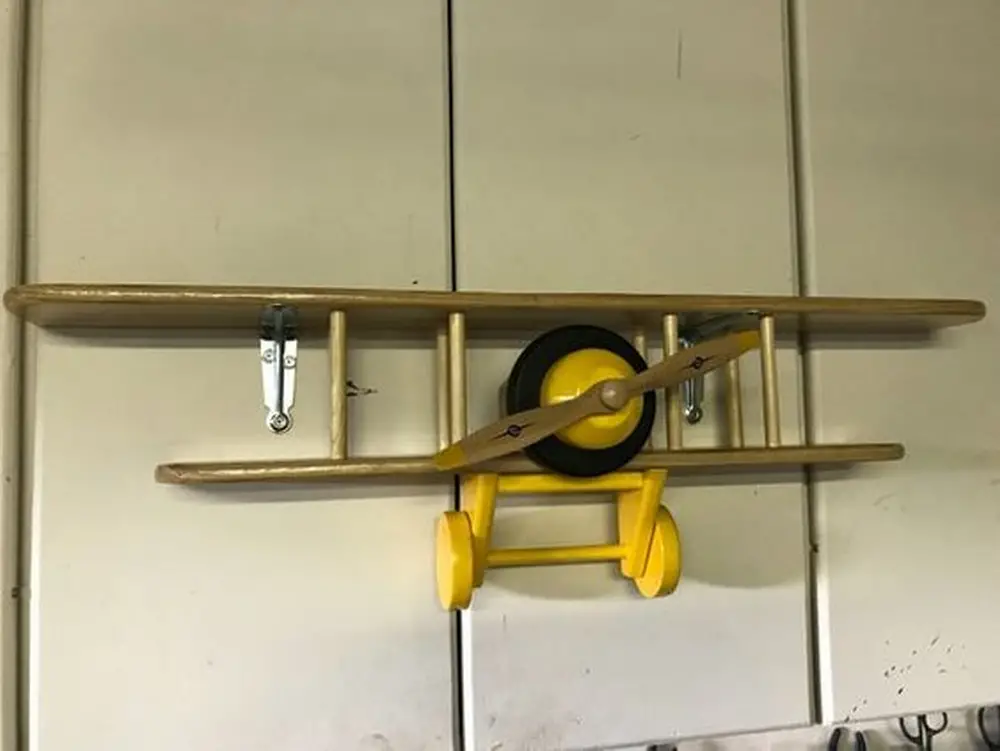
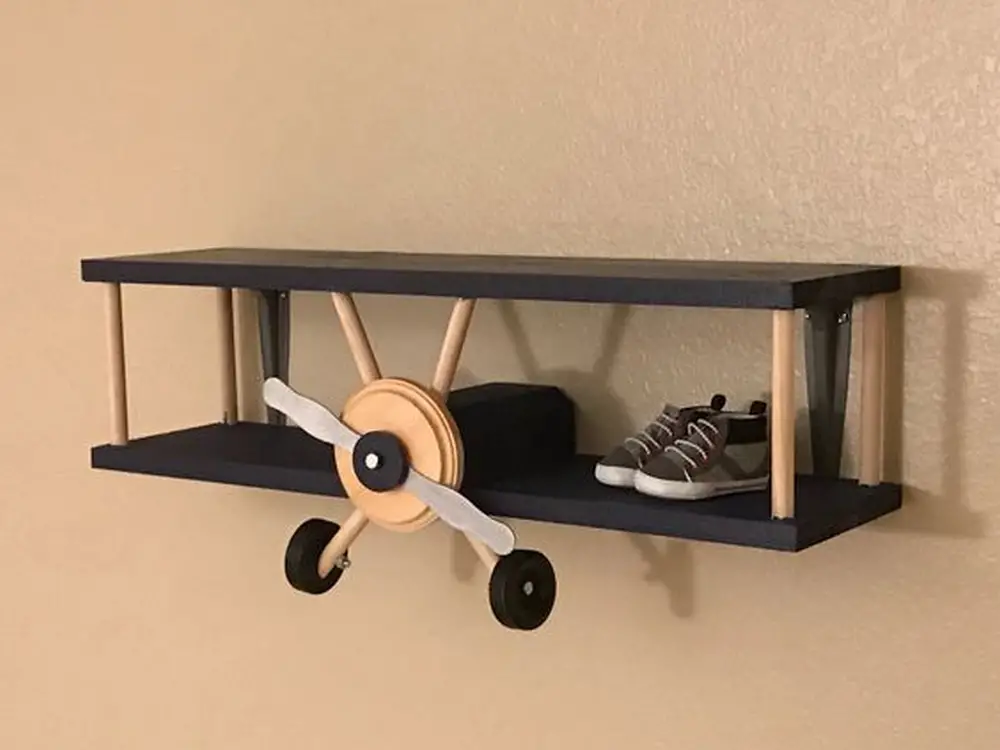
Paint it in classic aviation colors like red, blue, or yellow for an authentic look. Mount it on the wall and use it to display books, toys, or model airplanes. A DIY biplane shelf instantly adds a sense of adventure to the room while keeping things organized.
Race Car Wall Hooks
Add fun and functionality to the walls with race car wall hooks. Find small wooden car cutouts or use toy cars you already have. Attach them to sturdy hooks and mount them on a wooden board or directly onto the wall. These hooks are perfect for hanging jackets, hats, or backpacks. You can paint the cars in bright colors and add racing stripes or numbers for extra flair.
Hot Air Balloon Ceiling Mobile
Create a floating effect with a hot air balloon mobile hanging from the ceiling. Use paper lanterns as the balloon base. Decorate them with paint or patterned paper. For the baskets, small woven baskets or even paper cups work well. Use string or twine to attach the baskets to the lanterns. Hang several at different heights for a whimsical display that brings movement and charm to the space.
Boat Bookshelves
Nautical touches bring a new layer of excitement to a transportation theme. One fun project is turning an old wooden boat or canoe into a bookshelf. If you can’t find an actual boat, you can build one using wood planks shaped to resemble a boat’s hull. Paint it in classic navy blue, white, or red. The shelves inside can hold books, toys, or sea-themed decorations.
Train Track Wall Art
For a simple yet eye-catching feature, create train track wall art. Use strips of wood or thick craft foam cut into railroad ties. Arrange them on the wall in a winding pattern that looks like a track. Add a wooden or metal train model to make it look like it’s chugging along the wall. It’s a creative way to fill an empty wall space and keep the theme consistent.
Finishing Touches with Another Biplane Shelf
Round out the look with another biplane shelf on the opposite wall or above the bed. Having a pair of matching shelves gives the room balance and symmetry. You can even personalize each shelf with your child’s name or favorite flying ace.
A transportation-themed room filled with handmade decor sparks creativity and invites adventure. Adding custom touches like a DIY biplane shelf makes the space uniquely yours.
DIY Transportation-Themed Decor Ideas for Boys’ Rooms
Decorating a boy’s room can be exciting, especially when you go with a transportation theme. Planes, trains, cars, and boats create an adventurous vibe that sparks imagination and play. You don’t need to buy expensive decorations to bring this theme to life. With a few DIY projects, you can create unique pieces that are fun, functional, and personalized. Below are some easy and creative ideas to inspire your own transportation-themed decor.
Aviation-Inspired Biplane Shelf
A biplane shelf is a standout piece in any boy’s room. It works as both wall decor and a functional storage solution. You can build one using basic woodworking tools and materials like wood, dowels, and wood glue. Shape the wings with a band saw, smooth the surfaces with a sander, and connect the pieces using dowels.
Paint it in classic aviation colors like red, blue, or yellow for an authentic look. Mount it on the wall and use it to display books, toys, or model airplanes. A DIY biplane shelf instantly adds a sense of adventure to the room while keeping things organized.
Race Car Wall Hooks
Add fun and functionality to the walls with race car wall hooks. Find small wooden car cutouts or use toy cars you already have. Attach them to sturdy hooks and mount them on a wooden board or directly onto the wall. These hooks are perfect for hanging jackets, hats, or backpacks. You can paint the cars in bright colors and add racing stripes or numbers for extra flair.
Hot Air Balloon Ceiling Mobile
Create a floating effect with a hot air balloon mobile hanging from the ceiling. Use paper lanterns as the balloon base. Decorate them with paint or patterned paper. For the baskets, small woven baskets or even paper cups work well. Use string or twine to attach the baskets to the lanterns. Hang several at different heights for a whimsical display that brings movement and charm to the space.
Boat Bookshelves
Nautical touches bring a new layer of excitement to a transportation theme. One fun project is turning an old wooden boat or canoe into a bookshelf. If you can’t find an actual boat, you can build one using wood planks shaped to resemble a boat’s hull. Paint it in classic navy blue, white, or red. The shelves inside can hold books, toys, or sea-themed decorations.
Train Track Wall Art
For a simple yet eye-catching feature, create train track wall art. Use strips of wood or thick craft foam cut into railroad ties. Arrange them on the wall in a winding pattern that looks like a track. Add a wooden or metal train model to make it look like it’s chugging along the wall. It’s a creative way to fill an empty wall space and keep the theme consistent.
Finishing Touches with Another Biplane Shelf
Round out the look with another biplane shelf on the opposite wall or above the bed. Having a pair of matching shelves gives the room balance and symmetry. You can even personalize each shelf with your child’s name or favorite flying ace.
A transportation-themed room filled with handmade decor sparks creativity and invites adventure. Adding custom touches like a DIY biplane shelf makes the space uniquely yours.
Click on any image to start the lightbox display. Use your Esc key to close the lightbox.

How to Paint and Finish Wooden Shelves for a Professional Look
Finishing wooden shelves can make all the difference between an average DIY project and a polished, professional-looking piece. Whether you’re working on a simple floating shelf or something more creative like a biplane shelf, taking the time to apply paint or stain correctly will enhance both the appearance and durability of your work. Here’s a step-by-step guide to help you achieve a smooth, clean finish every time.
Prepare the Surface
Start by sanding the entire surface of your wooden shelves. Use medium-grit sandpaper (around 120-grit) to remove any rough spots, saw marks, or splinters. For a smoother finish, follow up with a fine-grit sandpaper (220-grit). Pay close attention to edges and corners. If you’re working on a biplane shelf with rounded wing tips or detailed parts, use a sanding sponge or fine sanding block to get into the curves.
Clean Off the Dust
After sanding, wipe down the shelves thoroughly. Use a tack cloth or a slightly damp lint-free rag to remove all dust and debris. Dust left on the wood can cause bumps in the paint or stain, so make sure the surface is completely clean before moving on.
Apply a Primer
If you plan to paint your shelves, apply a high-quality primer. Primer helps paint stick better and creates a uniform base. For dark woods or stained pieces, use a stain-blocking primer to prevent tannins from bleeding through the paint. Apply an even coat with a brush or foam roller, making sure to cover every surface. Let it dry completely according to the manufacturer’s instructions.
Sand Lightly Between Coats
Once the primer has dried, give it a light sanding with fine-grit sandpaper (320-grit). This step smooths out any brush marks or raised wood grain. Wipe away any dust before applying paint.
Paint or Stain the Shelves
For painting, use a high-quality latex or acrylic paint. Apply thin, even coats with a foam roller or brush. Foam rollers give a smoother finish and minimize brush strokes. Let each coat dry fully before applying the next. Two to three coats usually provide solid coverage. If you’re finishing your biplane shelf and want to use multiple colors for wings and fuselage, work carefully with painter’s tape to get clean lines.
For staining, apply the stain with a brush or a lint-free cloth. Wipe off any excess with a clean cloth, following the direction of the wood grain. Apply additional coats if you want a deeper color, allowing each coat to dry in between.
Seal with a Clear Topcoat
Once the paint or stain is fully dry, protect your shelves with a clear topcoat. Polyurethane, polycrylic, or a furniture wax will protect the surface from scratches and wear. If your shelf will be in a child’s room, like a biplane shelf for a nursery, choose a non-toxic, water-based sealer. Apply two to three thin coats, sanding lightly between each coat for the smoothest finish.
Final Touches
Inspect your work for any uneven spots or drips and sand lightly if needed. After the final coat has dried, your shelves are ready to mount. The finish should look smooth, clean, and professional.
With a little patience and attention to detail, your wooden shelves—whether simple or decorative, like a biplane shelf—will look just as good as store-bought pieces, if not better.
Conclusion
Crafting a biplane shelf is a rewarding project that adds both charm and function to any room. With careful attention to detail and a smooth finish, it becomes a standout piece that showcases your craftsmanship. Whether it’s for a nursery or a playful space, a handmade biplane shelf brings personality and creativity to your decor.
We have more fun projects for your bedroom or living room. Check out our guitar shelf guide next!


