
Last Updated on October 13, 2025 by Team Ideas24
Watering plants in your garden yourself can cost you valuable time especially if you are tending to a large yard. And sometimes you wastewater since it’s difficult to regulate the amount of water you let flow in your garden.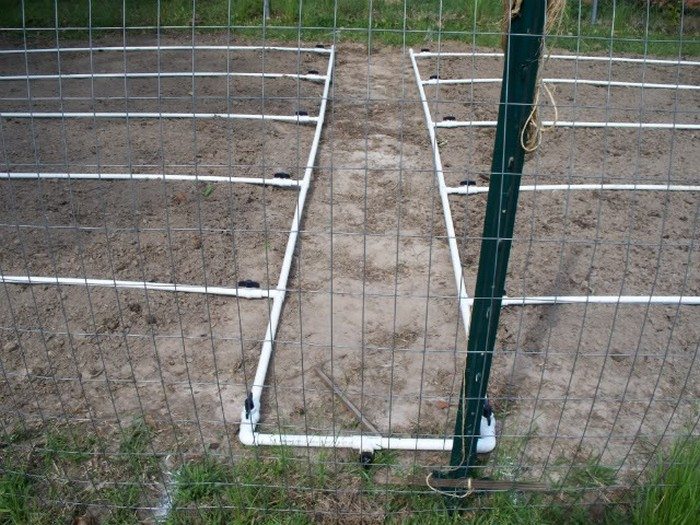
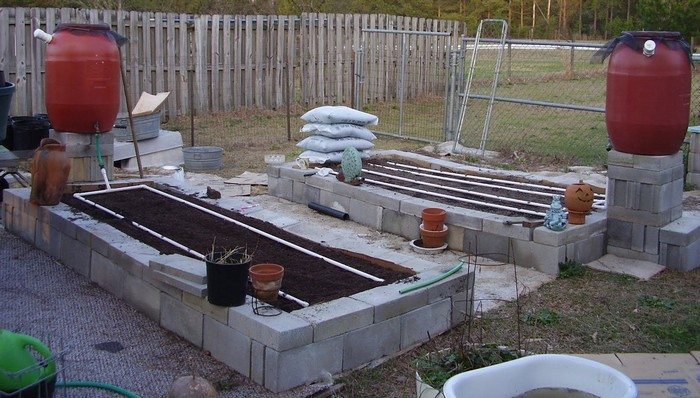
One way you can save time and water is to equip your garden with this drip irrigation system.
Farmers have been using drip irrigation since the 1800s. The system saves water by trickling slowly near the base of the plant so it gets to the roots either from above the soil surface or buried underneath it. The goal is to place water directly into the root zone and minimize evaporation.
An experienced irrigation company can install one for you, but you can save even more money building a system yourself!
This PVC project is cheap, easy, and can be adjusted to fit your garden. It waters your garden slowly but deeply, making efficient use of water. So it does not only save you time, but it also lowers your water bill!
Do you need a drip irrigation system in your vegetable garden?
Contents
How to Set Up Drip Irrigation Grids
You’ll need these materials:
- 3/4″ PVC Pipe
- 1/2″ PVC Pipe (with non-threaded T-connectors and End Caps)
- PVC Cement
- 1/2″ PVC Couples
- 3/4″ Elbow Joint
- Female Hose/Faucet Connector
- Sand Paper
And these tools:
- Measuring Tape
- Hacksaw
- Cordless Drill (with 1/8″ Drill Bit)
Steps:
Step 1: Plan Your Layout
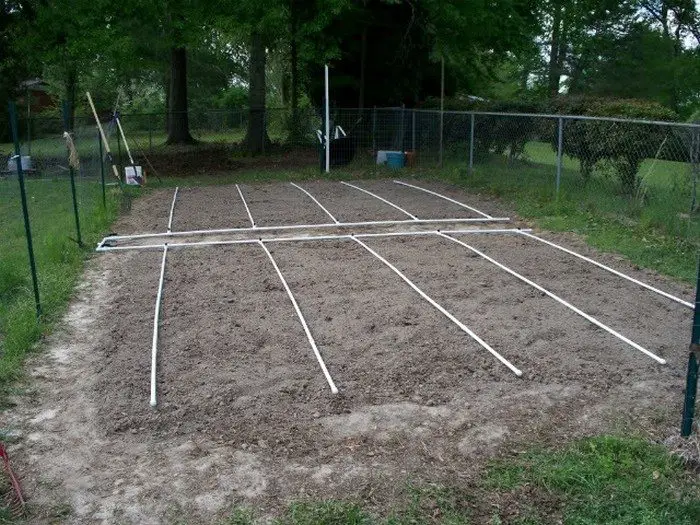
Measure the area you want to irrigate using a measuring tape. Sketch a rough layout of your garden. Mark where your plants are and where the mainline and feeder lines should go. This helps you estimate how much pipe you’ll need and where to drill holes for water output.
Step 2: Cut the PVC Pipes
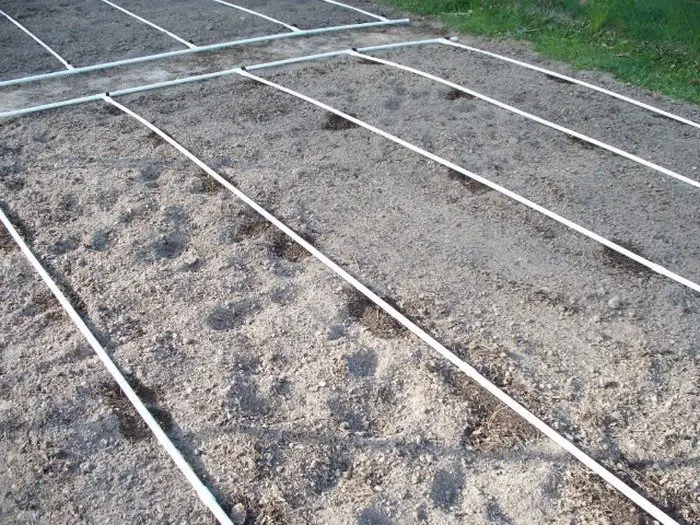
Use a hacksaw to cut the 3/4″ PVC pipe for your main water supply line. Then cut the 1/2″ PVC pipe into smaller sections to form feeder lines that branch off using T-connectors. Keep your layout in mind while cutting.
Step 3: Smooth the Edges
After cutting the pipes, smooth all the rough edges using sandpaper. This ensures secure fitting and prevents debris from clogging the system.
Step 4: Dry Fit the System
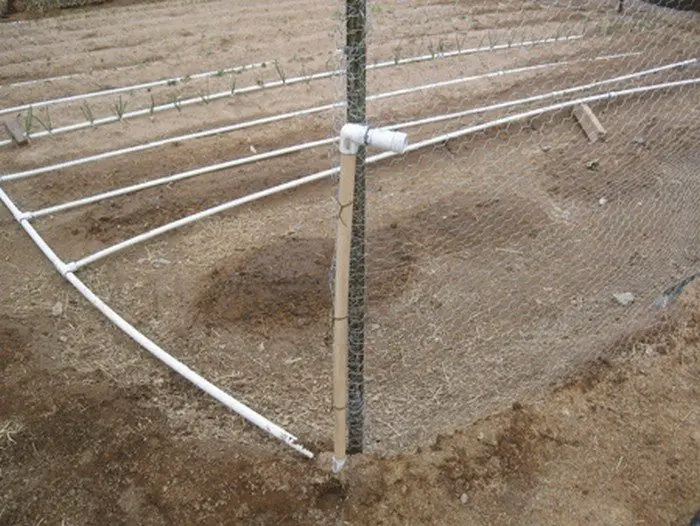
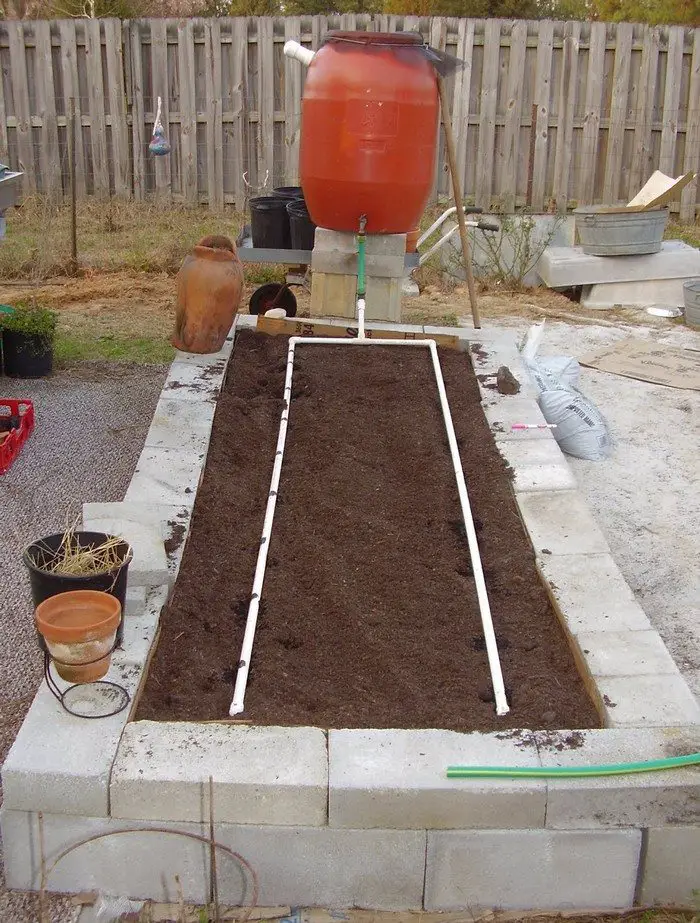
Assemble the pipes without glue first. Connect the 3/4″ main pipe with the 3/4″ elbow joint to make turns if needed. Use T-connectors to attach the 1/2″ PVC pipes branching off the mainline. Place end caps on the tips of each line. Attach couples where pipe extensions are needed. Adjust as necessary.
Step 5: Glue the Connections
Once satisfied with the dry fit, disassemble one section at a time and apply PVC cement to the inside of the fittings and the ends of the pipes. Press together quickly before the cement sets. Repeat this until the whole system is glued in place.
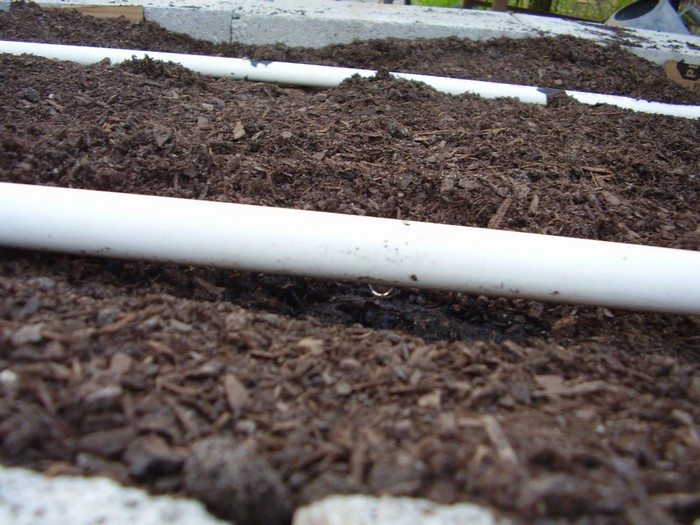
Step 6: Drill Watering Holes
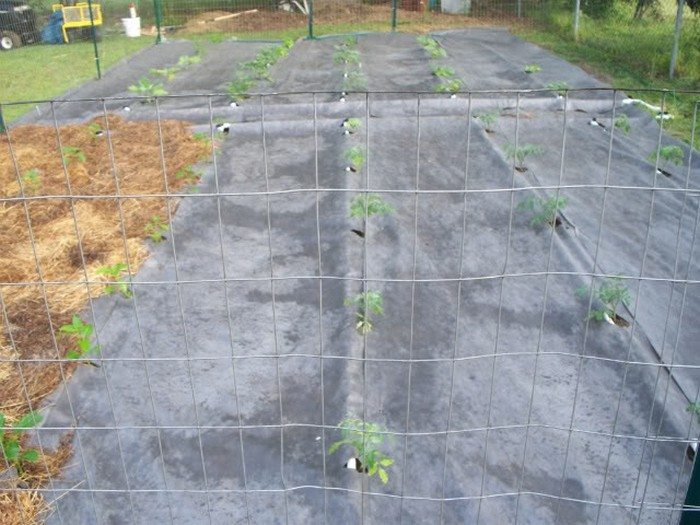
Use your cordless drill with a 1/8″ drill bit to make holes along the 1/2″ feeder pipes. Drill near where each plant is located. Space the holes evenly and keep them pointing downward to prevent water spraying.
Step 7: Attach the Hose Connector
At the start of your 3/4″ mainline, install the female hose/faucet connector. This allows you to attach a garden hose or faucet to supply water to the system.
Step 8: Test the System
Turn on the water slowly. Watch how water flows through the holes. Check for even distribution and leaks. If needed, plug holes with small bits of toothpick or sealant and drill new ones. You can also fine-tune water pressure for better control.
Step 9: Secure the Pipes (Optional)
Once everything works properly, use garden stakes or clamps to hold the pipes in place. This prevents shifting and keeps holes aligned with your plants.
Benefits of Drip Irrigation vs. Traditional Watering
Drip irrigation has become a popular solution for gardeners and homeowners who want to water plants efficiently without wasting time or resources. Compared to traditional watering methods like using a hose or sprinkler, drip irrigation delivers water directly to the base of each plant. This approach minimizes water loss and supports healthier plant growth. Whether you have a vegetable patch, flower beds, or raised garden boxes, knowing how to set up drip irrigation can transform the way you care for your garden.
Water Efficiency
One of the biggest advantages of drip irrigation is water conservation. Traditional sprinklers often spray water over a wide area, leading to runoff, overspray, and evaporation. Drip irrigation applies water slowly and precisely at the root zone.
Because water doesn’t sit on the leaves or evaporate before reaching the soil, it’s used more effectively. Over time, this reduces your water bill and supports a more sustainable garden. In dry regions or during water restrictions, this system becomes even more valuable.
Healthier Plants
Plants benefit more when water consistently reaches their roots. With sprinklers or hand-watering, it’s easy to under-water or over-water, both of which can cause stress and disease. Drip systems keep the soil evenly moist. This encourages deep root growth and reduces the chance of fungal diseases that thrive in damp foliage.
You also avoid compacting the soil, which can happen when walking through beds with a hose. Once you learn how to set up drip irrigation properly, you’ll notice your plants becoming stronger and more productive.
Time Savings
Watering by hand can take hours each week, especially if you’re caring for a large garden. Sprinklers need monitoring to avoid overwatering, and they often require adjustments. Drip irrigation runs quietly and can be left unattended once set up.
If you add a timer, the system becomes nearly automatic. You no longer need to drag hoses around or rearrange sprinklers. The time saved can be spent harvesting produce, pruning plants, or simply enjoying your garden.
Reduced Weed Growth
Because drip irrigation delivers water only where needed, the surrounding soil stays drier. This makes it harder for weeds to take hold. In contrast, sprinklers soak everything within range—plants and weeds alike. Less moisture between rows means fewer unwanted plants to pull. That also means you spend less time on garden maintenance, which adds up over the season.
Adaptability for Any Garden
Drip systems can be customized for almost any garden shape or size. Whether you’re watering rows of crops or potted plants, a drip layout can be adapted with minimal cost. You can use flexible tubing or PVC depending on your layout. Raised beds, flower borders, and greenhouse setups all benefit from tailored water delivery. Once you get the hang of how to set up drip irrigation, expanding it to other parts of your yard becomes simple.
A well-designed drip system offers long-term value, healthier plants, and peace of mind. It’s a smart upgrade for anyone serious about gardening efficiently and sustainably.
Drip System Gallery
Click on any image to start lightbox display. Use your Esc key to close the lightbox.![]()
Choosing the Right Drip Irrigation System for Your Garden
Not all gardens are the same, and that means one drip irrigation setup won’t work for every space. Choosing the right drip irrigation system for your garden depends on a few key factors—plant type, layout, water pressure, and budget.
Whether you’re watering vegetables, flower beds, or container plants, a system tailored to your needs will save water, reduce maintenance, and keep your plants healthier. Before learning how to set up drip irrigation, it helps to understand the different system options available and how they perform in various garden settings.
Emitter Systems for Precise Watering
Emitter drip systems use small, button-like devices that release water at a slow, steady rate. Each emitter is installed near the base of a plant. This option works best for gardens with widely spaced plants, like trees, shrubs, or large vegetables.
You can control how much water each plant receives by choosing emitters with different flow rates. Some gardeners even add adjustable emitters to fine-tune moisture levels throughout the garden. These systems take a bit more planning, but they’re ideal for permanent plantings and beds where precision matters.
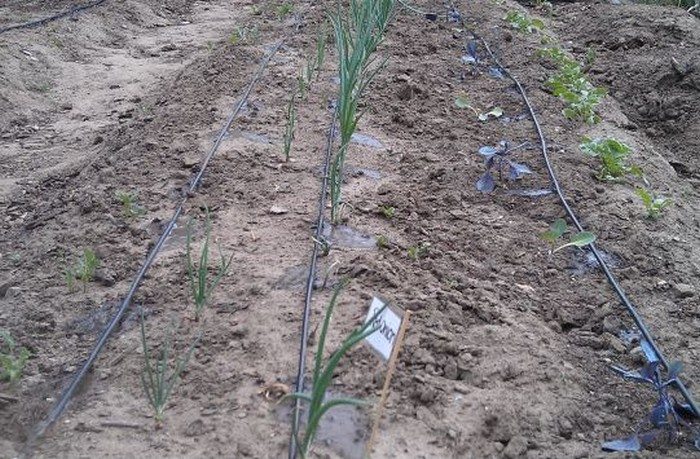
Drip Lines for Simpler Layouts
Drip lines come with built-in emitters evenly spaced along the tubing. These are great for rows of plants, raised beds, or evenly spaced crops like lettuce and carrots. You won’t need to install individual emitters, which speeds up the setup process. Drip lines are flexible and can be looped or cut to fit your garden beds. If you want to know how to set up drip irrigation for vegetables or groundcover, this is one of the easiest systems to work with.
Soaker Hoses for Broad Coverage
Soaker hoses are porous and allow water to seep out along their entire length. They’re ideal for closely planted flower beds or areas where you want broad, low-pressure watering. These hoses are simple to install and don’t require much customization.
However, they’re not as efficient as emitters or drip lines because they release water uniformly, regardless of plant size or need. If you’re setting up a temporary garden or just starting out, soaker hoses are a good low-cost option.
PVC-Based Drip Systems for Durability
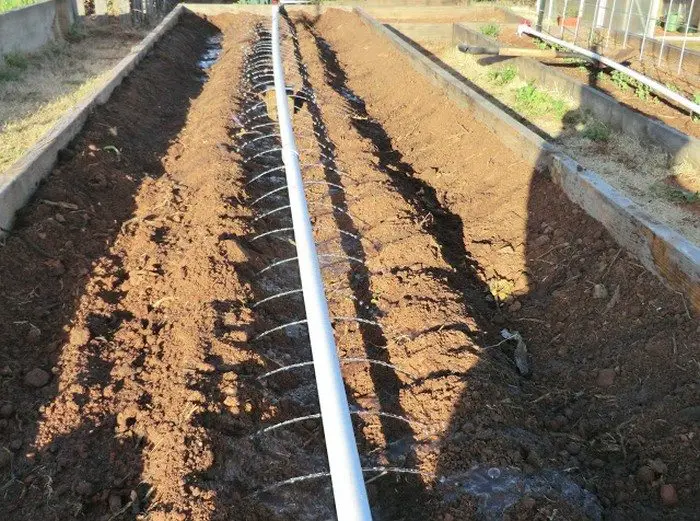
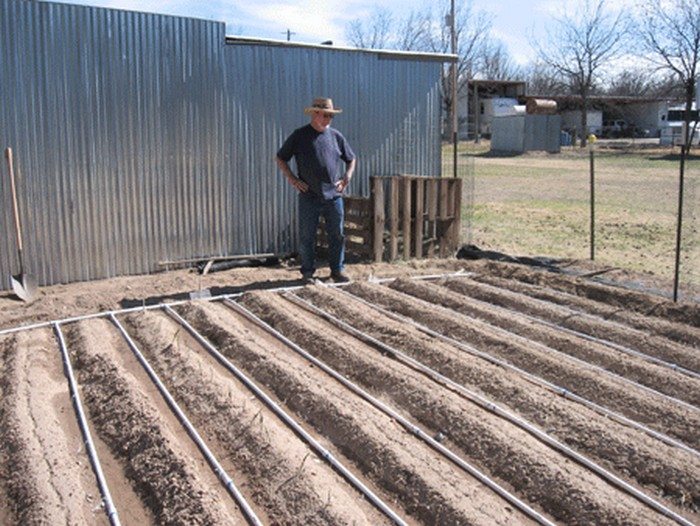
If you’re looking for a sturdy system that can handle long-term use and heavy-duty needs, a PVC-based setup might be the right choice. These systems use ½″ or ¾″ PVC pipes with holes drilled near each plant. You can customize the layout to match your planting arrangement. PVC drip systems are often less flexible than tubing, but they work well in structured gardens. If you’re confident with basic tools and want a long-lasting design, learning how to set up drip irrigation using PVC can give you a reliable solution for years to come.
Container Garden Kits for Small Spaces
For patios or balconies with container plants, there are compact drip kits designed specifically for small-scale gardening. These usually include thin tubing, connectors, and mini emitters that attach to each pot. They often come with quick-connect fittings that link directly to a garden hose or faucet. These systems save time and reduce water waste by delivering moisture directly into each container. They’re also easy to expand if you add more pots or hanging planters later.
Choosing Based on Water Pressure
Some systems work better with high water pressure, while others need pressure reducers. Emitter systems often need a steady, low-pressure flow to work efficiently. Soaker hoses are more forgiving but can fail if pressure is too high. Make sure your water source matches the needs of your chosen system. You can add pressure regulators, filters, and timers to improve performance and reduce wear.
The right drip irrigation system depends on your specific garden and your goals. Think about how often you want to water, how much time you want to spend maintaining the system, and the types of plants you grow. Once you choose a system that fits your garden, learning how to set up drip irrigation becomes a straightforward process. You’ll end up with healthier plants, less water waste, and more free time to enjoy your garden.
Conclusion
Learning how to set up drip irrigation gives you better control over watering while saving time and reducing waste. Anyone can create a system that sends water straight to plant roots with the correct materials and design. For more effective and healthy gardening, it’s a clever, inexpensive addition.
We have more smart gardening solutions. Check out our greenhouse project made from recycled windows!


