
Open floor plans and shared spaces can be beautiful, yet they often need a touch of privacy and visual order. A diy room divider helps you carve out a reading nook, a work zone, or a cozy corner without a costly remodel. You can tailor the look to your décor and choose materials that match your skills and budget. This guide gives you clear steps and smart tips so you can create something that looks intentional and feels at home.
Contents
Key Takeaways
- Measure carefully and plan panel count and alternating hinge orientation to ensure stability, smooth folding, and a clean zigzag stance.
- Build a diy room divider with 1×2 poplar, taut cane or 1/4 inch panels, and simple hardware for a tailored look on a sensible budget.
- Seal every surface, add felt pads or locking casters, and anchor tall units to studs to protect floors and keep daily use safe.
Building a DIY Room Divider
Create privacy, shape a cozy nook, and elevate style without remodeling. This diy room divider project blends beauty and practicality, guiding choices that fit your budget, skills, time, and life.
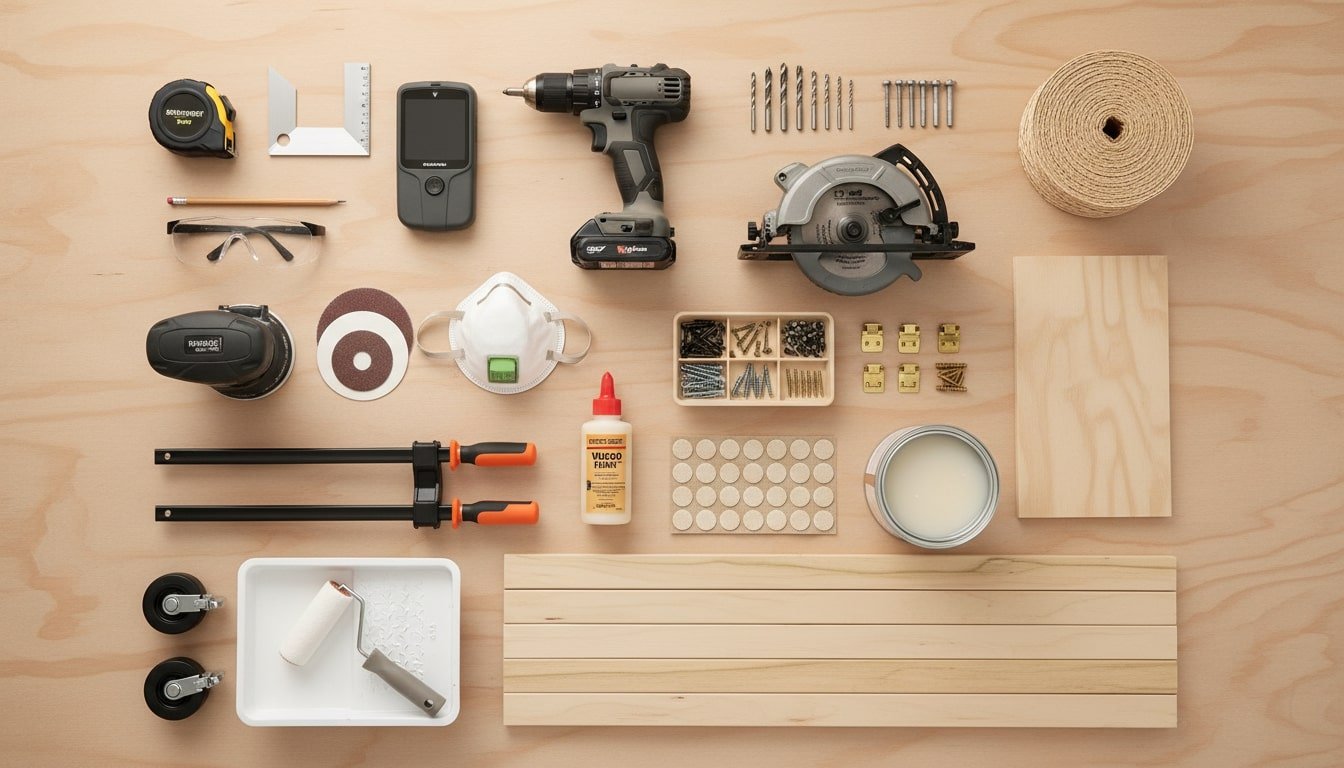
Materials And Tools
- Tools
- Tape measure and carpenter’s square
- Pencil and stud finder
- Drill-driver with wood and pilot bits
- Miter saw or circular saw with a fine-tooth blade
- Orbital sander with 120 and 220 grit
- Clamps sized to your panel width
- Safety glasses and a dust mask
- Materials
- 1×2 or 1×3 pine or poplar for frames
- Panel infill such as 1/4 inch plywood, MDF, cane, rattan, or frosted acrylic
- Wood screws and wood glue
- Three 2 inch butt hinges per seam with matching screws
- Primer and paint or stain plus a protective topcoat
- Felt pads or low-profile leveling feet
- Optional locking casters rated for total weight
- Optional fabric, cane webbing, or acoustic felt for extra privacy
Step-By-Step Guide
- Map the zone and mark a floor footprint, confirm clearance for doors and traffic, then finalize total width and panel count that suits your layout.
- Create a labeled cut list for stiles and rails, and double-check measurements so paired parts match exactly.
- Cut frame members to length, keeping duplicate pieces clamped together during cutting for consistency.
- Dry fit each panel, verify square with a carpenter’s square, and adjust any out-of-true edges before assembly.
- Glue and screw frames, clamping at the corners until joints set while you recheck for square to prevent racking.
- Add panel infill by stapling fabric or attaching plywood or acrylic, keeping surfaces flush and tension even.
- Sand all edges through 120 then 220 grit so the diy room divider feels smooth and safe to handle.
- Prime and paint or stain all sides evenly to limit moisture movement and reduce future warping.
- Hang panels with two or three hinges per seam, alternating hinge orientation so the screen zigzags and stands stable.
- Add felt pads or low-profile feet, place the diy room divider, and test stability on your flooring.
- If you need mobility, install locking casters rated for the total weight and verify that all fasteners remain snug after initial use.
- Position the diy room divider and fine-tune the angle of each panel until you achieve the desired privacy and light flow.
Choose A Style That Fits Your Home
Your home deserves a divider that adds privacy and charm while honoring how you live. Choose a diy room divider style that suits light, storage, and movement, making routines effortless.
Framed Panels
Framed panels create a furniture-like presence with clean lines and a tailored look. Combine cane, linen, or frosted acrylic to tune privacy, texture, and light. Hinged sections zigzag for stability, then fold flat when you need the room open.
This DIY room divider complements classic, coastal, or modern spaces, depending on the trim profiles and finish. Use poplar for crisp paint or pine for savings, and seal all sides to limit warping through seasonal humidity.
Curtains And Tracks
Curtains on a ceiling track glide smoothly and disappear when stacked, which suits renters and busy households. Choose heavy linen or lined velvet for privacy, or layered sheers to keep daylight flowing while softening views.
A curtain-based diy room divider installs fast with anchors suited to your ceiling. Add overlap at edges to prevent light gaps, hem to a gentle floor kiss, and use pleat hooks or grommets for easy movement.
Bookcase Or Slatted Wood
A backless bookcase zones a room while keeping sight lines open and adding valuable storage. Style baskets and closed boxes on lower shelves for visual calm, and reserve upper shelves for plants or display.
For a lighter look, vertical slats spaced one to two inches apart provide privacy cues without blocking airflow. Anchor tall pieces to studs with discreet straps, and choose a satin finish that resists fingerprints and dust.
Safety And Stability
Safety keeps a diy room divider useful, beautiful, and stress-free. Plan anchoring and balance early so the piece resists tipping, handles movement, and protects walls, floors, kids, and pets.
Anchoring Methods For Different Setups
Different homes call for different approaches. A folding diy room divider gains stability from a wide zigzag stance, yet it benefits from discreet anchors where traffic is heavy. Freestanding bookcase or slatted styles should secure to studs when taller than shoulder height. Renters can choose damage-light solutions that still prevent tipping. Plan for load paths from top to floor, and confirm hardware matches your wall type before you drill.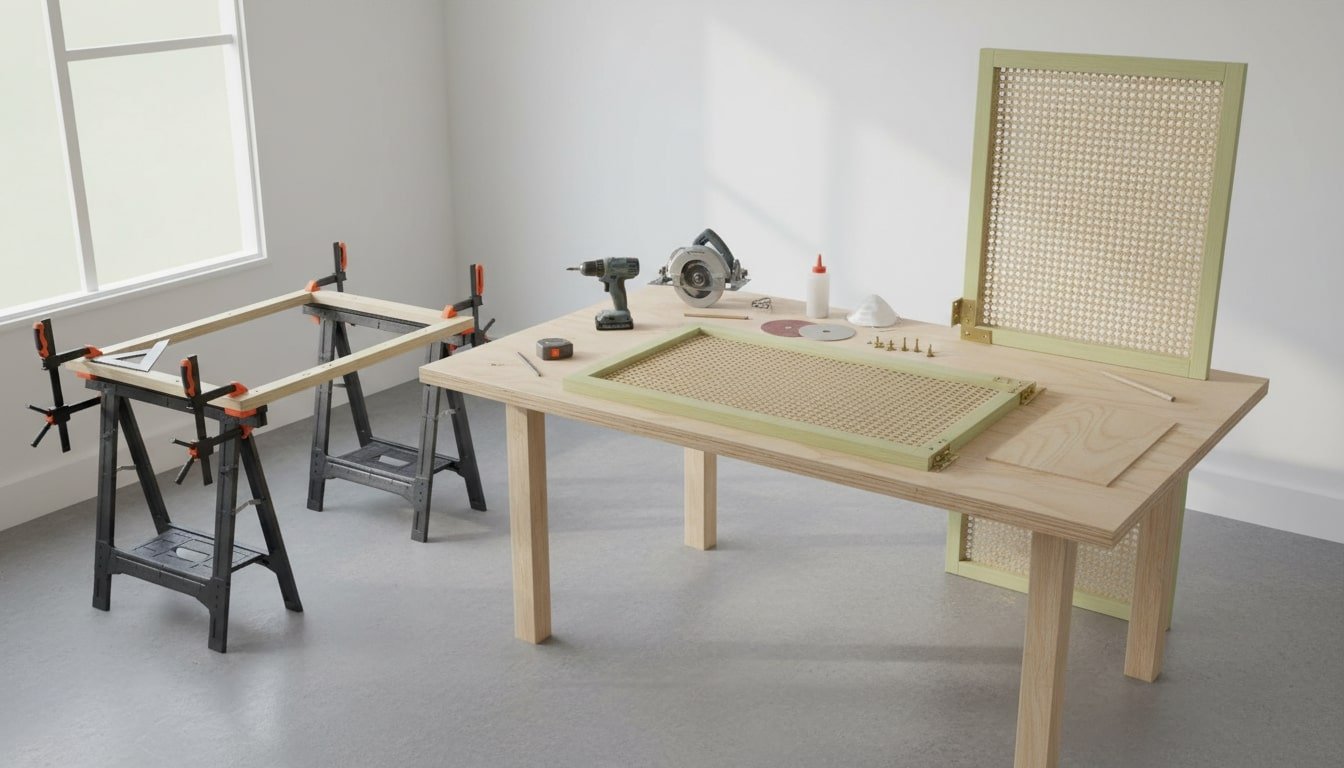
Anchoring options:
- Use furniture anti-tip straps secured into wall studs with proper lag screws.
- Install low-profile L-brackets at the top or base, fastening into studs or masonry as appropriate.
- Hang tall panels on a French cleat so weight bears down instead of pulling out.
- Add a ceiling track stop or discreet tether where a curtain or sliding panel ends.
- Widen bases with removable outriggers or weighted feet to increase footprint without floor drilling.
- Fit locking casters with top-plates and through-bolts on heavy frames to control movement.
Stability And Everyday Safety
Daily habits shape safety more than single fixes. Keep the diy room divider angled slightly when freestanding so weight lands over a wider footprint. Avoid placing climbable items near panels in kids’ rooms. Distribute mass low with books or weights, and keep casters locked whenever the divider is extended. Inspect fasteners after the first week and after seasonal changes since wood moves as humidity shifts.
Considerations:
- Keep climbable surfaces away from cribs, bunk beds, and play zones where children may pull or scale panels.
- Lock casters whenever the screen is extended and unlock only when you reposition it.
- Inspect hinges, straps, and brackets after the first week, then at each season change.
- Maintain clearance around vents and thermostats so airflow and sensors remain accurate.
- Route cords through clips or channels to remove tripping hazards across thresholds.
- Clean dust from tops and hinges since buildup can reduce friction and allow drift.
Common Mistakes And Troubleshooting
Even careful builders hit snags that stall progress and sap confidence. Use these fixes to steady structure, improve privacy, and keep your diy room divider looking intentional while working well.
Wobble And Tipping
A divider that shimmies often sits on a footprint that is too narrow or on floors that are slightly out of level. Increase the zigzag angle, alternate hinge orientations, and add wider feet or felt pads to boost friction.
If your diy room divider still feels unstable, secure anti-tip straps into studs and place weight low on a base shelf to lower the center of gravity. Tighten loose screws and add a discreet corner brace near the ends.
Light Gaps And Sound Bleed
Edge glow can make a divider feel ineffective, especially at night when contrast is high. Add a small return at the ends, overlap panels by an inch, or layer a sheer behind a heavier fabric to soften sight lines.
For better privacy, upgrade your diy room divider with acoustic felt panels or a removable blackout liner that snaps in place. A soft door sweep at the base limits light leaks, while a dense rug close by absorbs echo and footsteps.
Warping, Racking, And Sticking Hinges
Frames that rack or twist usually begin with lumber that was not acclimated or with faces that were not sealed evenly. Store boards flat, let them rest indoors for a few days, and check diagonals during assembly to keep each panel square.
Hinges bind when screws drift off center or when edges swell. Pre-drill pilot holes, use longer screws into the stiles, and adjust gaps with thin washers. Plane or sand any high spots, then reseal edges with topcoat to slow seasonal movement.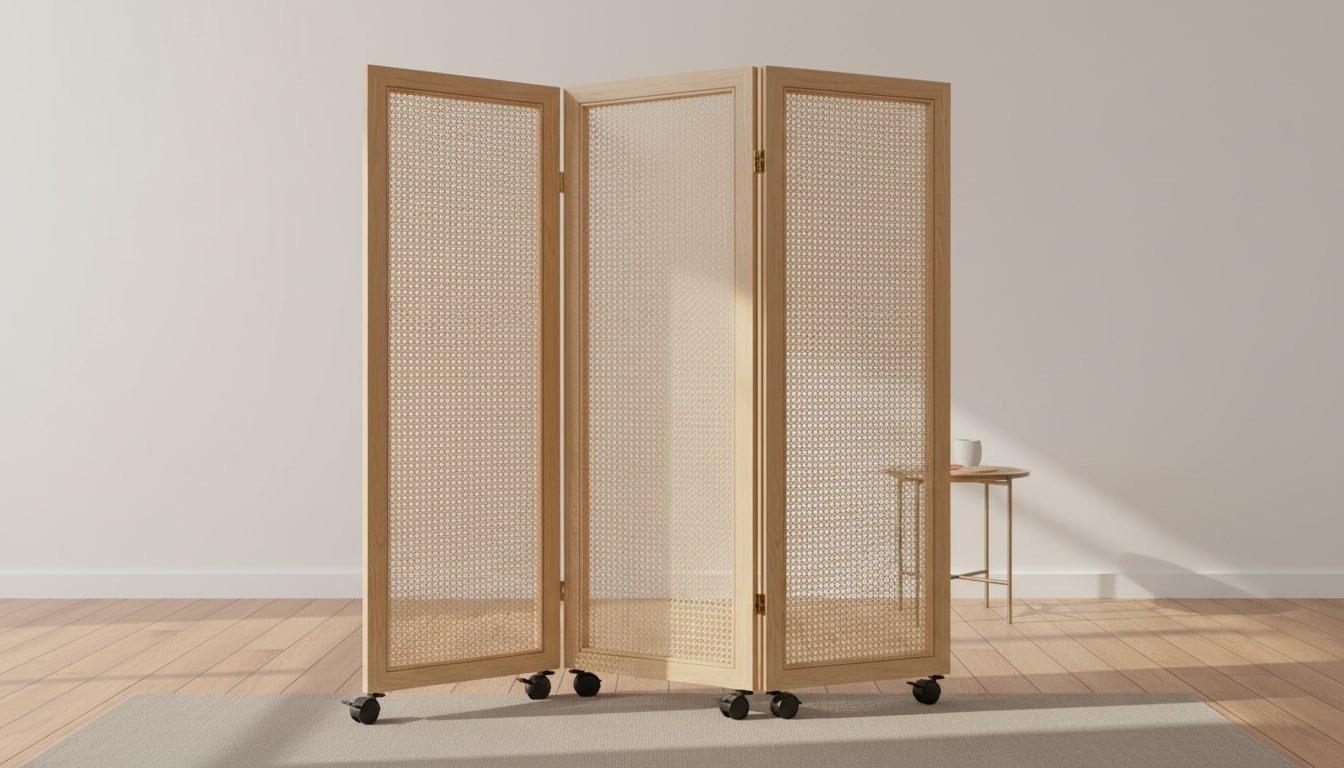
Finish Flaws And Surface Wear
Blotchy stain, lap marks, and drips happen when finishing moves too fast or when surfaces are dusty. Work in thin coats, follow the grain, and lightly sand between coats so the sheen stays even and touchable.
Protect high-touch areas with a durable water-based polyurethane, allow full cure time, and add felt pads before the first placement. Keep cleaners gentle, schedule quick wipe-downs, and save a small jar of mixed-finish for easy repairs.
Conclusion
A diy room divider can become a custom solution that reshapes space and adds calm without construction, and it will feel integrated when you match proportions, textures, and finishes to your room. Choose UV-resistant or moisture-tolerant topcoats where sun or steam are present so the surface stays beautiful through seasons and everyday cleaning. Layer ambient and task lighting around the divider so zones feel defined at night while glare stays controlled during the day.
FAQ: DIY Room Divider Build
- What Height Should A Divider Be Relative To The Ceiling?
- For good airflow and balanced proportions, stop solid dividers 6 to 12 inches below the ceiling, and mount curtain tracks close to the ceiling so panels finish just above the floor for an elegant line. Avoid blocking supply or return vents, and if the divider shifts airflow, leave a small top gap or integrate a decorative grille to maintain circulation. In rooms with detectors or sprinklers, keep clearances per local code and never enclose a device behind a solid panel.
- How Can I Improve Acoustic Privacy Without Making It Heavy?
- Layer soft materials to raise absorption without adding bulk, such as acoustic felt panels with NRC ratings up to 0.7, quilt batting behind fabric, or a thin mass-loaded vinyl sheet hidden inside wood frames. Decouple the divider from hard floors with felt pads and place a dense rug on both sides to cut reflections. Close small side gaps with soft-edge strips and choose textiles over glass or metal so voices feel dampened rather than amplified.
- What Are Renter-Friendly Anchors And Move-Out Tips?
- Use wide feet, tension poles, or ceiling tracks anchored into joists where allowed, and rely on removable tethers only for light screens since heavy units require mechanical fasteners. When removing temporary anchors, warm the adhesive with a hair dryer, peel slowly, fill small holes with lightweight spackle, feather sand once dry, and touch up with matching paint. Take photos of anchor points before drilling so patching is accurate, and confirm your lease rules for fastener size and placement.
- Which Materials Work Best In Humid Or Sun-Exposed Rooms?
- Choose hardwood or exterior-grade plywood with waterproof glue lines and seal every cut edge with primer and a water-based polyurethane so moisture cannot creep in. Skip MDF near baths or kitchens and favor cedar, poplar, or sealed pine for frames. For fabric panels, pick solution-dyed acrylic or outdoor-rated polyester with UV resistance to limit fading. In damp entries, add a slim glide or threshold under curtains so hems do not wick moisture.
- How Do I Add Lighting Or Power Safely To A Divider?
- Use battery puck lights or low-voltage LED strips for simple, cool-running illumination, and route wires in adhesive raceways along frames or the base where they will not snag. Keep cords out of hinge lines, use low-profile cord covers across walkways, and control lamps with a smart plug or foot switch for easy on and off.


