A spoilboard surfacing bit is a wide, flat-bottom cutter with replaceable inserts that skims your CNC’s sacrificial board to restore a true reference plane. That reliability opens projects like flat inlay panels, epoxy river or cutting boards, cabinet carcasses, and repeatable fixture work. In this beginner-friendly guide you’ll learn what matters in diameter and insert patterns, baseline settings for common materials.
Contents
What a Spoilboard Surfacing Bit Does
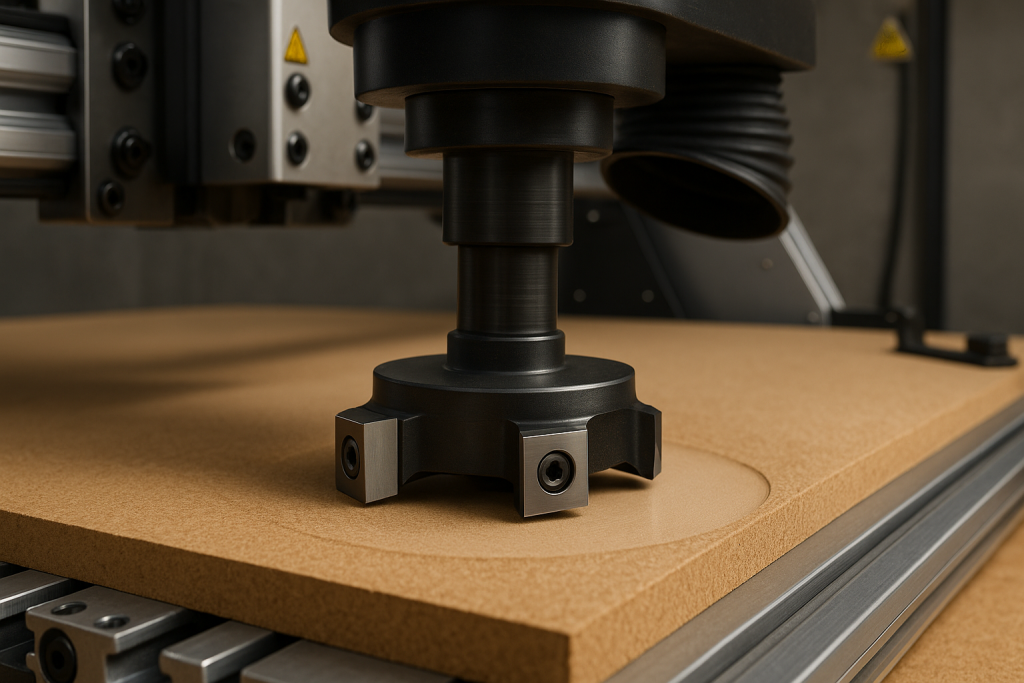
A spoilboard surfacing bit is a wide, flat-bottom router cutter with replaceable inserts. It skims the sacrificial board so the table becomes perfectly coplanar with the machine’s motion. The design favors broad, even cuts that level the surface in a few controlled passes.
This creates a reliable reference plane that drives accuracy in every job. Pockets hit the depth you programmed, inlays sit flush, and panels mill to consistent thickness. The spoilboard surfacing bit restores this baseline whenever dents, wear, or humidity shift your board.
Find Your Spoilboard Surfacing Bit at Tools Today
Tools Today makes picking a spoilboard surfacing bit simple. Explore insert cutters like Amana’s RC-2251, mini options for tight machines, clear specs, and fast shipping so beginners buy confidently online.
Purpose-Built Selection With Clear Specs
You’ll find dedicated spoilboard and surfacing bits with clear diameter, shank, and cutting-height details. The Amana RC-2251 page lists its 2-1/2 inch diameter, 2+2 design, included MDF-grade inserts, and compatible machines. Tools Today organizes group sizes and related CNC tooling, keeping choices simple.
Mini And Full-Size Options To Fit Your Machine
Running a compact CNC or router sled doesn’t lock you out. Mini insert surfacing bits cover small work envelopes, while full-size options like RC-2251 handle faster, wider passes on larger beds. You can match the diameter to your finish goals without guesswork.
Specs That Help You Run Safe
Their listing shows machine compatibility and maximum RPM, which keeps first runs predictable. RC-2251, for example, lists a 19,000 RPM ceiling and support for handheld, table router, CNC, and sled setups. Those details make dialing feeds and speeds less intimidating.
Buy your spoilboard surfacing bit to work on various projects at Tools Today. Choose the diameter that matches your stepover plan, confirm the RPM ceiling, and add spare inserts so you’ll keep cutting without delays. Order now and start surfacing jigs, cutting boards, and cabinet panels with clean, ridge-free results.
CNC Tramming Made Simple
Tramming aligns the router so your cuts sweep flat across the board. Beginners can handle this with patient checks and tiny tweaks. Small adjustments deliver big gains with a spoilboard surfacing bit.
What Tramming Does
Tramming sets the router head square to the table so the tool sweeps evenly across the surface. When the angle is off, one side cuts a touch deeper and leaves faint ridges that catch light. Use a wide circle scribble and a light skim to read the pattern. A spoilboard surfacing bit makes this test easy because its wide face reveals high and low spots without fancy tools.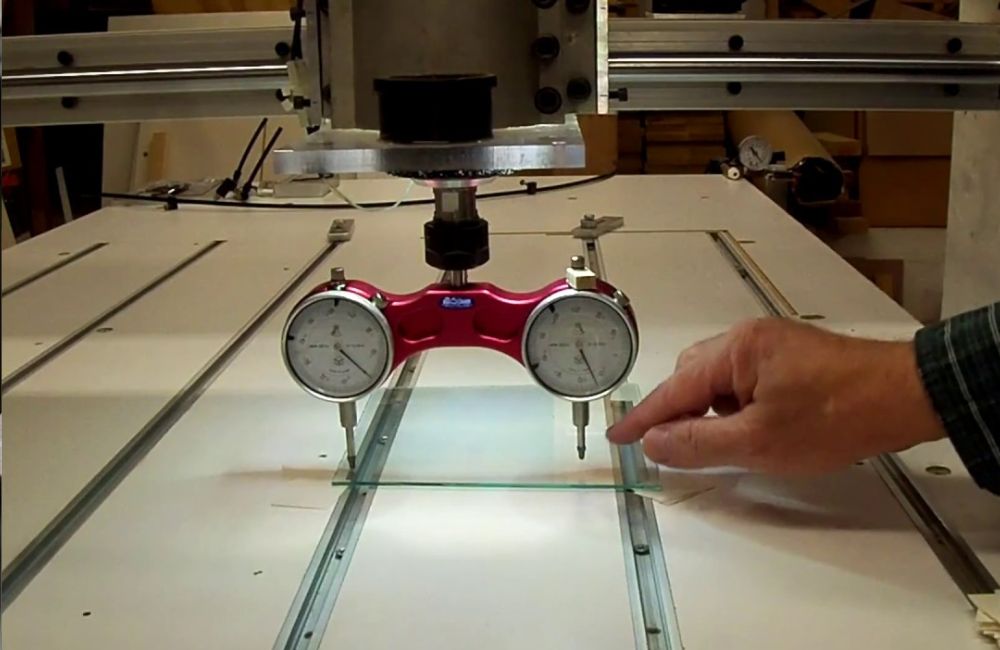
A Quick Check You Can Do
Draw a pencil grid, clamp the board, and skim a very shallow pass. Inspect which squares still show lines and which look clean, since the heavy side points to tilt. Loosen the mount, add a tiny shim, and re-tighten. Run another skim and compare. A spoilboard surfacing bit highlights changes quickly, because each pass covers a wide lane and turns small errors into patterns you can see clearly.
Simple Fixes That Hold
Tighten mounting bolts, keep a note of shim positions, and recheck after moving the machine or finishing a long job. Rotate or replace inserts before they dull, because tired edges can mimic tram issues. Clean dust from holders and clamps so nothing shifts mid-cut. Build a quick pre-flight: check clamps, skim depth, and stop switch, then surface with calm, steady motion.
Cutter Diameter And Stepover For Smooth Finishes
Bit size and lane spacing decide how smooth the surface feels. Bigger cutters leave gentler waves between passes. Stepover controls gap waves span as a spoilboard surfacing bit crosses evenly.
Why Diameter Matters
A larger cutter reduces the tiny waves left between passes, resulting in smoother surfaces that require less sanding afterward. Wider tools also finish faster because fewer lanes cover the board. Match bit size to your machine’s space and power so the motor stays comfortable. A spoilboard surfacing bit with a broader diameter often gives a cleaner look at the same settings and helps beginners get reliable results.
Picking a Starting Stepover
Begin with a stepover near one-quarter to one-third of the cutter’s diameter, then skim and feel the surface. If soft ripples remain, nudge the stepover smaller and try again. Balance time and finish so the machine runs safely while the surface looks even. Your spoilboard surfacing bit rewards small, careful changes with visible gains across the whole board and less sanding later.
Edge Cleanups Around Fixtures
Near clamps, tracks, or fences, leave a narrow border on your first pass so nothing collides with the tool. Remove hardware, then run a careful second skim into the last strip. Keep depth low so you can watch for marks or glue shadows and correct them quickly. This simple routine maintains a uniform surface and protects both the workpiece and the cutter.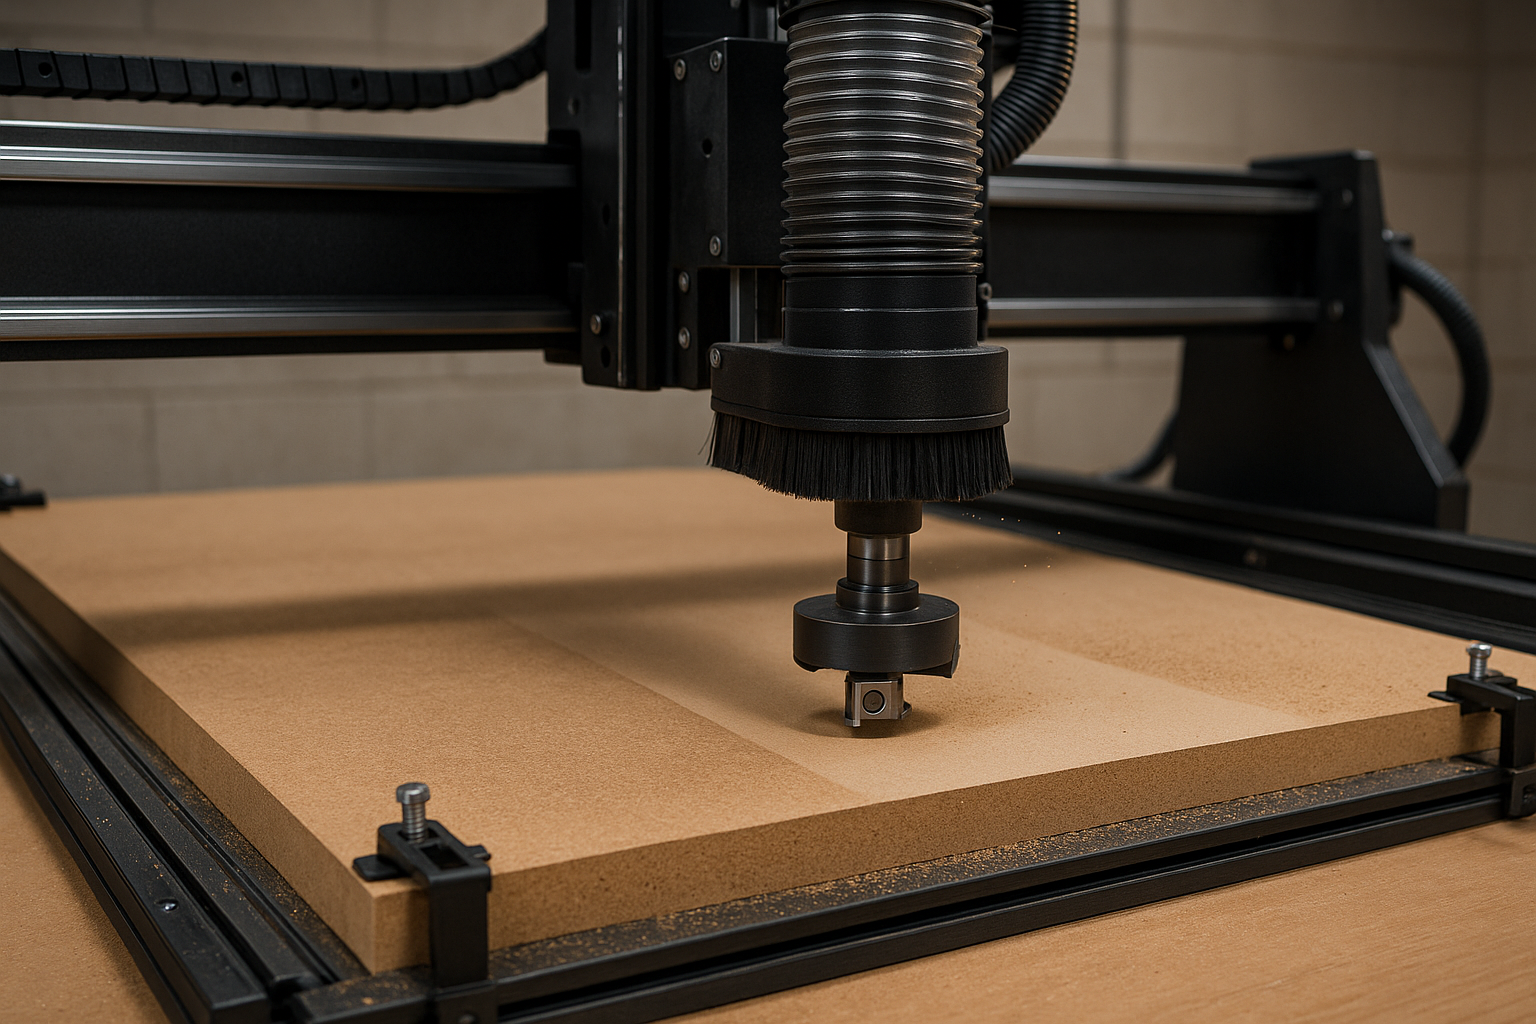
Material Differences You’ll Notice
Materials respond differently during surface flattening. MDF cuts predictably, plywood can print glue lines, and hardwood follows grain. Knowing this guides settings and smooth results with a spoilboard surfacing bit.
MDF
MDF provides predictable cuts and displays setting changes immediately, making it ideal for initial tests and quick reviews. The fibers are abrasive, so rotate or replace inserts on a routine schedule. Keep the suction steady, as fine dust can pack into lanes and create false ridges. A spoilboard surfacing bit handles MDF well and delivers even passes that are easy to check by sight and touch.
Plywood
Plywood contains glue lines and changing grain, so stripes can appear if the head sits a little off or the stepover runs too wide. Tighten the stepover and confirm solid clamping to prevent the board from shifting. If stripes remain, revisit tram and lower depth until patterns fade. Consistent speeds and light passes tame the mix of layers, delivering a smooth, uniform feel.
Solid Wood
Solid wood follows the grain direction, so fuzz or tiny tears can appear on challenging patches. Start with a light skim, watch the surface, and plan a second pass to clean the remaining fibers. Keep the tool sharp and the feed steady so heat stays low and color stays even. Log your best settings by species, since different woods respond in different, repeatable ways.
Acrylic, HDPE, and UHMW
Plastics dislike heat. Lower RPM and use a healthier feed so you’re making chips, not dust. Skim in shallow passes and pause if warmth builds. Keep the vac pulling well so chips don’t smear back onto the path. A spoilboard surfacing bit can true auxiliary plastic boards cleanly once you balance chip size, temperature, and extraction. Test on scrap first to find the sweet spot.
Phenolic and Compact Laminate
Phenolic is dense, abrasive, and easy to chip if the cut rubs. Use a modest RPM and very firm workholding. Keep pass depth mild and insert edges fresh. Good dust collection matters because the fine debris is harsh on tools and uncomfortable to breathe. A careful setup lets the spoilboard surfacing bit leave a consistent, low-sheen finish that’s ready for layout lines and fixtures.
Epoxy Over Wood
Fully cured epoxy machines well, yet it softens when warm. Take light skims, let the surface cool, and tighten stepover near transitions where resin meets wood. Watch for brief color changes that signal heat. A final shallow pass blends the interface so sanding starts at a finer grit. Your spoilboard surfacing bit will leave a flat, glassy plane when you manage temperature and chips.
Aluminum Tooling Plate (Advanced Only)
Some shops level aluminum spoiler plates for precise fixtures. That requires a very rigid machine, conservative depth, and tooling that’s rated for metal. If your manufacturer doesn’t endorse it, skip this material for safety. When it is supported, use gentle skims, abundant chip removal, and stop at the first clean sweep. Don’t assume a spoilboard surfacing bit is approved for aluminum.
Conclusion
A spoilboard surfacing bit gives your CNC machine a flat, dependable starting point for precise work across many builds. Clean, ridge-free decks make inlays, cutting boards, cabinet panels, and jig fixtures fit and finish better. Keep tram checked, stepover sensible, and inserts sharp, and you’ll surface quickly and move straight to assembly.


