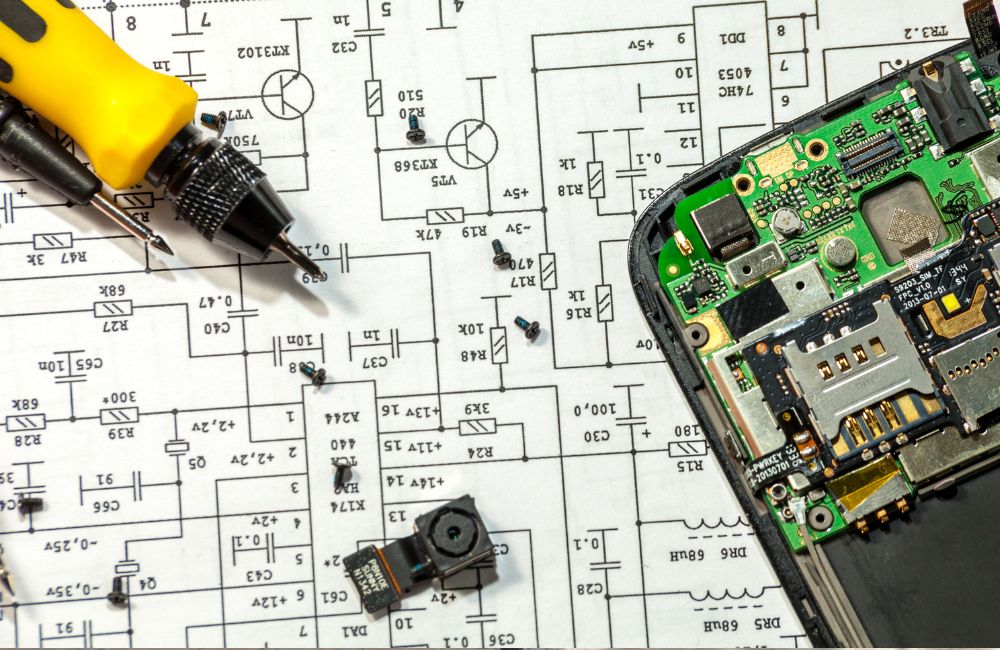
Speaker repair on a portable Bluetooth unit starts when internal joints crack or wires break. Fixing them isn’t as hard as you think. This guide shows you how to spot bad connections, strip the unit, and restore the links with fresh solder. You’ll see the tools, safety steps, and common mistakes first. Soon you’ll have music again with solid sound.
Contents
Safety and Tool Checklist
A soldering iron can revive a silent Bluetooth speaker, but it also brings heat, fumes, and molten metal. Prepare well before any repair. Gather the right tools and safety gear so every joint turns out strong. Follow this checklist to protect your eyes, lungs, and workspace while you work.
- Safety glasses or face shield
- Fume extractor or desk fan for ventilation
- Heat-resistant silicone mat to catch solder drips
- ESD wrist strap to prevent static damage
- Adjustable 15–30 W fine-tip soldering iron
- Lead-free rosin-core solder, 0.6 mm diameter
- Desoldering braid and squeeze-bulb pump
- Precision screwdrivers and plastic pry tools
- Needle-nose tweezers for small wires
- Digital multimeter for continuity tests
- Isopropyl alcohol and cotton swabs for pad cleaning
- Heat-shrink tubing or electrical tape for insulation

Common Bluetooth Speaker Fail Points
Every portable speaker has stress points hidden inside. Knowing them helps you trace faults fast.
Battery Leads Work Loose
Battery wires flex every time you drop the unit or toss it in a bag. Solder joints on the battery board can crack and break contact. The speaker then powers off as soon as you jiggle it. Look for dull, grainy solder around the red and black leads.
Tug each wire gently. If it moves, desolder, clean the pad, tin the wire, and resolder with fresh alloy. Add a dab of hot-glue near the joint so vibration can’t stress the copper again. A secure battery lead restores consistent voltage and prevents sudden shutdowns.
Driver Terminals Crack
The little metal tabs on the speaker driver carry both current and vibration. Constant cone movement can fatigue their solder until it fractures. You’ll hear intermittent sound or one channel may vanish.
Remove the driver and inspect the tabs with a magnifier. If the solder ring isn’t shiny and continuous, wick off the old metal. Re-flow with lead-free rosin-core solder and a fine tip. Keep the iron under five seconds to avoid melting the voice-coil former. A proper joint brings the driver back to full output without distortion.
Charging Port Pads Lift
USB-C and micro-USB connectors feel solid, yet leverage from the plug pries on tiny pads. Aggressive yanks lift the copper off the board. The speaker stops taking a charge and may not turn on at all.
Open the case and check for missing pads or cracked fillets at the connector’s rear posts. If the pads are still there, reinforce them with more solder and anchor the shell to nearby ground with thin copper wire. For missing pads, bypass with insulated jumpers from connector pins to test points farther inside. Finish by adding epoxy around the port to spread stress.
Amplifier IC Joints Overheat
A compact class-D amplifier chip pumps dozens of watts in a matchbox space. Heat cycles loosen its QFN or gull-wing leads. Symptoms include random shutdowns, hiss, or clipping at low volume. Use freeze spray or light board flex to reproduce the fault.
When you find the bad leg, apply flux, press the lead down, and reflow. If several joints look dull, drag-solder a thin bead across the whole row, then wick away excess. A stable power device lets the speaker reach rated volume without thermal cut-outs.
Micro-Switch Buttons Wear
Play, plus, and minus keys ride on tiny dome switches soldered to the control board. Repeated presses dent the domes and stress their pads. Buttons become unresponsive or stick in the down state, draining the battery.
Desolder the switch with braid, clean the site, and fit a matched part of the same height. While you’re there, add a rubber pad under the outer button cap to soften each press. New switches restore reliable control and stop ghost volume changes.
Antenna Wire Snaps
Bluetooth range drops when the antenna trace breaks. Many speakers use a thin coax or flat tab glued to the shell. Impacts or careless opening can snap it. Look for a loose gray or copper ribbon near the edge.
Strip one millimeter of shield, tin both ends, and renew the link with a short piece of tinned wire rated for RF. Route it away from metal screws. A solid antenna joint brings back full pairing range and cuts audio dropouts.

Moisture Eats PCB Traces
Poolside tunes invite splash damage. Water sneaks through seams, pools on the board, and corrodes fine copper tracks. You’ll see green fuzz, black pits, or swollen solder mask. Scrub the area with 90-percent isopropyl alcohol and a nylon brush.
Dry thoroughly, then bridge eaten traces with enamel-coated wire. Seal the repair with conformal coating and inspect the gasket that failed. Keeping water out preserves every other fix and extends the speaker’s lifespan.
These common fail points account for most dead Bluetooth speakers on a workbench. Check each one methodically and your soldering iron will have an easy target.
If you are new to soldering or need visual pointers to do speaker repair work, consider taking one of many Udemy’s soldering classes.
Opening the Enclosure Without Damage
Tiny tabs and hidden screws keep your speaker sealed, so forcing it open risks cracked plastic and stripped threads. Slow, deliberate steps let you expose the board without leaving pry scars. Follow these pointers to lift the shell cleanly and keep it watertight when you close it again.
- Inspect seams for rubber plugs or cosmetic stickers hiding screws
- Photograph each side before starting so you recall screw locations
- Use a precision Phillips bit that matches screw heads exactly
- Apply gentle heat from a hair dryer to soften waterproof gaskets
- Slip a thin plastic spudger, never metal, into the widest gap first
- Work around the perimeter in small increments instead of one big pry
- Release ribbon cables and battery connectors before pulling boards free
- Label screw sizes on masking tape to avoid mixing lengths at reassembly
- Keep magnets clear of loose drivers to prevent sudden attraction and damage
- Store removed parts in a divided tray so nothing rolls off the bench
Testing Before Reassembly
Your board looks healthy, but appearance can deceive. Run structured checks while everything is exposed to avoid reopening the shell later. These steps confirm power, audio, and wireless performance in real time.
Visual Checks Under Bright Light
Start with your eyes. Scan every joint with a loupe or phone macro. Look for dull solder, stray wire strands, or flux bridges between pads. Wiggle wires while watching the joint. A shiny fillet that stays still under light tugging is solid.
Verify heat-shrink covers exposed copper. Inspect capacitors for bulges and the battery for swelling. Confirm the antenna ribbon sits clear of screw bosses. Clean any residue with isopropyl alcohol so nothing hides corrosion.
Continuity and Resistance with a Multimeter
Set the meter to continuity mode. Probe every repaired trace end-to-end. Each beep proves a sound path. Check battery positive to the amplifier Vcc pin, ground to driver frames, and each USB pin to its test point.
Switch to resistance and confirm the speaker coil shows the published value, often four or eight ohms. Read charger input resistance; an open circuit here means a missing pad. A quick meter session eliminates silent breaks that a power test might miss.
Power-On and Basic Function
Reconnect the battery or bench supply. Press the power key. The status LED should light within two seconds. Pair the speaker with a phone at low volume. Play white noise and sweep the volume.
Listen for static or dropouts. Shake the board gently; sound should remain stable. Tap each switch. Button presses must register without double clicks. If the unit shuts off, probe voltage rails for a sagging cell or a loose fuse trace.
Stress Test for Audio and Wireless
Run music at 75 percent volume for ten minutes. Heat builds and reveals marginal joints. Feel the amplifier IC; it should be warm, not scorching. Move the phone five meters away with walls in between.
The stream should stay smooth. Rotate the board to check the antenna link. Finally, cycle full volume for a quick burst. No distortion means the driver tabs and battery leads are holding. Pass these tests and you can close the shell with confidence.
Rebuilding and Sealing the Case
A clean, tight enclosure keeps water, dust, and vibration out. Take your time re-seating parts so the speaker survives daily knocks and poolside splashes.
Cleaning Gaskets and Mating Surfaces
Wipe rubber gaskets with alcohol to remove old adhesive. Inspect for nicks that break the seal. Apply a thin bead of silicone grease to revive compression. Brush debris off screw posts and plastic lips. Any dirt trapped here compromises IP ratings. Dry parts fully before reassembly so moisture does not fester inside.
Aligning Boards and Drivers
Place the main board on its standoffs without forcing it. Pins must slip into sockets straight. Route battery and antenna wires through original channels to avoid pinches. Drop the driver into its recess and rotate until mounting holes align. Tighten screws in a star pattern. Even pressure prevents frame warps that buzz during bass hits.

Applying Adhesives and Thread Lock
Use blue thread-locker on metal screws that bite into brass inserts. It stops vibration creep yet allows future servicing. Add a dot of flexible epoxy around the USB connector shell to spread plug stress. Never flood the joint; a small fillet is enough. Press fresh double-sided tape under the battery to prevent rattle. Seat foam pads back over tactile switches to keep them dust free.
Final Exterior Inspection and Water Resistance Test
Snap the halves together slowly, watching the gasket compress evenly. Insert screws until snug, not torqued like wood bolts. After the last screw, run a fingernail along the seam. It should feel continuous with no gaps.
Power up and pair again. Play music while gently squeezing the case; no crackle means wires are clear. Finish with a light mist of water on all sides. Dry, open sound confirms the seal and your speaker repair is complete.
Conclusion
Proper soldering turns a silent Bluetooth speaker back into a reliable companion. Clean pads, fresh alloy, and steady heat make repairs last. Taking photos, labeling screws, and sealing gaskets guard against new faults. Each successful fix saves money and keeps electronics out of landfills. Keep practicing and every future speaker repair will feel easier and faster.A great place for speaker repair or other electronic fixes is in a well designed garage. Learn how to create a functional workshop in your garage with our guide!