
Rustic charm never goes out of style. Faux wood beams let you add it without straining the budget. They weigh much less than true timber, so DIYers can tackle installation safely. Simple tools and straightforward joinery make the project approachable even for beginners. Follow this guide to transform a flat ceiling into a cozy, high-end feature.
Contents
- 1 Transform Your Ceiling: DIY Faux Wood Beams Made Easy
- 1.1 Planning Your Beam Layout for Balance and Scale
- 1.2 Choosing Materials: Solid Lumber, MDF, or Foam Alternatives
- 1.3 Cutting and Constructing Hollow U-Shaped Beams
- 1.4 Finishing Techniques for Realistic Grain and Color
- 1.5 Locating Ceiling Joists and Installing Furring Strips
- 1.6 Securing Beams Safely: Screws, Adhesive, and Hidden Brackets
- 1.7 Concealing Wires and Lighting Inside the Beams
- 2 Conclusion
Transform Your Ceiling: DIY Faux Wood Beams Made Easy
Faux wood beams let you bring warm farmhouse character to a plain ceiling without hiring a carpenter. They use hollow box construction or lightweight foam, so weight stays low and install time stays short. You can build them from pine, MDF, or polyurethane kits and finish the surface to match reclaimed timber.
Start by mapping beam locations on paper and taping outlines on the ceiling. Rip three boards to the desired width, cut forty-five degree miters, then glue and pocket-screw them into a U-shaped shell. Add internal blocks for stiffness. Sand corners smooth, wire-brush the grain, and apply layered stains for a weathered look.
Once the finish dries, screw simple furring strips to the joists and slip each beam over the strips. Hidden fasteners lock everything in place, creating the illusion of structural timber with minimal effort. The result boosts visual warmth, hides wiring if needed, and adds resale appeal for a fraction of a real beam budget.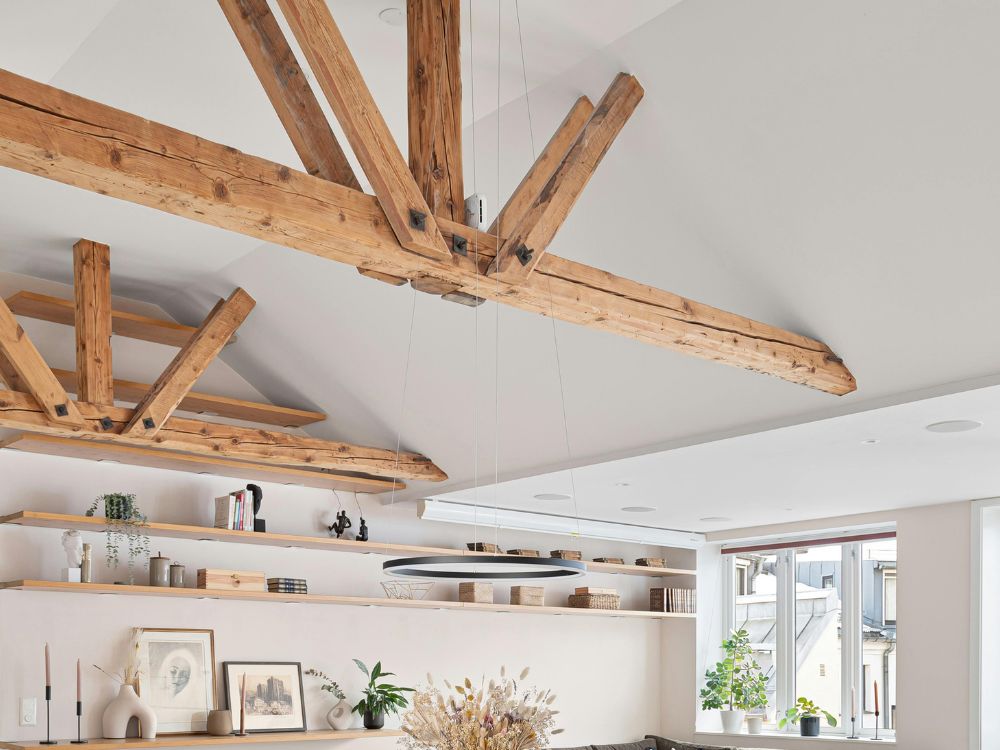
Planning Your Beam Layout for Balance and Scale
Perfect placement starts with a clear plan. Sketch the room and beam pattern first, because balanced lines decide whether your faux wood beams look custom made or afterthought.
Assessing Room Proportions
Measure ceiling height, width, and any alcoves in one shot, then mark them on graph paper. Tall ceilings welcome wider beams because generous depth fills vertical voids without feeling heavy. Compact rooms thrive on slimmer profiles.
Maintain at least the code-required 7 feet of clear headroom or 8 feet or more simply feels roomier. Stand in each corner and eyeball sightlines. Symmetry pleases the eye, yet slight offsets can frame fireplaces or kitchen islands in an appealing way.
Mapping Joist Locations
Locate every joist with a reliable stud finder, then mark lines in chalk across the drywall. Beams must anchor into solid framing for safety. Align decorative beams parallel or perpendicular to real joists to simplify installation and keep screw lengths short.
Joist spacing also signals where seams should land if you splice two beam sections. Following this hidden skeleton avoids random fasteners and future sag.
Creating a Visual Mock-Up
Use painter’s tape to outline the beam pattern on the ceiling before cutting any wood. Step back and photograph the room, because still images reveal balance issues your eyes may miss.
Tape lets you adjust spacing with zero cost, and it aids in deciding whether to include a center spine beam for a coffered look. After tweaks, record final measurements so every cut fits the mock-up exactly.
Choosing Materials: Solid Lumber, MDF, or Foam Alternatives
Material choice shapes weight, budget, and realism. Many DIYers default to pine, yet lightweight MDF and high-density polyurethane can mimic grain convincingly and install faster.
Solid Lumber Pros and Cons
Real wood gives authentic heft, genuine grain, and the option to distress for a farmhouse vibe. Pine and poplar are affordable, but they still weigh more than hollow forms. Extra mass means stronger anchors and sometimes added labor overhead.
Moisture changes can twist boards too, so acclimate lumber indoors for two days. Solid timber shines in small rooms where fewer beams are needed and weight stays manageable.
Engineered MDF Panels
Medium-density fiberboard arrives straight and knot-free, making joints tight and predictable. MDF cuts clean, accepts primer easily, and leaves zero splinters. Because sheets are uniform, seams almost disappear once caulked and painted.
The downsides include higher dust levels during cutting and the vulnerability to water leaks. Seal exposed edges with sanding sealer or shellac. MDF suits painted faux wood beams, modern spaces, and budgets that need stable pricing.
Lightweight Foam or Polyurethane Kits
High-density foam beams feel like real cedar after factory-applied grain stamps and tinted finishes. Individual sections often weigh under ten pounds, which means a single person can lift and mount them.
Kits arrive with interlocking ends and hidden brackets, trimming build time sharply. Cost per foot may rise over basic pine, yet labor savings often balance the equation. Foam resists warping and insects, making it ideal in humid regions or vaulted ceilings with long spans.
Cutting and Constructing Hollow U-Shaped Beams
Hollow beams mimic old timber while staying light. Building a U-shaped shell from three planks saves money because you mill stock from standard boards, not hefty slabs.
Measuring and Ripping Boards
Calculate interior width by subtracting one inch from desired visible beam width, allowing room for furring strips. Rip side boards on a table saw with locked fence and push sticks ready.
Match grain orientation on both sides so stains blend evenly later. Label each piece top, side, or bottom to keep edges square during assembly. Accurate ripping reduces gaps and limits filler work.
Joining Corners Invisibly
Bevel side edges at forty-five degrees to create mitered corners that hide end grain. Dry fit all three boards, then run a thin bead of construction adhesive along the miters.
Clamp the joint with band clamps or painter’s tape, placing pocket screws every twelve inches for mechanical strength. Countersink screw heads slightly so wood filler covers them without sanding dents. This technique yields crisp, continuous grain around each corner that fools most eyes.
Reinforcing Long Sections
Spans over eight feet need hidden blocking. Glue and screw scrap two-by-two cleats inside the beam every two to three feet so the shell stays square when handled. For lengths over twelve feet, plan to splice two beam halves at a joist line.
Angle cut the splice edges and glue them around a central support block. Once stained, the joint disappears behind natural color variations, preserving the illusion of a single log.
Finishing Techniques for Realistic Grain and Color
Surface treatment brings faux wood beams to life. Choose a style that matches household trim, then layer texture and color until boards resemble seasoned timber.
Wire-Brushing for Texture
Drag a stiff wire brush along the grain to carve out soft springwood. Work in long strokes with steady pressure, then vacuum dust. The process raises ridges that catch stain darker than harder latewood bands.
Texture adds shadows under overhead light, giving beams depth and age without heavy distressing. Practice on a scrap first to gauge pressure and pattern.
Layered Stain Application
Begin with a light wash of gray or weathered oak stain to set an aged undertone. Wipe back quickly so color stays subtle. After an hour, dry brush a mid-tone brown across high spots, letting grooves retain the gray.
Finish with a diluted dark walnut glaze in knot areas for natural variation. Each coat dries completely before the next, preventing muddiness and ensuring sharp contrast that mimics old barn beams.
Sealing and Sheen Control
Protect the finish with a matte water-based polyurethane. Matte sheen keeps glare low and highlights shadowed grain lines. Apply two thin coats with a high-quality synthetic brush, following board length to avoid lap marks.
Sand lightly between coats using a fine sanding sponge, then vacuum dust. Final sealer locks color, repels kitchen humidity, and makes cleaning easy with a damp cloth.
Faux wood beams repeat the charm of reclaimed lumber without structural hassle. Careful planning, smart material selection, precise construction, and authentic finishing turn simple boards into architectural stars.
Locating Ceiling Joists and Installing Furring Strips
Find solid framing first, or beams will sag and separate over time. Mark each joist clearly, then add furring strips that keep faux wood beams straight and secure.
- Slide a stud finder slowly across the ceiling and mark every joist centerline with painter’s tape.
- Confirm each mark by driving a small brad nail; it should bite into solid wood, not drywall void.
- Snap a chalk line along joist centers to create a continuous reference path.
- Cut 1×3 furring strips the full length of each planned beam span.
- Pre-drill the strips, then screw them into joists with 3-inch structural screws spaced every 16 inches.
- Use a long level to check that each strip sits flat; shim low spots with plywood slivers.
- Leave a ⅛-inch gap where strips meet walls so wood can expand without bowing the beam shell.
Securing Beams Safely: Screws, Adhesive, and Hidden Brackets
Fasteners must hold weight while staying invisible. Combine mechanical anchors and construction adhesive to lock beams tight and keep seams flawless.
- Run a continuous bead of polyurethane construction adhesive along the top edges of each furring strip.
- Lift the hollow beam over the strip and press until adhesive beds fully.
- Drive 2-inch trim screws upward through the beam sides into the strip, angling them so heads sink just below the surface.
- Countersink screw heads and fill with wood filler that matches the stain.
- For spans over 10 feet, add L-shaped steel brackets inside the beam ends and lag them into joists.
- Where two beam sections meet, splice over a joist and secure both halves with pocket screws into a shared support block.
- Avoid nails; they loosen with ceiling vibration and seasonal movement.
Concealing Wires and Lighting Inside the Beams
Faux wood beams double as hidden raceways. Route low-voltage cables or LED strips inside to create accent lighting without exposed conduits.
- Drill a ¾-inch hole through the furring strip at the wire entry point before installing the beam.
- Staple low-voltage cable neatly along the strip, keeping it centered to avoid screw damage.
- Cut a shallow groove inside the beam top to house the cable so it lays flat.
- Mount LED strip lights or puck fixtures inside the groove, aiming light toward the ceiling for a soft wash.
- Feed wires through hidden holes at beam ends, then inside walls to the transformer or switch.
- Use plastic grommets where wires pass through wood to prevent abrasion.
- Keep all connections accessible by leaving a removable end cap on one beam for future servicing.
Conclusion
Faux wood beams transform flat ceilings into architectural highlights fast. Accurate joist mapping and sturdy furring strips stop future sag. Screws, adhesive, and hidden brackets keep every beam tight and seamless. Built-in cavities make wiring simple and clutter-free. Follow these steps and enjoy a ceiling upgrade that looks timeless, feels solid, and costs far less than real timber.
We have more ways to improving your ceilings. Check out our tray ceiling ideas next!


