Last Updated on April 9, 2025 by Team Ideas24
So there I am, driving down the highway when WHACK, a passing truck throws a rock into my windshield. Judging by the noise, it had to be a brick! But the reality is that it was probably little more than a pebble.
The truck is doing 100kph (assuming it’s obeying the road rules) and I was doing the same (yes, obeying the rules). Combined speed equals 200kph. Windscreens aren’t designed to collect even pebbles at that speed.
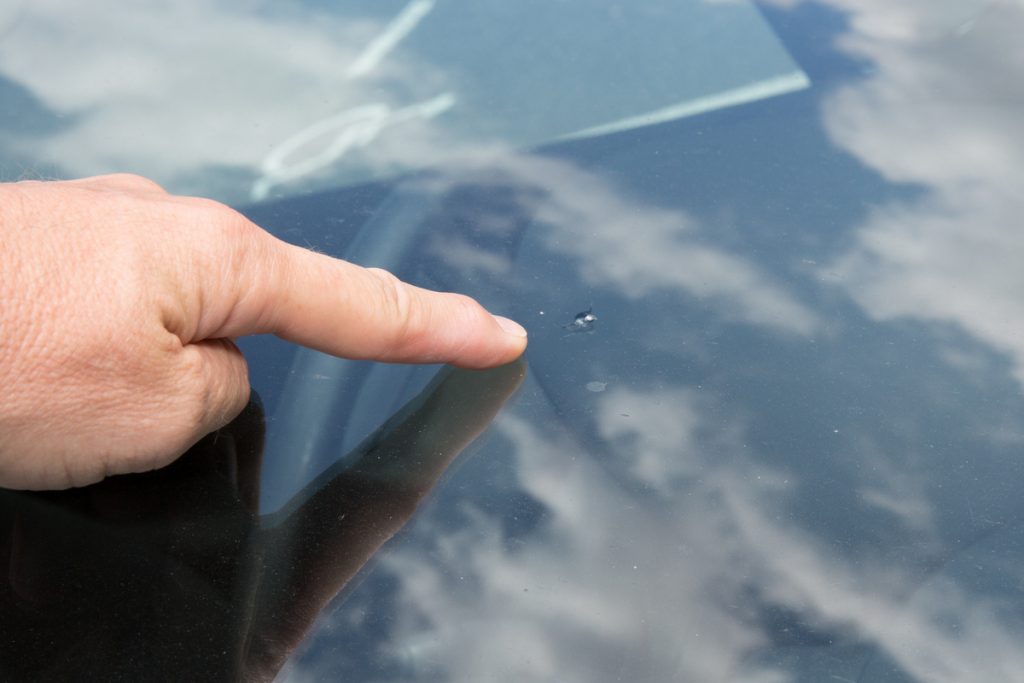
It takes me about one second to see where the brick sized pebble hit. The chip and radiating star is very obvious. Worse, it’s just below my normal eye level.
Now it’s a race to see if I can get it patched before that star becomes a nebula and then a galaxy!
I should mention that this car has a massive windshield. It’s a big ‘people-mover’ with a deeply sloping windshield that tries hard to overpower the air-conditioning for eight months of the year.
I have no idea how much a replacement windshield is and I don’t want to find out. My insurance excess is $750 so there’s no point trying to claim on that. This is also the second chip in it. And both are on the driver’s side 🙁
Here in Australia, that means I will have to replace the windshield before I can sell the vehicle. But I’m in no hurry to sell so I need to save the windshield I already own!
According to John Wilson, Auto Glass General Manager of the Royal Automobile Club of Queensland (RACQ) , most windscreen chips and other damage occur during summer due to the storm season and more people travelling on the road during the summer school holidays.
“It is difficult to prevent a windscreen chip as these can occur anywhere,” Mr Wilson said.
“It can be dangerous to drive with a chipped or cracked windscreen because it can impair your vision and the integrity of the windscreen, which is the barrier between you and the outside world, if affected.
“Attending to a chip repair quickly can save your chip from turning in to a crack which will require your windscreen to be replaced.”
Contents
Advice to Protect Your Windscreen
He offers five tips for preventing major damage to your windscreen.
Keeping a safe distance isn’t just about reaction times
Observing a proper distance behind other cars can help drivers to avoid rocks and objects which are flung into the air by tyres.
Sooner rather than later is always better
Once you notice a chip on your windscreen it’s best to get it repaired as soon as possible. The longer the chip is left, the more chance of it cracking.
Protect the chip as soon as possible
Placing clear sticky tape, or a ‘saver patch’, over the chip on the outside of your windscreen can help keep dirt, debris and water out of the damaged area. This will help improve the quality of the chip repair as the less exposed the chip is to dirt and debris, the better the cosmetic improvement of the repair. This is only temporary until repair work is done; and remember, only use a saver patch if it’s not in your line of vision.
Chip repairs can actually help you save
On average, a chip repair is a quarter of the price of a windscreen replacement. The cost of a windscreen repair can be as little as $60, depending on the size and location of the damage.
Get windscreen chips and cracks repaired as soon as possible
Windscreen repairs are permanent and restore 100% of the strength to your windscreen. However, be aware that chip repairs are not completely invisible. You will still see a small mark where the repair has been done.
DIY windshield repairs?
Definitely! In my case, I do a lot of ‘country miles’. Even though chips can occur anywhere, the speeds attained on open roads place you at much greater risk. That means that I am sure to get another chip or two before I sell this vehicle. And given that I will need to eventually replace the windshield anyway, I’m very happy to save money via the DIY option.
The DIY Windhield Repair Kit Solution
A DIY windshield repair kit can be bought for less than $10 and will do multiple chips. A windshield repair kit is a compact, all-in-one solution designed to fix small chips, star breaks, and short cracks in your windshield. Most kits include a specialized resin, an applicator or injector, curing strips, and a razor blade for smoothing the surface after the resin sets. The resin fills the damaged area, bonding with the glass to restore strength and prevent the crack from spreading. While it won’t make the damage invisible, it significantly improves clarity and reinforces the glass. These kits are ideal for car owners who want a quick, affordable fix without visiting an auto shop.
That sounds like a deal to me. What about you?
Best Conditions for DIY Repairs
Using a windshield repair kit can be a smart way to fix chips and cracks without spending a fortune. But timing and environment matter more than most people think. If the conditions aren’t right, the resin won’t bond properly, and the repair won’t hold. That could turn a small chip into a full crack across your field of vision.
Temperature plays a huge role in the success of your DIY repair. The ideal range is between 15°C and 30°C (60°F to 85°F). If it’s too cold, the resin becomes too thick to flow into the chip. Too hot, and it might cure too quickly or unevenly. If you’re working in direct sunlight, the heat on the glass can cause the resin to harden before it settles fully into the damage. Shade or an indoor garage is your best bet.
Cleanliness is just as important. Dirt, moisture, and debris inside the chip can stop the resin from bonding. Before using your windshield repair kit, make sure the glass is dry and spotless. Avoid doing repairs right after a rainstorm or during humid weather. A hairdryer can help remove any hidden moisture if you’re unsure.
Try to repair the damage as soon as possible. The longer you wait, the more likely dust or water will contaminate the chip. And if the crack starts to spread, a windshield repair kit may no longer be effective. Acting quickly increases your chances of a solid fix that will hold up over time.
Don’t forget that a calm, wind-free day helps too. Strong air currents can blow dust onto your windshield while you’re working. Even a small speck of dirt can weaken the final result. Give yourself enough time, a steady surface, and the right temperature, and your windshield repair kit can work exactly as promised.
When a Repair Kit Won’t Cut It
A windshield repair kit can handle small chips and minor star cracks, but it’s not a one-size-fits-all solution. Some damage is simply too severe or poorly placed for a DIY fix to hold up. Knowing when to put the kit down and call a professional can save you money and keep you safe.
If the crack is longer than a few inches, that’s already a red flag. Most kits are only designed to repair damage about the size of a coin. Long cracks tend to spread quickly, especially with changes in temperature or while driving over rough roads. Once that happens, a windshield repair kit won’t be able to restore the structural strength your windshield needs.
Location matters too. If the chip or crack is near the edge of the windshield, it’s more likely to grow. Edge damage weakens the entire structure of the glass. It also puts more stress on the frame and seal, which a kit can’t fix. You’ll run the risk of the crack spreading no matter how carefully you apply the resin.
Another deal-breaker is depth. Windshields are made of two layers of glass with a plastic laminate in between. If the chip has gone through more than just the outer layer, a repair kit can’t reach the deeper damage. That kind of crack often distorts visibility and can affect the performance of airbags, which rely on the windshield for support during deployment.
Finally, if the damage sits directly in the driver’s line of sight, even a successful repair might still leave a small blur or mark. That can be distracting and potentially dangerous. In cases like these, replacing the glass is the safer option.
A windshield repair kit is great for what it’s meant to do—fixing small, shallow chips in good conditions. But once cracks grow too large, go too deep, or show up in sensitive areas, it’s best to leave it to the pros.
Safety Considerations When Using a Kit
A windshield repair kit offers an affordable and effective way to fix minor chips and cracks. But just because it’s a do-it-yourself solution doesn’t mean safety should take a back seat. Improper use or neglecting simple precautions can lead to poor results—or worse, compromised visibility and structural integrity. If you’re planning to do the repair yourself, there are a few important things to keep in mind before getting started.
Avoid Repairs in the Driver’s Line of Sight
If the damage is in your direct field of vision, using a windshield repair kit may not be the best idea. Even after a successful repair, a small distortion often remains where the resin filled the chip. That can interfere with your view of the road. In some lighting conditions, especially at night or in glare, this can become distracting or even dangerous. For chips in this area, professional help is the safer call.
Be Cautious with Pressure and Force
Windshields handle more stress than most people realize. They’re built to support the roof and resist outside impact. When you apply a repair kit, you’re introducing pressure into an already stressed surface. If you press too hard while injecting resin or using the applicator, the chip can spread into a larger crack. Follow the instructions in your kit carefully. If the damage starts to grow mid-repair, stop right away. That’s a sign the damage is too advanced for a DIY fix.
Choose a Safe and Stable Work Area
Repairs should never be done while the vehicle is running or parked on an incline. Make sure your car is parked on a flat surface, away from traffic or strong wind. A calm, shaded garage is ideal. If you’re outdoors, avoid working under trees or in dusty areas. Any vibration or movement during the process could throw off your repair. Also, secure all loose tools and make sure nothing will roll off onto your windshield during application.
Handle the Resin with Care
The resin in a windshield repair kit is a chemical compound. It’s not toxic in small amounts, but direct contact with skin or eyes should still be avoided. Always wear gloves while working. If the resin gets on your hands, wash it off right away. Avoid breathing in fumes and keep the kit away from children and pets. Once you’re done, make sure to dispose of any leftover resin or applicators according to the instructions provided.
Watch the Weather and Temperature
Temperature can affect how the resin flows and cures. If it’s too cold, the resin thickens and may not fill the crack. Too hot, and it may harden too quickly. Don’t work in direct sunlight, especially on hot days. Sudden expansion or contraction of the glass could turn a chip into a full crack. Aim for mild, stable temperatures and give the resin enough time to cure in shade or indirect light.
Know the Limits of DIY Repairs
A windshield repair kit is only meant for minor chips and short cracks. If the crack reaches the inner layer of the glass or runs along the edge of the windshield, the damage may compromise the structural integrity of your vehicle. In that case, even a well-done DIY repair isn’t enough. Full replacement becomes a safety necessity. Don’t rely on a kit for serious damage. If in doubt, talk to a professional.
Using a windshield repair kit is safe when done under the right conditions. Respect the process, follow the directions, and prioritize your safety and visibility. Fixing a chip on your own can be rewarding, but it should never come at the cost of your security on the road.
Conclusion
A windshield repair kit is a practical and budget-friendly tool for fixing small chips and cracks. It can extend the life of your windshield and prevent costly replacements. When used correctly and at the right time, it’s a reliable solution for minor damage. It was definitely a life saver when that pebble hit my windshield.
For more DIY projects for your cars, check out our backseat car organiser project next!


