
Last Updated on June 17, 2025 by Team Ideas24
As land development has increased, bird populations have decreased. As many as 100 bird species are now considered endangered or threatened, according to experts. You can help support wild bird populations by creating an attractive habitat for them in your backyard.
Birdhouses are not just ornaments; they actually serve a real purpose. These serve as temporary places where birds can rest while some even build their nests in them. Imagine how beautiful it would be to wake up to them singing and chirping every morning.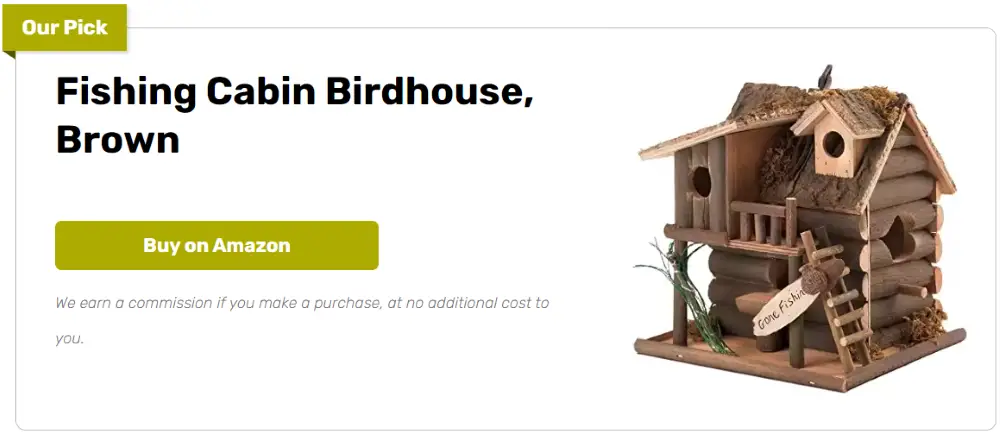
There’s never a bad time to put up birdhouses. You don’t have to worry about putting them up only during nesting season. Birds go around ‘house-hunting’ to investigate their possible homes. Who knows, they may just choose yours.
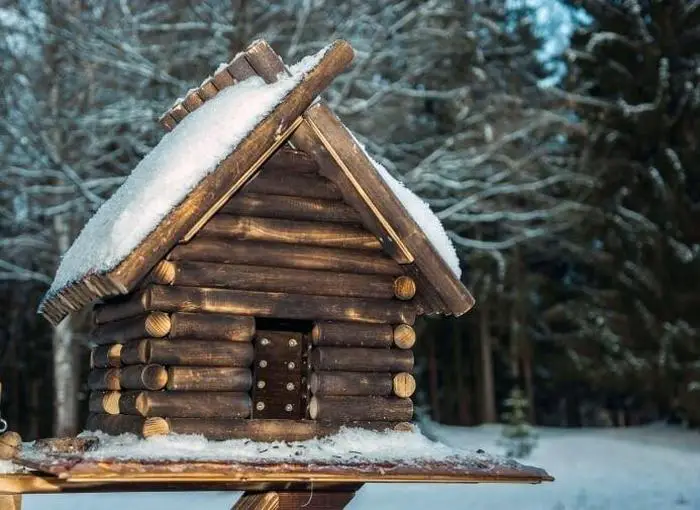
If you have pieces of wood lying around in your backyard, why not create birdhouses out of them? Like this log cabin birdhouse. It would be a fun activity for the whole family. You can have the kids help you gather pieces of wood. Brainstorm how you would like the house to look. Pick an appropriate spot and be creative with the design and color.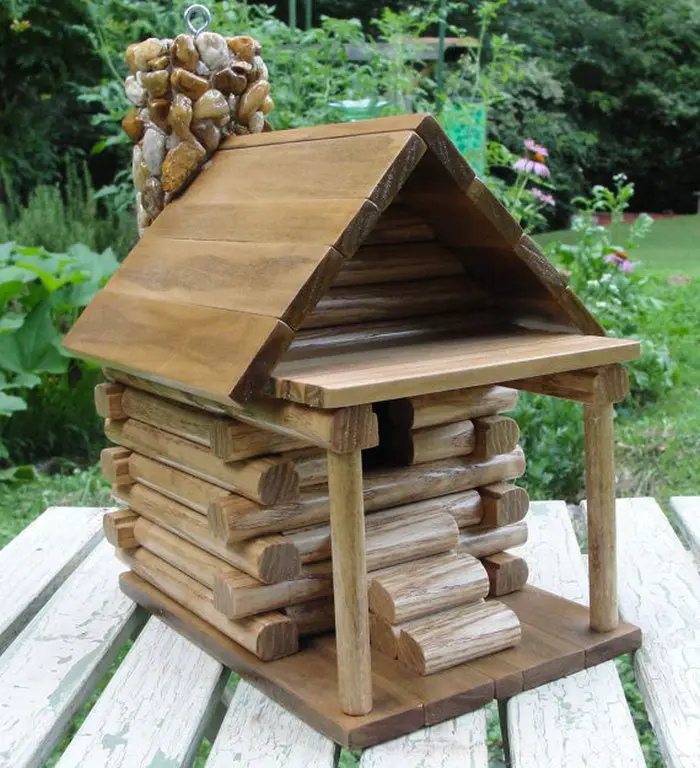
Contents
Materials and tools needed to make a log cabin birdhouse…
Materials:
- Sticks
- Chicken wire
- Glue
- Grass sod
- Panel pins
- Polythene
- Staples
- Several pieces of pallet wood
Tools:
- Hammer
- Hand saw
- Hatchet
- Tenon saw
- Utility knife and blades
Steps:
- Step 1: Gather materials and tools. Use sticks, pallet wood, chicken wire, glue, grass sod, polythene, panel pins and staples. Have your hammer, hand saw, hatchet, tenon saw and utility knife blades ready.
- Step 2: Lay polythene on a flat workspace. It will protect the wood from ground moisture. Arrange several pallet wood pieces side by side on the polythene until they form a square about 6 inches wide.
- Step 3: Nail the planks together with panel pins and your hammer. Drive two pins into each joint. Make sure the floor sits flush and solid.
- Step 4: Trim sticks to wall length. Use the hand saw to cut each stick to about 8 inches. Split thicker sticks with your hatchet so all have a uniform diameter.
- Step 5: Stand trimmed sticks upright along the base edges. Space them side by side. Apply a bead of glue between each stick and the base before pressing it into place.
- Step 6: Reinforce the walls by driving panel pins through the sticks into the base. Use two pins per stick. Keep the pins straight and sit them flush with the wood.
- Step 7: Wrap chicken wire around the outside walls. Pull it tight so it hugs the sticks. Staple the wire to each stick every inch.
- Step 8: Cut polythene to the wall height and slide it inside the chicken wire. Staple the polythene to the top of the sticks. This adds a waterproof barrier inside.
- Step 9: Build a simple roof ridge. Cut two pallet wood rectangles to 6×4 inches with the tenon saw. Nail them together at a right angle using panel pins.
- Step 10: Mount the roof frame on top of the walls and nail it down. Lay grass sod flat over the frame until all wood is covered. Press each patch onto the roof so it sticks.
- Step 11: Trim excess grass around the edges with the utility knife. Tuck polythene under the sod to hold it in place. Sand any rough wood edges you find.
- Step 12: Mark a 1½-inch entry hole on one wall. Cut the opening with the utility knife blades. Sand the edges smooth so birds won’t catch their feathers.
- Step 13: Stuff a little extra grass inside for insulation.
- Step 14: Hang or mount your log cabin birdhouse in a sheltered spot. You’re ready to welcome feathered guests.
Proper placement to attract more birds
Finding the ideal spot boosts your chances of welcoming feathered visitors. Positioning the birdhouse thoughtfully can increase comfort and occupancy.
Shelter from prevailing winds
Tuck your log cabin birdhouse near shrubbery or behind a fence to block strong gusts. You’re giving birds a calm space to rest in harsh weather. Positioning near thick evergreens or dense hedges works best.
Natural windbreaks cut down on drafts and preserve nesting comfort. They protect eggs and nestlings from chill and wind damage. Test potential sites on a breezy day before mounting. That step helps you find the calmest spot in your garden.
Favorable height and orientation
Mount the birdhouse at least six to ten feet above ground level. You’ll keep birds safe from cats, raccoons and other predators. Face the entrance away from direct afternoon sun to prevent overheating.
An east or northeast orientation delivers mild morning light and afternoon shade. You help maintain a stable interior temperature this way. Tilt the house slightly forward so rainwater drains off. That small angle also prevents pooling at the opening.
Access to food and water
Place the house near bird feeders or natural water sources. Birds scout locations where they can feed and rest. You’re turning your birdhouse into a welcoming habitat. Consider a small water dish or fountain nearby for easy access.
Flowing water attracts a wider range of species than still pools. Keep feeders a few feet from the house to prevent spills inside. You’ll see more visits if birds feel they can linger safely.
Clear flight paths
Ensure no obstacles block approach routes to the entrance hole. You’re preventing collisions during landing and takeoff. Trim low branches and remove nearby planters or yard ornaments. Provide at least a five-foot clear zone in front of the house.
That offers birds an unobstructed glide path. Low perches can snag feathers and frighten timid visitors. Clear flight paths also make nest checks safer for you.
Proximity to nesting materials
Install near areas rich in twigs, grass and other lining materials. Birds use these fibers to build secure nests inside the cabin. You’re offering them convenience that saves time and effort. Nearby brush piles or woodland edges usually supply loose fibers.
Encourage native grasses to grow by leaving small patches intact. Avoid treated lawns that lack free nesting materials. You’ll attract more cavity nesters with that simple boost.
Adding an internal waterproof barrier
Protecting the interior of your birdhouse from moisture will extend its lifespan and keep nests dry. A reliable barrier stops wood rot and mold before it starts.
Choosing suitable polythene liners
Select a durable, UV-resistant polythene sheet designed for outdoor use. Thicker liners around three to five mils prevent tears and bird beaks. You’re choosing a shield against moisture that lasts season after season.
Avoid thin plastic that cracks under temperature swings. Look for food-grade liners to avoid harmful chemicals. Cutting the sheet to exact wall dimensions reduces waste. A well-fitted liner makes your birdhouse watertight and healthy for nestlings.
Proper installation techniques
Measure the interior walls precisely before cutting your liner. You’ll avoid gaps that let water seep through. Slide the polythene flush against the sticks and secure with staples. Start by anchoring the top edge six inches below the roof line.
Work your way down, smoothing out wrinkles as you staple. Drive staples every inch to prevent shifting. That careful method stops moisture from wicking into the wood.
Sealing edges and joints
Fold the liner over the top of each wall beam and staple securely. Run waterproof wood glue along all seams for extra protection. You’re creating a double barrier that blocks moisture entry. Pay special attention to corners where leaks often start.
Smooth out excess glue before it dries to avoid mold traps. Use foam brushes for precise application in tight spots. Proper sealing boosts longevity and keeps nesting areas dry.
Checking and replacing barriers
Inspect the liner at least once a year for signs of wear. Look for tears, mold or areas where staples have pulled free. You’re preventing small issues from turning into rot problems. Replace damaged sections immediately to maintain full protection.
Keep spare liner materials on hand for quick repairs. Cleaning the interior before replacement helps remove debris. Regular maintenance guarantees a healthy environment for your birds.
Benefits for durability and insulation
A waterproof liner prevents wood swelling and decay over time. You’ll save hours on repairs and avoid costly rebuilds. Moisture barriers also help regulate temperature inside the birdhouse. Stable conditions support healthy nesting and egg incubation.
You’re giving birds a cozy, insulated home in any season. Added durability means you can enjoy your craft year after year. A simple liner turns a basic cabin into a lasting wildlife haven.
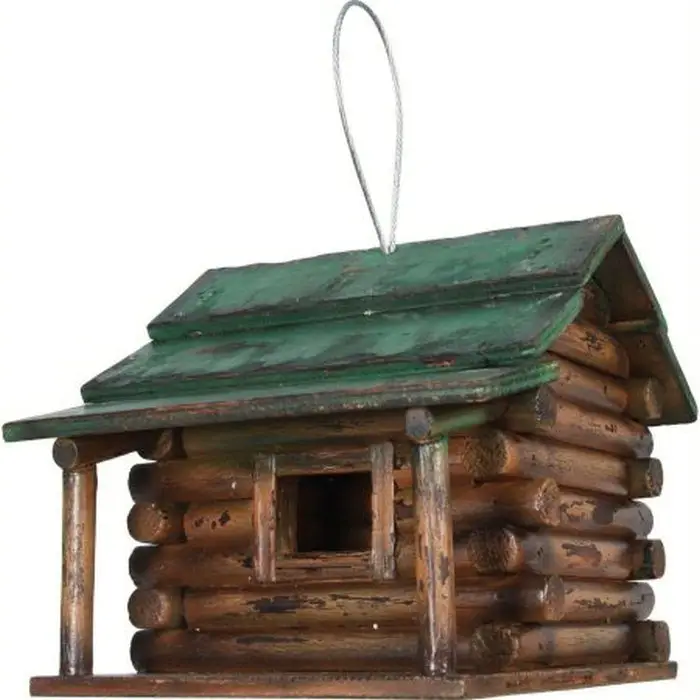
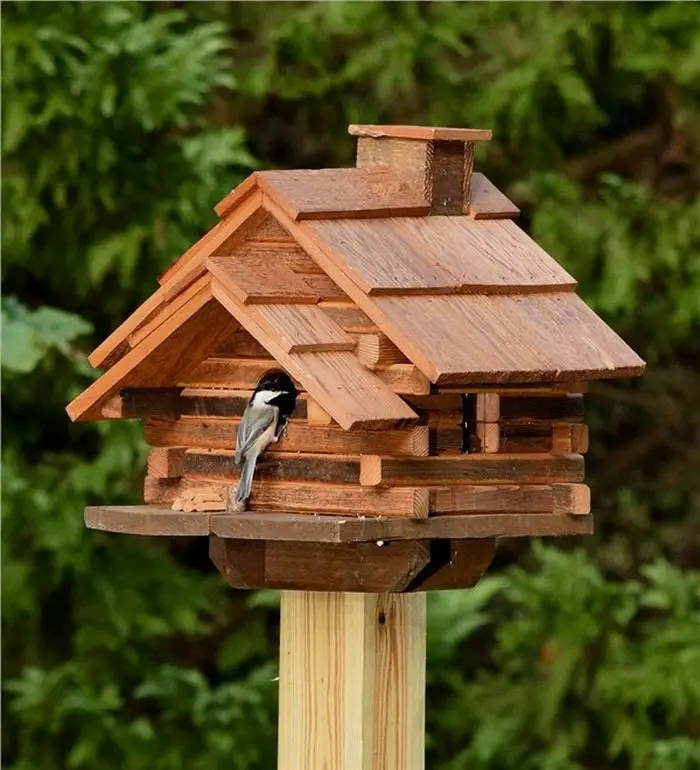
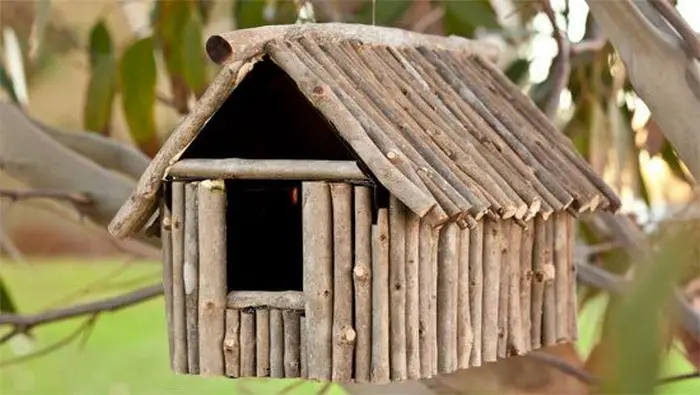
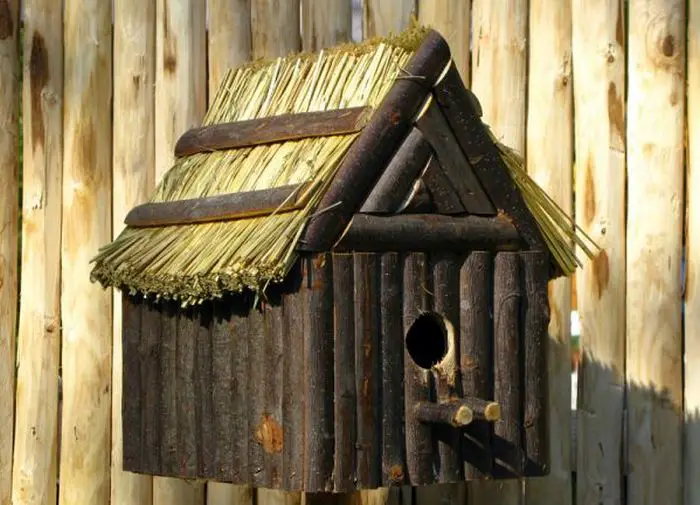
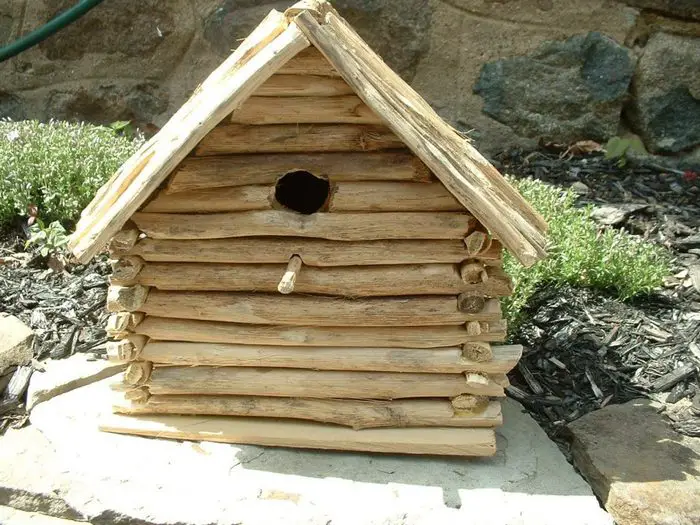
Log Cabin Birdhouse
Click on any image to start the lightbox display. Use your Esc key to close the lightbox.

Installing predator guards for safety
Protecting nestlings from predators ensures a high success rate. Installing predator guards on your log cabin birdhouse provides added safety against raccoons, snakes, and curious cats.
Choosing the right guard type
Keeping predators at bay starts with selecting the proper protector. Metal baffles around the entrance hole block climbing mammals and deter woodpeckers. Sturdy hardware-cloth cages wrap the house without obstructing airflow. You can also use PVC cones below the mounting plate to stop snakes from slithering up. Choose weather-resistant materials that won’t rust or crack. You’ll ensure reliable protection for multiple seasons.
Designing and mounting entrance baffles
High-quality entrance baffles shield the hole from curious paws and beaks. Cut a metal or PVC plate slightly larger than the opening. Slide it over the front wall before you mount the birdhouse. Secure it with rust-proof screws or panel pins so it won’t shift under pressure. Angle the baffle downward to channel rainwater away and maintain dryness inside. A snug fit around the hole keeps eggs safe and undisturbed as nestlings grow.
Installing hardware cloth cages
Hardware-cloth cages wrap around your cabin’s walls and roof for full coverage. Choose 19-gauge mesh with half-inch openings to block predator paws while allowing airflow. Cut panels to size with tin snips, wearing gloves to avoid cuts.
Fold sharp edges inward and staple the mesh every inch along each stick. Leave a half-inch gap at the bottom for drainage. This mesh layer acts as a robust barrier without blocking birds’ view.
Securing roof and base
Predators often climb roofs and slip under floors to reach nests. To block roof climbers, nail galvanized metal flashing along the eaves and overhangs. Use a continuous strip that extends two inches beyond each side.
Secure the base by slipping a PVC or metal anti-climb cone around the mounting pole. Its smooth surface prevents animals from gaining a grip. Seal all gaps with exterior-grade silicone caulk. You’ll create a seamless shield against both upward and downward access.
Regular inspection and upkeep
Even the toughest guards need regular checks. Inspect staples, screws, and mesh attachments every season. Look for rust, loose edges, or chewed sections. Replace damaged mesh, tighten loose fasteners, and reapply caulk where gaps appear. C
lean debris off baffles so they don’t trap leaves. You’ll catch small issues before they become serious threats. Consistent upkeep ensures your predator guards remain effective year after year.
Installing predator guards transforms your log cabin birdhouse into a safe haven for nesting birds. Metal baffles and hardware-cloth cages block curious paws and beaks. Careful installation and annual inspections keep predators at bay.
You’ll protect eggs and fledglings from raccoons, snakes, and neighborhood cats. Your backyard birdhouse will not only attract feathered friends but also give them a secure home season after season.
Conclusion
Building a log cabin birdhouse brings together craftsmanship and nature support. You’ll gather simple materials and use basic tools to create a sturdy, charming home. Adding a waterproof barrier and predator guards ensures birds stay safe and dry. Thoughtful placement helps feathered visitors feel secure and welcome. You’re turning your backyard into a thriving bird sanctuary.
You can build birdhouses from different materials apart from wood. Check out our DIY PVC birdhouse guide next!


