Last Updated on October 13, 2025 by Team Ideas24
I am a very clumsy person. If you’re anything like me, carrying something fragile means breaking them at one point. I don’t know how many times I’ve actually dropped a bottle or a glass because it slipped out of my hands. Or I trip – even on flat surface. I don’t know how that happens but it does.
Luckily, not everyone is as clumsy as me. But still, you’ll find this project really interesting, especially if you’re a wine connoisseur.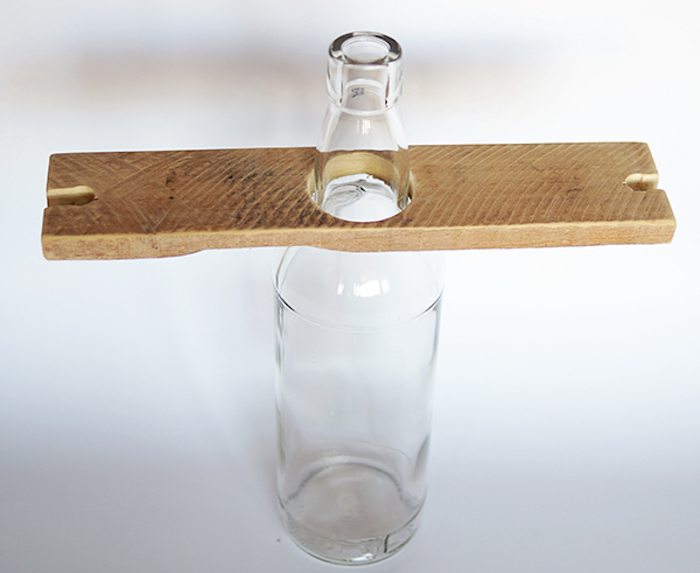
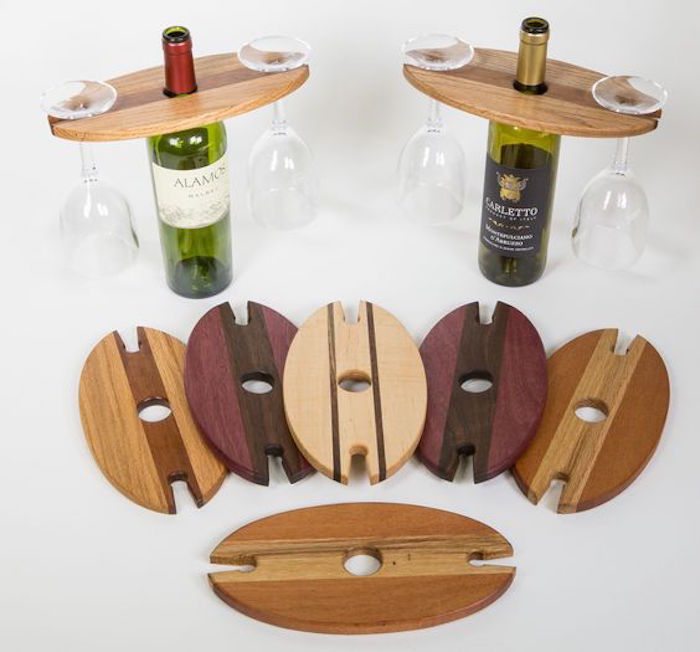
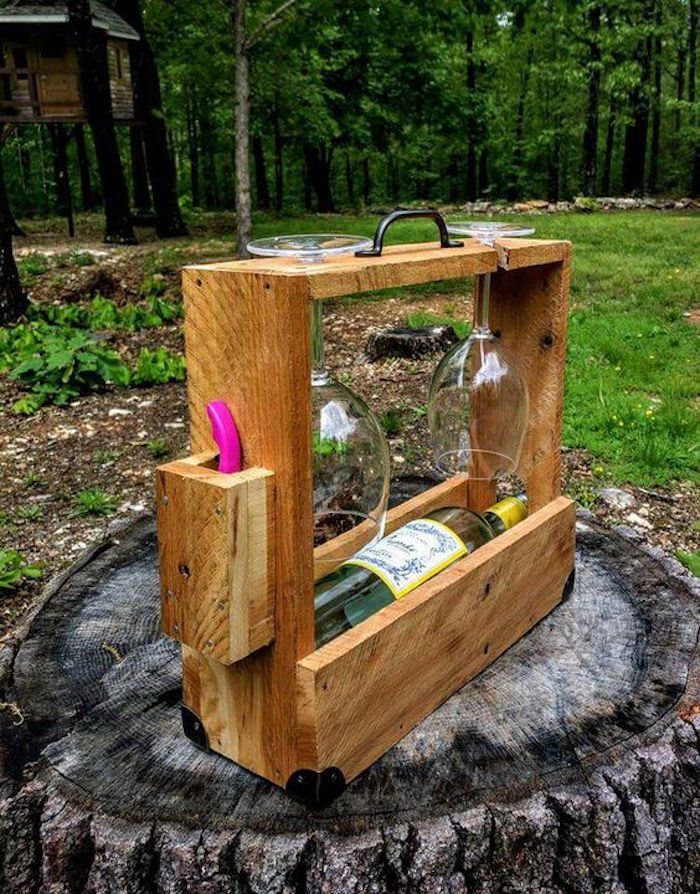
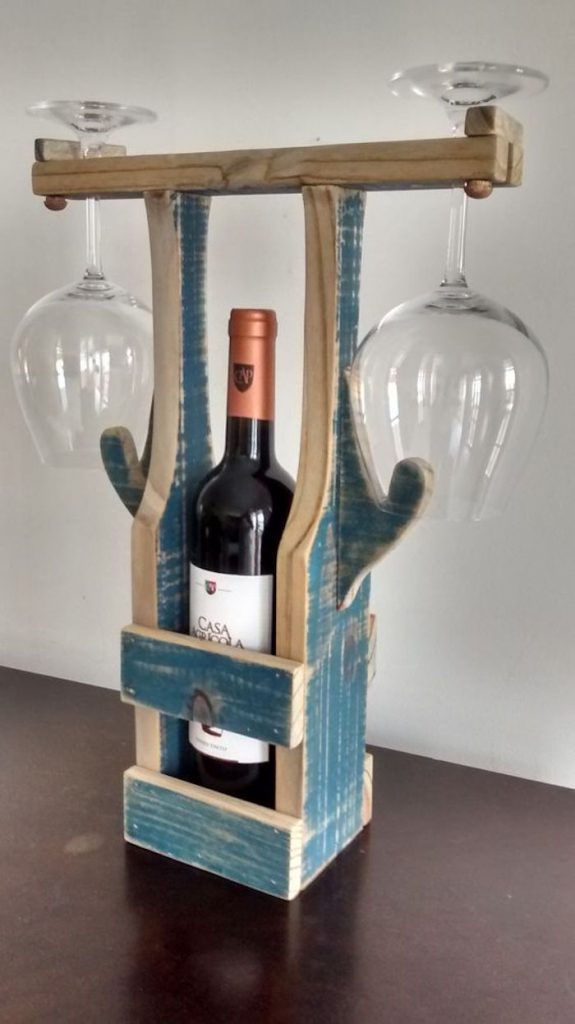
It’s all in the presentation. Serve your guests some wine using this cleverly designed wine bottle and glass caddy made from reclaimed wood. This will significantly lessen the risk of you dropping (and breaking) an expensive bottle of wine.
Enjoy drinking wine with your friends or go on a picnic with your significant other. You can take this wood wine caddy practically anywhere, and you can make it out of some wood you’ve got sitting around.
You can even personalize this and give it as a gift to a friend!
Building a Wood Wine Caddy
You’ll need these materials:
- 7 x 7” of wood
- stain
- sand paper
- finishing sander
- brush for stain
And these tools:
- tape measure
- pencil
- jig saw
- drill
- drill bit
Steps:
- Cut a 7 × 7-inch square of reclaimed timber and check that the surface is flat. Lightly sand away rough spots with 120-grit paper.
- Measure the true center of the board. Draw a 1 ¾-inch circle for the bottle neck and a straight guideline to each edge for glass slots.
- Drill a starter hole inside the center circle. Follow the pencil line with the jig saw to remove the round plug cleanly.
- At the outer end of each guideline, drill a small starter hole. Use the jig saw to cut two narrow slots that run from the bottle hole to opposite edges.
- Round off all four corners with the jig saw for a softer look. Ease every cut edge with 220-grit paper until it feels smooth.
- Switch to the finishing sander and work over both faces. Aim for an even, splinter-free surface ready for stain.
- Wipe away dust with a dry cloth. Brush on a thin coat of stain, following the grain. Let it soak in for five minutes, then wipe off the excess.
- Allow the first coat to dry. Apply a second coat if you want deeper color. Let the board cure completely according to the stain label.
- Optional: rub on food-safe mineral oil or clear wax to add sheen and moisture resistance. Buff until the surface feels satiny.
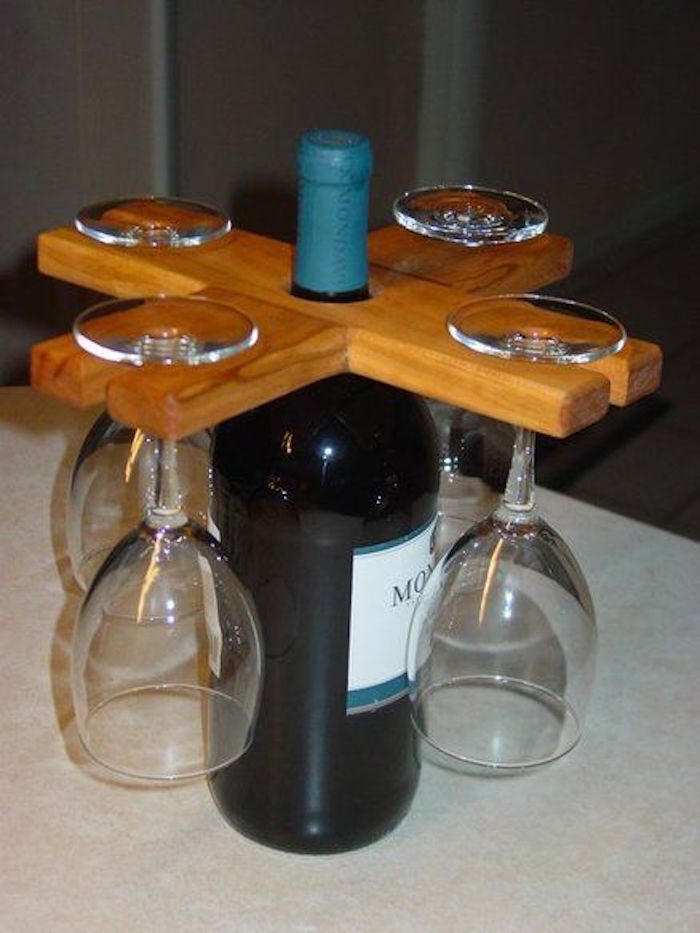
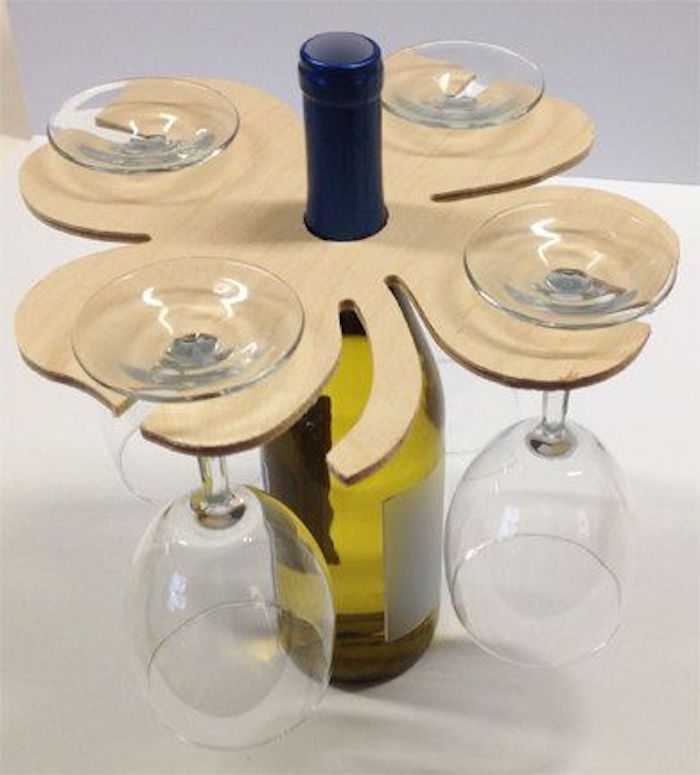
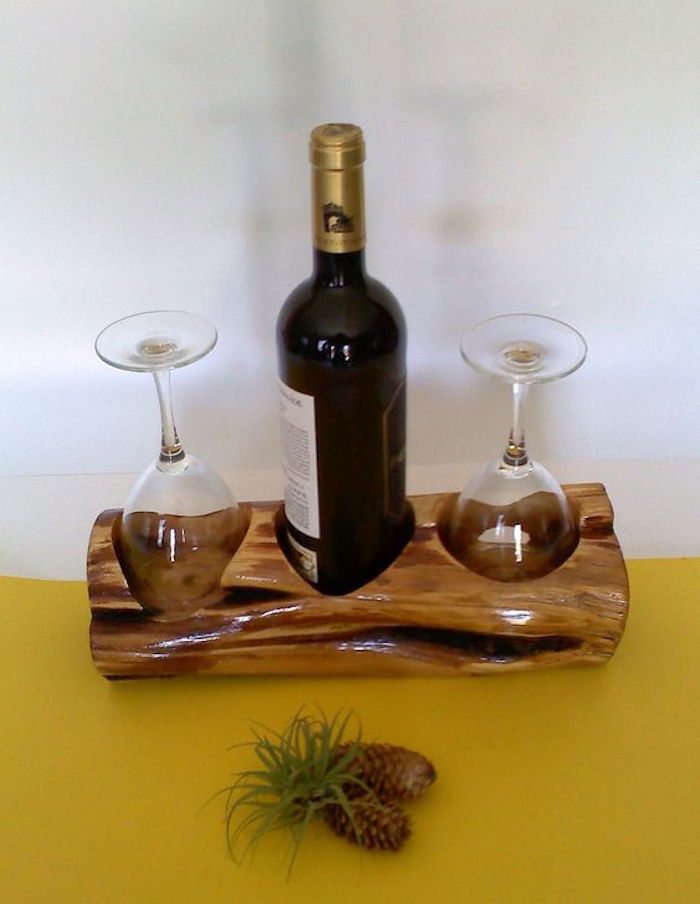
- Slide a wine bottle neck through the center hole, balance two stemmed glasses in the slots, and enjoy your handmade wood wine caddy.
Choosing the Best Reclaimed Timber for a Wood Wine Caddy
Selecting the right timber sets the foundation for a long-lasting wood wine caddy. Look for straight boards that stay dimensionally stable after you mill the slots.
Sourcing Local Reclaimed Boards
Scout salvage yards, pallet piles, and old wine crates. Fewer transport miles mean a smaller carbon footprint. Pallet slats often come in hardwood species such as oak or maple, giving the finished piece classic winery charm with minimal cost. Inspect every plank outdoors in bright light so hidden stains or oil residues do not surprise you during sanding and finishing.
Inspecting for Warp, Rot, and Nails
Lay each board on a flat surface and press the opposite corners. Any rocking movement signals twist that will throw off slot alignment later. Probe soft spots with an awl. A dull thud or easy puncture means rot, skip it. Drag a strong magnet along the grain to locate stray brads. Pull metal before a blade finds it and avoid expensive tool damage.
Balancing Grain, Strength, and Weight
A straight, parallel grain running at full length carries weight without cracking. Rings tighter than a quarter inch add density and strength, yet keep the wood wine caddy light enough to lift with one hand.
The target thickness is between five-eighths and three-quarters of an inch so the board supports a full bottle but does not feel bulky. A quick moisture-meter reading below twelve percent guarantees the timber will not shrink away from the glass slots after you finish.
Cutting Accurate Bottle and Glass Slots Without Splintering
Clean slots give a professional look and keep the wood wine caddy balanced when it holds a full bottle and two stemmed glasses. Careful layout and patient blade control prevent chip-out.
Marking the Layout with Precision
Use a sharp pencil and combination square to center a one-and-three-quarter-inch circle for the bottle neck. Extend guidelines straight to the edges for glass channels. Check symmetry twice because small layout errors become obvious once the carrier is loaded.
Drill-First Technique for Cleaner Curves
Drill a pilot hole inside the circle large enough to accept the jig saw blade. Drilling through both faces before sawing removes bulk and supports fibers on the exit side, which reduces tear-out. Clamp the board over scrap so the bit never bursts into empty space.
Controlling the Jig Saw for Chip-Free Edges
Let the saw reach full speed before touching wood. Guide it along the line in one smooth pass. Stop when dust builds, clear the kerf, then continue. For glass slots, drill starter holes at both ends and connect them with slow, deliberate cuts. Scoring the pencil line with a utility knife before sawing also severs surface fibers and yields crisp edges.
Final Fitting and Adjustment
Test with an actual stem. The glass should slip in with gentle friction, never wobbling. Wrap 150-grit paper around a dowel and kiss only high spots until the fit feels right. A snug but smooth slot keeps the bottle centered and prevents sideways tipping that could damage your finished wood wine caddy.
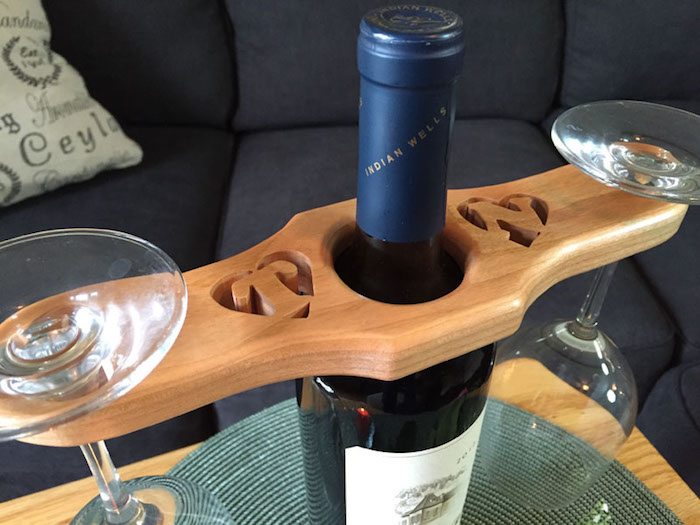
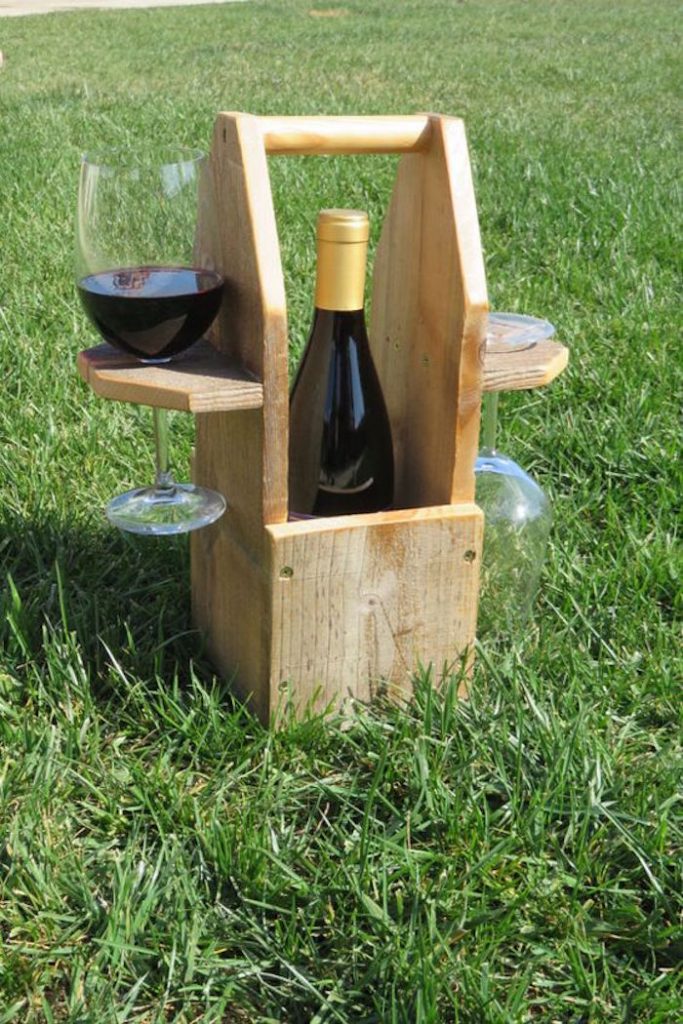
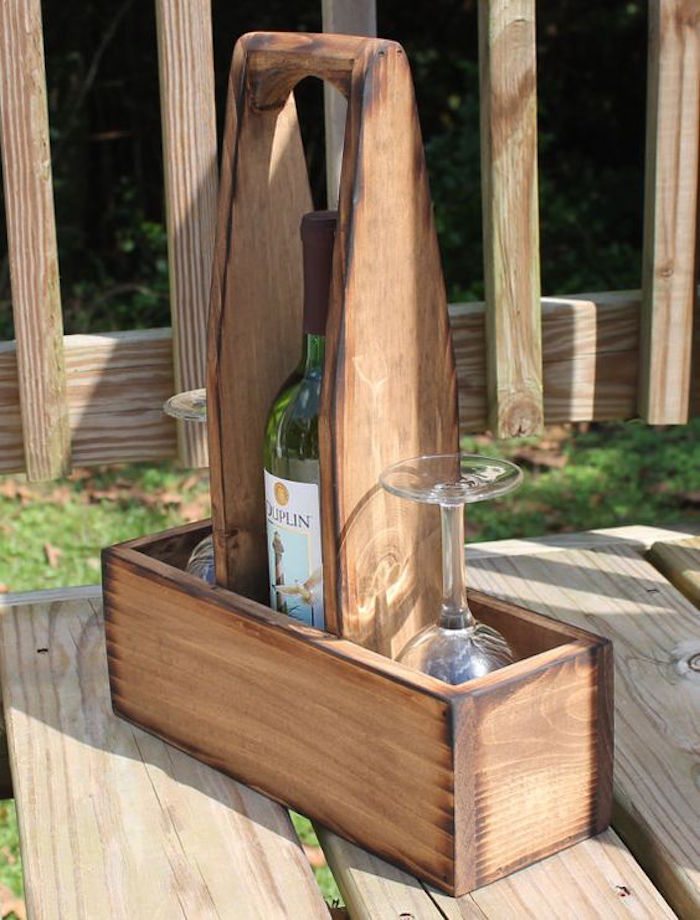
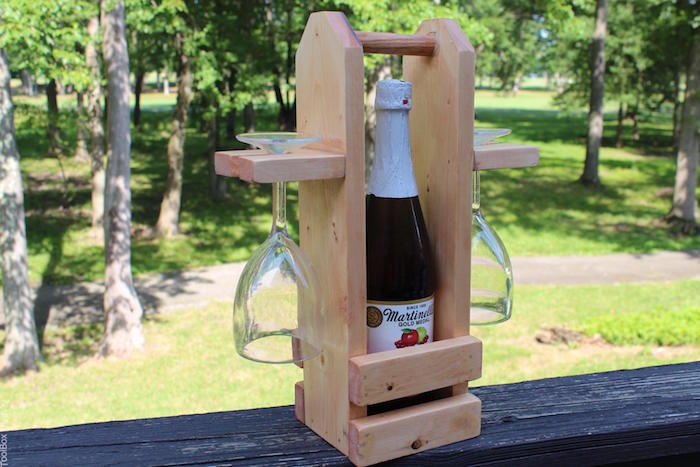
Wood Wine Caddy Gallery
‘Click on any image to start lightbox display. Use your Esc key to close the lightbox. ?’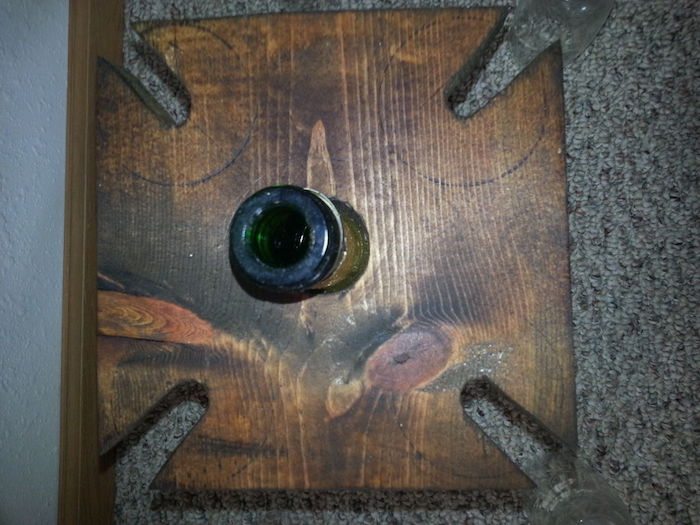

Safe Sanding, Sealing, and Finishing for Food-Grade Protection
Refined surfaces and food-safe finishes protect both the wine and the hands that carry the wood wine caddy. A disciplined sanding sequence and the right oil or wax deliver a satiny sheen that lasts.
Progressive Grit Sanding for a Silky Touch
Start with 120-grit paper to erase saw marks and layout lines. Move to 180-grit and finally 220-grit, always sanding with the grain. Knock down sharp corners with a quick pass of 320-grit folded paper so the carrier feels smooth when lifted. Wipe away dust with a tack cloth before any finish touches wood.
Choosing Food-Safe Oils, Waxes, or Varnishes
Pure tung oil polymerizes into a hard, water-resistant film without synthetic additives. Mineral-oil-and-beeswax blends give picnic gear a soft glow and easy maintenance. Avoid products containing heavy-metal driers or toxic solvents. Labels marked FDA food-contact compliant are safest.
Application Tips for Even, Durable Coverage
Flood the surface with a lint-free rag, wait ten minutes, then wipe excess until the board no longer feels tacky. Edge grain drinks finish faster, so give corners a second wipe. Repeat once a day for three coats, letting each layer penetrate and cure fully.
Curing and Maintenance Between Celebrations
Allow the final coat to harden for seventy-two hours in a dust-free room. Buff lightly with brown paper to raise a gentle sheen that resists fingerprints. Re-oil every six months or after a spill to keep moisture out and color rich. Consistent care guarantees your wood wine caddy stays picnic-ready for years of shared toasts.
Care and Maintenance Tips to Keep Your Wood Wine Caddy Looking New
Regular upkeep keeps your wood wine caddy handsome long after the last toast. Follow these easy habits to protect the grain, finish, and balance.
Routine Wipe-Downs After Every Use
Dampen a soft cloth with warm water and a drop of mild dish soap. Wipe the board along the grain to lift fingerprints and wine drips. Dry it right away with a towel so moisture never soaks in. A quick pass after each gathering prevents sticky residue that dulls the finish. Your wood wine caddy stays fresh and party-ready every time you reach for it.
Deep Cleaning for Stubborn Wine Stains
If red wine leaves a shadow, mix equal parts baking soda and water into a paste. Spread a thin layer over the mark and let it sit five minutes. Rub gently with a soft sponge until the stain lifts, then rinse and dry. Avoid abrasive pads that scratch the surface. This gentle method clears tough spots without stripping protective oil or wax.
Refreshing the Finish with Food-Safe Oil
Oil nourishes wood fibers and restores sheen. Warm a tablespoon of pure mineral oil or tung oil between your palms and rub it into every surface. Let it soak for ten minutes, then buff with a clean rag until no residue remains. Reapply when the surface looks dry or water no longer beads. The renewed finish keeps your wood wine caddy resistant to spills and humidity swings.
Storing the Caddy in Stable Humidity
Wood moves with changes in moisture. Store the caddy indoors away from direct sun, radiators, or damp basements. A stable environment prevents warping that could tilt bottle and glasses. Slip it into a cotton bag or wrap it in a clean tea towel to block dust while still letting air circulate. Proper storage means no surprise cracks next picnic season.
Quick Repairs for Scratches and Dings
Minor gouges happen. Rub a walnut kernel over the scratch to darken exposed fibers. Follow with a dab of matching stain if needed, then seal with a drop of oil. For deeper dents, place a damp cloth over the spot and press a warm iron for a few seconds. Steam swells the fibers back to level. Simple fixes like these keep your wood wine caddy looking showroom fresh without a full refinish.
Conclusion
Crafting a wood wine caddy requires only a scrap board, steady cuts, and patient finishing. Each step reinforces joinery skills and teaches respect for reclaimed timber. The finished piece keeps bottles and glasses stable, so you’re free to mingle without worrying about spills. Its food-safe oil finish resists stains and brings out deep grain tones. Give one as a gift and watch friends toast both the wine and your craftsmanship.
Does your wine need a decorative storage solution for your home? Check out our wine rack tower project next!


