Last Updated on July 1, 2025 by Team Ideas24
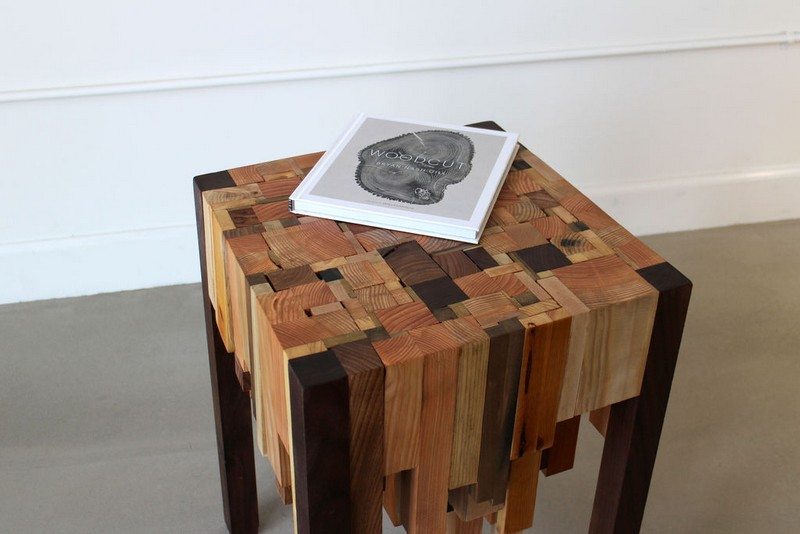
It’s amazing how something incredibly beautiful can come from things we label as trash or scrap. Take this end table as an example! It hasn’t come from a high-end furniture shop. In fact, it’s made from bits of scrap timber that 99% of us would trash. Just think of all those offcuts you’ve binned! Heck, I’ve probably discarded enough to make a thousand tables like this :(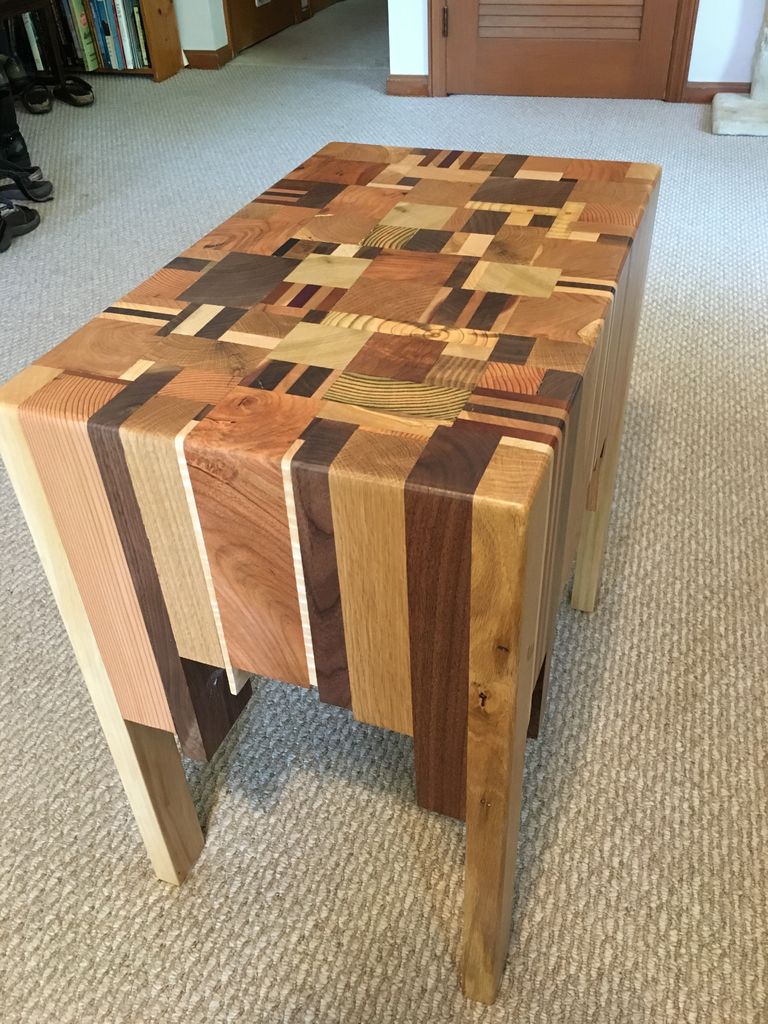
One man’s trash… another man’s inspiration! A timber end table made from off-cuts.The only bought materials for this table are the legs and the felt pads under them. Everything else is easily found in your workshop or the nearest building site!
From scrap to an expensive-looking piece of furniture! Next time you’re done with a timber project, think twice about throwing away those offcuts you thought were too small to build anything with.
If you have a mountain of leftover scrap timber, what are you waiting for? Start building your own stylish end table!
Contents
Building a Timber End Table
You’ll need:
- Newspaper
- Wood Glue
- Safety Goggles
- Mask
- Gloves
- Old Cloth/Rag
- Wood Finish
- Felt Pads
Along with the following tools:
- Planer
- Table Saw
- Clamps
- Coping Saw
- Nailer Gun
- Drill
- Palm Sander with 100, 180 and 220 grit
Steps:
1. Select and plane the off-cuts
Plane each scrap until the faces are flat and the thickness is even. This helps the timber end table feel solid and sit level.
2. Arrange the pieces
Dry-fit strips like a puzzle, alternating grain and color for strength and style. Mark the layout so you can return each board to its spot.
3. Glue the tabletop blank
Brush wood glue on every mating edge. Press the boards together and clamp across the width. Add two clamps along the length to keep the surface flat. Tighten until a thin bead of glue squeezes out.
4. Cure and scrape
Leave the assembly clamped for at least two hours, or overnight for hardwoods. Remove clamps, scrape off dried squeeze-out with a dull chisel, and wipe with a damp rag.
5. Square and size with a table saw
Rip the long sides straight, then cross-cut the ends. Aim for a top around 450 mm by 450 mm, but adjust to your scraps.
6. Shape edges
Use a coping saw to round the corners or cut decorative notches. Small details turn scrap into a custom timber end table.
7. Sand in stages
Start with 100-grit on the palm sander to level joints. Move to 180-grit to remove scratches, then finish with 220-grit for a silky touch. Vacuum or wipe dust between grits.
8. Build the base frame
Rip four narrow battens from leftovers on the table saw. Drill pilot holes and glue them into a square that matches the underside of the top. Shoot brads with the nailer gun to lock the frame while the glue sets.
9. Attach store-bought legs
Position each leg flush with the frame corners. Drill pilot holes and drive the supplied screws. Double-check for wobble; small shims from scrap correct any mismatch.
10. Final sanding touch-up
Give the whole piece a quick pass with 220-grit. This removes handling marks picked up during assembly.
11. Apply wood finish
Stir, not shake, your chosen finish. Wipe on a thin coat with a lint-free rag, following the grain. Let it dry, lightly sand with 220, and add one or two more coats. The finish seals pores and highlights the varied colors of your timber end table.
12. Add felt pads and test
Stick felt pads under every leg. Set a glass of water on the top and check for rock. If it moves, trim or pad the short leg until the timber end table stands firm.
Clean up the workspace and store tools. Your handcrafted timber end table now proves scrap wood can shine in any living room.
Sourcing sustainable off-cuts
Turning scrap into a showpiece starts with mindful sourcing. Local off-cuts reduce waste and add great unique character to your timber end table and charm.
Local shop treasure hunts
Independent cabinet makers clear their racks at the close of every week. Walk in early Saturday with safety goggles dangling from your belt and cash in hand. They often sell off-cut bundles by weight, cheaper than buying firewood.
Sort boards on the spot under good light. Look for straight grain, minimal knots, and no nail scars that will chip planer blades. Stack pieces by thickness so the planer removes only a whisker later.
Ask the owner for scraps in matching species if you plan a patterned timber end table top. Keep track of moisture by pressing two boards together; if they feel cool or damp, sticker them at home for a few days before milling.
Respectful construction salvage
Renovation sites throw away surprising quality timber during framing and trim work. Always get written permission from the foreman, wear gloves and a mask, wear a hard hat, and arrive after crews leave to avoid hazards.
Concentrate on ends of joists, stair treads, and door headers. These sections hold dense heartwood that mills flat and strong. Run a metal detector across every find before it meets your table saw. Hidden screws wreck carbide teeth in seconds. Pressure-wash mud, let boards dry, then cut away any paint that might contain lead. Inspect paint layers carefully.
If you suspect lead, encapsulate the spot with epoxy or discard the board. Health always outranks nostalgia when dealing with reclaimed materials. Salvaged wood carries nail holes and patina that tell a story once sanded and oiled.
Matching species and moisture
Mixing incompatible densities causes seasonal cracks. Stick with two or three hardwoods that share similar shrink rates, like maple, ash, and walnut. Plane everything to identical thickness and measure moisture with a cheap pin meter. Aim for 8–10 %. Clamp sample strips overnight to confirm they stay flat.
When colors contrast yet movement matches, glue joints remain tight for decades. Choosing complementary species also lets you highlight grain without heavy stain, letting the finished timber end table glow naturally.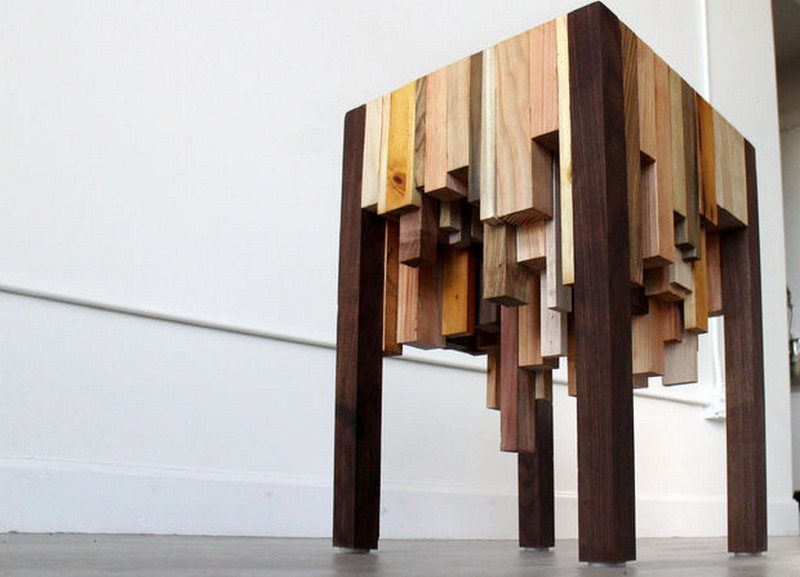
Creative leg upgrades
Pick legs that match the room’s vibe to shift the feel of your timber end table. Good choices add stability, proper height, and bold style for little money.
Hairpin steel drama
Thin steel hairpins deliver a mid-century look that pairs well with reclaimed timber tops. Order raw legs and spray them with clear lacquer so the blue steel shines through. Screw them into corner cleats instead of directly into the tabletop to allow wood movement.
The narrow footprint makes small rooms feel bigger and vacuuming easier. Add felt pads before final placement to prevent floor scratches.
Hairpins also lighten the visual weight, letting attention stay on the rich textures above. They handle heavy loads because the leg bends, not breaks, under stress.
Tapered wooden grace
Cutting your own hardwood legs keeps grain consistent from top to floor. Rip oversized blanks, mark a gentle two-degree taper on two inside faces, and run them through a simple shop-made jig. Plane each facet until light reflects evenly, then sand through 180 grit.
Glue the legs into a doweled frame under the top and add brass foot cups to block mop water. The continuous flow of color makes the entire timber end table read as a single sculpture. Slight outward splay widens stance without looking bulky, giving rock-solid support.
Hidden storage columns
Box legs look solid yet hide handy space. Build each leg from four slim boards glued into a rectangular tube. Sand the inside before assembly, then cut a discreet door on the inner face and hinge it with a brass pivot.
The hollow holds remotes, magazines, or a power strip for discreet charging. Because weight drops to the corners the tabletop can be thinner, making the piece easier to move during cleaning.
Finishing for durability
Long-lasting beauty demands a finish that blocks spills, scratches, and UV glare. Careful prep and coating lock in the grain patterns of your new timber end table.
Prep that reveals grain
A flawless surface starts by removing mill marks. Sand across the grain with 100 grit to flatten joints, then work through 150 and 220 in the direction of the fibers. Vacuum between passes to keep abrasive cutting clean.
Dampen the board lightly, let it dry, and knock down the raised fuzz with a used disc. Touch the surface with the back of your hand. It should feel like silk. Investing this extra hour ensures the final coat will highlight every color change in the timber end table, not the scratches.
Choosing the right coat
Pick a finish that fits the room and usage. Water-based polyurethane stays clear and resists sun yellowing, ideal when contrasting species decorate the tabletop. Oil-modified poly adds amber warmth that deepens walnut and oak.
Hardwax oil soaks in and leaves a velvety sheen that hides fingerprints. Brush or wipe an initial flood coat so thirsty edges drink evenly. Wait the full dry time listed on the can, scuff sand with 320 grit, and lay two thin follow-up coats. Thin films cure harder than one heavy pour and are easier to repair later.
Easy care routine
Protection never ends once the piece sits in your living room. Slip felt under lamps and coasters to prevent abrasion. Dust weekly with a microfiber cloth in long strokes that follow grain. Once water no longer beads, refresh the top with a quick wipe of the original finish.
These small habits keep color bright and prevent ring stains for years. Oil-treated surfaces may darken slightly during the first month. That gentle color shift is normal oxidation, not a defect.
After six months, buff on a thin layer of paste wax with a cotton rag, let it haze, then polish. The wax seals microscopic pores, slows moisture exchange, and gives fingers that smooth glide furniture lovers notice immediately.
Conclusion
Building a timber end table turns leftover wood into a functional accent that reflects your skill and style. Each cut and joint teaches solid shop habits that carry into bigger projects. Sustainable off-cuts keep costs low while giving your living space a story to tell. A durable finish guards the surface, so the table looks fresh after every coffee or game night. Grab those scraps and start transforming waste into a piece you’ll proudly use every day.
We have more incredible upcycled tables. Check out our wine barrel coffee table project next!


