
Last Updated on May 13, 2025 by Team Ideas24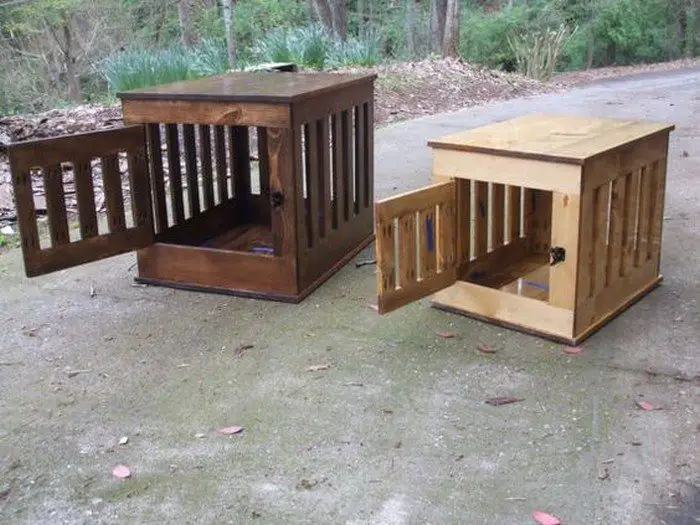
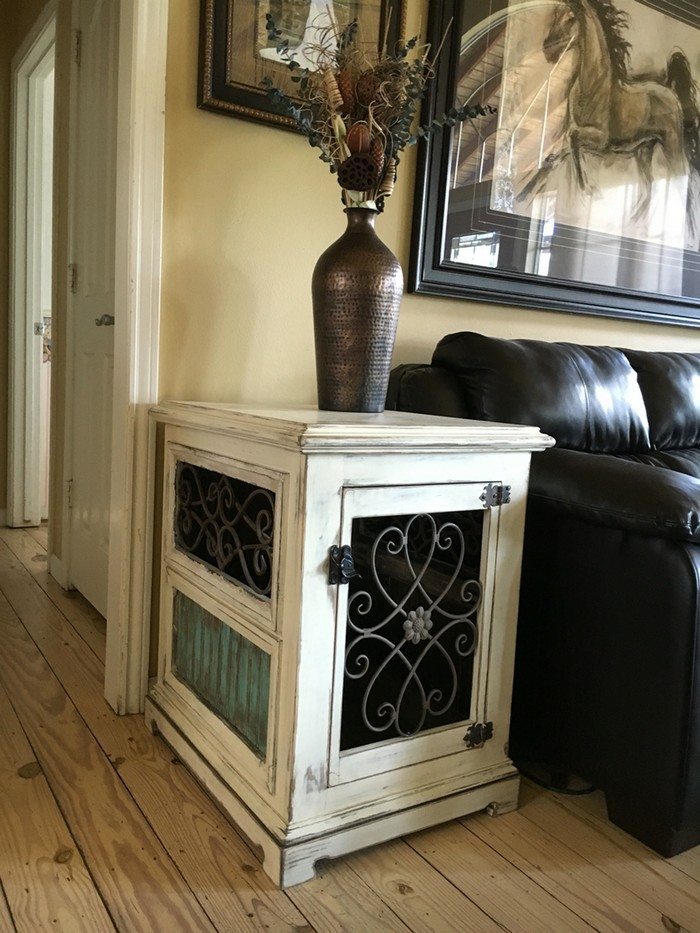
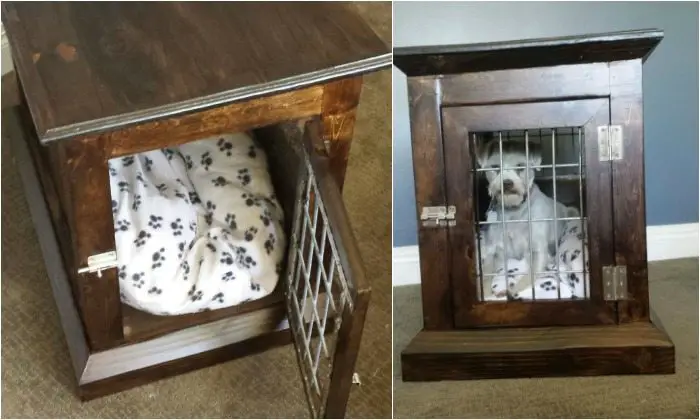
Do you want to provide your pet dog his own little space indoors but don’t have enough room for it? If your dog is of a small or medium-sized breed, then we suggest you build a dog kennel end table for him!
Dogs usually love to sleep and lounge around when it’s not playtime. And this space-saving dog kennel table DIY project can serve as a nice cozy space for them to rest while their pet parents are busy with other things.
Now what’s great with this DIY furniture item is that you can also use it as a temporary crate if your dog gets aggressive when you have guests at home. But if you have a sociable pet, then you do away with a door and just leave it open.
Is this the kind of indoor dog house you are looking for?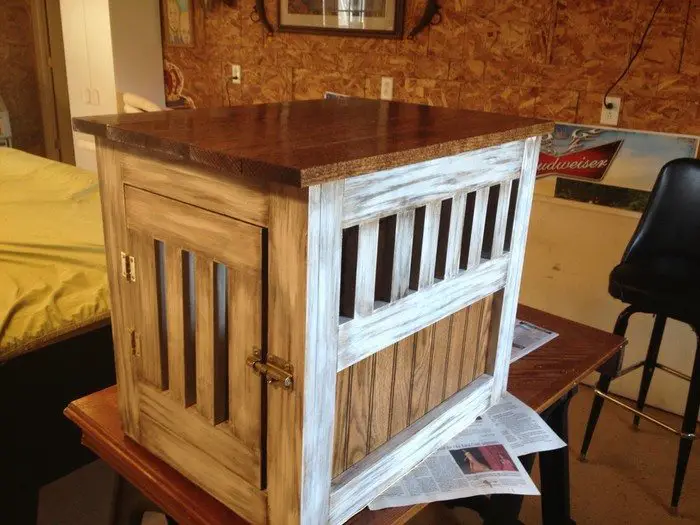
Build a dog kennel end table now by following the step-by-step tutorial below!
Contents
Crafting a Dog Kennel End Table DIY Project
Materials:
- 1 – 8′ 2×4 Timber
- 3 – 8′ 1×4 Timber
- 1 – 6′ 1×12 Timber
- 1 – 4′ 1×24 Pine Laminate
- Wood Glue
- 3/4″ x 25′ Steel Hanger Straps
- 100 – 1/2″ Screws
- Hinges
- Locking Mechanism
- Salvaged Horse Fence
- Wood Conditioner
- Dark Walnut Stain
- Polyurethane
Tools:
- Table Saw
- Circular Saw
- Chop Saw
- Hand Saw
- Sander
- Nail Gun
- Router
- Power Drill
- Angle Grinder
- Dremel
Steps: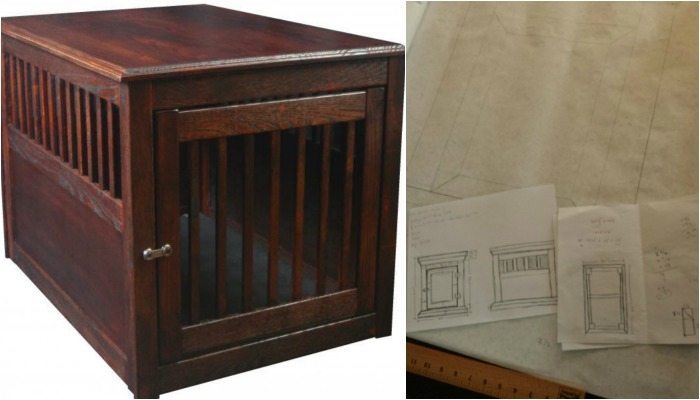
Figure out design: After looking at some other designs online (most were for larger dogs) I drew up a basic design of what I wanted to do. After the design passed the approval committee (wife), she suggested drawing up a blueprint to check if the dimensions I had mapped out would work.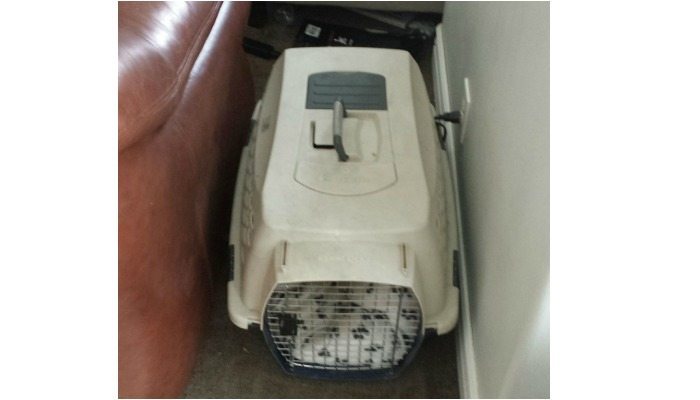
We didn’t want any part of the kennel to end up smaller than the plastic kennel she was already sleeping in. This proved to be very helpful in making sure the look of the thing wasn’t altered too much by the practical dimensions we needed for the space and the dog. I found we needed to take down some of the thickness to give the dog more space to look out of the kennel and to not have the whole thing become a big box with some occasional holes.
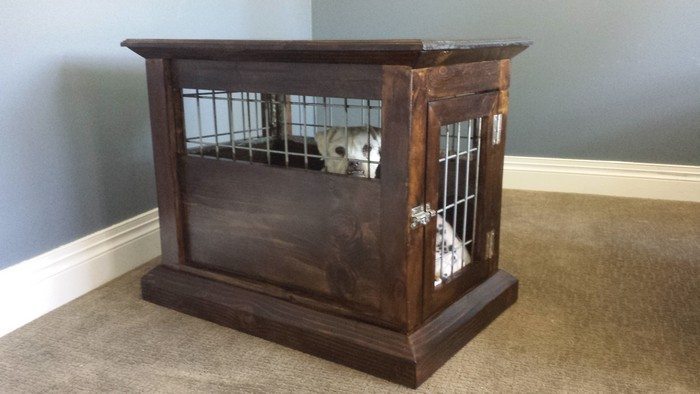
Because I drew this up more on the fly and only did a rough blueprint, I don’t have most of the design drawn on paper. Mostly I just took notes improvised as I went along. The overall size of the table/kennel is 24″ tall, 30″ long and 20″ wide. This put the top of the table just a couple inches below the armrest of the couch. This would be optimal for setting down drinks and the like while watching TV (though that might be cruel torture for the pooch underneath).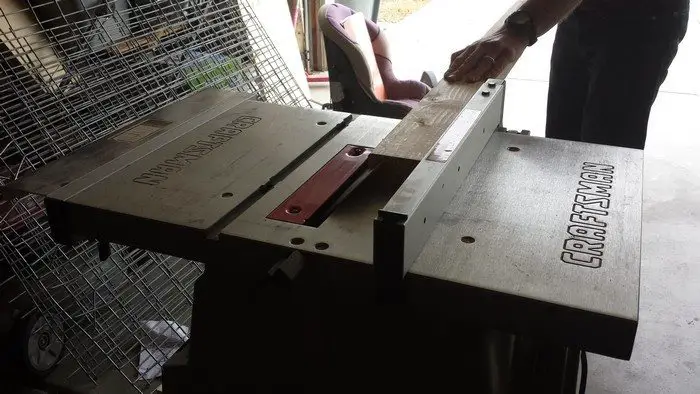
Cut lumber: I started with the base and the posts of the kennel as that would provide the overall framework to build everything else on. The base is created from the 2×4. I set my table saw up at a 45 degree. I wanted 2″ flat before the angle, so I measured my guide to the tip of the blade to allow this. This left the remaining 1.5″ to be cut perfectly at a 45 degree angle to the tip (high school math pays off). I ran this through with the saw and then saved the scrap to be used as trim of the table top later on.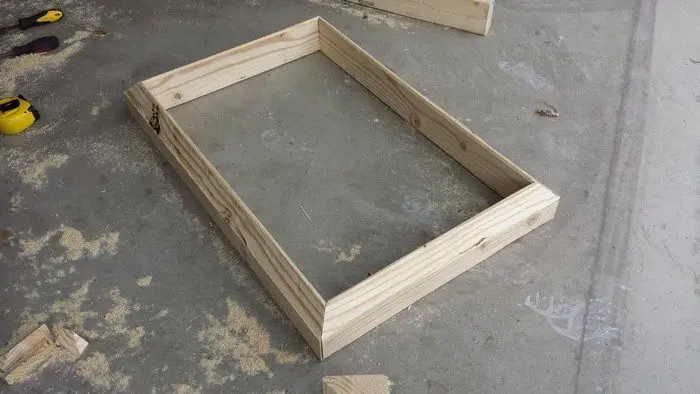
Next, I used my chop saw to cut 45’s on the 2×4’s again to make more of the frame (more appealing and professional looking). Its pretty important to get these as exact and uniformly cut as possible because a crooked base does not a good build start.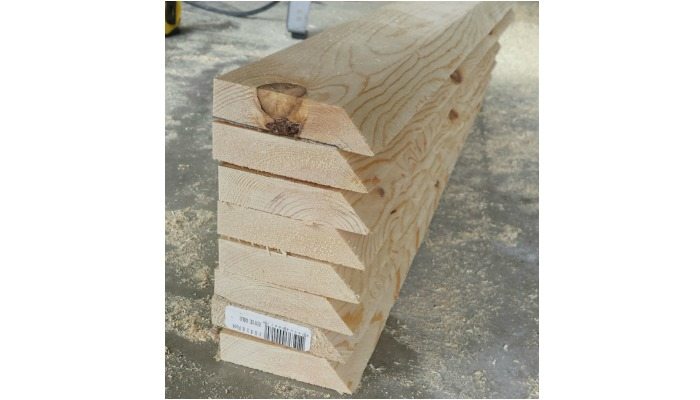
Then, using my 1x4s, I followed a similar pattern. However, knowing that I wanted these to be 2 1/4″ wide I also had to cut some off the back side. I saved that back cut too for the trim at the bottom.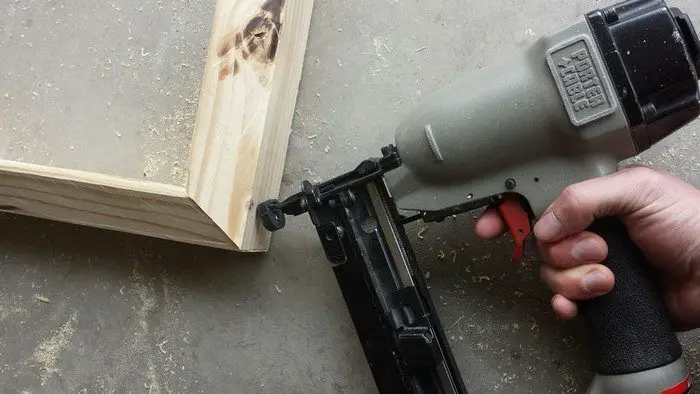
Build base and posts: Wood glue can be your friend when putting something together that needs to be solid. So, before getting the handy nail gun out, I put glue where the joints would all meet. Then I nailed it together.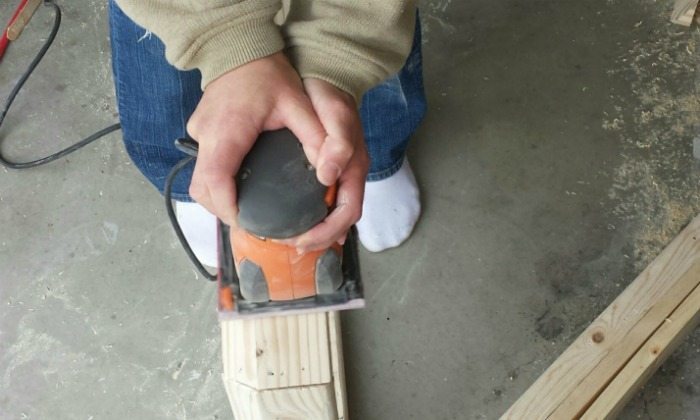
Once I had the base all solidly together (and let the glue dry a bit), I got out the trusty sander and got it to a nice smooth finish while it would be easier to access all the parts (a helpful wife idea).
With all that done I was ready to put the posts in place. I had decided to use the 1x4s on an angle like this for a few reasons.
1) cut down on the overall weight of the kennel/table,
2) maximize the amount of space in the kennel, and
3) I don’t really like the look of overlapping wood and I wanted a cleaner look overall. Hence, the design.
Putting it together was a little more challenging this way though. Luckily, I have a handy wife with an extra set of hands (for some reason I only have 2) and we were able to hold them in place while nailing them into the base and to each other. This worked really well and I am pleased with how it turned out. There were some small gaps, but I will get to how that was fixed later.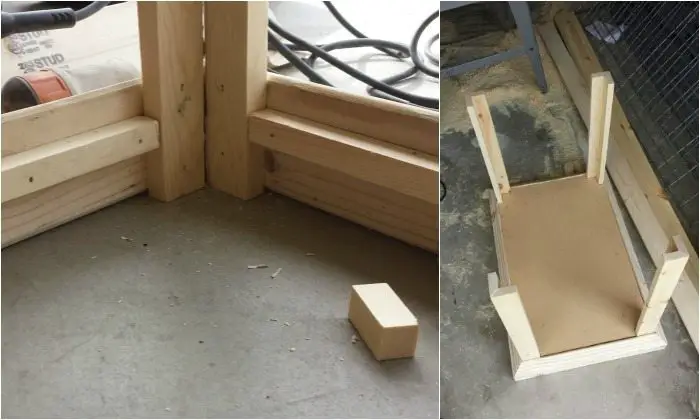
Next came the base board. I needed something for it to rest on. Luckily, I saved some of the scraps from the 1×4 cuts and this worked perfectly. I drew a level line around the entire inside of the base and then just nailed the support in place. Then, I grabbed a scrap of MDF board left over from a different project and cut it to shape. Then I just slid it down into place and nailed it in.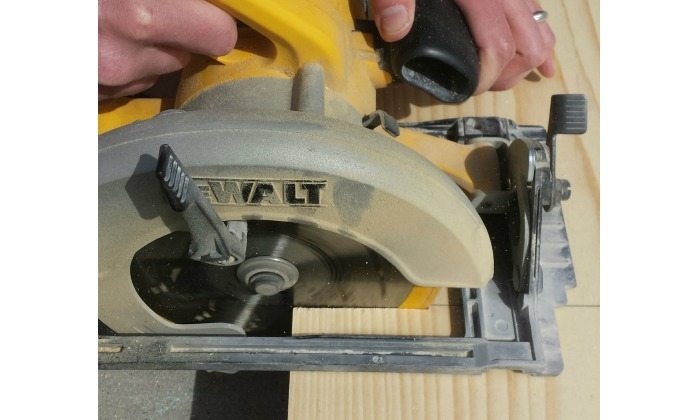
Build walls and add caging: Next, I needed to put each of the walls together before putting them in place. This actually required a bit more work than I thought it would. Using the 1×12 for the bottom part of the wall and the 1×4 for the top, I determined how big of a window there would need to be. Then, with that measurement, I cut out the size of caging from the horse fencing. (I used my angle grinder with a cutting disc for this, though bolt cutters would work just as easily for this.)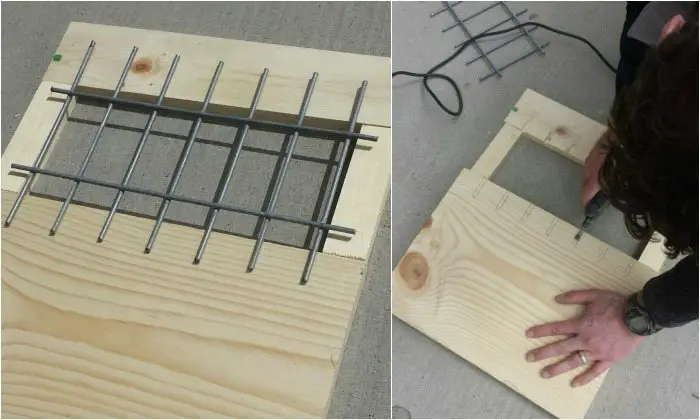
Then, I laid the caging on the wood and drew marks for where I would need to carve out to have the cage rest inside the wood. Using my dremel tool I carved out the wood so the cage would rest just under the surface of the wood.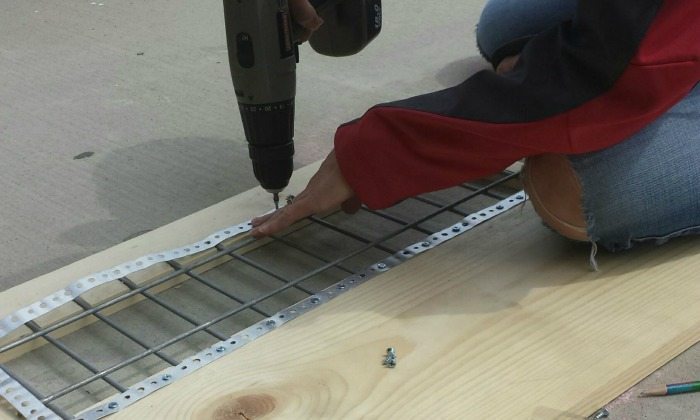
Then using the steel hanger strips (aka plumber’s tape) I screwed the caging into place.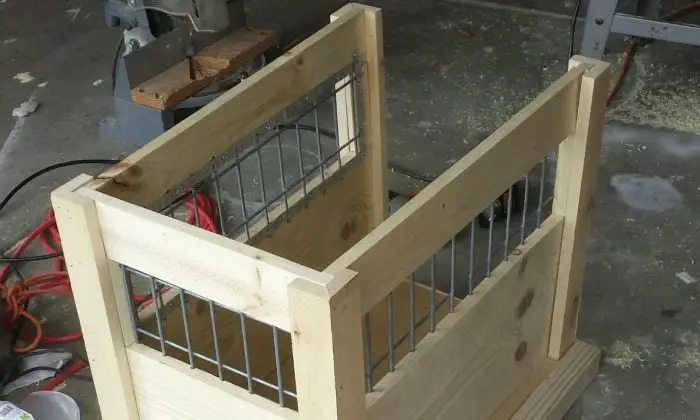
Once finished with each of the walls, I put them into place on the frame and nailed them in. (Side note: It is important to measure the bottom of where the wall sits to get the total measurement as the top will not be exact due to warping of the wood or things not being perfectly square. This all gets evened out once the walls are nailed in place.)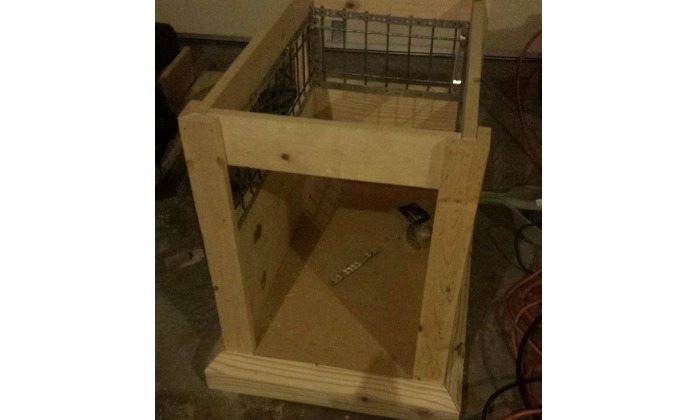
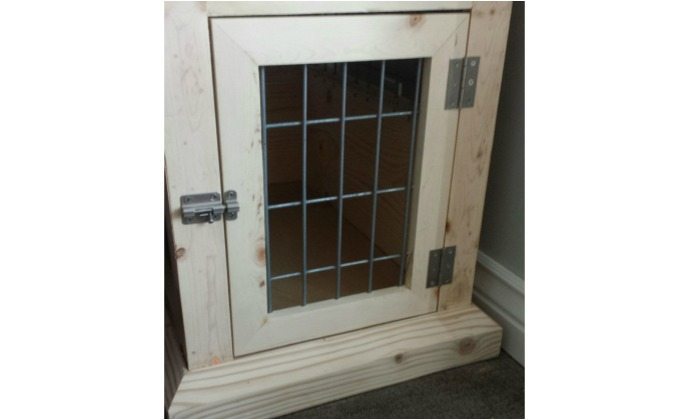
Make door: To start the door I had to frame out the top of the door. Again, as mentioned in the last step, measuring from the bottom is the key to getting things the right length, otherwise things would start looking weird. With the top support in place I was able to measure out the size for the door.
In order for the door to work smoothly, there needs to be some gaps between the door and the frame. I allowed 1/8″ on all sides for this. This meant I need to subtract 1/4″ from each of the measurements. That done, I cut out the frame for the door. I used the 1×4 for this cut down to 1.5″ width.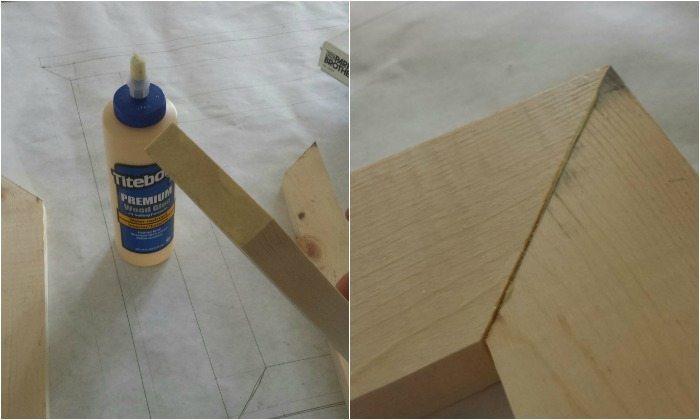
I didn’t feel comfortable using the nail gun for this, so I used the wood glue and clamped it all together overnight.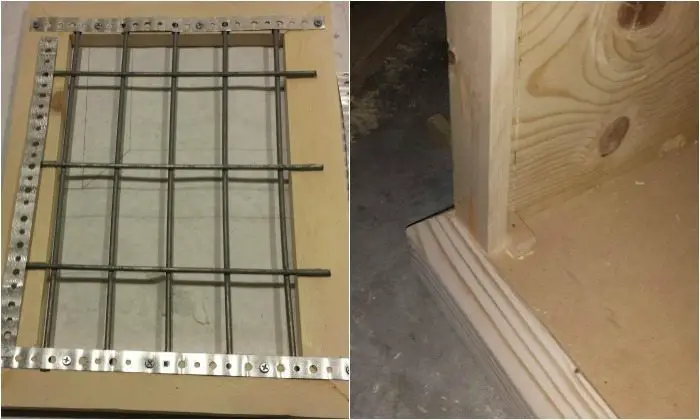
Once dry and sanded, I used the same process with the caging for the walls on the opening of the door.
Then, knowing that I didn’t want the door to swing inside the kennel, I put in a little door stop at the bottom to keep it from stressing the hinges.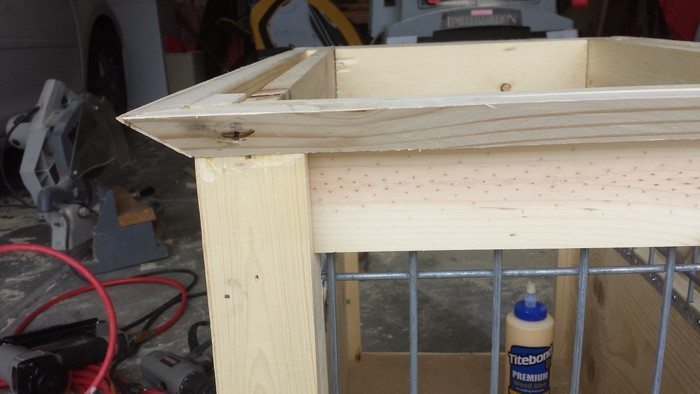
Add top and bottom trim: This is where the leftover scrap really shines. Using what was left from the 2×4 cut and the 1×4 cut I added trim around the top of the table…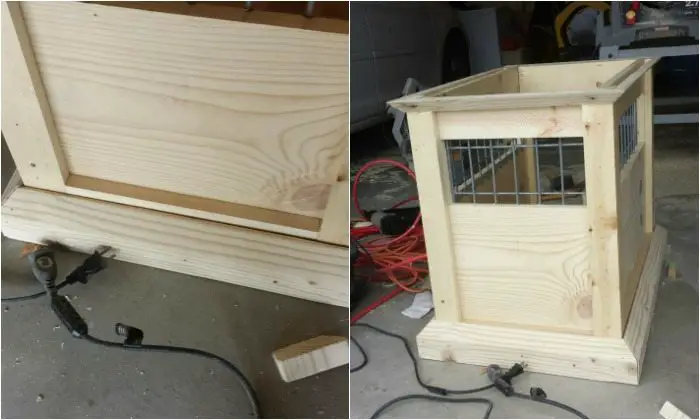
and at the base of the bottom. This really added to the overall look.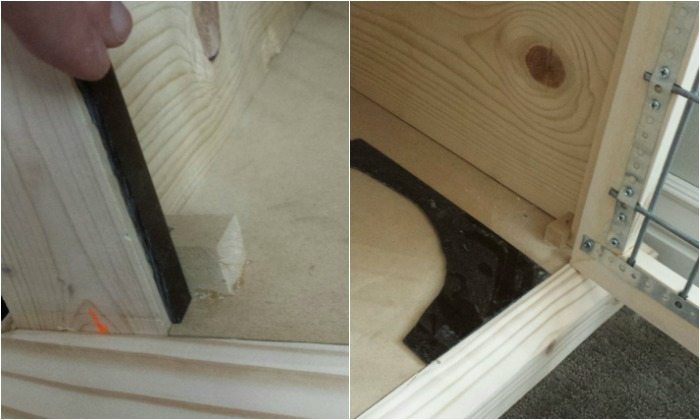
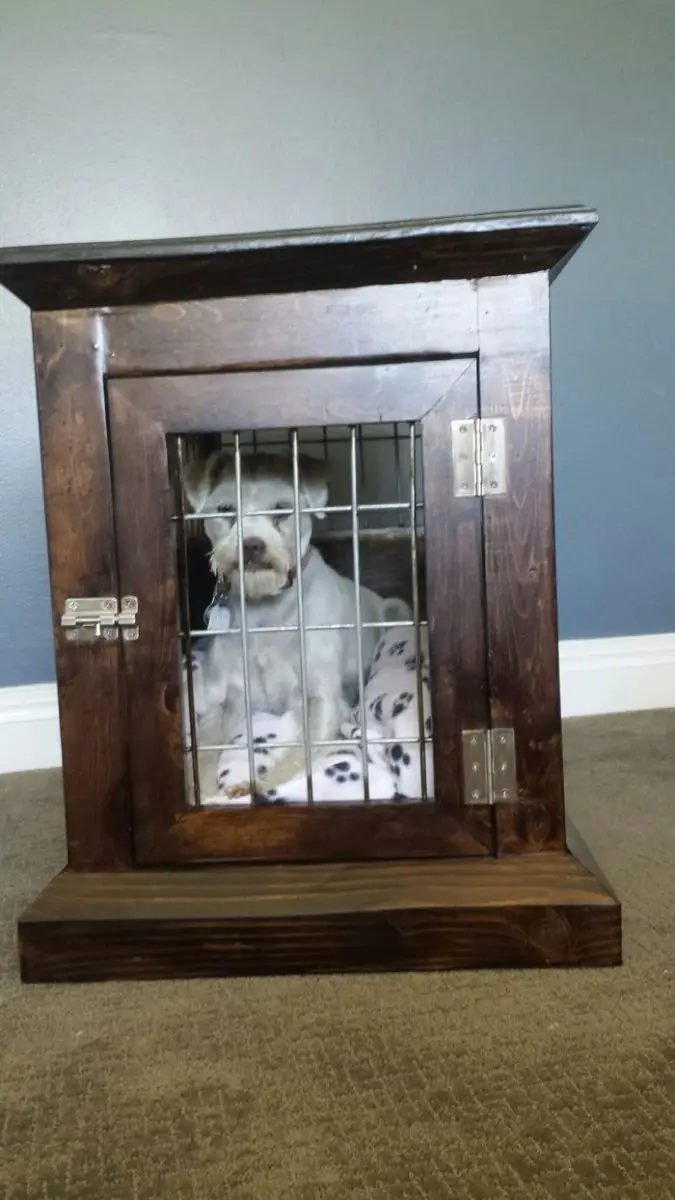
Install door and lock: Doors are fun to install… as long as it is done right. To make sure that the gap around the edge of the door was 1/8″ I placed some scraps of plexiglass I had left over from my monster costume on the edges and rested the doors on those while I screwed the hinges in place. This worked marvelously.
Then I placed the locking mechanism in place centered on the other side.
Put your top on: I don’t have any pictures of routering the table top. If you’ve ever done it, its rather simple and really makes it look more professional. My friend let me use his and it turned out great.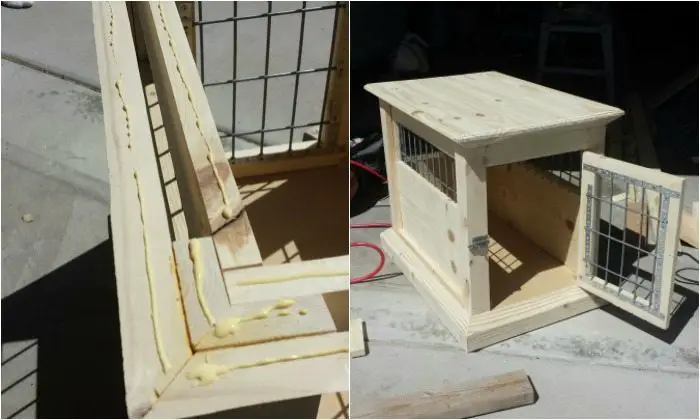
This is an important piece so make sure it’s secured firmly in place. Get the wood glue out and get some good coverage around the whole edge. Then, set the top wood down and make sure it is nice and centered before nailing it in place. This is where it really starts to come together and look awesome.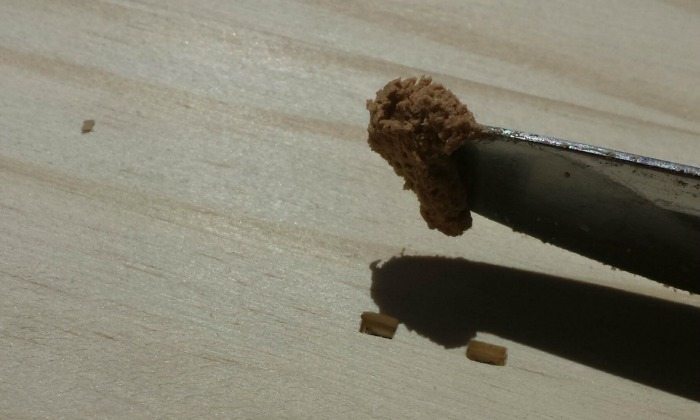
Putty nail holes and sand: Now you need to go through with good wood putty and fill all the nail holes. I also filled in the gaps of the wood on the post to make them invisible once stained.
Once the putty has dried, make sure to sand it down well. Left over putty (or wood glue for that matter) will really change the look of the stain.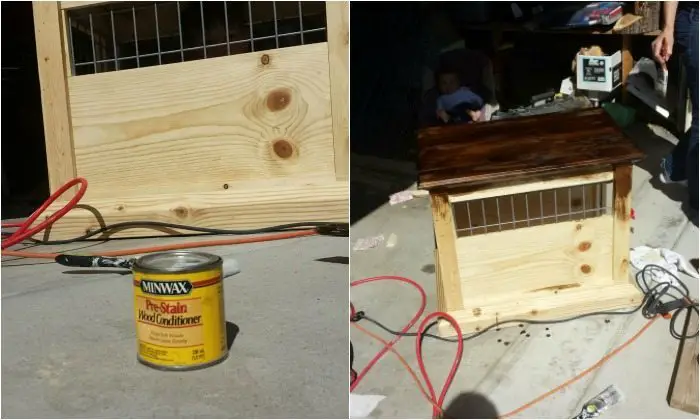
Wood condition and stain: Since I used pine (less expensive) for the whole project, I needed to condition the wood before staining. Without doing this, pine looks really splotchy as it absorbs the stain at different rates. The conditioner stops it from doing this. The stain needs to be applied within about an hour of the conditioner being applied.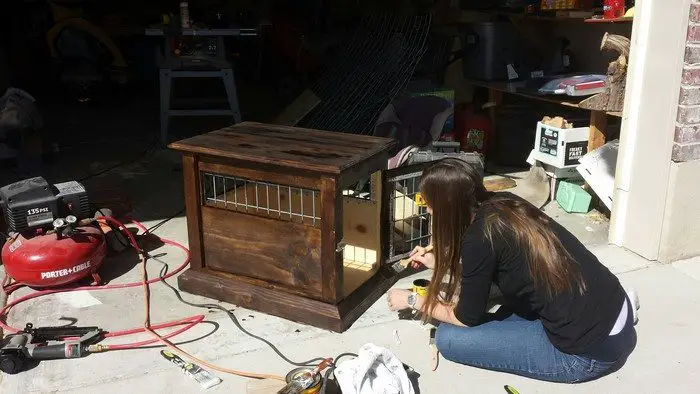
The dark walnut stain looked really great on this. The pine absorbed it really well too and so we only had to do one coat to achieve the darkness we were going for. We did end up staining the inside as well which will be obvious in other pictures.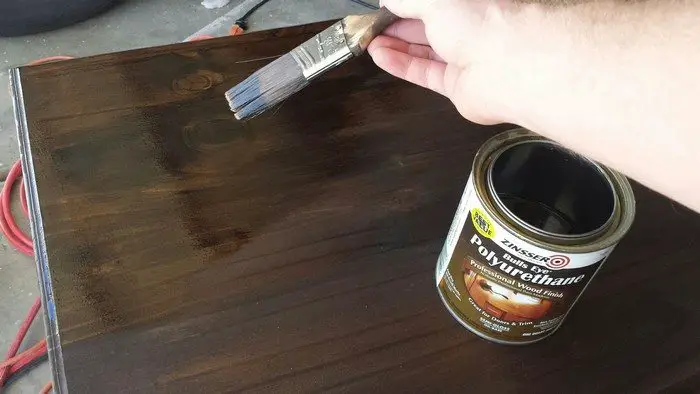
Coat of poly: To keep the stain and the wood protected, I applied polyurethane to the whole kennel/table. I used 2 coats everywhere except the top which got 3 coats. It can be helpful to do a light sanding between coats with a high grit (600) sandpaper.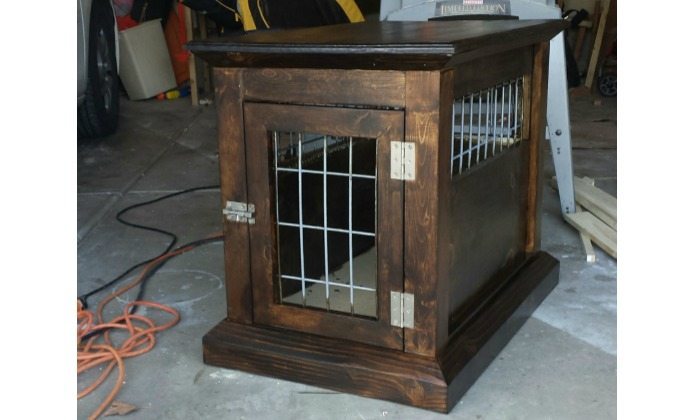
This keeps things nice and smooth.
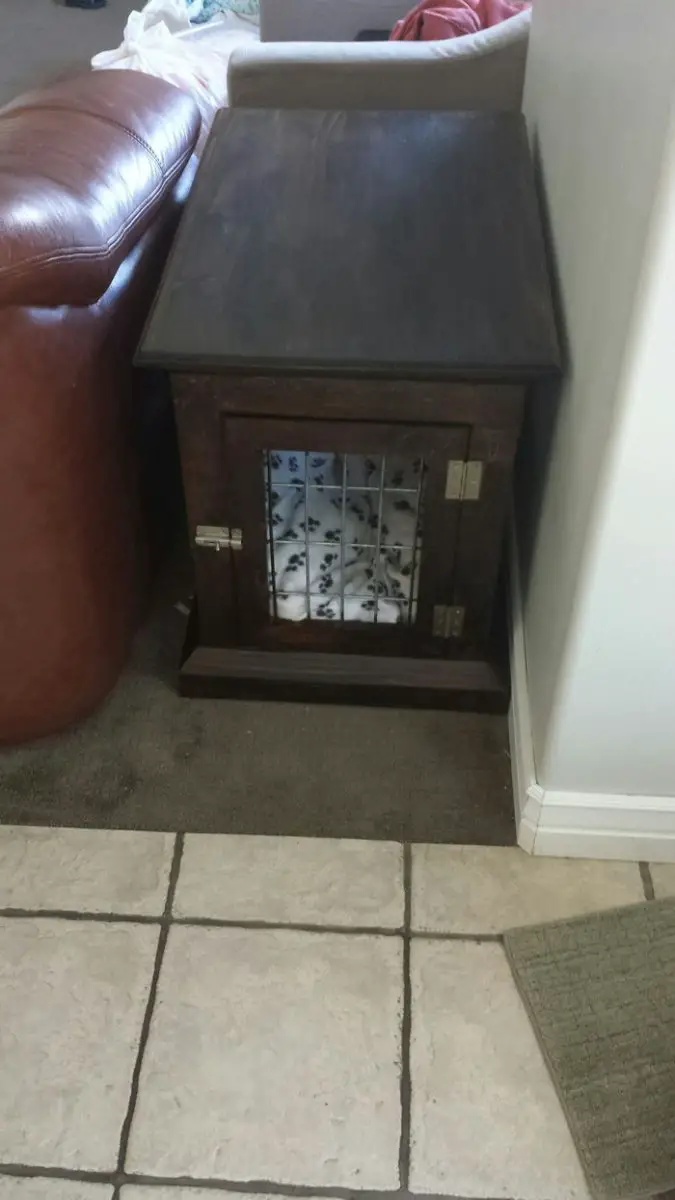
Put your animals inside: Now that it’s done, time to introduce the dog to it’s new home. She is a little anxious when it comes to change, so it may take her some time to get used to it. It turned out well and I’m pleased with how close it was to my initial brainstorming.
Thanks to NathanSellers for this great project!
Dog Kennel Table Design Variations
A dog kennel table DIY project doesn’t just offer a safe space for your pet—it also gives you a chance to add style and function to your home. Whether you want something that blends with your furniture or stands out as a design feature, there’s plenty of room to get creative. With a little planning, you can build a dog kennel end table that works as well for your pet as it does for your home decor.
Farmhouse-Style Dog Kennel Table
If you love the cozy, rustic charm of farmhouse decor, this style is perfect for your dog kennel table DIY project. Use reclaimed wood or distressed finishes to give the table an aged, weathered look. Stick to warm stains like walnut or chestnut. Add simple hardware in matte black or antique brass. Crossbars or barn door designs on the sides and doors can make it look like a miniature farmhouse piece. A neutral cushion inside will keep the look cohesive and comfortable for your dog.
Modern Minimalist Dog Kennel Table
For a clean, uncluttered look, go with a modern minimalist design. Use sleek lines and smooth finishes in your dog kennel table DIY project. White or black painted wood paired with stainless steel bars can create a contemporary vibe. You can skip additional trim and keep the design streamlined. A flush door with hidden hinges can make the kennel table almost disappear into the rest of your furniture. If you prefer a softer look, choose light wood with a clear coat finish and simple horizontal slats instead of metal bars.
Industrial Dog Kennel Table
An industrial design gives your DIY dog kennel table a rugged, urban feel. Combine raw materials like metal and wood. Dark metal mesh or rebar works well for the sides, while a rough-hewn wooden frame adds warmth. Leave the wood with a natural or lightly stained finish. Use visible welds, pipe fittings, and heavy-duty bolts to complete the look. Industrial kennel tables are perfect for loft-style interiors or modern rustic homes.
Mid-Century Modern Dog Kennel Table
If you like retro design, try a mid-century modern style for your dog kennel table DIY project. Choose smooth wood with a rich stain like teak or walnut. Tapered legs give the table an authentic mid-century profile. Rounded edges and integrated handles on the door create a clean, seamless look. For ventilation, use narrow horizontal slats instead of mesh. This style works well in homes with vintage decor and furniture from the 1950s and 60s.
Rustic Cabin-Style Dog Kennel Table
Bring the outdoors in with a rustic cabin-style dog kennel table DIY project. Use knotty pine or cedar for the frame. A darker stain can enhance the natural grain of the wood. Add branch-style spindles or natural wood twigs for the side panels. Consider using wrought iron hardware for hinges and latches. This design creates a cozy, lodge-like feel in any room and gives your pet a warm retreat.
Custom Painted Dog Kennel Table
If you want to add personality, consider a custom-painted finish for your dog kennel table DIY project. Paint the table to match your color scheme or add fun designs like paw prints or bone motifs. For a bold look, try bright colors or high-gloss finishes. You can even stencil your dog’s name on the door for a personalized touch. This option works well in casual or eclectic spaces.
These dog kennel table design variations show how a functional piece can also be stylish. Whether you’re drawn to rustic charm or sleek modern lines, a dog kennel table DIY project gives you the freedom to create something that fits both your dog’s needs and your home’s style.
Dog Kennel Table DIY Project Gallery
Click on any image to start the lightbox display. Use your Esc key to close the lightbox.![]()
Best Wood Types for Building a Dog Kennel Table
Choosing the right wood is one of the most important decisions in any dog kennel table DIY project. The type of wood you use impacts the table’s durability, appearance, and safety. You want a material that’s strong enough to withstand daily use but also safe and comfortable for your pet. Here’s a closer look at some of the best wood options to consider.
Pine
Pine is a popular choice for many DIY furniture projects, including a dog kennel table DIY build. It’s affordable, easy to find, and simple to work with. If you’re new to woodworking, pine is a forgiving material. However, pine is a softwood, which means it can dent and scratch more easily than hardwoods. To protect it, make sure to apply a quality wood conditioner before staining. A good coat of polyurethane will help extend its life and protect it from wear and tear.
Oak
Oak is a hardwood known for its strength and durability. If your dog is active or tends to chew, oak is a great option for your dog kennel table DIY project. It resists dents and scratches and holds up well over time. Oak has a prominent grain pattern that adds a traditional or rustic look to the table. It stains beautifully, especially in darker shades like walnut or espresso, giving the kennel table a rich, warm finish.
Maple
Maple is another hardwood that works well for a dog kennel table. It has a smooth grain that gives it a clean, modern appearance. Maple is harder than oak, making it an excellent choice if you need something sturdy. It can be a little more difficult to stain evenly because of its tight grain. Using a pre-stain wood conditioner can help you achieve a uniform finish. Maple is ideal if you’re going for a lighter, more contemporary look.
Birch
Birch is a strong hardwood that’s less expensive than oak or maple, making it a solid choice for a dog kennel table DIY project on a budget. It has a pale color and smooth surface, which takes paint and stain well. Birch is also fairly easy to work with, although it can sometimes be prone to chipping if you aren’t careful when cutting. This wood works great for modern or transitional styles.
Cedar
Cedar is a softwood that’s naturally resistant to insects and moisture. While it’s not as hard as oak or maple, it’s a good option if you’re building an outdoor dog kennel table or want a lighter, more aromatic wood. Cedar has a distinct, pleasant scent and a warm, reddish color. If your dog tends to chew, you may want to avoid cedar as it’s a softer wood, but it’s still a great choice for a cozy indoor table.
Poplar
Poplar is a lightweight hardwood that’s affordable and easy to cut, drill, and sand. It doesn’t have much grain pattern, which makes it a good candidate if you plan to paint your dog kennel table DIY project. It’s less durable than oak or maple, so it’s better suited for smaller dogs or dogs that are calm and less likely to chew or scratch.
Reclaimed Wood
Using reclaimed wood is a sustainable option that gives your dog kennel table DIY project a unique, weathered look. Old barn wood, pallets, or salvaged boards can add character and charm. Be sure to sand thoroughly and check for nails or other hazards before using reclaimed wood. It’s perfect for farmhouse or rustic designs and adds a story to your project.
Selecting the right wood for your dog kennel table DIY project comes down to your style, budget, and your dog’s behavior. Whether you choose sturdy oak for durability or reclaimed wood for character, the right material will ensure your kennel table looks great and stands the test of time.
Conclusion
Crafting a dog kennel table DIY project gives you a functional piece of furniture that blends comfort for your pet with style for your home. With the right materials and thoughtful design, you can create a kennel that’s safe, sturdy, and matches your decor. It’s a rewarding project that benefits both you and your furry companion.
We have more ways to keep your pets comfortable. Check out our pet murphy bed project next!


