Last Updated on June 4, 2025 by Team Ideas24
Want to keep your little kids (or pets) out of a certain part of your home? Then a Dutch barn door might just appeal to you!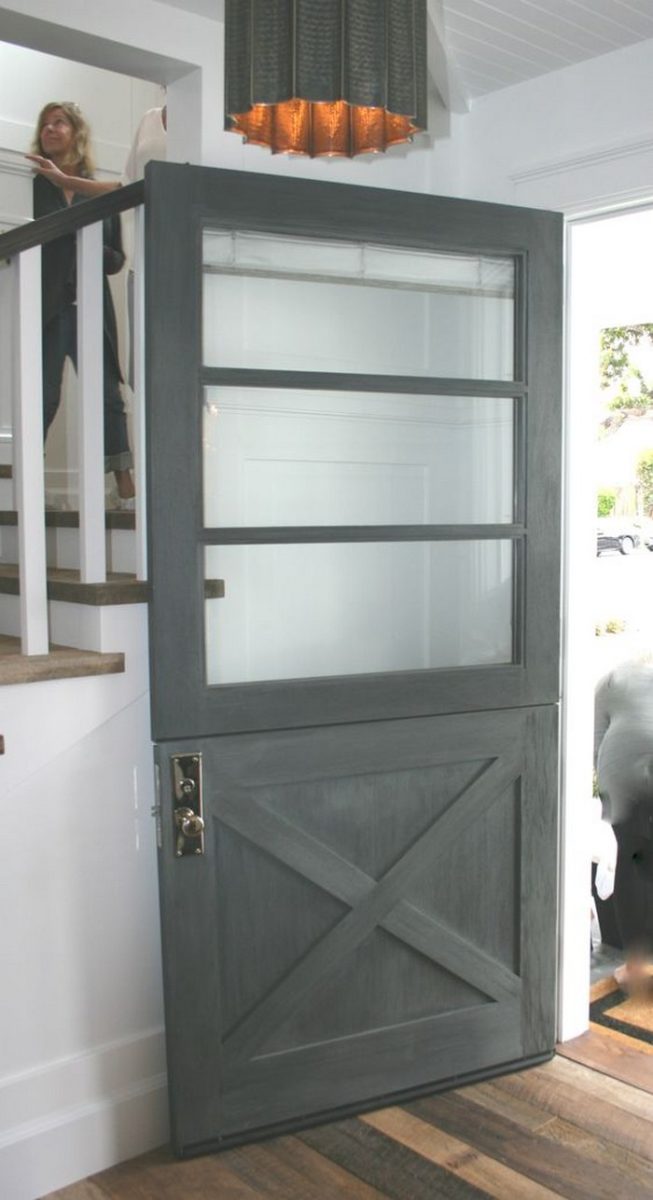
Dutch door, stable door, or half door – this type of door is a great solution for keeping your children or pets from going into certain areas of your house while still allowing for air and light to flow in both areas.
You can even use one as your external door if you want more light and breeze coming into your home while still being able to kids in or dogs out! The closed lower half will also help prevent outside dirt from getting into your house. ;)
A Dutch barn door is functional, easy to build and it adds character to a room!
Learn how to build a Dutch door by following the guide below. Do you think a Dutch barn door would look good in your home?
Contents
How to Build a Dutch Door
You’ll need these materials:
- Timber
- Gate Hinges
- Latch
- Wood screws
- Waterbased Wood Stain
- Sanding Block
And these tools:
- Measuring Tape
- Circular Saw
- Razor Blade
- Speed Square
- Cordless Drill
- Dremel Multi-Max MM20
- Foam Brush
Steps:
Building a Dutch door is a great weekend project that adds charm and function to your home. This guide walks you through each step using simple tools and readily available materials.
Step 1: Measure the Door Opening
Start by measuring the height and width of your existing doorway. Use your measuring tape to get accurate dimensions. Add an extra inch to the width and height of your timber panels if you want a snug fit, then trim as needed.
Step 2: Cut the Timber to Size
Using your circular saw and speed square, cut the timber to match your measurements. You’ll need enough pieces to create the frame and inner panels of both the top and bottom halves of the door.
Step 3: Build the Door Frame
Assemble the outer frame for each door half. Create two rectangles using your cut timber. Secure the joints with wood screws using a cordless drill. Then add horizontal and vertical supports inside the frame to stabilize it.
Step 4: Cut and Fit the Panels
Fit additional timber panels into the inner space of the door frame. Trim them precisely with the circular saw. If needed, clean up edges using the Dremel Multi-Max MM20. Screw or nail the panels into place from the back side for a clean look.
Step 5: Sand the Entire Door
Use a sanding block to smooth all surfaces and edges. Focus on corners and areas where hands will touch often. Proper sanding ensures better stain absorption and a safer, splinter-free door.
Step 6: Stain the Timber
Apply the water-based wood stain evenly using a foam brush. Follow the grain of the wood for a natural look. Let it dry completely based on the stain manufacturer’s instructions. Apply a second coat if a deeper finish is desired.
Step 7: Cut the Door in Half
Once the full door is assembled and finished, use your circular saw to carefully cut it in half horizontally. Go slowly to keep the cut straight. Sand the new edges smooth.
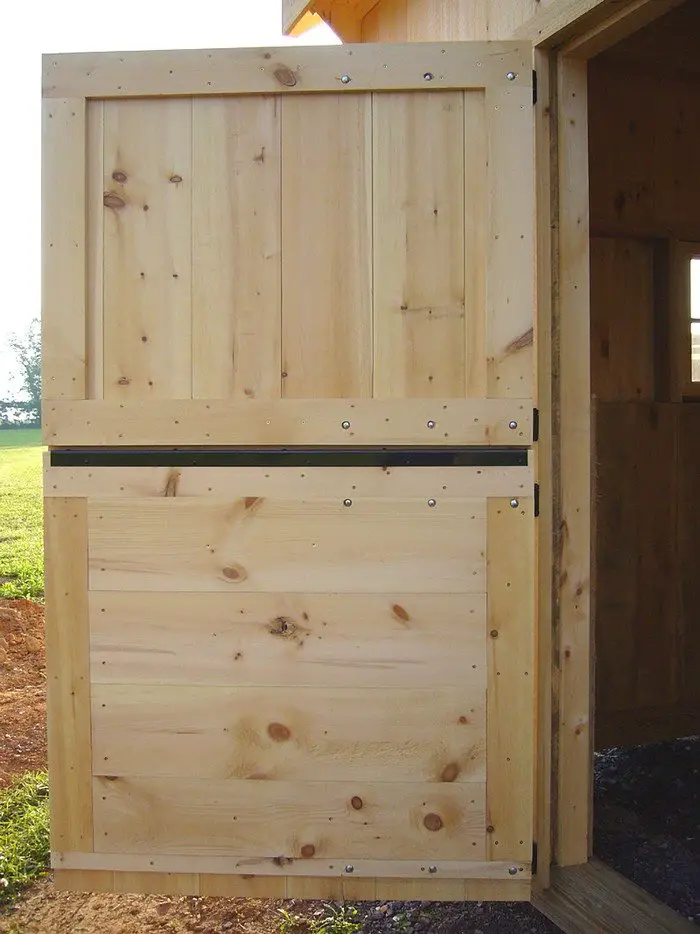
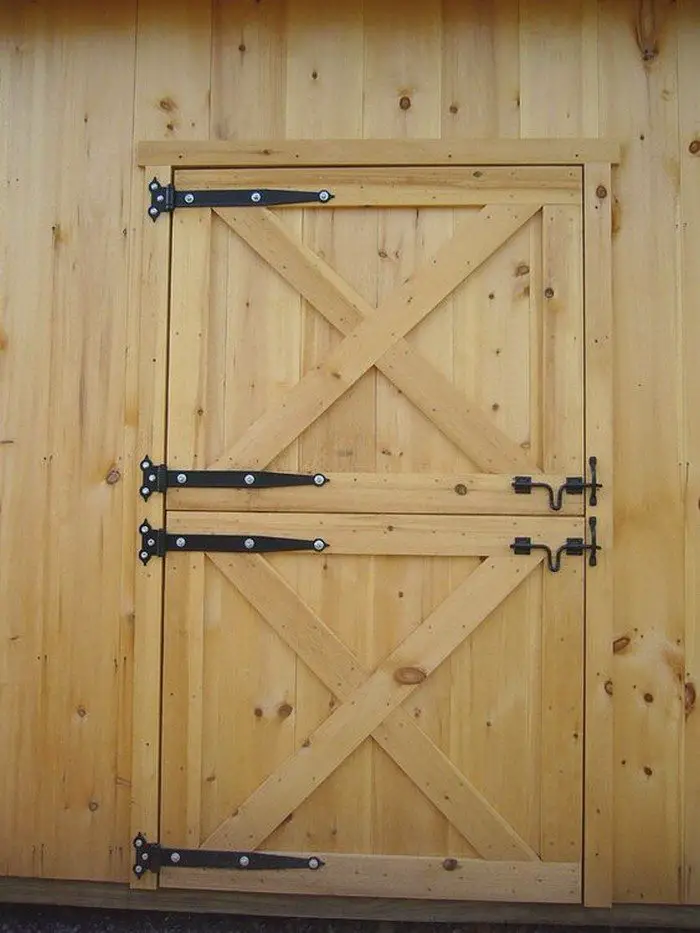
Step 8: Attach the Hinges
Install two or three gate hinges on each half of the door. Line up the bottom half with the door frame and screw in the hinges. Repeat for the top half, making sure it aligns with the bottom when closed.
Step 9: Install the Latch and Hardware
Install a latch on the top half so it can lock into the bottom when you want the door to function as one. You can also add a surface bolt on the bottom half to lock it independently.
Step 10: Final Touches and Fitting
Check the swing and alignment of both door halves. Make any final adjustments by sanding edges or repositioning hinges slightly. Once everything fits well, you’re done.
Choosing the Right Wood for a Durable Dutch Door
Building a Dutch door that lasts starts with choosing the right type of wood. The material you select affects not just durability but how the door handles weather, wear, and daily use. If you’re learning how to build a Dutch door, knowing your wood options is just as important as your tools.
Hardwood vs Softwood
Hardwoods like oak, mahogany, and maple offer excellent strength and long-term durability. They’re less prone to warping and can handle outdoor exposure better than many softwoods. Oak, in particular, is a popular choice for exterior Dutch doors because of its dense grain and resistance to moisture. If you’re using the door indoors, maple or poplar can also work well and are easier to shape and finish.
Pine: Budget-Friendly but High-Maintenance
Pine is often used in DIY projects due to its affordability and wide availability. It’s easy to cut and sand, which makes it a good option for beginners figuring out how to build a Dutch door. However, pine is a softwood and can dent or warp over time, especially if it’s exposed to moisture or sun. Use it for interior doors, and always seal it properly with primer and stain or paint.
Cedar for a Rustic Look
Cedar is a smart choice if you’re after a rustic aesthetic and natural resistance to rot and insects. It’s lightweight compared to other woods, making it easier to install. Cedar also holds up well in changing temperatures, which is helpful for outdoor Dutch doors.
Reclaimed Wood for Character
Using reclaimed timber gives your door a unique look and is also environmentally friendly. Make sure the wood is dry, stable, and free of old nails or contaminants. Reclaimed hardwood can be ideal if you want a weathered or vintage look without sacrificing strength.
Finishing for Longevity
No matter which wood you choose, proper finishing is essential. Sand every surface thoroughly, apply a quality wood stain or sealer, and consider adding a protective clear coat. This protects the wood from moisture and sunlight, extending the life of your Dutch door.
Choosing the right wood is a critical first step in your project. It sets the tone for everything that follows and determines how well your Dutch door performs over time.
How to Install a Dutch Door in an Existing Door Frame
Once you’ve built your Dutch door, the next step is making sure it fits and functions well within your existing door frame. Installing it the right way ensures smooth operation, proper alignment, and a tight seal. If you’re learning how to build a Dutch door, knowing how to install it properly is just as important as the build itself.
Check and Prep the Frame
Start by checking the condition of your current door frame. It should be square and structurally sound. Use a level to ensure the sides are plumb and the top is even. If your frame is warped or out of alignment, it’s worth correcting before proceeding. Remove the old door and hinges, then clean up any rough or uneven edges on the frame. Fill holes and sand the surface so it’s ready for your new door halves.
Measure and Test Fit the Halves
Bring in the two halves of your Dutch door and test fit them in the opening. Place the bottom half first, then set the top half on top to check spacing. You’ll want a small gap—usually around ⅛ inch—between the two halves to allow for movement. Check that each section swings freely and doesn’t rub against the frame. If adjustments are needed, trim the door edges or lightly sand them.
Install the Hinges
Attach heavy-duty hinges to the bottom half first. Use a cordless drill to secure them into the side of the door and the door frame. Once the bottom half is swinging properly, move on to the top section. Align it carefully so the top and bottom parts line up cleanly when closed. Install hinges on the top half using the same method.
Secure the Latch and Optional Bolts
A key part of installing a Dutch door is joining the two halves when needed. Add a surface bolt or sliding latch that connects the top half to the bottom. This allows you to open it as one solid door. Some people also add a separate lock or deadbolt to the top half for extra security.
Final Alignment and Finishing Touches
Open and close each door half multiple times to test movement and alignment. Make any hinge adjustments as needed. If everything works smoothly, you’re done. For those learning how to build a Dutch door, this installation phase is where craftsmanship and fit come together.
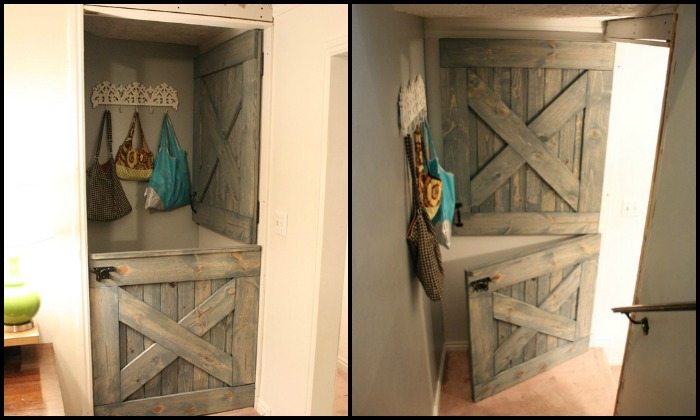
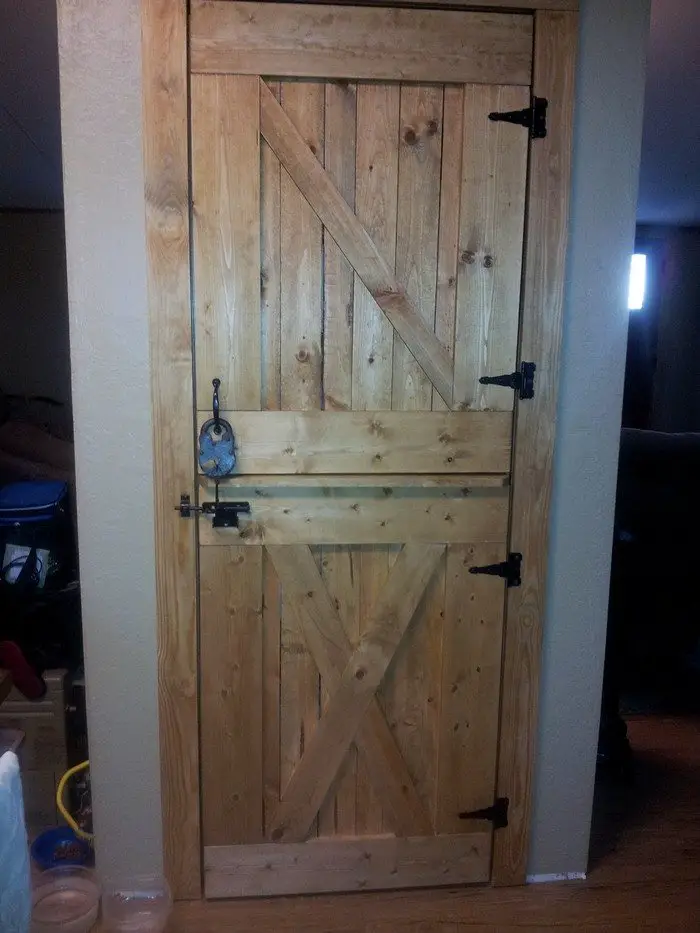
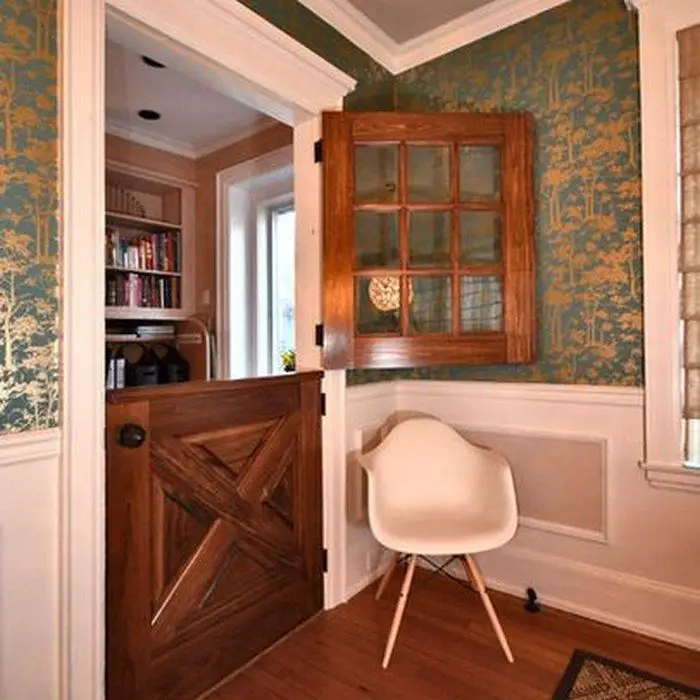
DIY Dutch Door Gallery
Click on any image to start the lightbox display. Use your Esc key to close the lightbox.![]()


Weatherproofing and Sealing Your Dutch Door
A Dutch door is charming and practical, but it needs proper sealing to keep the elements out. If you’re using it as an exterior entry, protecting it from wind, rain, and drafts is essential. Once you’ve learned how to build a Dutch door, this step ensures it lasts and functions well year-round.
Seal the Edges and Gaps
After installation, inspect the edges where the top and bottom halves meet. There should be a small, even gap to allow smooth operation, but not enough for wind or water to sneak through. Apply weatherstripping to the top edge of the bottom half and along the door frame. Use high-quality adhesive-backed foam or rubber weatherstrip for a snug fit.
Add a Door Sweep
Install a door sweep on the bottom edge of the lower half. This prevents water from seeping under the door and also keeps out drafts and insects. Choose a flexible sweep that can adjust to uneven flooring if needed.
Seal the Wood Properly
If you’re building your door from raw timber, make sure it’s sealed before installation. Use an exterior-grade wood stain or paint followed by a clear waterproof sealant. Apply it with a foam brush, following the grain for a smooth finish. Don’t forget the edges, especially where the door was cut in half. This helps prevent swelling, cracking, or warping.
Protect the Hardware
Use rust-resistant hardware like stainless steel or galvanized hinges and latches. Add a small amount of silicone caulk around the screw holes and fasteners to keep moisture out.
Whether you’re building your first or second Dutch door, weatherproofing is a step that makes a big difference. Learning how to build a Dutch door includes understanding how to protect it from the elements, so it keeps looking great and working smoothly.
Conclusion
Knowing how to build a Dutch door lets you create furnishings that combine charm with practicality. With the right tools, materials, and steps, it’s a straightforward DIY task. Once installed and sealed properly, it becomes a unique and functional feature in your home.


