Last Updated on October 7, 2025 by Team Ideas24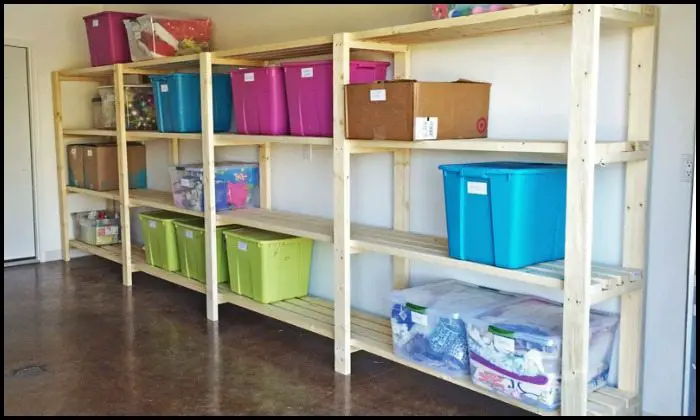
We all have little messy areas around our homes – in the garage and basement, most especially! Some of us may have more than a little.
Clutter can be an energy zapper. Just looking at it can be stressful. And we often waste so much time looking for things we can’t find!
Been planning organizing your garage or basement? It’s probably going to be a lengthy task, but you can get the ball rolling now with this easy DIY garage shelving project!
Organizing a garage or basement can be overwhelming even just thinking about it. If you’ve been wanting to clean up and organize your garage, this holiday is a good time to finally begin the task. :)
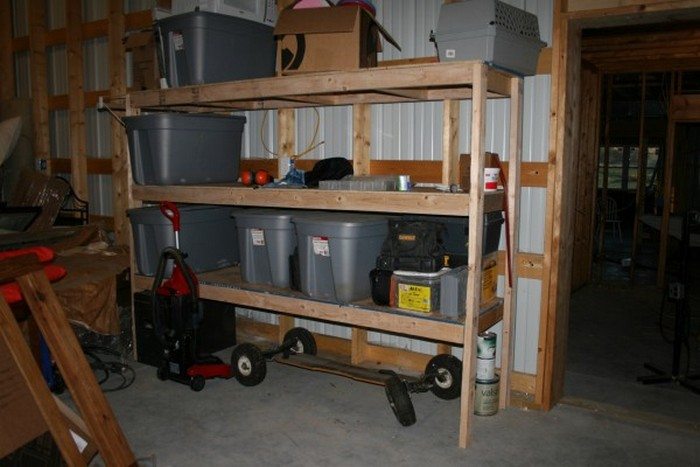
Start off with this basement shelving that is very easy to do with its basic design! This project will only take you a few hours to finish. You can definitely add this to your holiday activities, even with your slightly busy schedule!

Since many of your storage containers are probably out for the Christmas decorating, building this DIY shelf is timely. When the holidays are over you can put all your decorations back in your improved garage or basement storage system.
You can easily modify the size, height and length of your shelf so that it fits perfectly in your space. It’s really simple, but sturdy and functional. Just don’t forget to secure it to your wall to avoid tipping.
With this DIY shelf in your garage or basement, you never have to unstack or move heavy container boxes just to get what you need. :)
Do you know anyone who needs to have this DIY garage shelf?
Contents
Building Cheap Basement Shelving
Materials:
- 2 pcs of 10′ long 2×4 Timber PER Leg Support (ex. 10 pieces for 5 Leg Supports)
- 4 pcs of 2×4 Timber PER Shelf (length depending on how long you want your shelf to be)
- 2-1/2″ Self-Tapping Wood Screws
- 2 1/2″ Screws
- Elmer’s Wood Glue
Tools:
- Measuring Tape
- Square
- Pencil
- Safety Glasses
- Hearing Protection
- Drill
- Sircular Saw
- Random Orbital Sander
Steps:
- Plan the layout
- Measure the wall and ceiling height. Decide shelf length, depth, and number of levels that fit your bins. Mark stud or block locations to guide anchoring later.
- Cut leg supports
- Mark five pairs of 10′ 2 × 4s to match the full height you need. Use the square for a clean line. Cut each piece with the circular saw. Label matching pairs so assembly stays simple.
- Prepare shelf rails
- Cut four 2 × 4s for every shelf level. Keep each set identical in length for a tight frame. Lightly sand cut ends to remove splinters.
- Lay out the first frame
- On a flat floor, arrange two leg supports parallel, inside faces up. Position two long rails between them, flush with the top edges, to form a rectangle. Check squareness with the square.
- Fasten with glue and screws
- Run a thin bead of wood glue on contact faces. Drive two self-tapping screws through each rail end into the leg. The glue stops racking, and the screws lock the joint fast.
- Add lower rails
- Measure down the legs for the first shelf height. Mark identical lines on both legs. Position the next pair of rails on those marks. Glue and screw as before. Repeat for each shelf level.
- Build remaining frames
- Repeat steps 4 to 6 for the other leg pairs until every frame section is complete. Keep measurements consistent so shelves line up when joined.
- Connect sections into one unit
- Stand two frames upright. Bridge them with shelf rails at the marked heights, gluing and screwing through the rails into leg edges. Add the third, fourth, and fifth frames the same way, forming a rigid ladder structure.
- Anchor to basement wall
- Drill pilot holes through the rear legs at stud or block spots. Use standard 2-1/2″ screws with appropriate anchors to secure the shelf. This prevents tipping when you load heavy boxes.
- Finish and inspect
- Run the orbital sander over sharp edges. Wipe off dust. Give joints a final tighten. Put on safety glasses, then gently shake the unit; it shouldn’t wobble. Let the glue cure for an hour before stacking bins.
Choosing Moisture-Resistant Materials for Basement Shelving
Basements collect damp air and sudden temperature shifts that can warp boards and rust hardware. Picking the right timber and coatings stops deterioration and keeps basement shelving solid for years.
Assess Humidity and Airflow
Before you buy a single board, track moisture patterns for seven straight days. Hang a digital hygrometer at the height of the future basement shelving and another near the floor drain. Jot down morning, midday, and late-night readings.
Condensation often spikes after laundry cycles or heavy rain, so watch those windows. Walk the room with a lit stick of incense and see how smoke drifts. If it hugs the wall, you’ve found a stagnant pocket that needs a vent or fan. Map these results on paper.
You’ll spot damp corners and plan shelf placement away from the worst zones. This simple study shapes every lumber and coating decision you’ll make later.
Pressure-treated Versus Cedar
Pressure-treated pine starts as ordinary softwood, then soaks up copper-based preservatives in a vacuum cylinder. The salts diffuse deep into the grain and disable fungi on contact.
Boards stay strong even when a sump pump fails and water laps at the feet of the basement shelving for a day. Cedar follows a different path. Its natural thujaplicins repel most insects and mildew while the tight grain shrugs off minor warping.
Cedar costs more per linear foot yet needs no chemical bath or mask during cutting. Pick pressure-treated for hidden leg supports that rest on concrete, and cedar for visible shelf fronts where appearance matters.
Kiln-dried Lumber Benefits
Freshly sawn wood can hold thirty percent water by weight. Kiln ovens bake boards down to about twelve percent before they reach the store. That stable core means shelf rails stay straight when the dehumidifier kicks on in July or when cold winter air creeps in.
Lighter weight also makes lone-person assembly safer. Check the stamp on each 2 × 4; KD-HT means kiln-dried and heat-treated, a bonus for pest control. Let the stock acclimate inside the basement for two days before cutting.
This pause equalizes surface moisture and prevents hairline splits once screws go in. A small step, but your basement shelving will reward you with decades of square corners.
Engineered Panels for Shelf Decks
Solid planks span short gaps, yet wide shelves demand something stronger. Exterior-grade plywood uses phenolic glue that won’t dissolve if a nearby water heater drips. Look for stamps that read “EXTERIOR” or “CDX.”
If you need to stretch dollars, choose OSB rated for exposure one. The chips interlock and evenly carry heavy paint cans without soft spots. Cut panels to size with a sharp carbide blade, then brush waterproof wood glue along every raw edge.
The seal stops thirsty end grain from wicking damp air. Lay decks atop the frame, flush to the wall side, and secure with countersunk screws so bins slide smoothly across your basement shelving.
Composite and Polymer Boards
When routine leaks feel inevitable, step up to plastic. PVC trim boards look like painted wood yet refuse to rot, warp, or harbor mold. High-density polyethylene, often recycled from milk jugs, arrives in thick planks that carry massive static loads.
You can cut both with standard carbide blades, though the shavings are slick, so sweep often. Fasten with stainless screws because composites expand with heat and can shear ordinary steel.
Cost per foot doubles compared with pine, but the lifespan dwarfs it. Install synthetic boards on the lower tiers where puddles form first. You’ll add near-zero maintenance resilience to your basement shelving system.
Galvanized and Stainless Hardware
A solid frame deserves fasteners that survive the same harsh conditions. Hot-dip galvanized screws sport a thick zinc shell that sacrifices itself before rust can creep into threads.
They suit most inland basements where humidity hovers around sixty percent. Switch to 304 or 316 stainless in coastal zones or if you run a salt-based water softener nearby. Stainless keeps its polish even when stray brine mist settles on metal.
Drive pilot holes to prevent splitting and cam-out. Match bolt length to two-thirds of the board width for maximum grip. The right hardware means you’ll tighten once, then load the basement shelving with zero worries.
Rubber and Foam Isolation Strips
Concrete wicks ground water upward year-round. A thin sill gasket, sold for framing walls, stops that invisible march. Roll out strips under every leg before the first screw. The closed-cell foam compresses under weight yet never absorbs moisture.
For heavier racks, upgrade to recycled-rubber horse-stall mat cut into pads. Rubber resists chemical spills from bleach or paint thinner stored on the lower shelf. Both barriers raise wood a fraction of an inch, enough to keep capillary forces at bay.
Inspect once a year for tears or mold. Replacing a strip takes minutes and adds seasons to the life of your basement shelving.
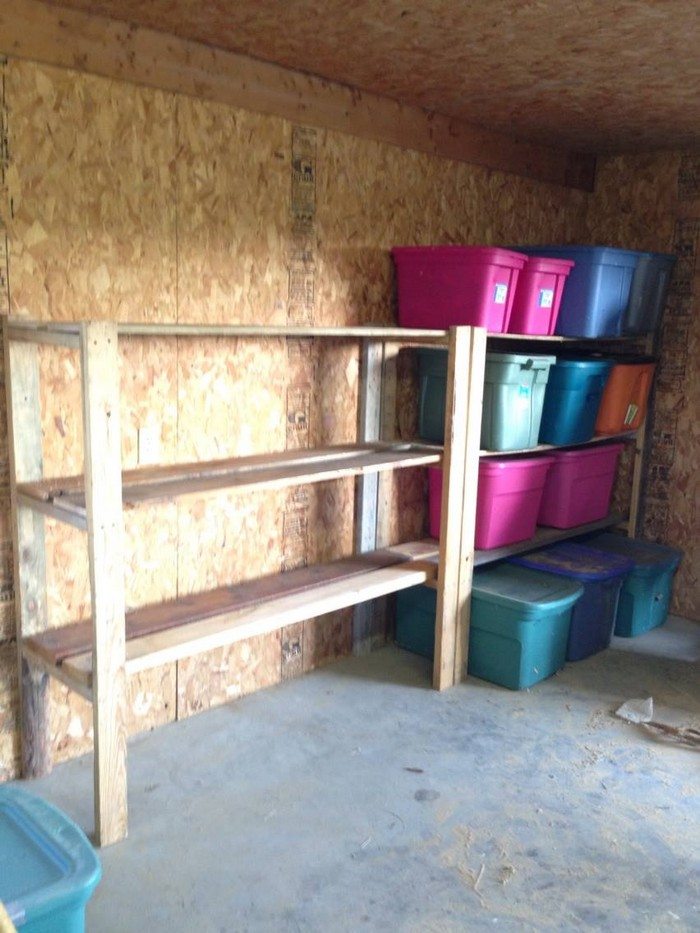
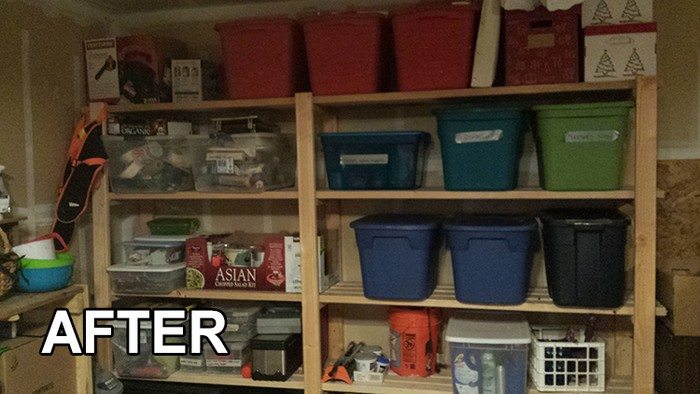
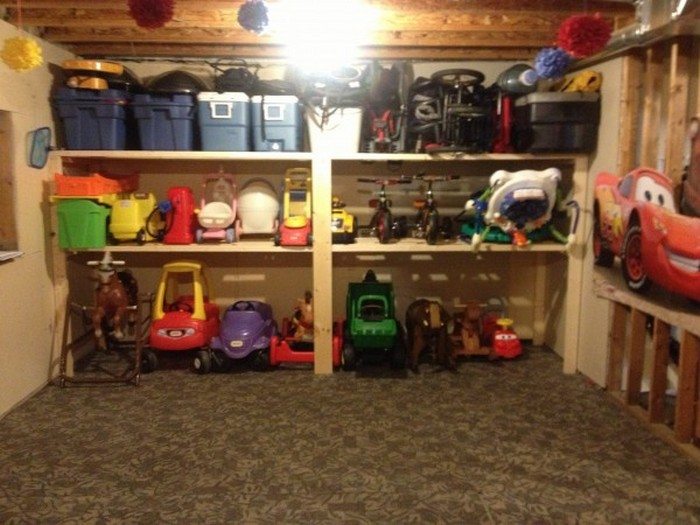
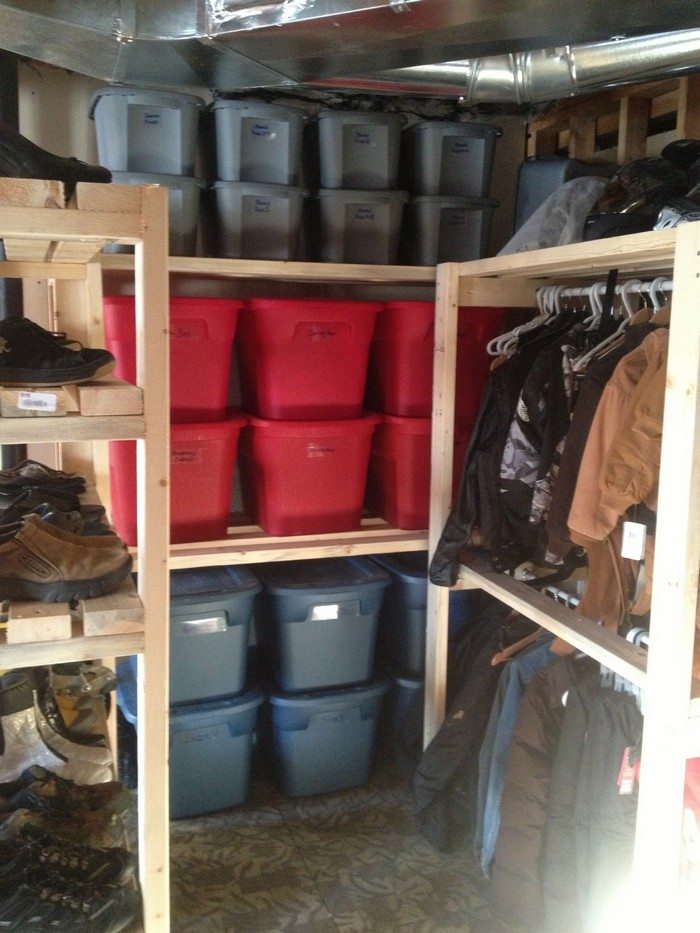
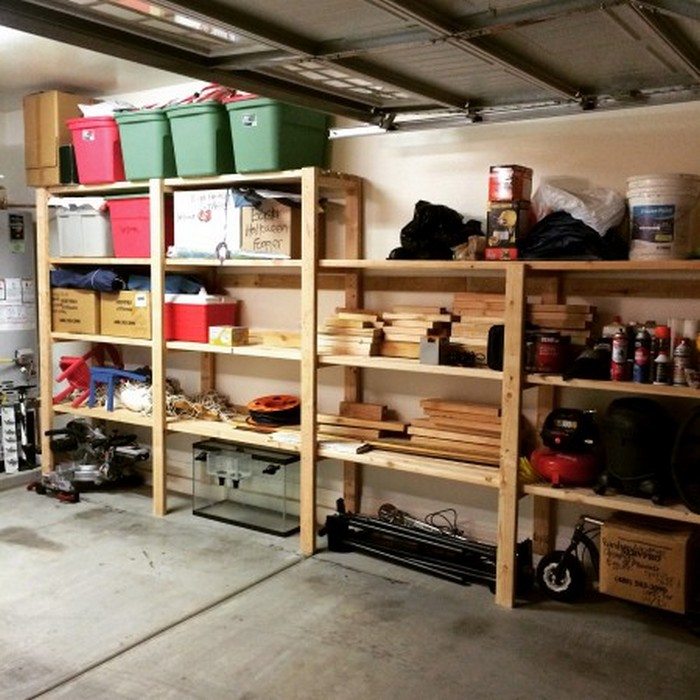
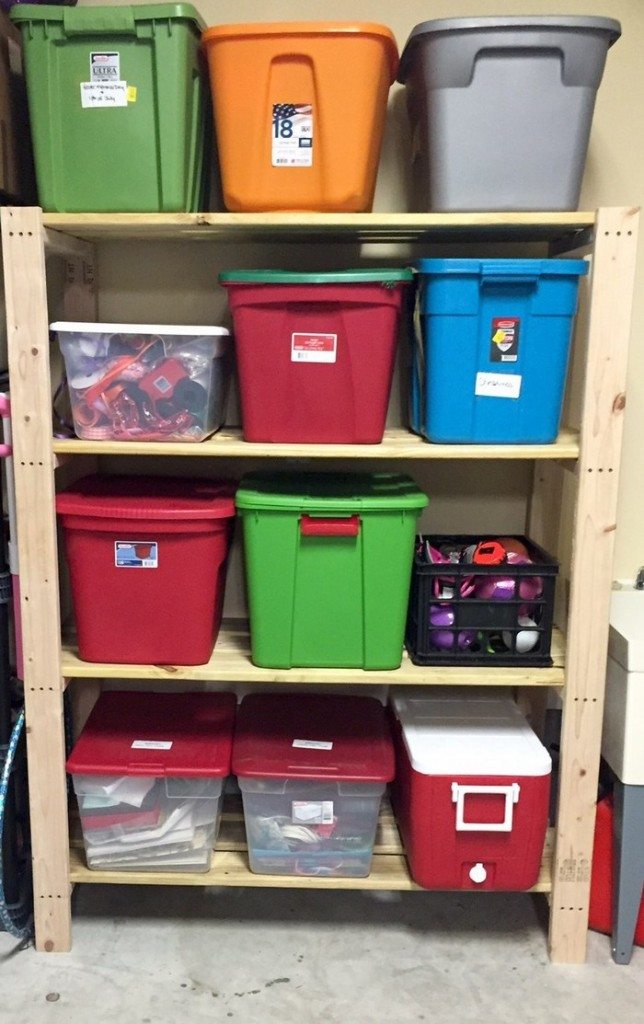
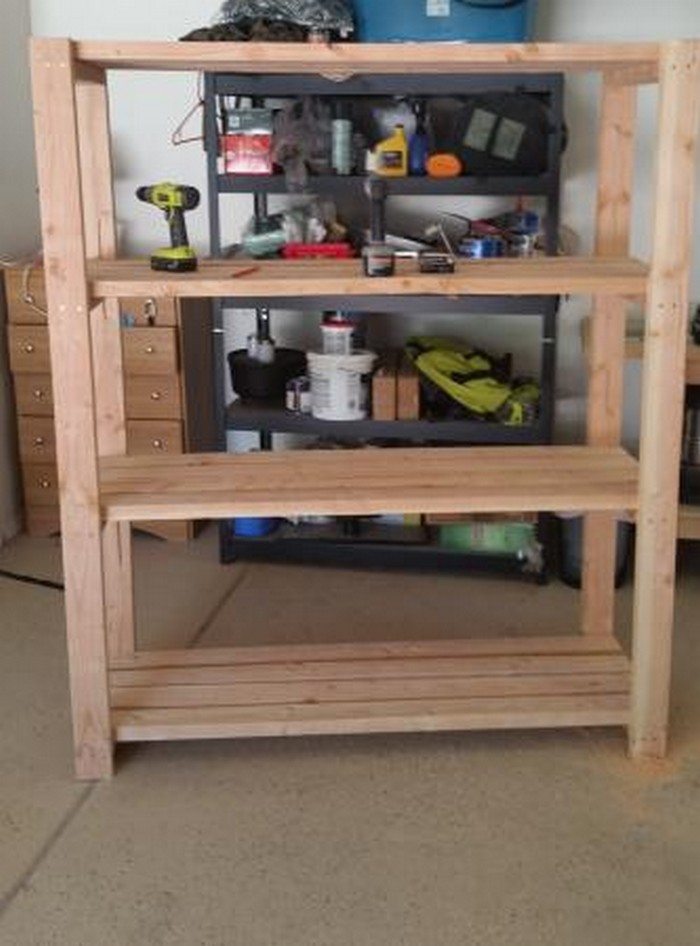
Basement Shelving Gallery
Click on any image to start lightbox display. Use your Esc key to close the lightbox. ![]()


Anchoring Basement Shelving Securely to Concrete Walls
Strong anchoring stops tipping accidents when heavy totes slide on and off. A secure connection also lets basement shelving carry more weight without bulging frames.
Identify Wall Composition
Tap the surface in several spots and listen for tone changes. A solid, deep thud signals poured concrete that can take heavier wedge anchors. A hollow echo indicates block cavities that need sleeve anchors or toggle-style fasteners to spread load.
Probe a mortar joint with a masonry nail; dusty material crumbles under light taps while solid aggregate barely marks. Knowing the wall substance shapes every drilling choice and keeps basement shelving secure, not guesswork.
Locate Safe Drilling Zones
Scan the entire wall with a stud finder on metal and AC modes. Mark every steady beep to outline hidden pipes, conduit, and rebar. Shift the tool horizontally and vertically until the screen clears, those blank rectangles are safe corridors.
Stay at least two inches from mortar joints to avoid cracking edges. Careful mapping lets you place anchor holes exactly where basement shelving needs them without risking a flooded floor or live wire.
Masonry Bit Selection
Pick carbide-tipped bits because the cutting edge stays sharp through aggregate. Match diameter to the anchor sleeve listed on the box; undersize holes crush threads while oversize ones spin loose under load.
SDS-plus shanks lock into rotary hammers and reduce vibration in your wrist. Inspect the tip before every new hole, swapping a bit with chipped edges to keep drilling crisp and fast. Sharp tooling means anchors seat flush and basement shelving stays level.
Sleeve Versus Wedge Anchors
Sleeve anchors slide into a pre-drilled hole and expand a metal jacket when you tighten the nut. They grip rough block interiors without cracking the shell. Wedge anchors have a tapered pin that jams into poured concrete for higher shear strength.
They demand exact hole depth but support heavier static loads. Choose sleeves for block walls and wedges for monolithic slabs, then mix both if your basement shelving spans different substrates.
Pilot Hole Depth Control
Wrap bright painter’s tape on the drill bit at the exact embedment depth shown on the anchor package. Stop drilling when the tape touches the wall face. Use a depth-stop collar for production work so every hole matches without measuring twice.
Correct depth keeps the expander exactly where the manufacturer tested it. Going too deep wastes thread engagement; too shallow makes the anchor sit proud and tilt your basement shelving.
Dust Removal Improves Grip
Rock dust in the hole acts like marbles and cuts holding power in half. Blast the cavity with compressed air or a hand squeeze bulb until no grit flies out. Follow with a narrow shop-vac nozzle to catch fine powder near the rim.
A nylon bottle brush scrubs stubborn residue off sidewalls. Clean holes let the anchor’s knurls bite firmly so basement shelving won’t shimmy loose after you stack heavy paint cans.
Torque to Spec
Slip a calibrated torque wrench over the anchor nut and tighten in small half-turns. Stop when the wrench clicks at the value printed on the anchor chart. Under-torque invites slip, while over-torque can strip threads or spall concrete.
Pause one minute, then recheck because metal threads settle under load. Correct torque locks each anchor in place and makes every shelf feel rock solid.
Add Lateral Bracing
Cut a 2 × 4 to run diagonally from the top rear corner of the rack to a lower leg near the floor. Set the brace flat against both members and fasten with two three-inch screws at each end. This triangle cancels racking forces when you pull a tote forward.
Use galvanized metal straps if the brace crosses an aisle and you want a slimmer profile. Lateral stiffeners distribute side loads across multiple anchors so basement shelving never leans.
Conclusion
Solid shelves lift clutter off the floor and give your storage room new life. Planning moisture control and secure anchors prevents sagging and rust. Kiln-dried boards and stainless hardware pay off with decades of service. Regular inspections and quick touch-ups keep mold away and screws tight. Build once and you’re set to tackle any seasonal chaos with confidence.
Still need to improve your basement? Check out our guide on creating basement walkouts!


