Last Updated on July 1, 2025 by Team Ideas24
Improve your backyard garden by making the most out of your space and making tending to your plants easier! Here’s one DIY staircase planter that offers both. :)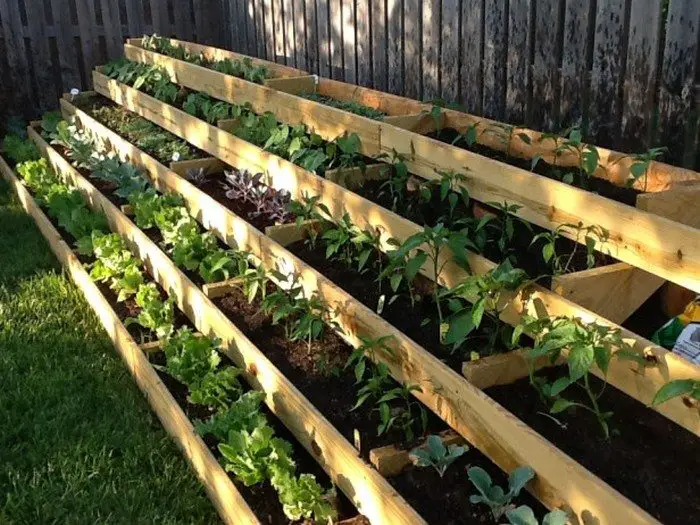
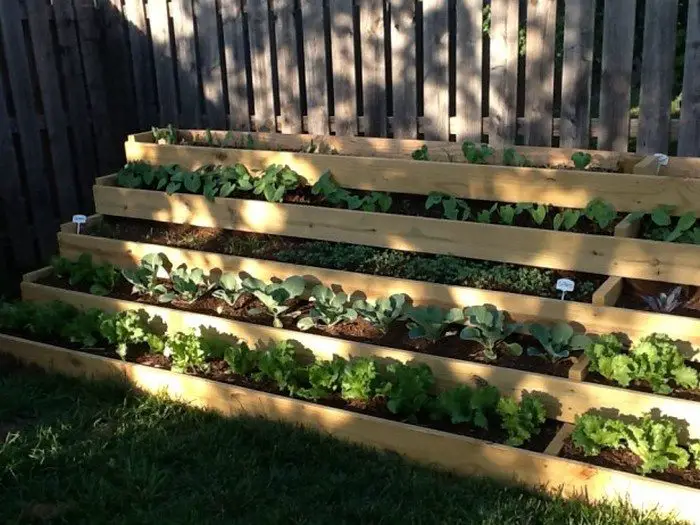
With this staircase vertical planter, you can grow more plants and herbs using less space. This staircase planter also makes work easier since you don’t have to kneel and reach down to the ground in tending plants. And as a bonus, it prevents garden critters from getting to your produce!
You can easily build this staircase planter over the weekend, or in just a few hours if you are an experienced DIY-er!
Is this going to be your next garden project?
Contents
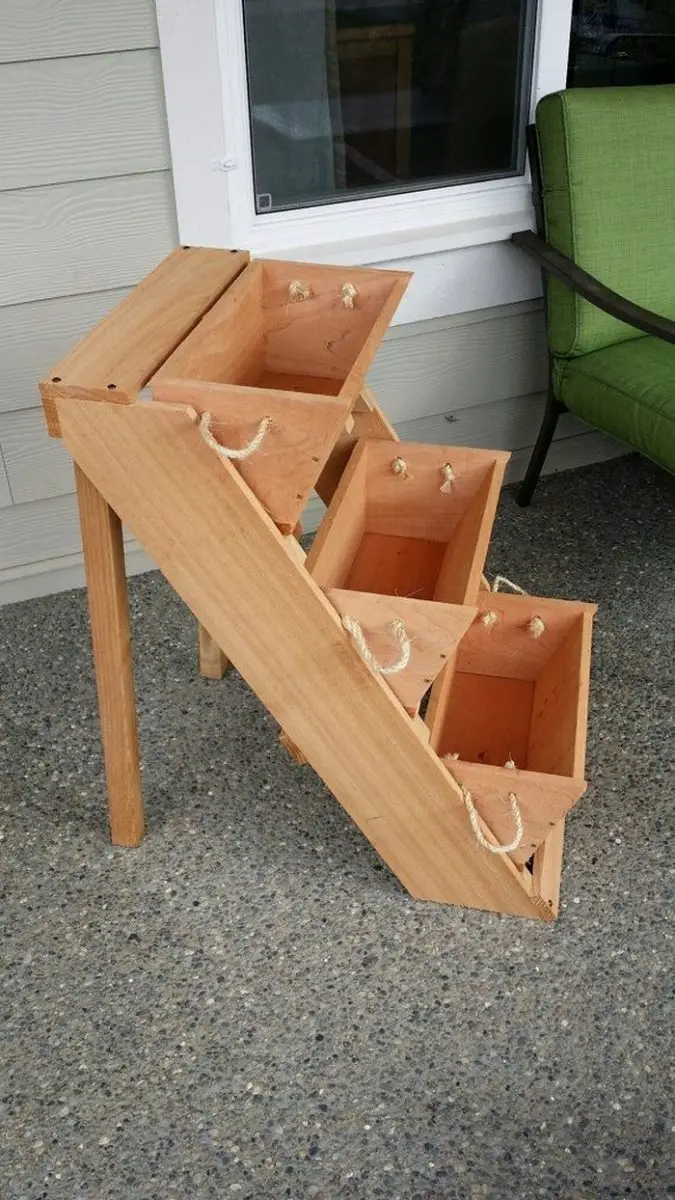
Crafting a DIY Staircase Planter
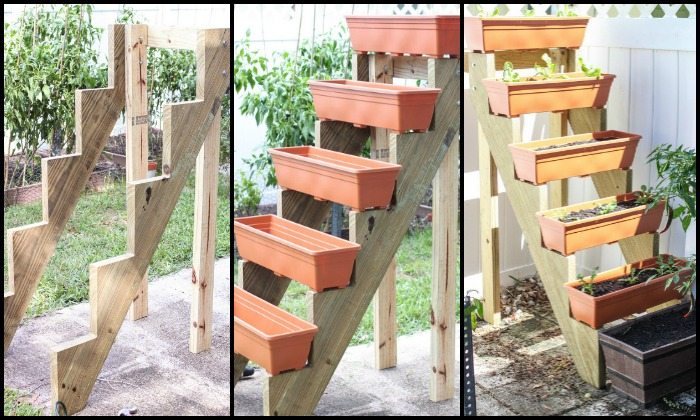
You’ll need these materials:
- 2 – Stair Risers
- 5 – Planter Boxes
- 1 – 2″x4″x12′ Pressure Treated Board
- 4 – 3.5″ 5/16 Hex Bolts
- 4 – 5/16 Nuts
- 8 – 5/16 Washers
- 20 Screws (and matching size Washers)
- 8 additional Screws
And these tools:
- Drill
- Measuring Tape
- Circular Saw
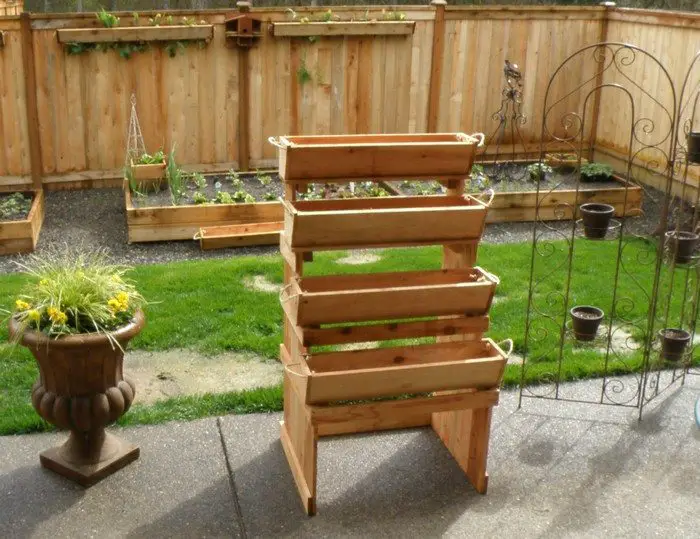
Step-by-step build
- Measure and mark supports. Lay the 2×4 on a flat surface. Measure the inside width of your stair risers. Mark two support pieces that match this width.
- Cut the 2×4. Use the circular saw to cut the marked pieces. These boards will brace the risers and hold the planter boxes.
- Drill pilot holes. Set the risers upright like a mini staircase. Mark two pilot holes on each side where the support boards will sit flush. Pilot holes stop the wood from splitting.
- Attach the lower support. Hold the first cut board between the lowest treads. Drive two screws through each riser into the board. Add washers so the screws bite firmly. This locks the base square.
- Add the upper support. Repeat the process for the top tread. The frame of your DIY staircase planter now stands rigid.
- Reinforce with hex bolts. Slide a washer onto each 5/16″ bolt. Push a bolt through the riser and support board at both ends of the frame. Add washers and nuts on the back side and tighten. The bolts handle heavy soil weight.
- Set the planter boxes. Place a box on every tread to check fit. Mark the rear inside corner of each box where it meets the riser.
- Secure the boxes. Drill two pilot holes through the back of each box into the riser. Fasten with the eight extra screws. Your plants won’t wobble when watered.
- Check level and alignment. Place a small level on the top box. If the bubble drifts, adjust the bolts or supports until all tiers sit flat.
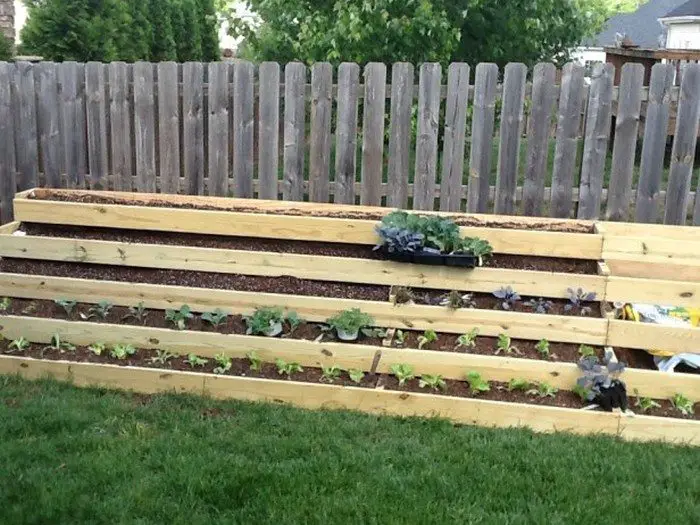
- Fill and plant. Add quality potting mix. Stagger herbs, flowers, or compact veggies so taller plants don’t shade lower tiers. A balanced layout makes the diy staircase planter lush and productive.
- Water test. Lightly soak the soil to confirm drainage. Tighten any joint that shows movement.
- Finish and protect. Brush on an outdoor wood sealant to extend the life of the pressure-treated lumber. Now wheel the frame into position, or leave it to add vertical charm where space is tight.
Rot-Resistant Lumber Choices and Weatherproof Finishes
Rot weakens outdoor builds quickly, so durable lumber saves repairs. Weatherproof finishes lock out moisture and give your diy staircase planter a refined, lasting look.
Cedar vs Redwood: Weight, Cost, and Longevity
Cedar resists decay through natural oils that repel fungi and insects. The boards stay light, so you can shift the planter without straining your back. Redwood offers deeper color tones and slightly denser grain, which adds strength against accidental knocks.
It costs more where redwood is scarce, yet it handles constant damp better than cedar. Weigh the local price gap against expected rainfall in your region. Choose a clear, knot-free grade no matter the species. Fewer knots mean fewer entry points for water, so the lumber endures longer. Your upfront investment returns seasons of reliable service.
Pressure-Treated Pine: Safe Handling and Off-Gassing Facts
Modern treatment uses copper azole or micronized copper to block rot. You’re safe using it for ornamentals and herbs when you line the boxes with food-grade plastic. Wear gloves and goggles while cutting to avoid sawdust irritation.
Let freshly cut pine sit two days before sealing, because moisture driven out by the saw needs an exit path. Off-gassing odors fade fast in open air, and the boards settle to a neutral scent within a week. The budget cost lets new gardeners build big without draining funds. Match lengths carefully, since treated pine can warp if left unpainted too long.
Eco-Friendly Stabilizers: Soy-Based Wood Sealer
Plant-based sealers soak deep and cure clear, so grain stays visible and touchable. They use renewable oils that polymerize inside each cell wall, which stops swelling when rains arrive.
You’re avoiding volatile organic compounds that irritate lungs, so weekend projects feel healthier. The sealer sprays on with a basic pump bottle, and one coat covers every joint you drilled.
Reapply after two summers for best defense, and note how water beads instead of soaking. That behavior shows the cells remain locked against rot. Your staircase planter keeps its fresh-milled scent yet handles daily watering with ease.
Layered Finish Strategy: Primer, Paint, and Topcoat Timing
Start with an exterior wood primer that bridges small cracks. Brush along the grain to force resin inside. After twenty-four hours of cure time, roll on a high-quality acrylic paint. Two thin coats beat one thick coat because each film dries harder. Finish with a clear polyurethane formulated for UV resistance. It prevents fading and chalking that dull bright colors. Lightly sand between layers to create microscopic grooves the next coat can grab. Follow the same order on replacement boards later, and the planter keeps a consistent sheen from top tread to lowest box year after year.
Color-Coordinated Paint or Stain Ideas to Match Your Deck
A cohesive palette makes your diy staircase planter blend with the deck instead of looking tacked on. Smart color picks highlight foliage and hide dirt.
Neutral Earth Tones for Rustic Timbers
Soft taupe or weathered gray mimics sun-aged cedar planks and lets greenery pop. Choose pigments labeled earth oxide because they fade slower under tropical sunlight. Paint the risers first and judge how the color shifts at dusk. Add the planter boxes next so tones settle together.
Earthy shades mask soil splashes that appear after heavy watering, which keeps maintenance light. Guests see an integrated structure rather than a separate add-on. You’re also future-proofing style, since muted hues pair with new patio furniture down the road.
Bold Contrast Bands That Frame Greenery
Deep charcoal rails with crisp white box faces create a gallery feel. The dark edge outlines leaf clusters while white backdrops amplify blossom color. Use painter’s tape to keep edges sharp and professional.
Apply the lighter coat first, let it cure, then tape and spray the accent color. The technique avoids bleeding and removes clean lines in one pull. Bold contrast helps night lighting pop because solar lamps bounce off pale surfaces. It’s an easy designer trick that makes a modest planter look custom.
Semi-Transparent Stains That Let Grain Shine
Stains sink rather than sit, so surface texture remains touchable. Pick a tint that echoes deck posts, like warm chestnut or golden pine. Brush with long strokes to prevent lap marks, and wipe excess within ten minutes to avoid sticky patches.
You’re sealing pores while allowing knots and growth rings to read as natural art. Semi-transparent finishes accept a fresh topcoat without the need for sanding, saving time during seasonal spruce-ups. They also resist peeling, so you avoid the dreaded cycle of scraping and repainting.
Testing Swatches Under Sun and Shade
Paint chips lie indoors because artificial light skews warmth. Dab sample squares on scrap boards and place them beside the planter at noon and twilight. Note how color changes with shifting sun angles. Deck boards often reflect light upward, lightening the lower boxes, so choose one shade darker than expected.
Keep samples outside through one rain to ensure water spots don’t stain. This hour of testing saves years of regret and unnecessary repainting. Confident choices mean you’re proud every time you step outside.
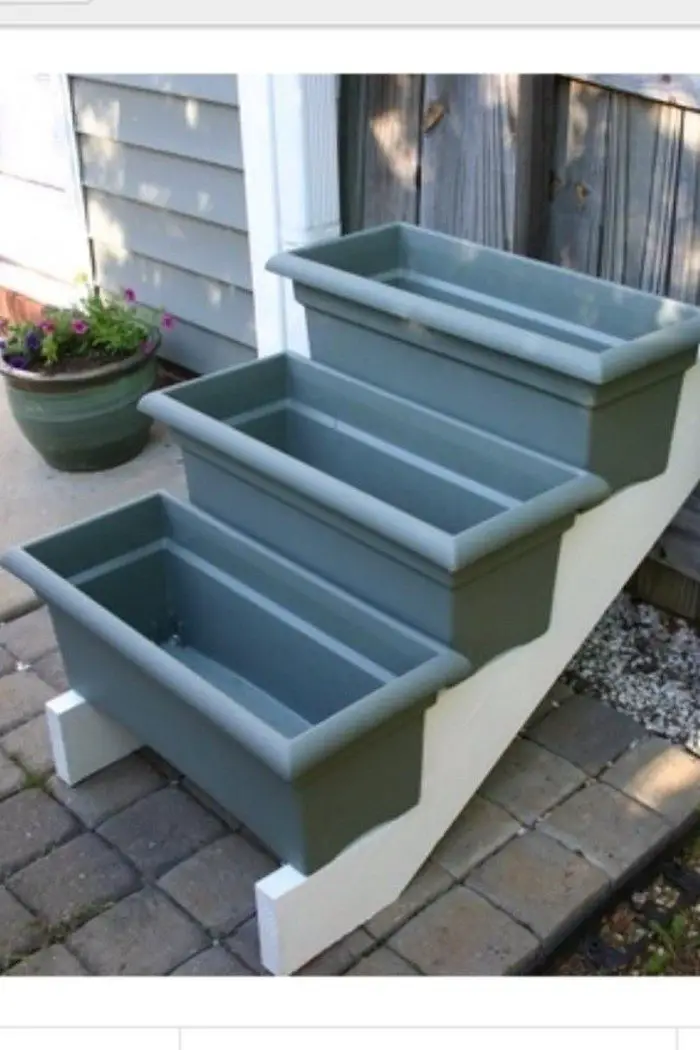
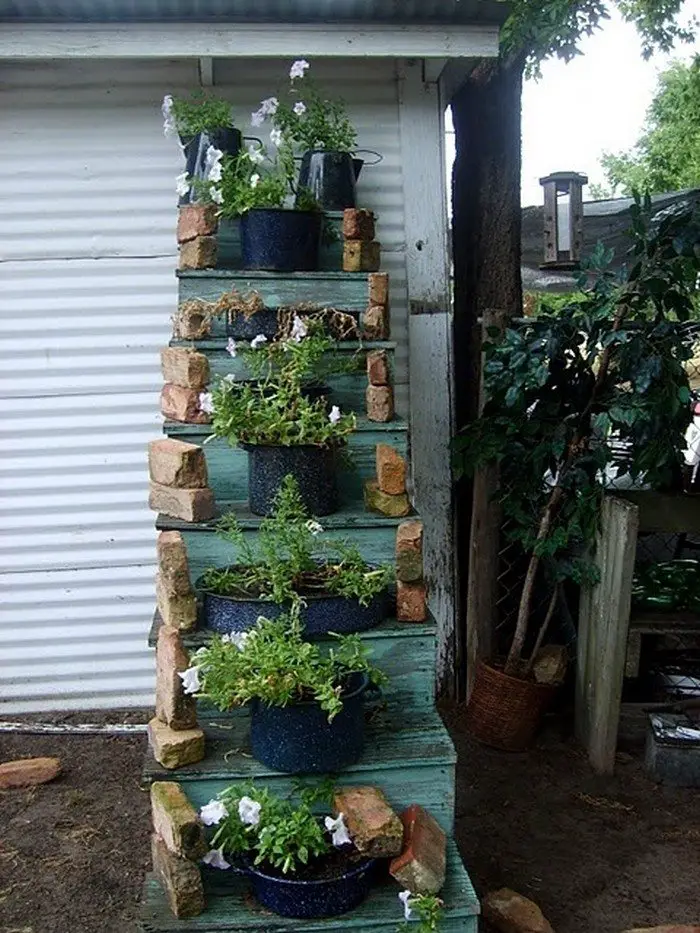
DIY Staircase Planter Gallery
Click on any image to start the lightbox display. Use your Esc key to close the lightbox.![]()


Creative Plant Mixes for a Lush DIY Staircase Planter
Plant layering turns each step into a living tapestry. Mixing edibles, flowers, and trailing vines keeps the diy staircase planter productive and picture-perfect all season.
Sun-Loving Herb and Veggie Pairings
Top tiers bask in the most light, so fill them with compact tomatoes, dwarf peppers, and basil. Basil repels tomato hornworms while sharing similar moisture needs. Cherry tomatoes cascade slightly yet stay contained inside the box edge.
Dwarf peppers add pops of red and orange, matching brightly painted rails if you chose bold colors. Reserve back corners for rosemary, whose woody stems anchor soil against heavy rain. The combination means salads just one reach away without bending, and the scent welcomes visitors before they see the blooms below.
Shade-Tolerant Green Cascades
Lower steps hide behind upper foliage, so select plants that thrive on filtered light. Lettuce blends such as buttercrunch grow loose heads that you harvest leaf by leaf. Add curly parsley for texture and a fresh kick in cooking.
Creeping jenny spills over the front, hiding hardware and softening sharp corners. The trailing stems shade soil, keeping roots cool on hot afternoons. Moisture stays longer, so you water less. Shade plantings widen the usable list beyond sun addicts, giving your planter greater visual depth.
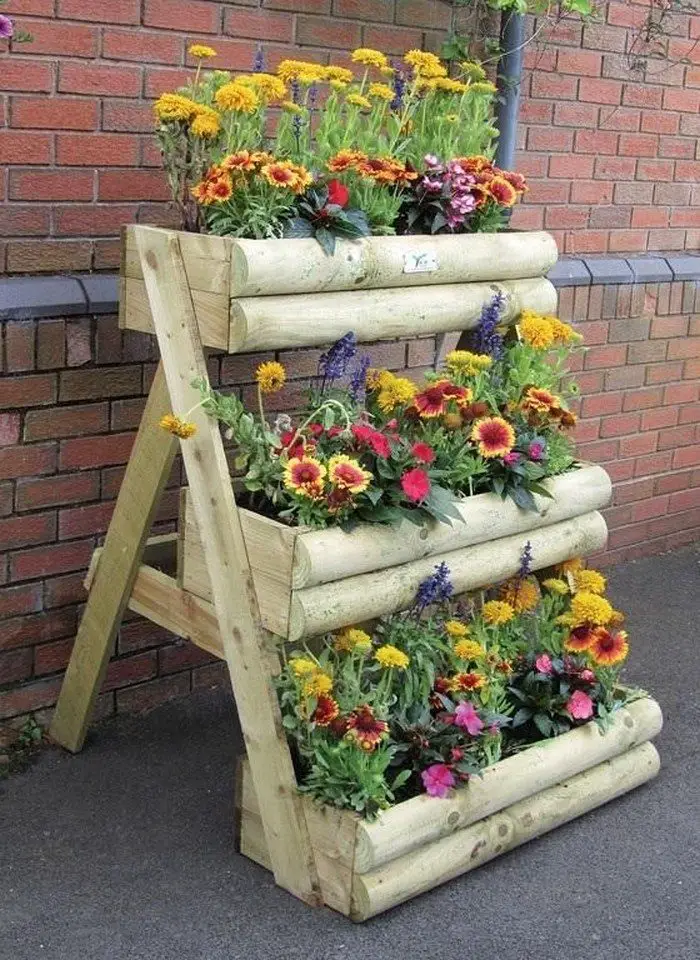
Pollinator Magnets for Upper Steps
Bees and butterflies boost kitchen yields, so lure them close. Sweet alyssum spreads gently and releases honey-like fragrance at ankle height. Interplant with dwarf zinnias whose flat petals provide landing strips.
The bright disks draw butterflies that then spot tomato blossoms nearby. Nasturtiums add edible blooms and peppery leaves, great for salads. They handle morning sun and afternoon shade, bridging conditions across tiers. You’re building a mini-ecosystem where color meets function, keeping pollinators cycling through all day.
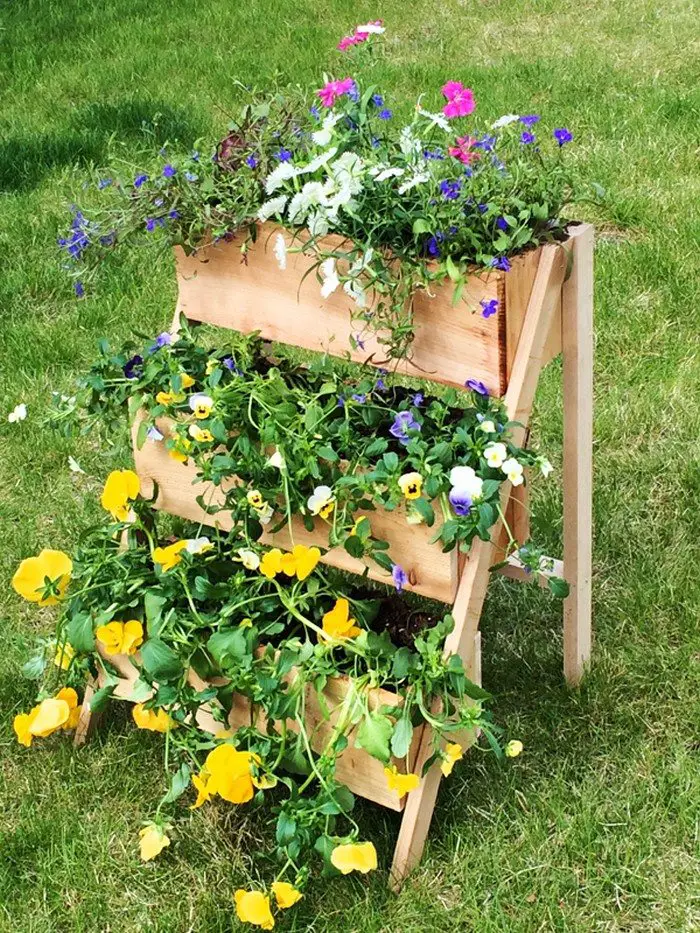
Seasonal Swap Plan for Year-Round Color
Cool months invite pansies, kale, and dwarf snapdragons. Pull tired summer annuals and refresh the top two inches of soil with compost. Kale’s ruffled leaves turn sweeter after a light frost, adding interest when most gardens look bare. Spring welcomes peas that climb simple twine stapled to risers, freeing box interiors for fast-growing radishes.
Rotate families to reduce disease buildup, and sprinkle organic fertilizer every changeover. Document successes in a notebook, so next year’s plan improves yield again. Continuous color keeps the staircase planter alive in photos year round, inspiring neighbors to build their own.
Conclusion
Building a DIY staircase planter turns scrap risers into a compact garden statement. Each tier lifts herbs and veggies to waist height, so tending feels effortless. Rot-resistant lumber and weatherproof finishes keep the frame solid through heavy rain and scorching sun. Seasonal plant swaps let the structure work twelve months a year without looking tired. Follow the measured cuts and sturdy fasteners, and your new planter will serve as both décor and harvest station for years.
We have more space saving garden planters you can make at home. Check out our DIY PVC pipe planter project next!


