Last Updated on June 23, 2025 by Team Ideas24
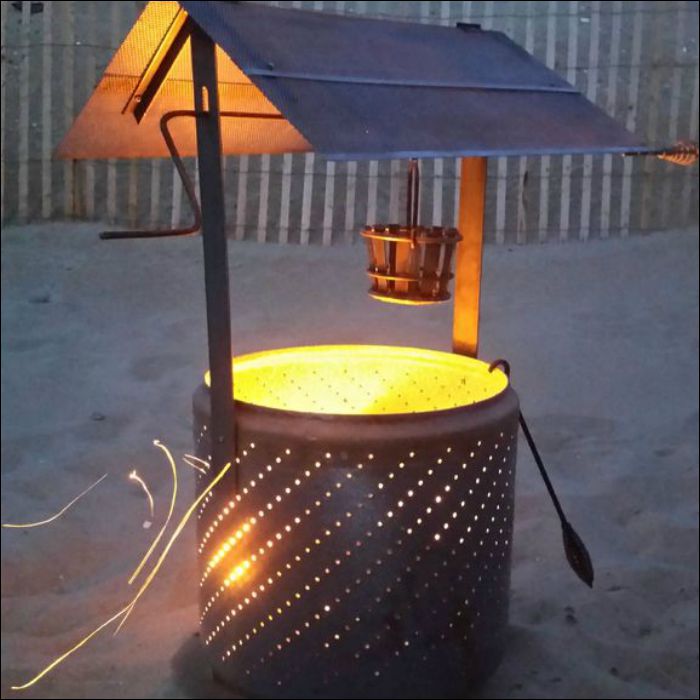
Why buy an expensive, decorative fire pit for your yard when you can have something as impressive by upcycling an old (cheap) washing machine drum? Take a look at this wishing well burn barrel!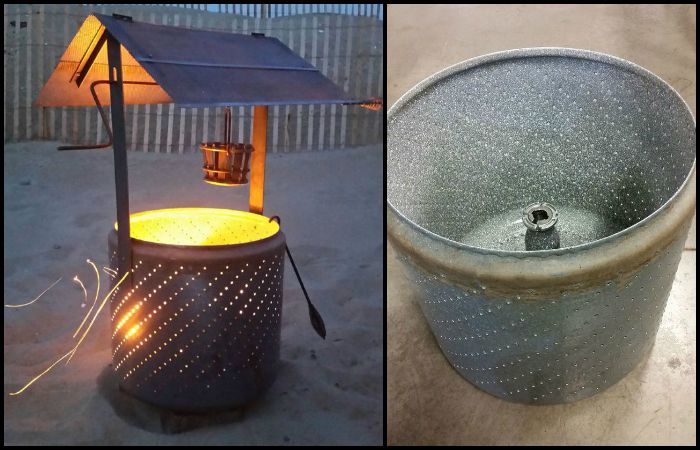
This DIY fire pit is another example of creativity, function and beauty. And what’s great about it is that it is also simple, making it easy to make, assemble and use!
The wishing well design not only provides good fire but also conveniently allows you to cook or heat foil-packed food like vegetables and meat. Just put your meal inside the metal bucket, lower it down, and crank it up again when it’s done! If you want to boil water, you can replace the bucket with a camping kettle.
As mentioned, this creative washing drum fire pit is very easy to assemble. You only need 8 bolts and 10 minutes, and you’ll be ready to enjoy some outdoor unwinding! Want to use this burn barrel in your backyard, or bring it at the beach or for camping? Why not? All of its parts fit inside the washing machine drum, so you can easily transport it to anywhere you wish. :)
Got access to an old washing machine drum? Read on to see what else you’ll need to make your own version of this washing drum fire pit!
Contents
Building a Wishing Well Burn Barrel
Materials
- Old Washing Machine Drum
- 4 sheets of 24in x 6.5in Perforated Steel
- 5 ft long of 3/8in Mild Steel Rod
- 12 pieces of 1in x 4in x 1/8in Bar Stock Metal
- 2 pieces of 2in x 24in x 1/8in Bar Stock Metal
- 4 pieces of 9in long, 1in Angle Iron
- Permanent Marker
- Paper
- Hinges
- Steel Chain
- Threaded Quick Link
- #6 and #8 Bolts with Nuts
Tools
- Power Drill with bits for metal drilling
- Welding Machine
- Tape Measure
- Metal/Steel Cutter
- Clamps
- Vice Grip
Steps
First things first, you need a barrel!
Washing machine drums are easy to come by if you look for abandoned machines out on curbs, scrap yards, or you might be looking to find a use for your own worn out washing machine.
Be prepared to get a little dirty wrestling it out but it’s worth the fight for your wishing well burn barrel. You will probably end up smelling a bit like laundry soap by the end.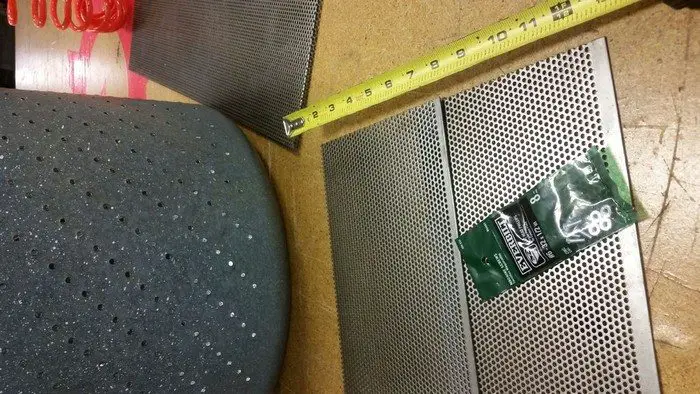
I used some perforated steel for the roof. The holes will make it light, prevents it from trapping heat, and allows you to watch the fire from the top.
The sheets I used were scrap from the shop so I’m not sure of the guage of the metal but it was a total of 4 sheets that were 24in x 6.5in.
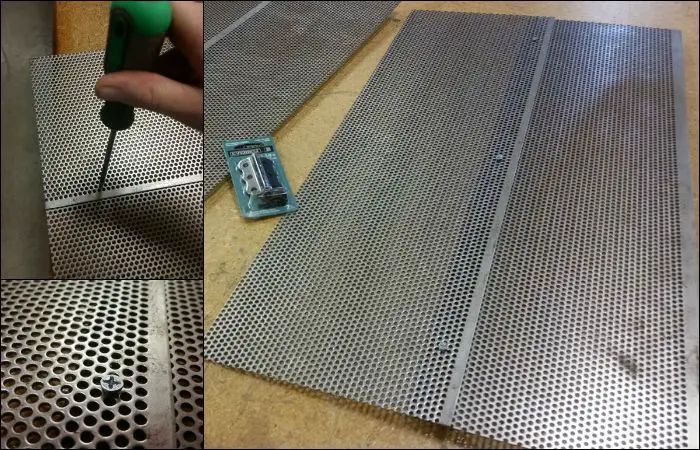
I overlapped the metal sheets a bit to make it look like traditional wood slats and screwed them together for my wishing well burn barrel. 2 screws per roof half was enough to hold it together well. #6 bolts can be found at any hardware store and they fit the holes perfectly.
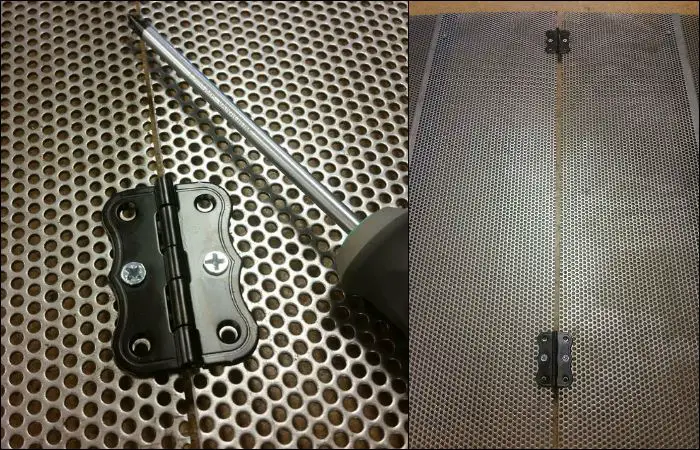
I chose a set of decorative hinges and screwed those in with the same #6 bolts. I used hinges so the roof can be lifted out of the way with a handle I welded on. That way you can have easy access to add wood, poke the fire, and handle the bucket without struggling.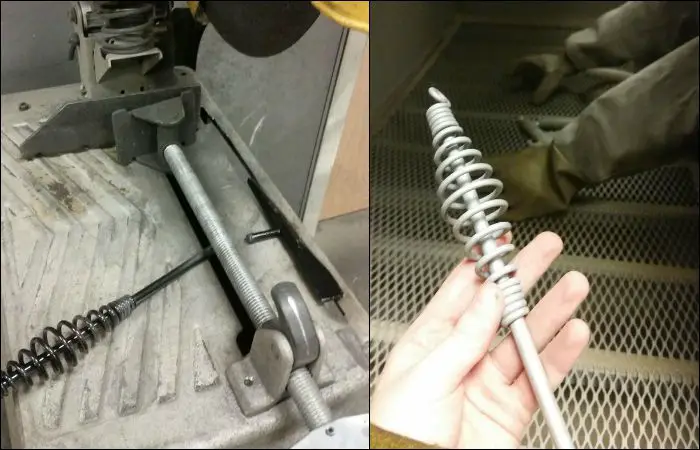
For the hot handle I cut apart a chipping hammer, sandblasted it, and spot welded it onto the roof that will lift (opposite side of the turn handle so they don’t collide). Tah Dah!
Now let’s build the crank for the wishing well burn barrel bucket…
For the bucket turn crank I used a 3ft length of 3/8in mild steel rod that can be found at any large hardware store.
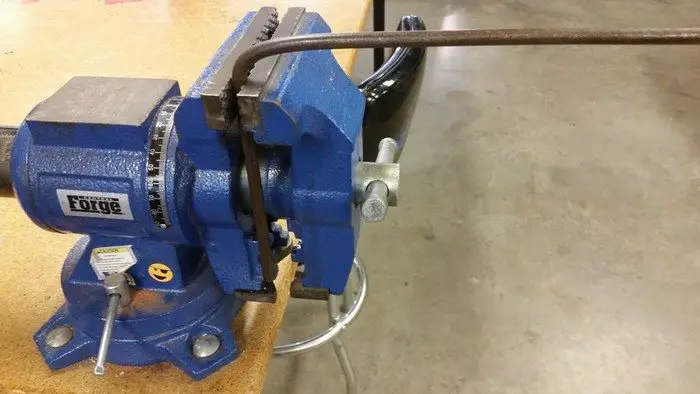
The wishing well burn barrel handle is made by making 2 bends on one end of the rod. I’m not one for accuracy or precision so I set it up in a vise and bent away. It is best to do the handle bend first and then the bend to complete the 90 degree angle. You can use the length of the rod to help you bend it or use a mallet for a sharper bend.
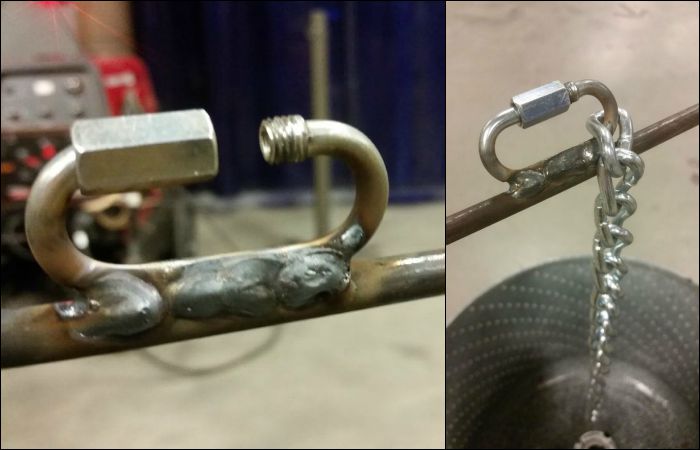
Next step is welding on a threaded quick link so you can add the chain and take it off again. This allows the rod to be installed and removed quickly.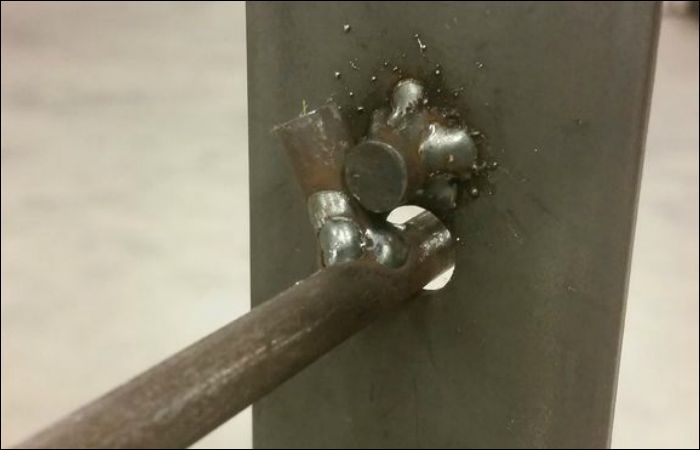
I also welded a little nubbin that was cut off the back end of the rod. This will create a stop as it is held in place by another nubbin so you can lock in the height you want for the bucket.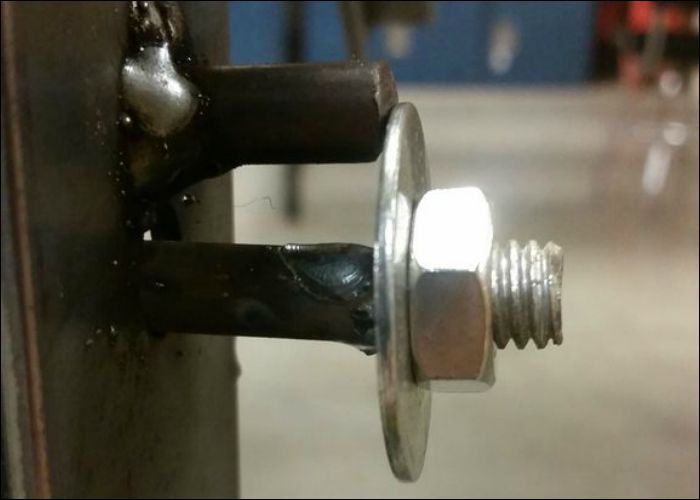
Finally, I cut down some 3/8th all thread, welded it onto the end of the rod that is not the handle, and added a washer and nut. This prevents the bucket crank from getting pulled out and your meal ending up in the fire.
The bucket:
The wishing well burn barrel bucket is the one element that really sells that this is more than just an ordinary burn barrel. It simply wouldn’t be a wishing will without it.
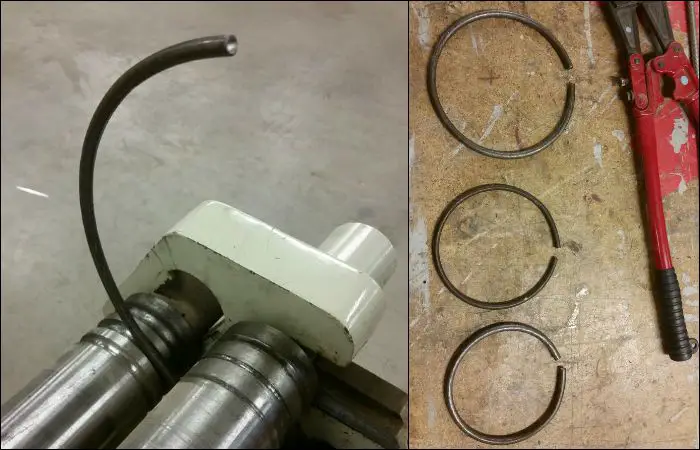
The hardest part was making the rings. I had to go back to my geometry days to figure out the circumference of the rings so I could cut the proper lengths. I ended up with 5in diameter for the bottom and 6in diameter for the top and 5.5in diameter for the decorative middle ring.
I used another rod of the 3/8in mild steel, cut it down to size and curved it. I was lucky and had access to a slip roller so I could get prefect rings in no time. I’m sure there are many other ways to go about making your bucket if you don’t have the same tools.
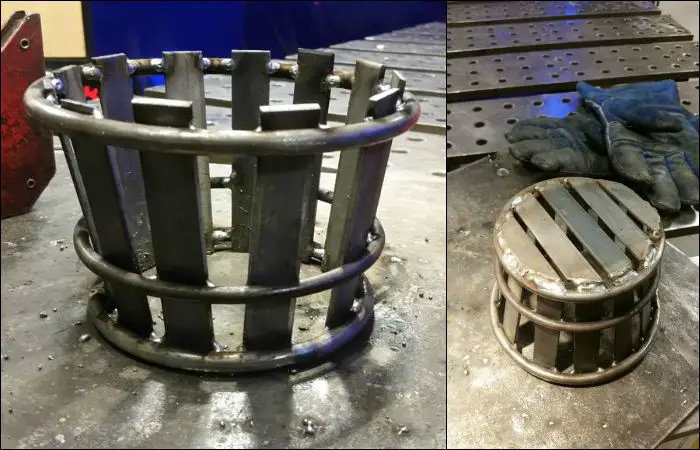
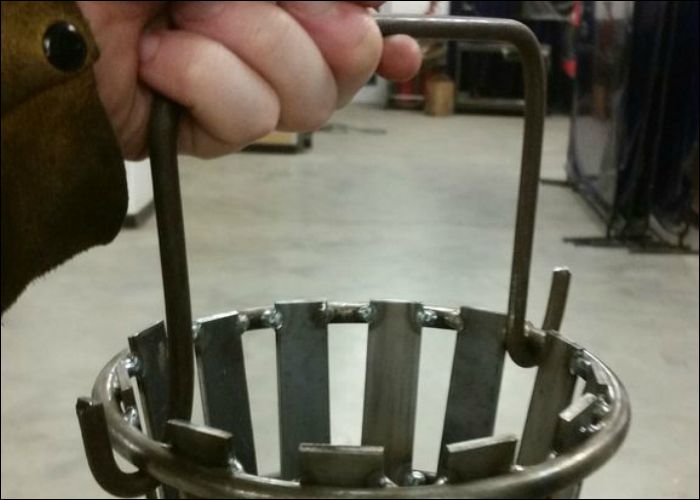
After I had the rings welded I cut down some bar stock metal for the slats. Each slat was 1in x 4in x 1/8in. I used 12 total and welded then haphazardly to the rings for a rustic look. I then traced the bottom angles onto the bar stock so I could trim them to size and maintain the round shape.
Finally, I used the vice again to bend up a handle and hook it between slats for it to hold into the top ring.
Now you have a heavy duty metal bucket ready to brave the heat of a fire to ensure you have perfectly warmed meals.
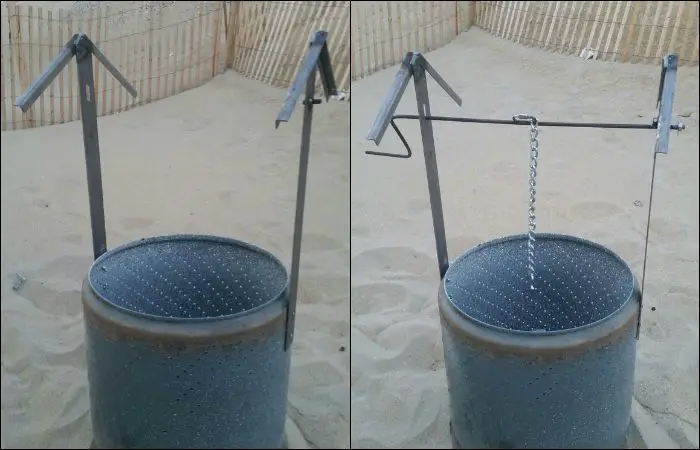
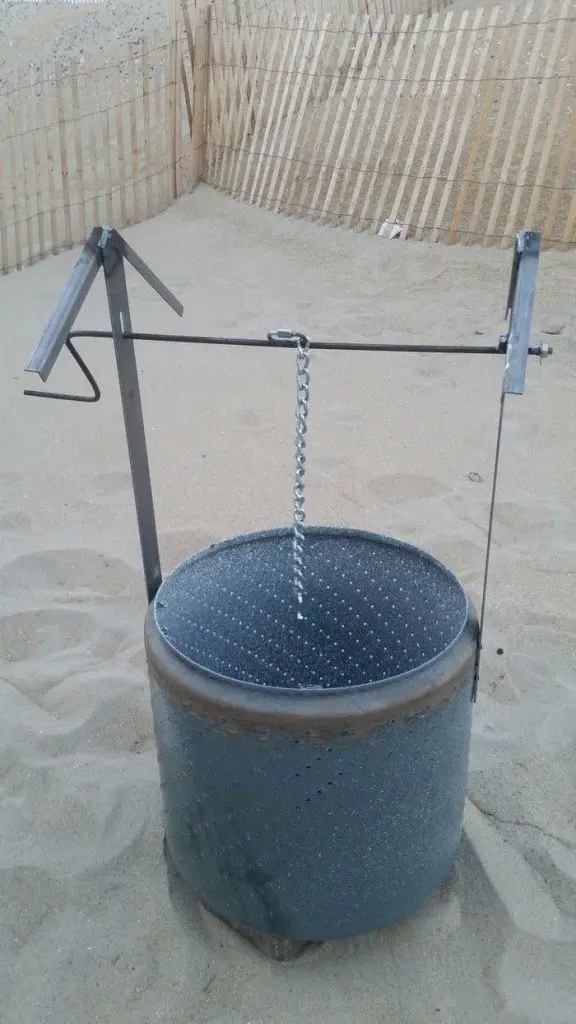
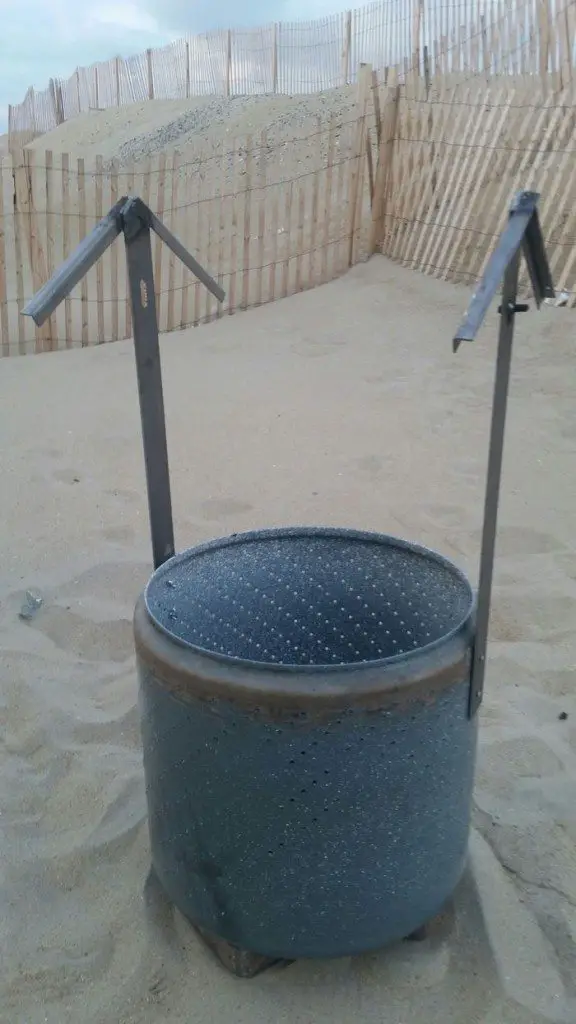
Side supports:
Ultimately the sides are fairly straightforward but there is a lot going on. This is the part that really brings everything together.
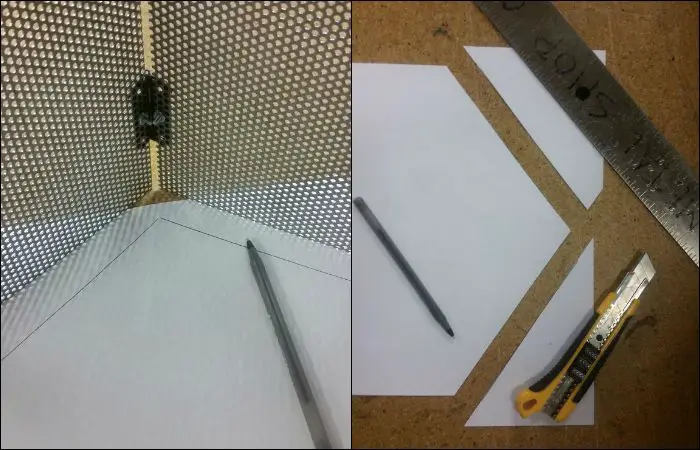
First, I closed the roof panels until they naturally stopped at the maximum reach of the hinges. I’m not one to worry about the actual degree of the angle, I just needed to make sure they were the same. I traced the angle, stenciled it onto 2 pieces of 2in x 24in x 1/8in bar stock.
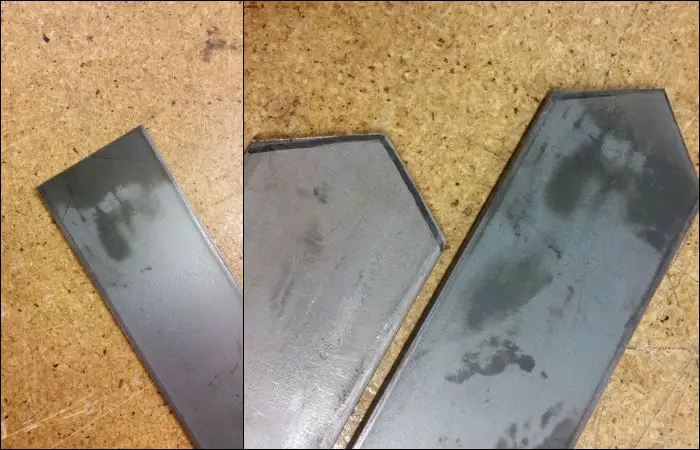
That way I can cut the bar stock to the perfect angle.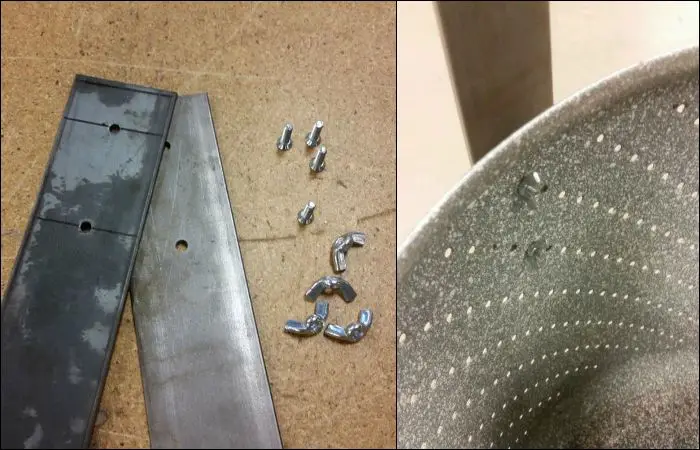
Each side support needed 2 holes to connect it to the washing drum. I figured out the holes were consistently 2in apart so I marked out some lines and punched the holes. #8 bolts fit great in the barrel holes and I picked out some #8 wing nuts for easy assembly.
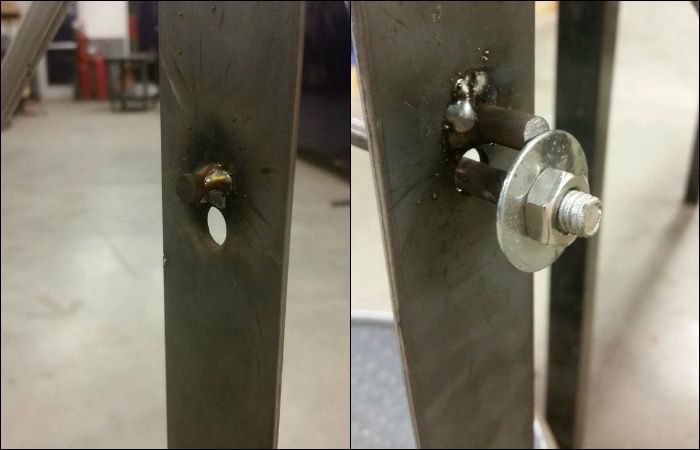
I punched a single hole in one side to hold the bucket crank rod. That is the side I adorned with welded stops on both sides for the washer and the locking nubbin.
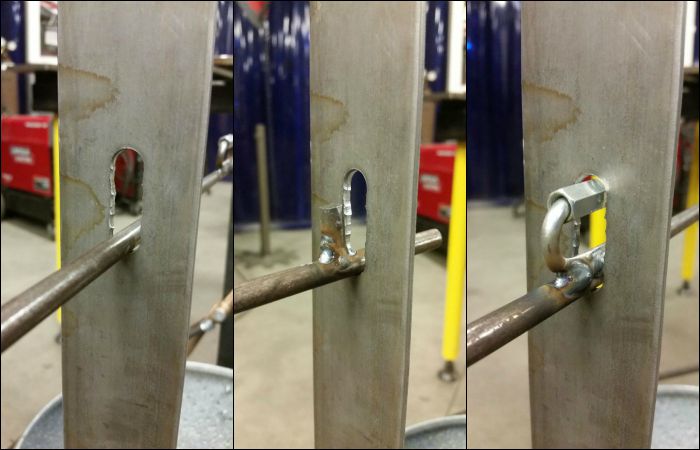
The other side I punched a series of holes to make an opening that would fit the rod, the lock nubbin, and the threaded quick link.
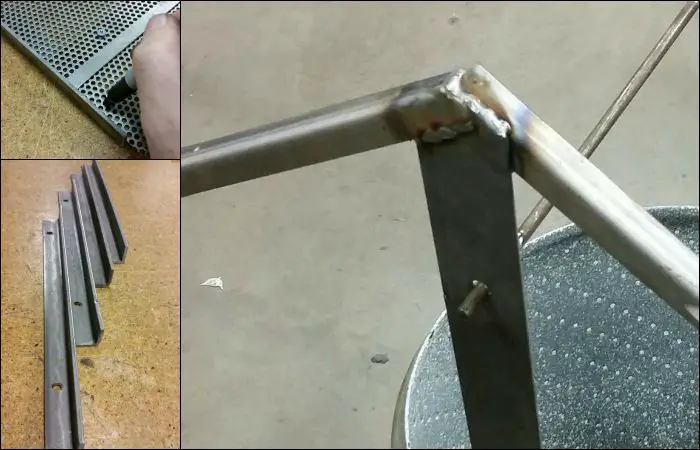
Finally, I needed to weld on rails to support the roof. I cut down some 1in angle iron into 9in lengths. I punched holes into 2 of them.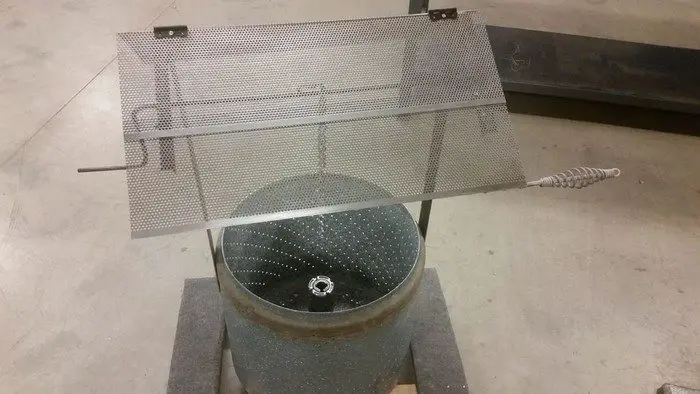
The rails with holes will be used to bolt the roof onto.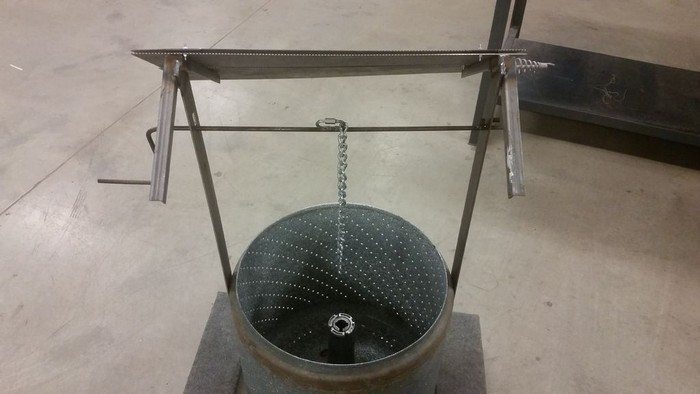
The other rails will not use bolts so you can utilize the hinges to freely lift the roof. A few weld beads to secure the rails to the side bars and we are ready to assemble!
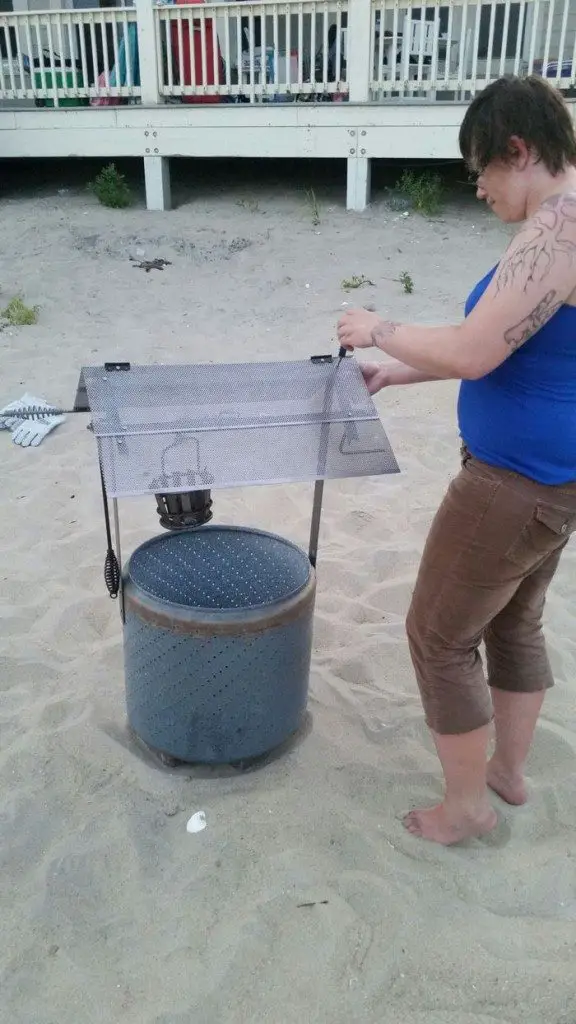
On-site assembly: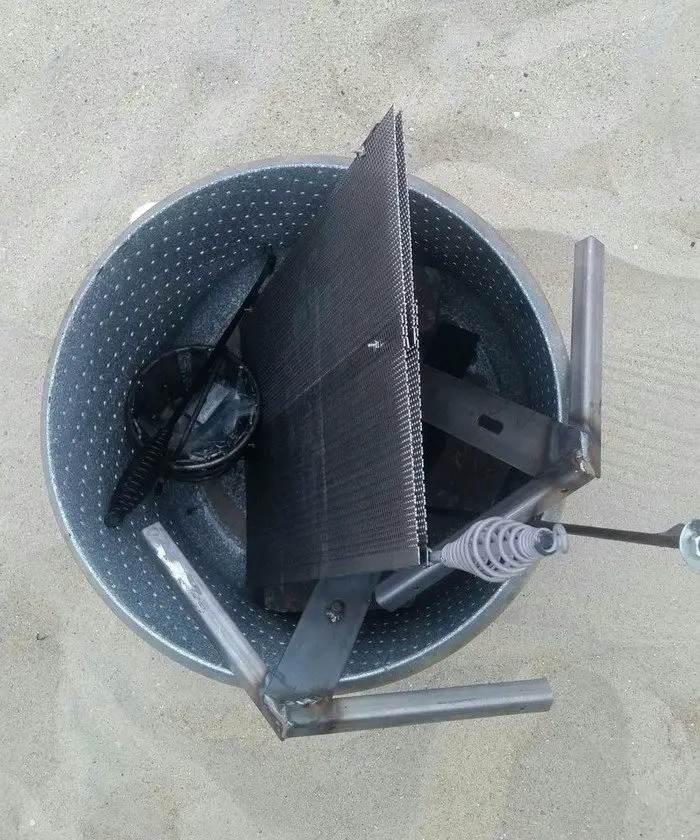
After all your hard work is time to put your burn barrel to work. It arrives on scene conveniently packed all into the barrel.
After removing the pieces from the barrel the side supports are added in no time. 4 bolts are rapidly tightened with the help of the wing nuts. The bucket crank fits right through our openings and is secured with a washer and bolt on the end.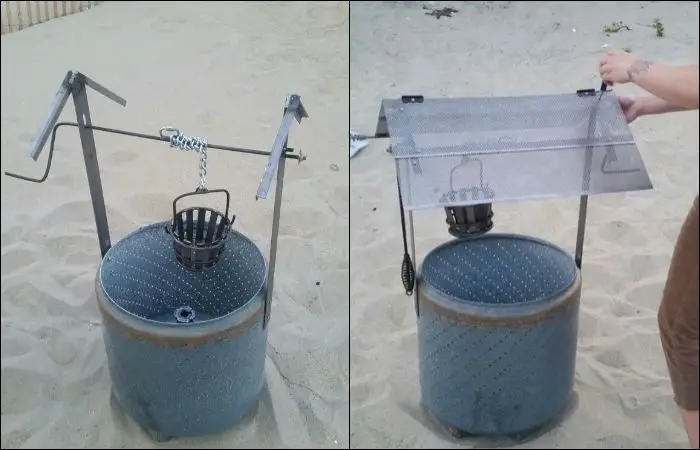
The chain and bucket of the wishing well burn barrel are attached with no difficulty.
Finally, the roof is attached with 4 bolts using a Philips head screwdriver found in my utility knife set up (Thanks Amanda for demonstrating the assembly).
As soon as the sun sets, light up some logs, add a meal to your bucket, and enjoy some relaxing conversation around your one-of-a-kind burn barrel.
Thanks to
Here’s a quick video…
Alternative Uses for the Wishing Well Burn Barrel
The versatility of a wishing well burn barrel extends beyond its primary use as a fire pit, offering creative ways to repurpose it around your home or garden. Here are a few imaginative alternative uses for your wishing well burn barrel, transforming it into a functional piece of decor when not ablaze.
Planter for Garden Spaces
Transform your wishing well burn barrel into a striking planter. This repurposed feature can become the centerpiece of your garden, housing anything from vibrant flowers to aromatic herbs. To protect plants from the heat-retaining metal, line the barrel with a suitable garden fabric and ensure there is adequate drainage to keep your greenery thriving.
Outdoor Beverage Cooler
On warm days, the wishing well burn barrel can be filled with ice to create a rustic, charming cooler for your outdoor gatherings. It’s perfect for chilling drinks, making it a practical addition to any barbecue or garden party. Simply clean the barrel thoroughly, fill it with ice, and let your guests enjoy cool beverages at their convenience.
Wishing Well Burn Barrel
Click on any image to start lightbox display. Use your Esc key to close the lightbox. 8-)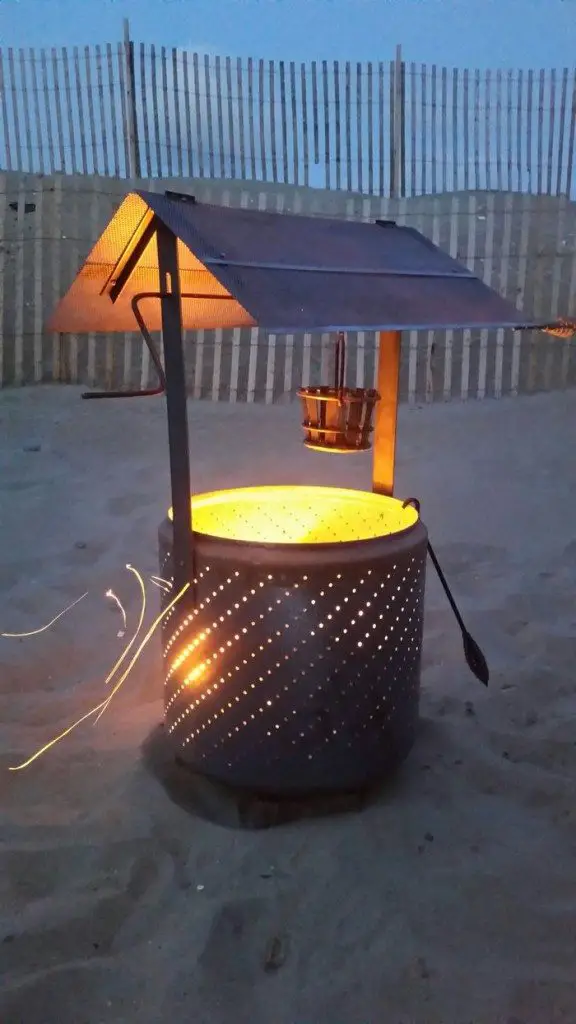


Storage Unit
The wishing well burn barrel can also serve as a unique outdoor storage solution. Whether it’s gardening tools, firewood, or children’s outdoor toys, the barrel can keep your items organized and within easy reach, all while adding a touch of rustic charm to your outdoor area.
Outdoor Seating
By securing a sturdy, round wooden top, your wishing well burn barrel can be transformed into an additional seating option for your backyard. This is particularly useful during large gatherings when extra seating is needed. Cushions can be added for comfort, creating a cozy, inviting spot for guests to relax.
Decorative Lighting Fixture
Lastly, consider using your wishing well burn barrel as an innovative outdoor lighting fixture. By placing a series of LED lights inside the barrel, it can illuminate your garden paths or patio areas with a warm, ambient glow. This use not only repurposes the barrel but also enhances the beauty of your outdoor space during the evening hours.
Each of these alternative uses not only maximizes the functionality of the wishing well burn barrel but also emphasizes its decorative potential, making it a versatile addition to any outdoor setting.
Conclusion
A wishing well burn barrel offers a unique blend of functionality and aesthetic appeal, proving to be a versatile centerpiece for any outdoor space. Its ability to transform from a cozy fire pit to a decorative planter or functional storage solution ensures it remains useful year-round. Embracing this creative DIY fire pit project enhances your garden or patio, making it a focal point for gatherings and everyday enjoyment.


