Last Updated on October 13, 2025 by Team Ideas24
By guest blogger, Daniel Wilks
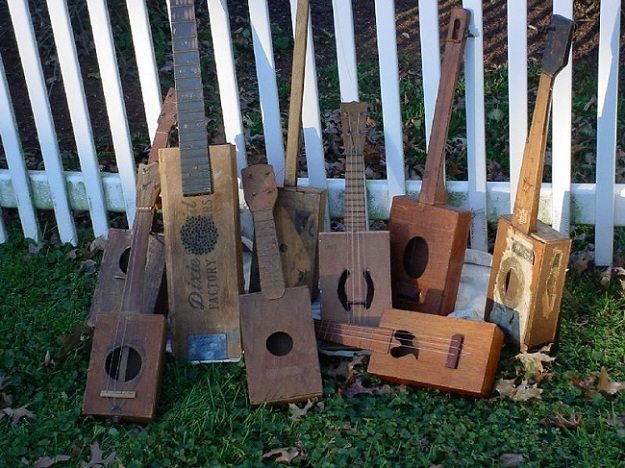
Before we start into the actual construction of a Cigar Box Guitar, I should probably explain what a CBG actually is. As the name suggests, a CBG is a small, playable guitar with a body constructed from a cigar box.

Cigar Box Guitars have a long and colorful history dating back to the mid 19th century. Thanks to the readily available and inexpensive materials, cigar box guitars, fiddles, and banjos were instrumental in the formation of the blues as most of the original performers were poverty-stricken African Americans without enough money to buy “real” instruments.
Over the last few years thanks to the emergent DIY culture, Cigar Box Guitars has had a revival. Unlike a normal six-string guitar, CBGs are easy to make, easy to learn, and can be put together for very little money. They’re an ideal project to make with the kids and they also make great presents for anyone even slightly musically inclined.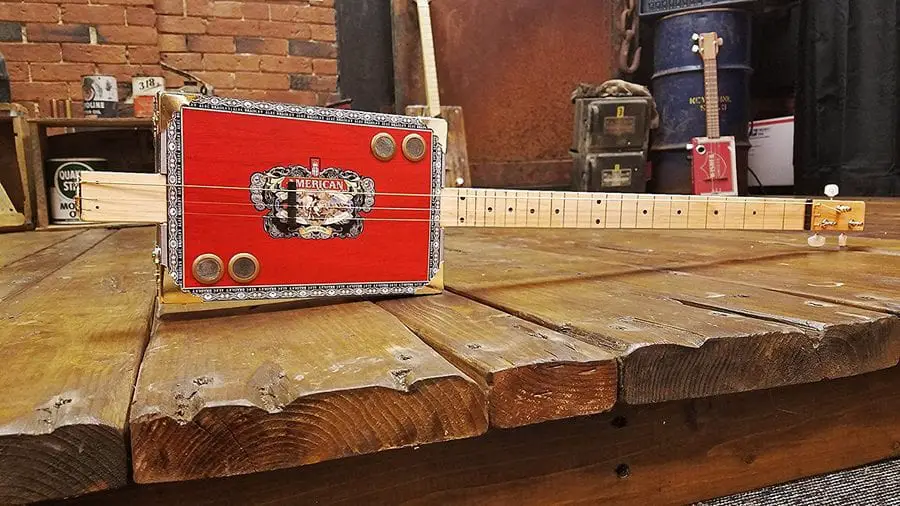
Still not convinced? Hop over to youtube and take a listen to some of the people who have constructed their own guitars. If that doesn’t convince you, nothing will.
Contents
Building a Cigar Box Guitar
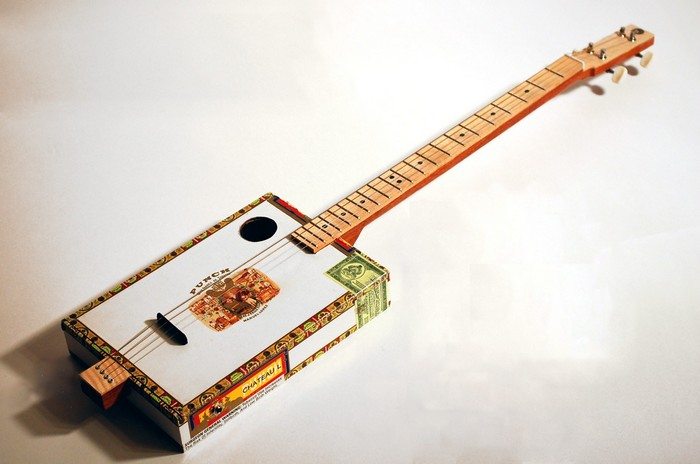
This particular style of cigar box guitar is referred to as a strike-through design meaning that the neck goes all the way through the body. Strikethrough guitars are the easiest to build and also require the fewest components.
What You’ll Need

*Cigar Box – this one’s a bit of a no-brainer. The construction and size of a cigar box depend on the brand but ultimately the materials and dimensions don’t really matter – a laminated high-density cardboard box will function as well as a hinged wooden box. Cigar boxes can be found in most high-end tobacconists or on eBay.
*100cm of hardwood – the width and thickness of the neck depending on how the guitar is to be played. The CBG in this build is for playing like lap steel so the neck is both quite wide and thick (2.5cm x 5cm) but for more traditional fingering you’ll probably want something closer to 2cm x 4cm. This build was made with Jarrah – it’s a beautiful hardwood but it’s extremely difficult to work with hand tools, so choose your wood with your equipment in mind.
*Hinge – a good ornate hinge with a little modification makes a perfect cheap tailpiece. The tailpiece holds the strings so the machine heads can tension them.
*Threaded Rod – Two lengths of the threaded rod about the width of your neck make an excellent bridge and nut if you don’t want to fork out for the real thing. The Nut is the string guide that sits near the head of the guitar and the bridge is the string guide that sits on the body and transfers the vibrations of the strings into the body so the instrument produces sound. You can find threaded rods at most hardware stores, but if you can’t find any then standard bolts will work just fine.
*Tuning Pegs/Machine Heads – These are the tuners on the head of the guitar and they will probably be the most expensive part of the build. CBGs come in a variety of different traditional styles, with 1 string, 3 string, and 4 string being the most common. Standard cheap externally geared guitar machine heads will work just fine but usually require a bit of countersinking to install. Internally geared banjo-style machine heads are easier to install but cost quite a lot more. You can find machine heads on eBay but to get the best deal you’ll probably have to import them from America or China.
*Strings – another no-brainer. Originally CBGs were strung with whatever the players could get their hands on but rather than scrounging strings 3, 4, and 5 from a set of standard medium gauge steel strings are perfect for an open G tuning.
Recommended Parts
*Grommets or bushings for sound holes
*Stain or varnish – a plain sanded neck is great but a stain or varnish can really elevate your Cigar Box Guitars and bring out the natural beauty of the hardwood in your neck. Aerosolised beeswax furniture polish is a brilliant way to finish the wood with very little work.
Tools
Having access to tools like a drill press, band saw, router and orbital sander will definitely make the process of constructing Cigar Box Guitars a lot faster and easier, but in reality, you only need a couple of hand tools to get the project underway.
Here’s what you’ll definitely need
*Coping Saw/Keyhole Saw – if you don’t already have one you can usually pick up a coping saw from any hardware store, hobby store, or junk shop for under $10
*Screwdrivers – the exact sizing will depend on the screws needed for affixing the Cigar Box Guitars’ tailpiece and machine heads.
*A Drill/Drill bits – hardwoods require the drilling of guide holes for screws so the wood doesn’t split. An electric drill will make the job a lot easier but a hand drill and some patience will definitely suffice. A standard set of drill bits should have everything you need, from 1/16” for drilling guide holes through to 1/2” bits for making Cigar Box Guitars’ sound holes.
*Sandpaper – you don’t need to get your neck baby smooth but the last thing you want is a splinter from the neck of your guitar. Various grades of sandpaper are a must.
*Wood File – a wood file isn’t entirely necessary but there’s nothing quite like one for enlarging holes and taking off big burrs.
*Sharp Chisels
*Rats Tail File
Steps
Shaping the Neck
In the old money, you should cut your neck to be 34” long (that’s a little over 86cm), but any length between 85 and 90cm is just about perfect. Keep any offcuts as they will definitely come in handy later for measurement purposes.
Once you’ve cut your neck to the desired length you need to thin the Cigar Box Guitars’ headstock so it’s thin enough that the machine heads have enough room to function. The depth of the recess required will really depend on the specific machine heads you have bought, but thinning the neck to about 1.25-1.5cm should suffice for most makes. For a three string design, the length of the head stock should be around 11-12cm – this will give you enough space to position the tuners adequately and stop the strings from crowding.
Once you’ve marked out the Cigar Box Guitars cut lines use your saw to remove the cut-out. How easy this cut will be really depends on the quality of your saw and the density and dryness of your wood. If you’re having trouble cutting you can try using your saw to cut tightly spaced guide lines down to the desired depth and then use a sharp chisel to remove the wood. Using this method does mean that you will have to put in some time with a rasp or file and sandpaper to get it smooth, but for hard woods like Jarrah (as used in this build) it makes matters a whole lot easier.
Body Cut-out
Once you have your Cigar Box Guitar’s headstock cut and smoothed it’s time to work out exactly where your neck will fit through your cigar box body. Measure the centre point of each side of your box and mark it with a pencil. Here’s where the cut off length of wood comes into play. Mark the centre part of one of your cut-off lengths and align with the mark on your box. Tracing around the wood will give you a good guide for where to cut.
Make sure to cut within the lines. Don’t worry if the holes are too small to begin with – you can always enlarge your cuts with a file. The neck should fit snugly into the box and sit flush with the top edge. This design of guitar is only held together by friction and the tension of the strings, so care and precise cutting are important.
Two things you should keep in mind before making the cuts – make sure the Cigar Box Guitar neck will extend from the correct side and be sure that the artwork on the cigar bow will be the right way up when the build is finished. Making sure that the art is oriented correctly will not only make your guitar look better, it will also ensure that the lid will hinge from the top edge, making the guitar sturdier in the long run.
Neck Cut-out
Once you have your Cigar Box Guitar body cut-outs it’s time to work out the positioning of the neck and then cut a recess so that the lid can close fully. You’ll want the tail to sit about 5cm from the edge of the box. This will give you good spacing between the tail piece and the bridge, making the guitar easier to tune.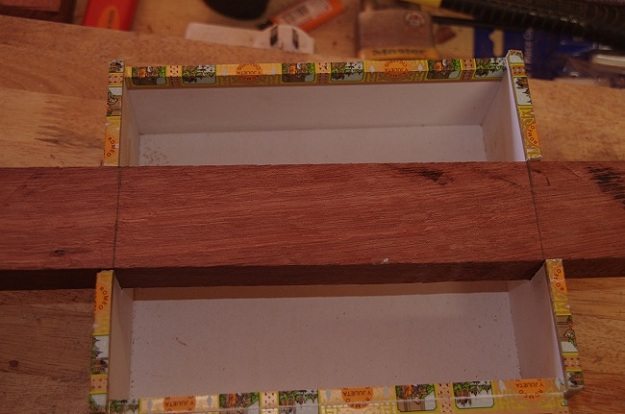
Once you’ve decided on the length of your Cigar Box Guitar tail piece, Mark the inside edges of the box on your neck and mark a cut line to the thickness of the lid. With most boxes you can use a cut-off from where you made the body cuts as a depth measure for those cuts.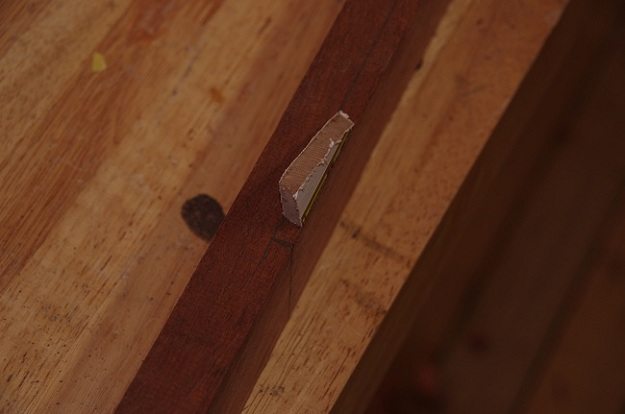
Much like with fashioning the Cigar Box Guitar headstock, you may have an easier time using the guide cut and chisel technique to remove material from the lid recess. Making sure the lid fits snug and flush will probably be the most time consuming part of the build. You need a good tight fit for structural integrity, so erring on the side of caution and slowly enlarging your original cut with a file or rasp is advisable.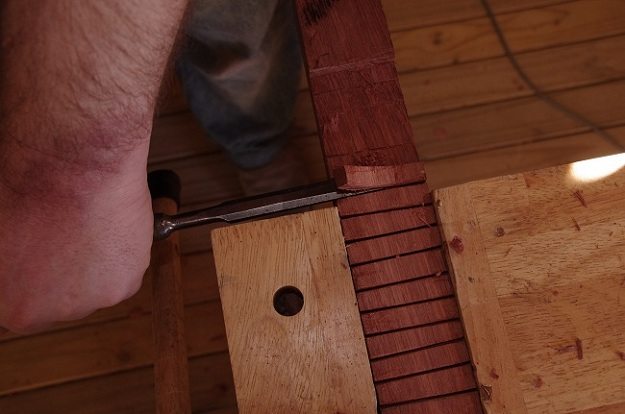
Tailpiece
There are any number of things that can be used to make a Cigar Box Guitartail piece – a fork with bent tines, picture hooks, screws, tacks and the like, but a good old fashioned ornamental brass hinge with a little bit of modification is perfect.
Before you attach the hinge to your Cigar Box Guitar neck you need to drill holes for the strings to pass through. These holes have to be large enough to pass strings through but small enough so that the brass nuts on the end of the strings will catch.
A 1/16” or 3/32” drill bit will do the job. It goes without saying that you will have an easier time using an electric drill than a hand drill to make the holes, but a decent metal bit will chew through the brass without too much effort. If you can’t get your hands on a small enough drill bit you can always try using a fine nail to make the holes.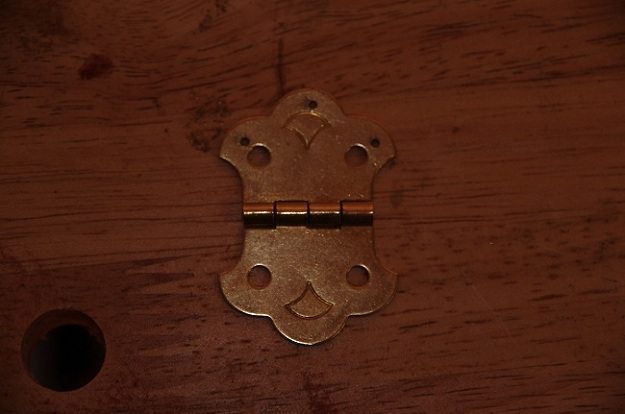
Once your Cigar Box Guitar string holes are made the hinge needs to be screwed to the rear side (the side opposite to the head stock and body cutouts) of the neck so that the hinge folds around the end of the wood. Be sure to pre drill screw holes to avoid splitting the wood.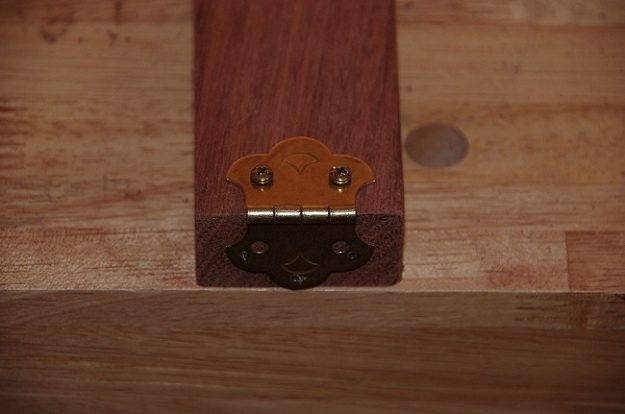
Machine Heads
Installing your Cigar Box Guitar machine heads isn’t hard but it is delicate work that will require some precise marking and drilling. The exact nature of the drilling really depends on the kind of machine heads you have bought. Internally geared, planetary style tuners usually only require a single straight hole, whereas cheaper externally geared turners usually require some countersinking for bushings.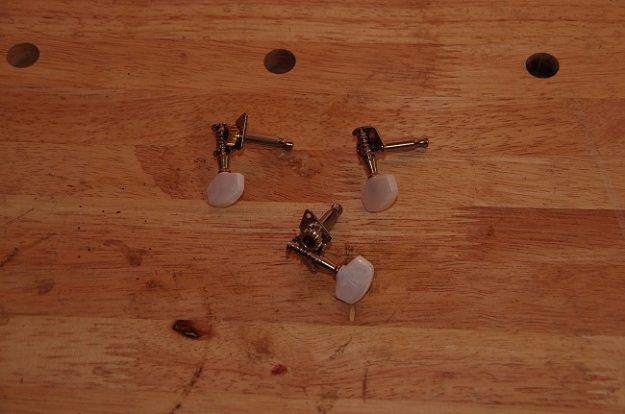
When working out the placing of Cigar Box Guitar machine heads you first need to work out which direction they actually tune in. For externally geared tuners, the gears should always point towards the body or the instrument. As a rule of thumb, planetary banjo tuners all tune in the same direction so they can be placed anywhere.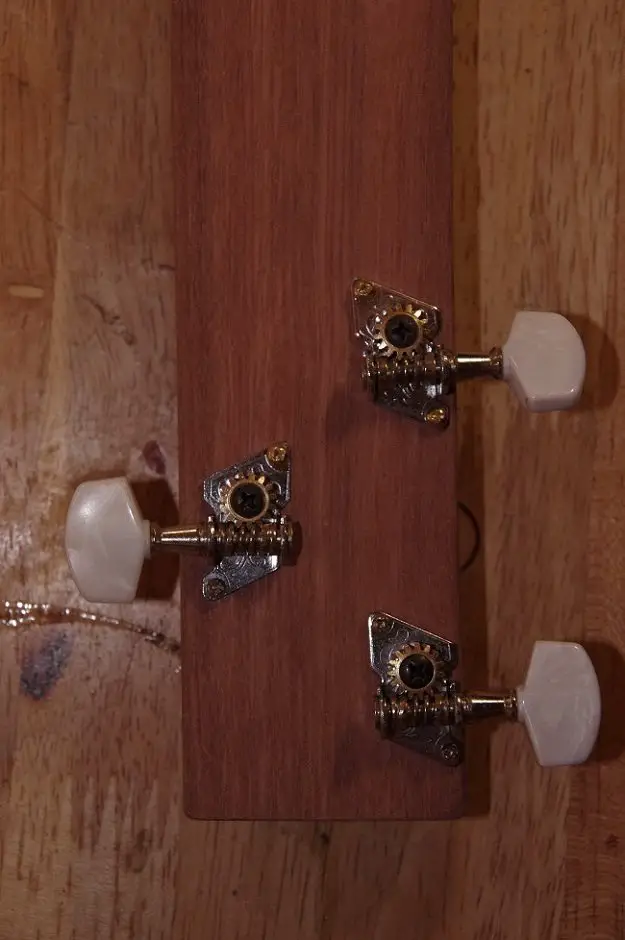
Once you’ve worked out which direction your machine heads tune in it’s time to mark up some points for drilling. On the side with two tuners, these should be evenly spaced around 25-30mm from each end of the headstock and about 10mm from the edge. The other machine head should be places half way along the head stock , 10mm from the edge.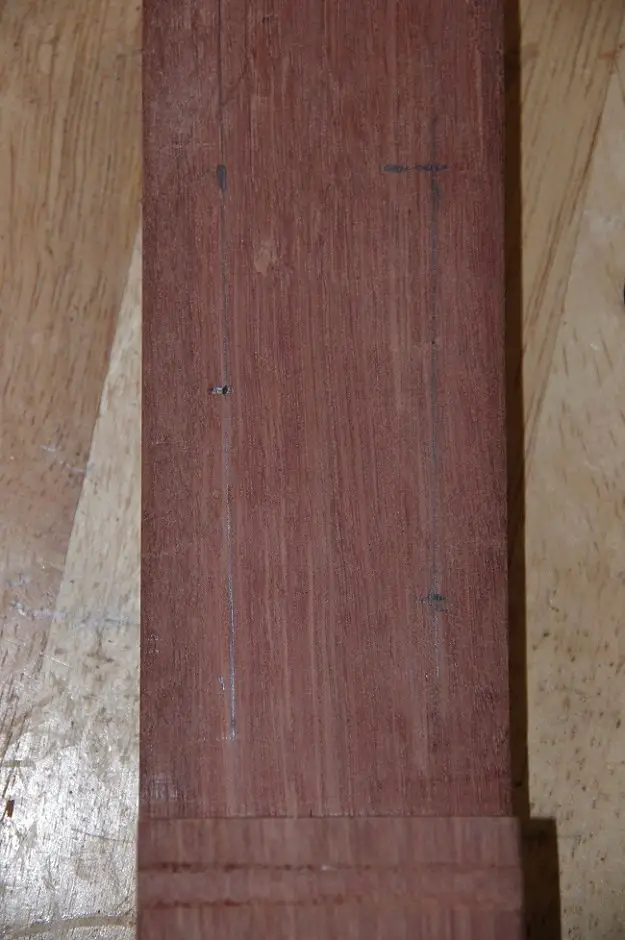
Ultimately the exact placement of machine heads doesn’t matter. What is important is that you get the tuners tuning in the correct direction and have enough room to turn.
Once you have your drill points marked it’s time to make your first holes. If the Cigar Box Guitar machine heads don’t have sizing on them you can use a bit gauge (a piece of plastic with holes in it ranging from 1/16” through to 1” or more) to work out the size.
If you need to countersink the holes for bushings there’s a very simple technique you can use so that you don’t drill all the way through the wood. Simply measure the depth of your bushing and wrap a good amount of electrical tape around you drill bit so that only the desired depth is showing. The drill will stop cutting as soon as it reaches the taped depth.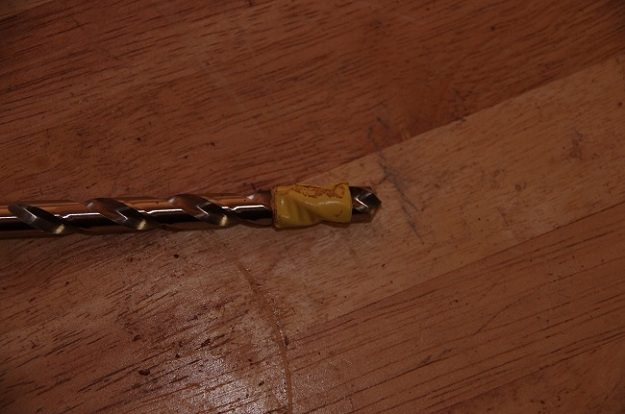
Once you have your main guide holes drilled the only job left before you complete construction of your neck is marking and pre-drilling some holes for the tuner screws. As a rule these screws are tiny so will require all the help they can get cutting into hard wood.
Once you have your machine heads installed it’s time to file a groove for your threaded rod nut to sit in. This groove should be about 3-5 mm from the edge of the Cigar Box Guitar headstock cut-out. If you can’t get your hands on a rats tail or round file, a pen, pencil or dowel wrapped in coarse sandpaper will suffice for making the groove.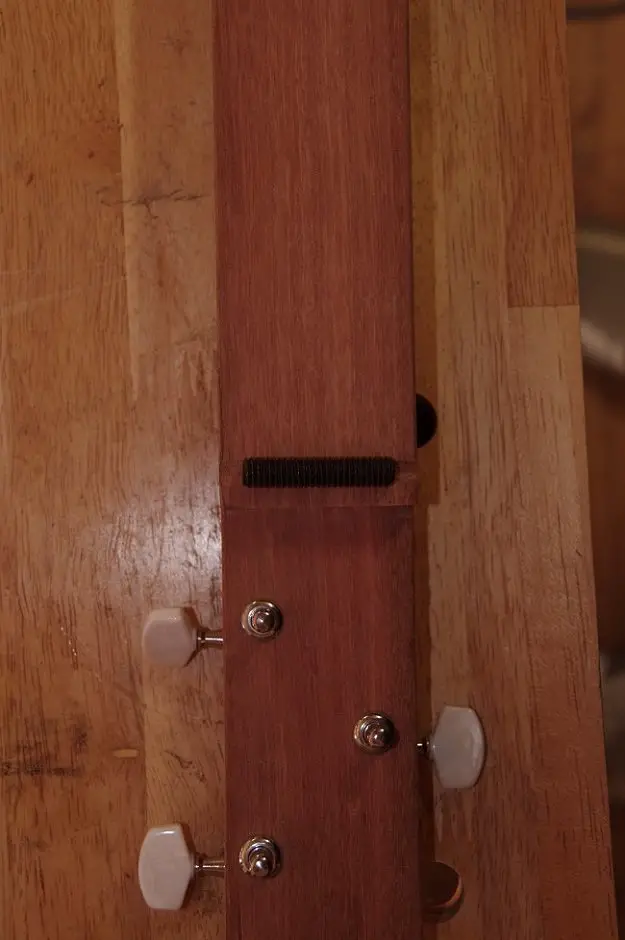
Sound Holes
There’s one final task before you can put everything together – you need to make some sound holes for your Cigar Box Guitar. There are no strict guidelines for number or placement – there are plenty of theories and arguments online as to the perfect placement and number, but at least one sound hole is a must, otherwise your guitar will sound muted and dull. You can cut traditional F holes or simply drill a few holes around the periphery of the guitar. If you want to protect your guitar from extra wear and tear and make it look good to boot, some ventilation grommets or brass bushings work a treat.

Stringing and Tuning
The threaded rod bridge and nut of your Cigar Box Guitar are held to the guitar only by the tension of the strings, so it can take some fiddling to get them placed correctly. Placing the bridge around 7cm from the tail edge of the box seems to offer the best results with medium sized boxes, but it will probably take some tweaking to get the guitar to sound just the way you want it to.


Once you have the guitar strung and before you tune it, this is also a good time to check the action. The action (that’s how far the strings are positioned above the body of the guitar) on this build was deliberately left quite high for lap steel style play, but if you’re planning on doing some more traditional fingering you may want to see how things feel and use a rats tail file to deepen the nut groove if necessary.
When you’re happy with the way everything feels, tune your new CBG to any of the myriad standard tunings like G-d-g, D-A-d, g-b-d or d-f#-a (you can find an excellent starting guide HERE) and start playing. You may want to mark some of the key positions such as 5th, 7th and 12th on the neck or choose to keep it fretless. In any case, you now have a hand made, traditional blues guitar to add to the collection.
Ready to give it a go or have you already built your cigar box guitar? Don’t forget to share your thoughts via the comments box or we’ll never know what you think :)
This article was originally published in Australian Guitar magazine Issue #93
For more guitar related projects, check out our guitar hangar post!
Pro Tips, Upgrades, and Troubleshooting
Already know the basics of how to make a cigar box guitar? Use these upgrades, setup tips, and wiring ideas to boost tone, playability, and durability without complicating the build.
Choose a scale length and fret plan
Decide early whether your build will be fretless (slide) or fretted. Common scale lengths are 24.75 in and 25.5 in; shorter 23–24 in scales suit small boxes or kids. For fretted builds, print a template from any online fret calculator, spray-mount to the neck, and saw shallow slots for fret wire. For fretless slide, add position dots at 3, 5, 7, 9, 12, 15.
Set bridge position and intonation correctly
Measure your exact scale length from the nut to the 12th fret, double it, and mark that distance on the box top. Angle the bridge slightly back on the bass side (1–3 mm) for compensation. Use temporary tape to hold the bridge, tune to pitch, and compare fretted 12th‑fret notes to harmonics. Slide the bridge minutely until they match, then secure permanently.
Dial in string gauges and tunings
For 3‑string open G (G‑D‑G), try 0.042, 0.032, 0.024 on a 25 in scale. For D‑A‑D, drop each one step. For 4‑string builds, GDGB or DGBE work well; add a 0.016–0.018 plain. Heavier gauges suit slide and short scales; lighter sets favor fretted play. Use steel strings for magnetic pickups; piezos accept bronze or steel.
Nut and bridge materials, height, and action
Threaded rod works, but bone, Corian, brass, or dense hardwood can increase clarity and sustain. For fretted action, aim roughly 1.5–2.0 mm at the 12th fret; for slide focus, 3–5 mm prevents rattle. File nut slots to half the string diameter, angling slightly toward the tuners. A hardwood saddle shim or thin card under the bridge lets you fine‑tune height.
Add a pickup and simple controls
Piezos are cheap and loud: epoxy a 27 mm disc to the underside of the top near the bridge, wire to a 500k volume pot and quarter‑inch jack, and add copper foil shielding to reduce hum. Magnetic pickups require steel strings and a cavity; a mini‑humbucker near the bridge sounds tight. Consider a tone control (0.022 µF cap) for shaping highs.
Neck strength and headstock angle
Without a truss rod, stiffness matters. Use quarter‑sawn hardwood, keep grain straight, and consider a 10–15° headstock angle or a simple string retainer to increase downforce at the nut. For extra rigidity, inlay a 6–8 mm carbon‑fiber strip or a light aluminum U‑channel. Seal all faces with oil or varnish to minimize humidity‑related movement and warping.
Acoustic volume, bracing, and sound ports
Thin box lids resonate more but need support. Glue a small spruce brace under the bridge footprint running side‑to‑side to prevent sag while staying lively. Experiment with sound‑hole size and placement; a pair of 25–35 mm holes or a side port on the player’s upper bout improves perceived volume. Grommets add durability but aren’t required for tone.
Tailpiece and string anchoring alternatives
Beyond a hinge tailpiece, try string‑through‑body ferrules, zither pins, or a simple bar with drilled holes. Back up holes with washers inside to stop tear‑out. Ensure the break angle over the bridge is 10–15°; add a spacer block if needed. Heavier tailpieces slightly increase sustain by adding mass, but prioritize clean geometry and stress distribution.
Finish, protection, and shop safety
Wipe‑on Tru‑Oil, shellac, or a thin polyurethane protects the neck and enhances grain; avoid thick, plastic‑y coats on the lid that can dampen resonance. De‑odorize strong cigar smells by airing the box in sunlight before assembly. Use dust protection when sanding tropical hardwoods, pre‑drill every screw, and round over fretboard edges for comfort. Label wiring inside the box for future repairs.
Conclusion
From selecting the scale to dialing in nut, bridge, and electronics, small decisions add up to big tone and playability. Build the first one simply, learn its voice, then iterate with thoughtful upgrades. When you know how to make a cigar box guitar, you can craft instruments that feel personal, durable, and stage-ready.


