
Last Updated on April 24, 2025 by Team Ideas24
Then I set up the dovetail jig, testing and tweaking it with some offcuts until the joints are coming out just right. I chose to use 6mm dovetails.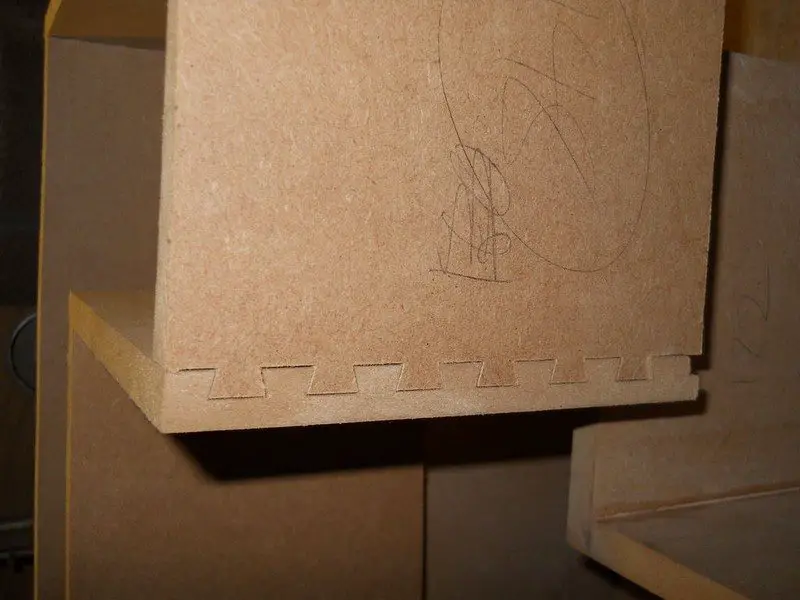
Although dovetails are a bit over the top, you can get away with just rebating each edge 6mm and doing a rabbit joint with some pins, glue, and plenty of clamps.
Then a long day of cutting joints! Make sure you’re fully covered in your PPE, as this stage is very dusty…and MDF dust is nasty stuff.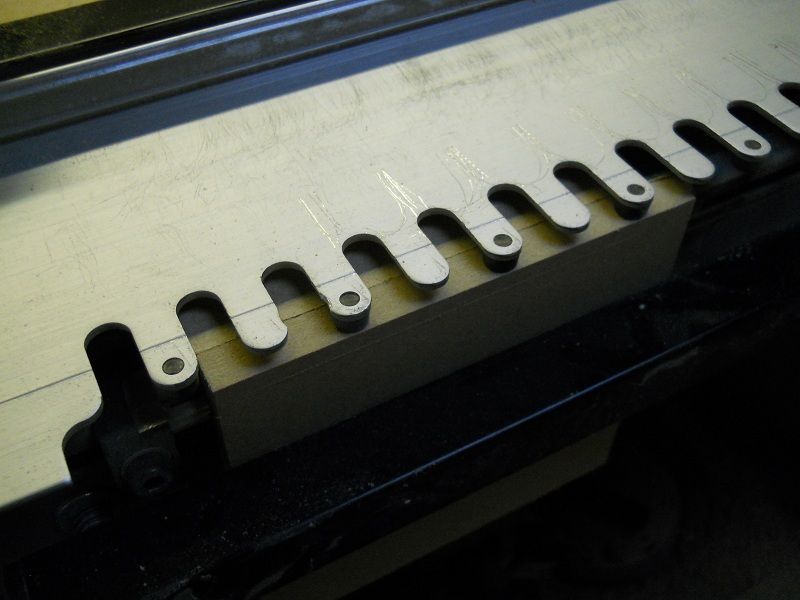
I used “Resintite” wood glue. Just use plenty of clamps and keep checking everything’s square.
For the more complicated shapes you’ll want to do the gluing in a few phases. Maybe make a jig to help you along too.
You’ll have a little bit of play in the joints before you put the back panels on, but it can’t hurt to get em as accurate as possible now.
I scraped the glue on the inside joints off now, as sanding it off later would have been a nightmare.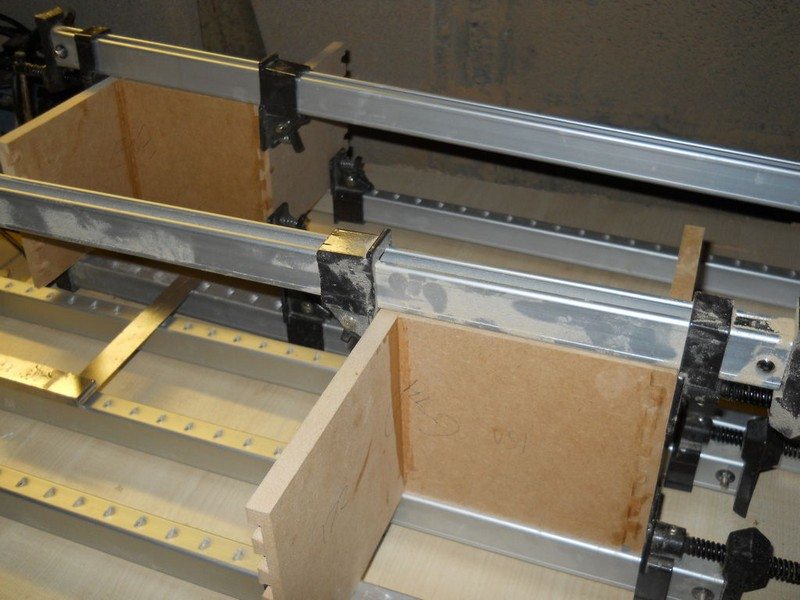
Simply cut the back panels to fit each piece.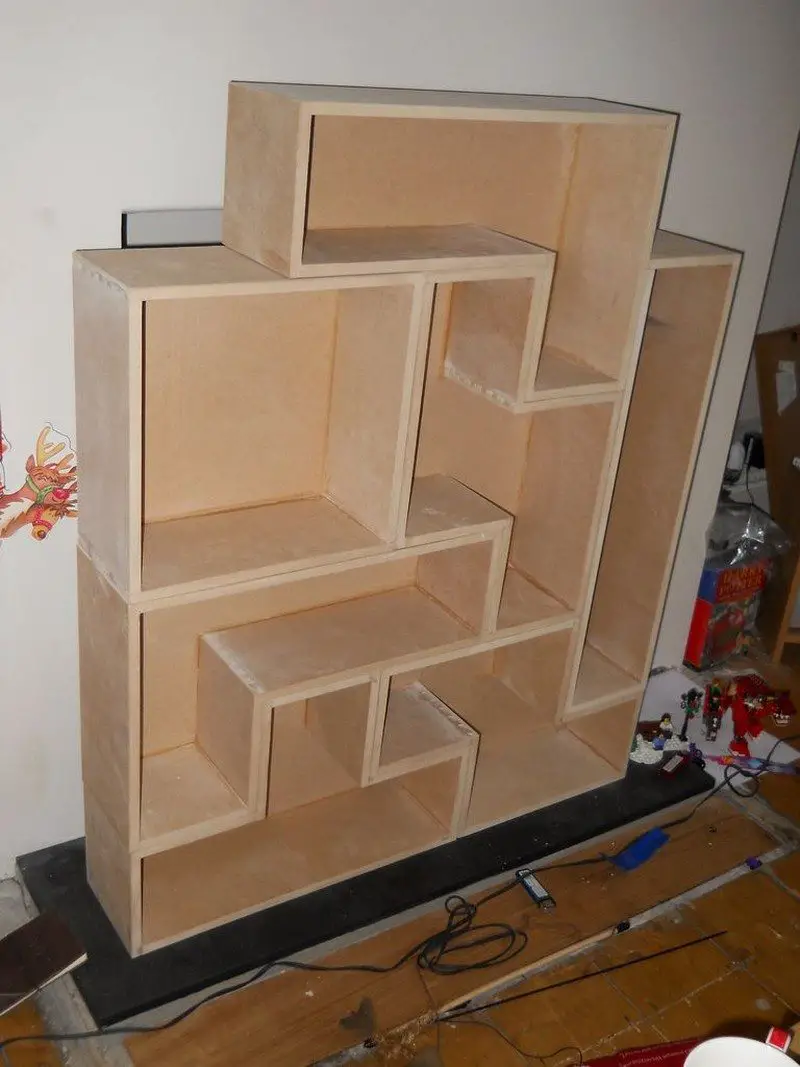
I measured the channels on each block and copied it onto some 3mm MDF using squares and suchlike. Get it as square and accurate as possible as the back panels will hold it in shape.
3mm MDF isn’t the toughest material in the world so with a bit of persistence I got through it with a knife & a straight edge.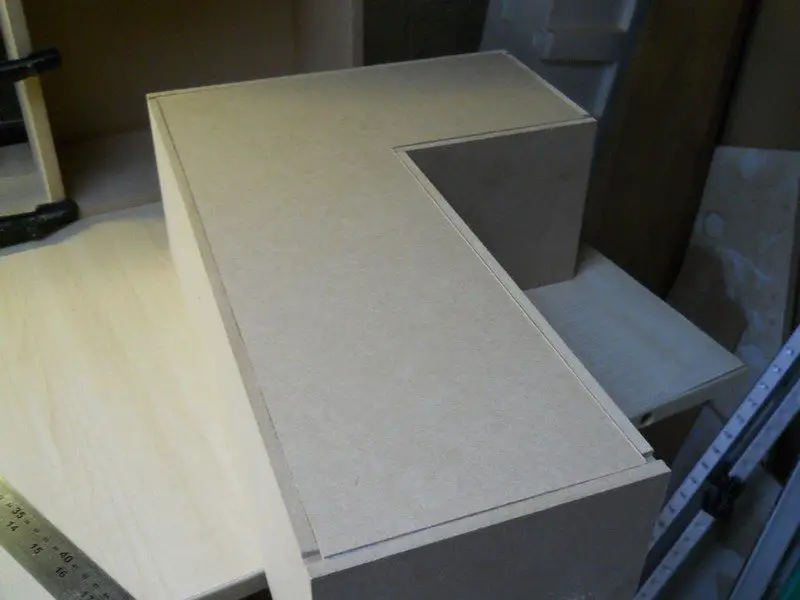
Then I glued them in place, wiping the glue off the inside
Once that was dry I rubbed in a good amount of filler, and it all got a good sanding (use a dust mask).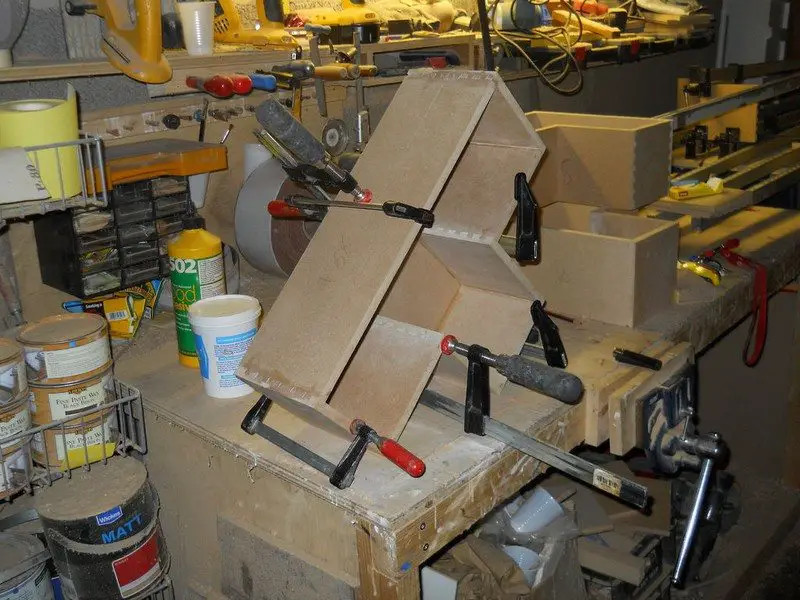
Before painting I gave each surface a wipe with damp cloth to get the dust off.
Then I gave each block a couple of coats of primer, sanding with 240grit after each coat.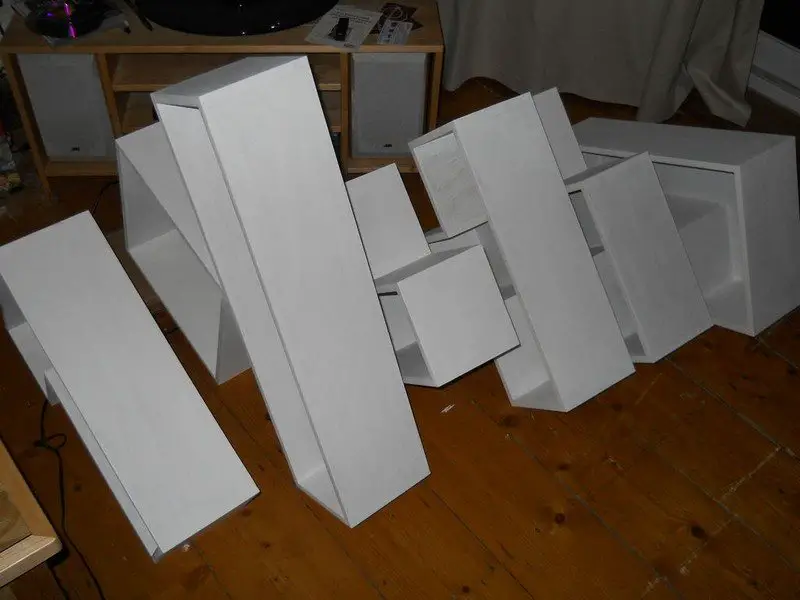
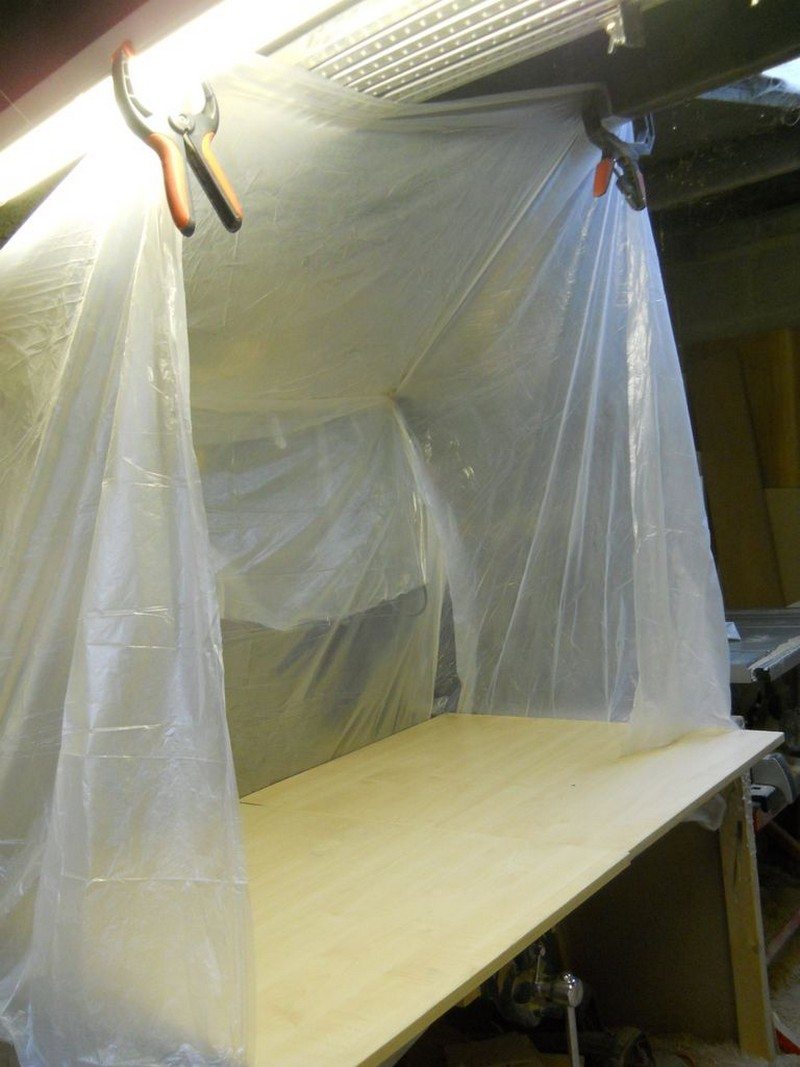
I went for the “Tetris worlds” colour scheme…as all the other versions have a magenta (pink!) block. I thought I’d give spray paint a chance as I found it hard to get a smooth finish with brushes on my first set.
Basically….spray at about 6inches & perpendicular to the surface, wear a good quality mask, and it’s better to do lots of thin coats instead of fewer thick coats.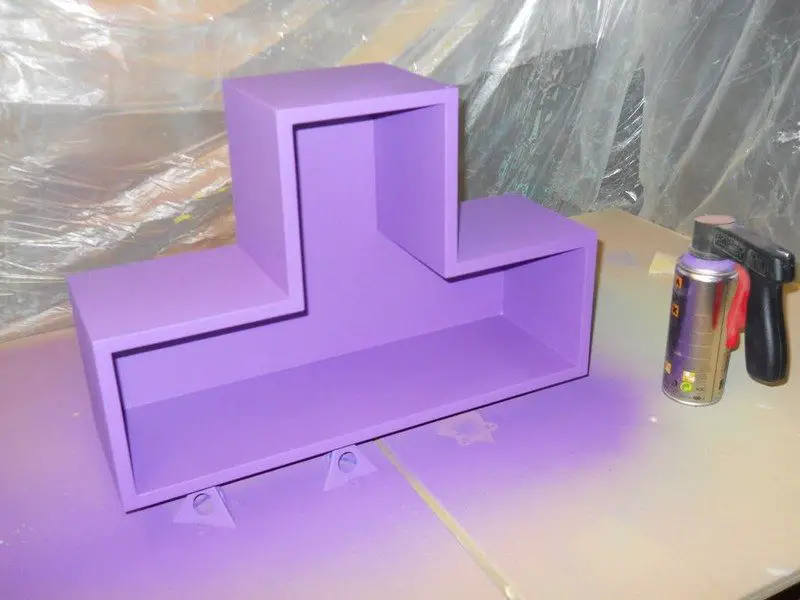
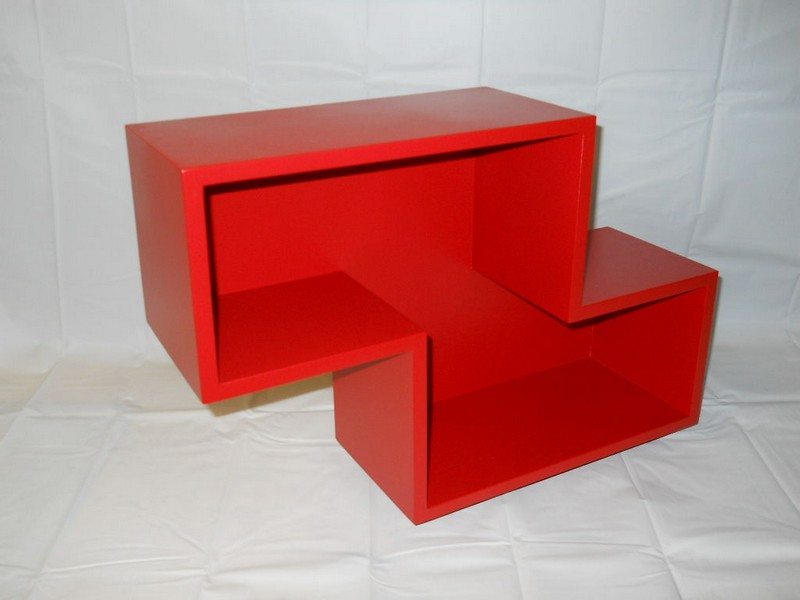
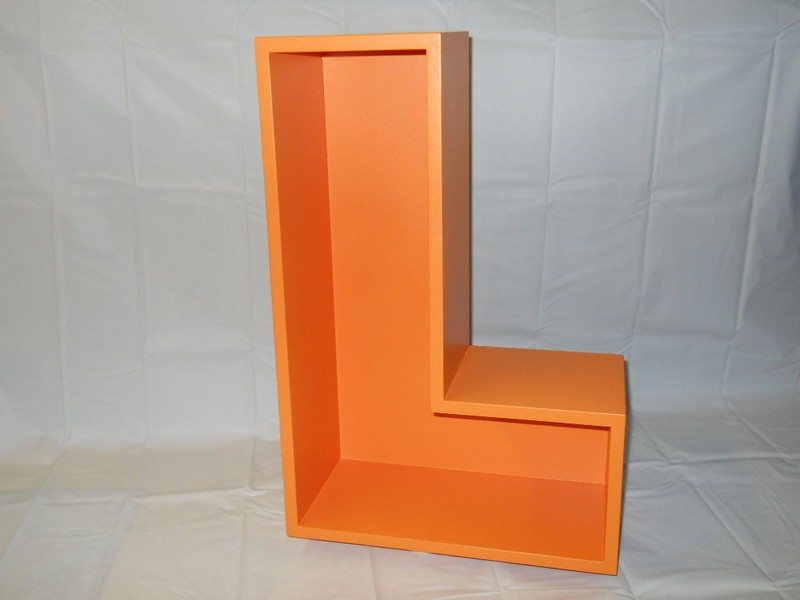
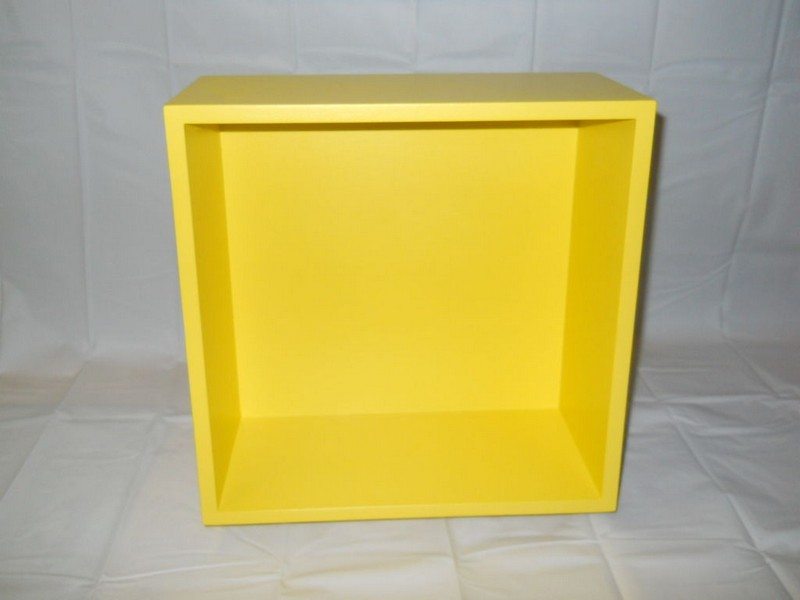
Stack them and there we go! Add more pieces later on until they reach the ceiling! Haha.
And if ever you are moving out, you can easily transport this bookshelf and simply rearrange the blocks to fit your new space.
For those of you who haven’t done a lot of carpentry projects, you will need assistance from those who have more experience. This project will require a bit of precision and advance woodworking tools. But with the advantages it offers, we’re sure it will all be worth it.
Thanks to HicksCustomFurniture for this great tutorial.
Contents
Creative Layout Ideas for Your Tetris Shelves
Tetris shelves are more than just storage—they’re a visual statement. Since each block can be arranged in endless combinations, you can customize the layout to match your personality, room size, and storage needs. Whether you’re stacking them tall, spreading them wide, or turning them into wall-mounted art, there’s no shortage of creative ways to set them up.
Play With Asymmetry
Symmetry has its charm, but asymmetrical stacking creates more visual interest. Mix different Tetris shapes in a way that balances the height and visual weight without mirroring each side. Use odd-numbered groupings or keep some blocks separated for a more dynamic look.
Go Vertical for Small Spaces
If you’re working with limited floor space, think tall. Stack your Tetris shelves vertically along a narrow wall or corner. This creates a dramatic effect while giving you ample vertical storage. Leave gaps between the blocks to break up the visual bulk and create spots for plants or framed photos.
Create a Floating Wall Display
Mount individual blocks at different heights directly to the wall. This turns your Tetris shelves into wall art with storage functionality. Vary the spacing and angles slightly to create a sense of motion, just like falling blocks in the game.
Use Negative Space to Your Advantage
Don’t feel the need to fill every space. Leaving some openings between pieces can make the shelf look lighter and more modern. Use the gaps to show off curated items or to let light pass through if you’re using the shelf as a room divider.
Build Around a Focal Point
Frame a TV, artwork, or a large mirror using your Tetris shelves. This anchors the room and gives the shelving more purpose beyond storage. It’s a smart way to blend form with function.
Painting and Decorating Your Tetris Shelves
One of the most fun parts of building Tetris shelves is deciding how to paint and decorate them. The shapes already grab attention, but the colors and finish you choose can take your shelves to another level. You can match your existing decor, highlight each block with bold contrast, or turn the whole structure into a playful centerpiece.
Classic Tetris Color Scheme
Stick to the original Tetris game palette for a nostalgic look. Paint each block in a different bright color—blue, yellow, red, green, cyan, orange, and magenta. This instantly gives the shelves a retro vibe and makes each shape pop. Use spray paint for an even finish, and opt for semi-gloss to reflect a bit of light and energy.
Monochrome or Gradient Themes
For a more modern or elegant feel, try painting all the blocks in the same color but using different shades. A gradient that fades from dark at the base to light at the top creates depth and visual flow. This approach works especially well in minimalist interiors where too many colors might overwhelm the space.
Two-Tone Interiors
Leave the outside of each block in a neutral tone—white, gray, or black—and paint the interior a bright color. This contrast draws the eye inward and adds depth to the design. It’s a great way to highlight books or decorative items placed inside.
Add Graphic Details or Patterns
Use painter’s tape and stencils to add patterns like stripes, triangles, or pixel-art-inspired motifs. You can even stencil icons or letters onto the blocks for a more personalized touch. Consider adding chalkboard paint to one face of a few blocks for a message or doodle area.
Distressed or Rustic Finishes
If you prefer a vintage or farmhouse look, use sanding techniques to distress the edges after painting. A layer of clear wax or matte sealer can protect the finish while keeping the texture soft and aged. Wood stain also works well if you want to keep the material visible but add color and character.
Decorative Accessories
After painting, add knobs, decals, or even LED strip lights to enhance the look. These little additions can give your Tetris shelves more personality and help them blend into themed rooms like game spaces, kid’s bedrooms, or creative studios.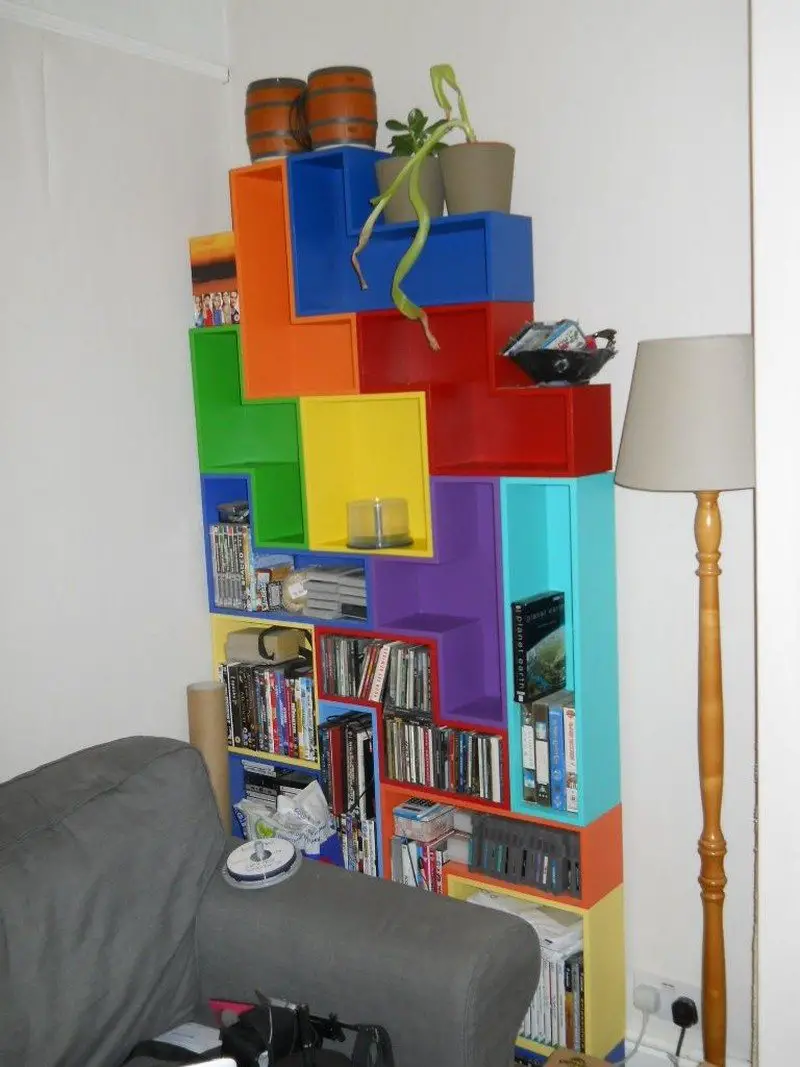
How to Customize Shelf Sizes for Different Storage Needs
Tetris shelves are as flexible in function as they are in form. Because each block is built from scratch, you can tailor the dimensions to fit specific items you want to store or display. Whether you’re organizing books, vinyl records, kitchen supplies, or even potted plants, customizing the size of each shelf lets you make the most of your available space.
Measure What You Need to Store
Start by identifying the items you want your Tetris shelves to hold. Books, for instance, come in varying sizes, so measure the tallest and deepest one to set a minimum height and depth for those specific blocks. If you’re storing collectibles or decor, give them some breathing space to keep the layout visually balanced.
Adjust Square Dimensions to Fit Your Items
Standard Tetris shelves are based on square units. You can increase or decrease the size of each square depending on your storage goals. For example, use 180mm square units for larger hardcover books or vinyl records. Go smaller—around 120mm per square—if you’re designing shelves for CDs, candles, or small jars.
Vary Depth for Practicality
Depth plays a big role in usability. Shallow blocks are ideal for photo frames or spices in the kitchen, while deeper ones are better suited for bins, baskets, or bulkier items. You can also alternate the depth of blocks to create visual contrast while boosting function.
Stacking with Purpose
Design your layout with specific groupings in mind. Group deeper and taller blocks at the bottom to handle weight and anchor the setup. Use smaller or decorative pieces toward the top or sides. This improves stability while making the shelf look intentional.
Create Specialized Shapes
Don’t feel restricted to the classic seven Tetris shapes. Modify or combine designs to fit unusual items. For example, a longer rectangular block might fit board games or wide serving trays. An L-shaped unit with added height can hold tall bottles or houseplants.
Plan Ahead for Future Needs
Leave space for flexibility. If you plan to use the shelves for evolving needs, build a few empty blocks with generous dimensions. These can adapt over time without the need for a full rebuild. Flexibility is one of the best features of a custom Tetris shelf system.
Conclusion
Tetris shelves combine function, creativity, and visual appeal in a single DIY project. With customizable shapes and sizes, they adapt to any space or storage need. Whether you want bold colors or minimalist tones, these shelves let you design with personality.
We have more unique ways of organizing your decorations in your living room. Check out our floating shelves guide next!


