Last Updated on October 13, 2025 by Team Ideas24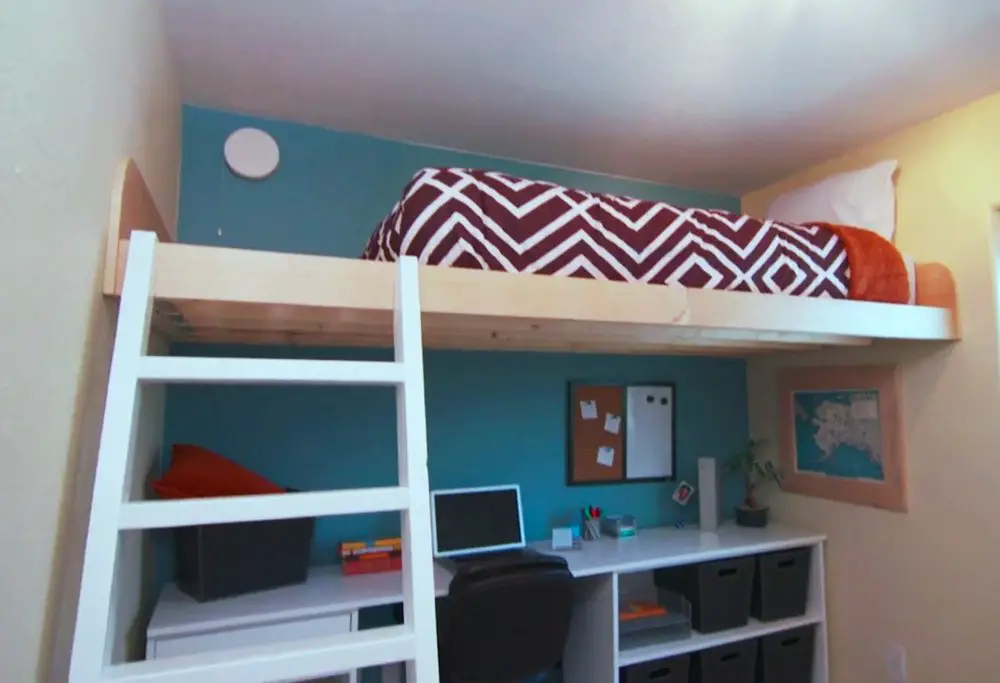
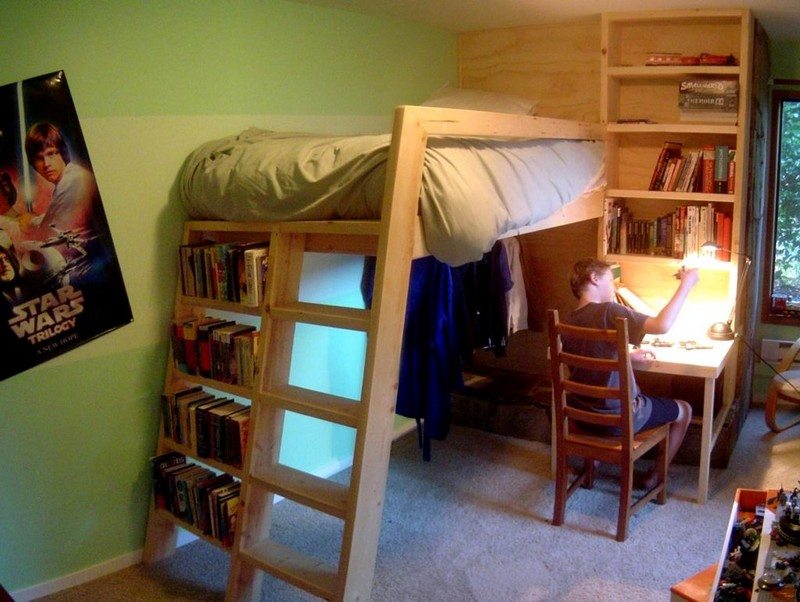
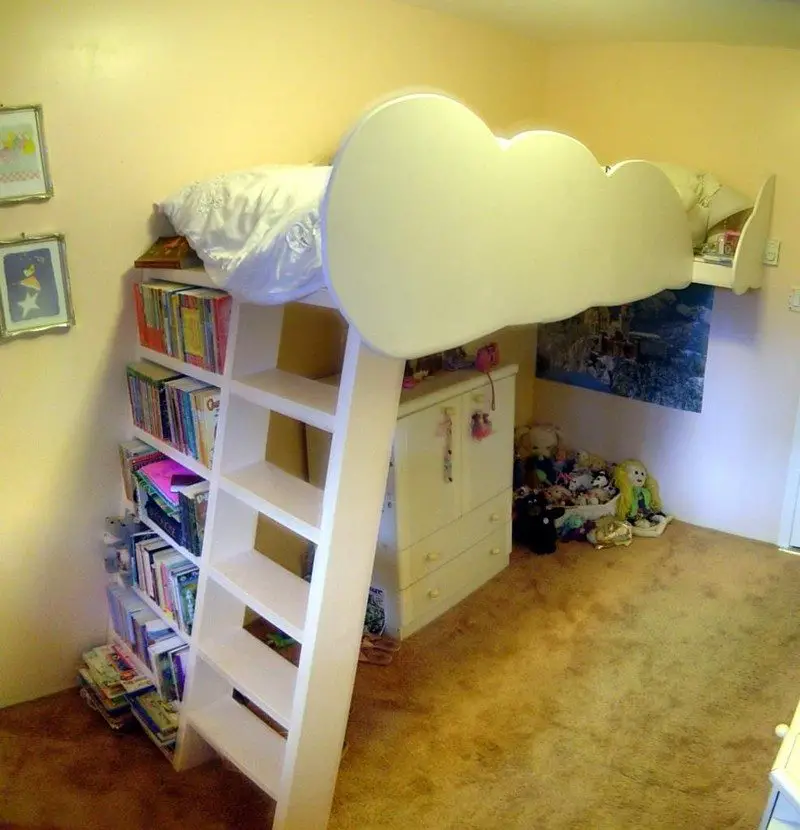
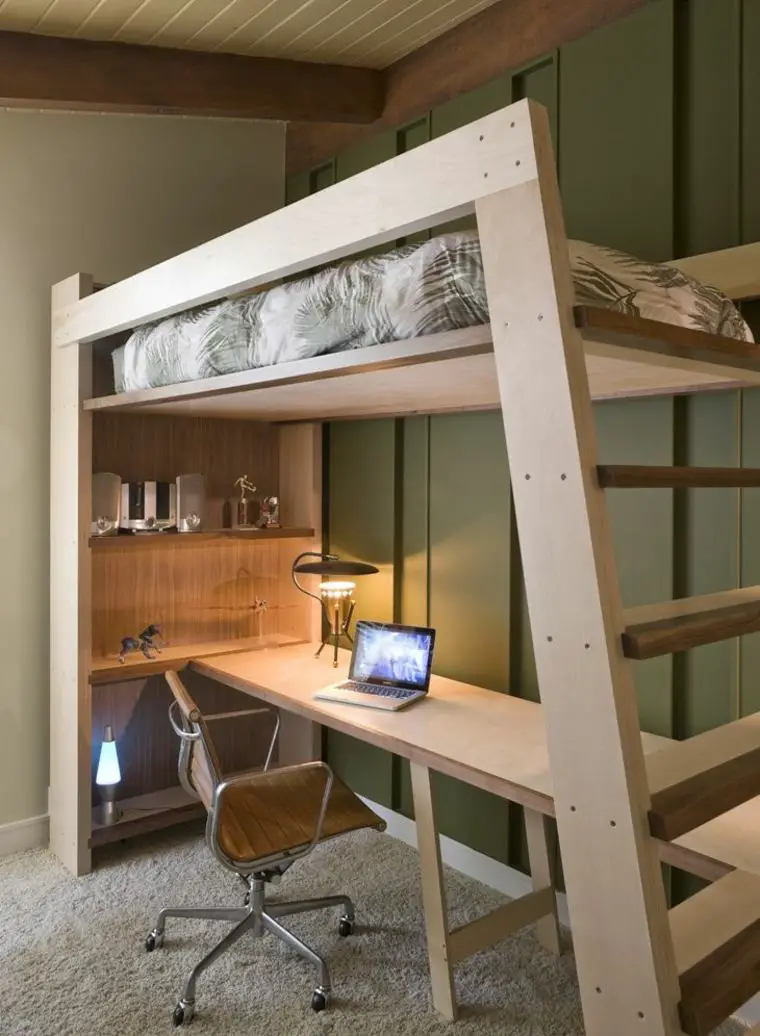
If you’re short on space, this loft bed could be the solution. Combining a desk, hanging space, shelving, and a place to sleep, it gives you everything you need in a bedroom. You could even use the second top shelf as a “bedside table”.
Now isn’t that a clever use of space? This design is perfect for those who lack space and require functionality.
The design can be easily modified to suit your needs. You can extend the desk to full width under the bed if you need a wider workspace. This design also allows the easy addition of storage space as you require.
What other modifications would you make if this was yours?
Contents
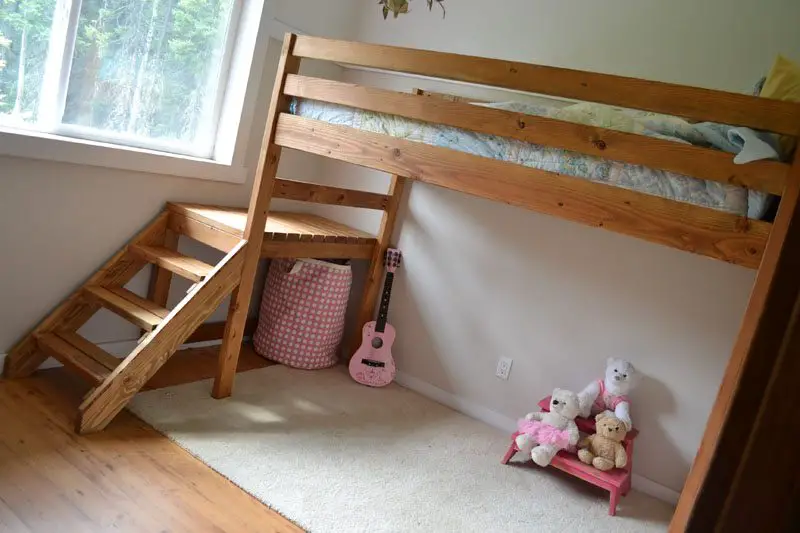
Building Your DIY Loft Bed With Stairs
Materials:
- 4 pcs – 2″ x 6″ x 10′ Construction Timber (carefully selected)
- 6 pcs – 2″ x 4″ x 10′ Construction Timber (carefully selected)
- 3 pcs – 2″ x 10″ x 10′ Construction Timber (carefully selected)
- 3″ Deck Screws
- 1/2 sheet – 1/4″ Plywood
- 1 1/2 sheets – 5/8″ Plywood, construction grade
- 1 sheet – 5/8″ Plywood, one side sanded
- 4 1/4″ x 6″ Lag Screws with Washers
- Wood Filler
- Paint
Tools:
- Circular Saw
- Orbital Sander
- Jigsaw
- Router
- Tape Measure
- Square
- Level
- Stud Finder
- Cordless Drill
Steps: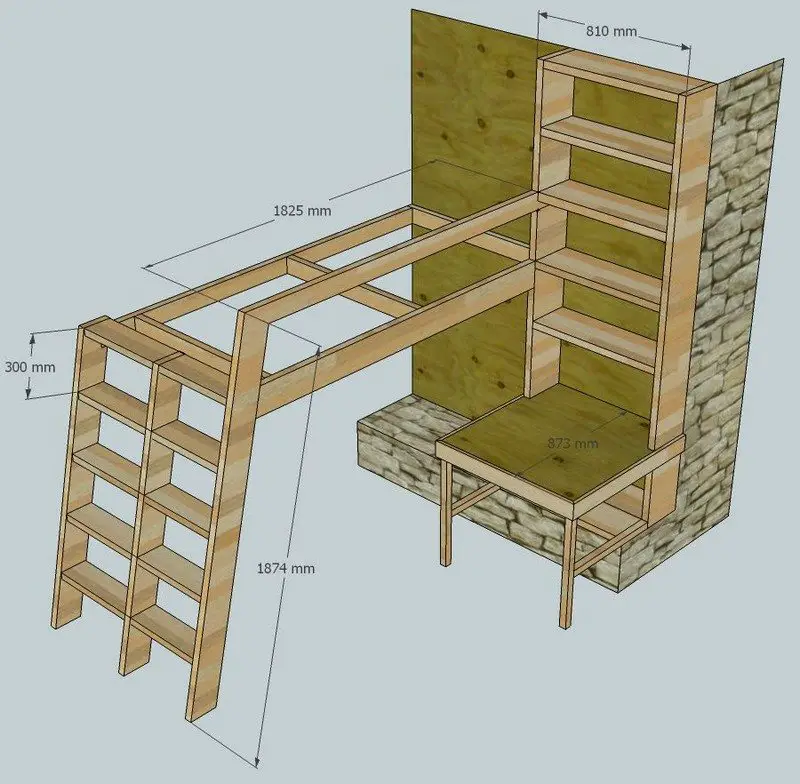
Here are the general dimensions for my DIY loft bed. Adjust measurements as needed :)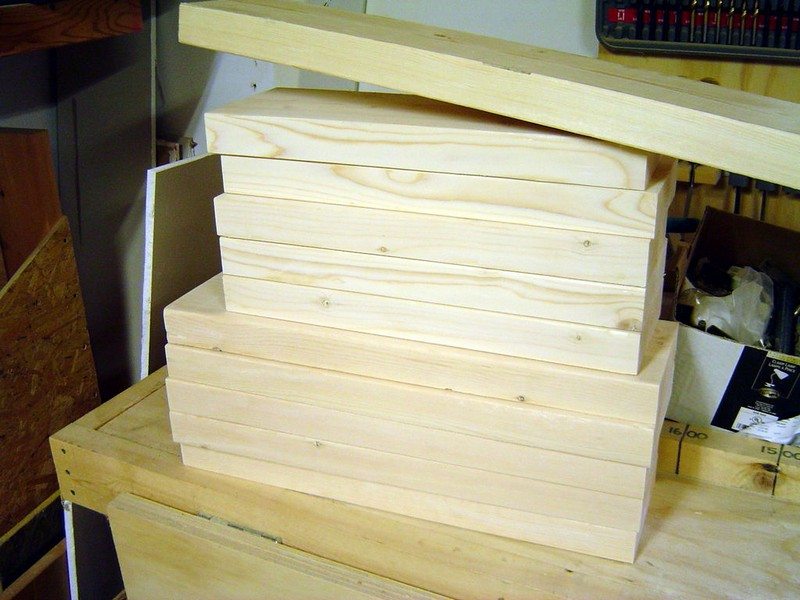
Saw the 2×6 to the following lengths. Note: construction timber is far from perfect. You’re better off to buy too much lumber and cut out the worst bits (knots, damaged areas) – the offcuts are good for firewood, and you’ll have a nicer DIY loft bed.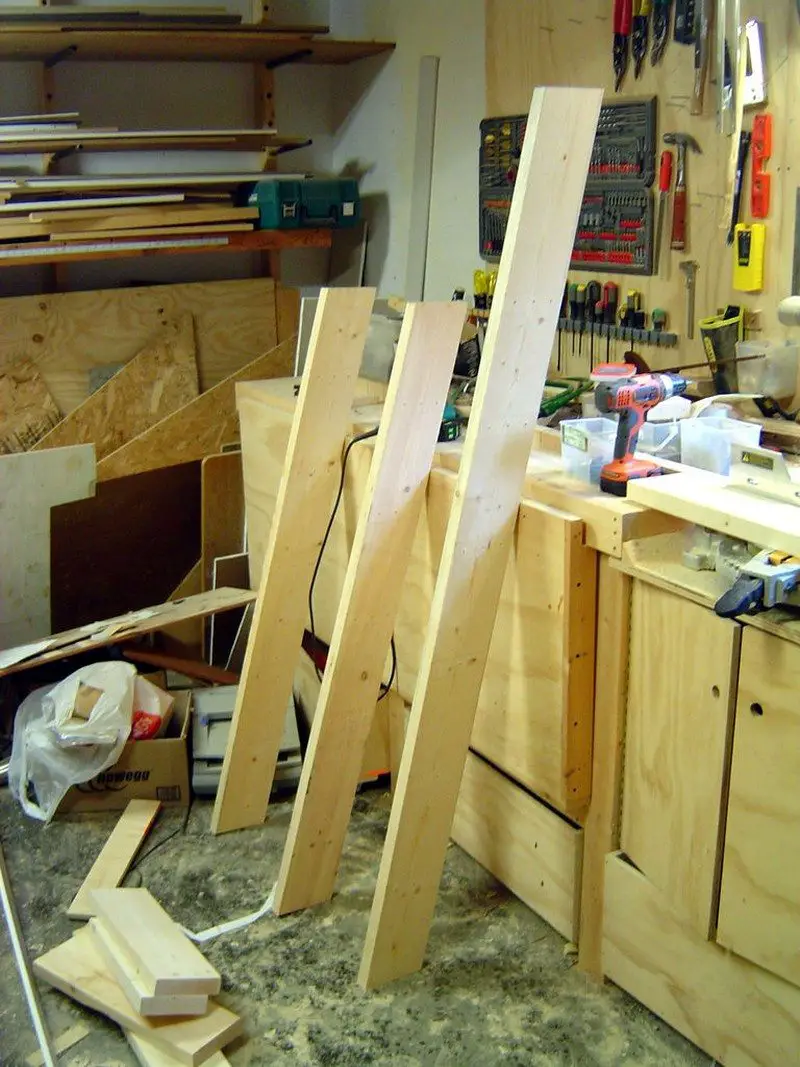
Cut these 11 pieces with square ends:
5 x 400 mm, 5 x 486 mm,1 x 962 mm
Cut these 3 pieces with parallel ends at 14 degrees:
1 x 1900 mm, 2 x 1462 mm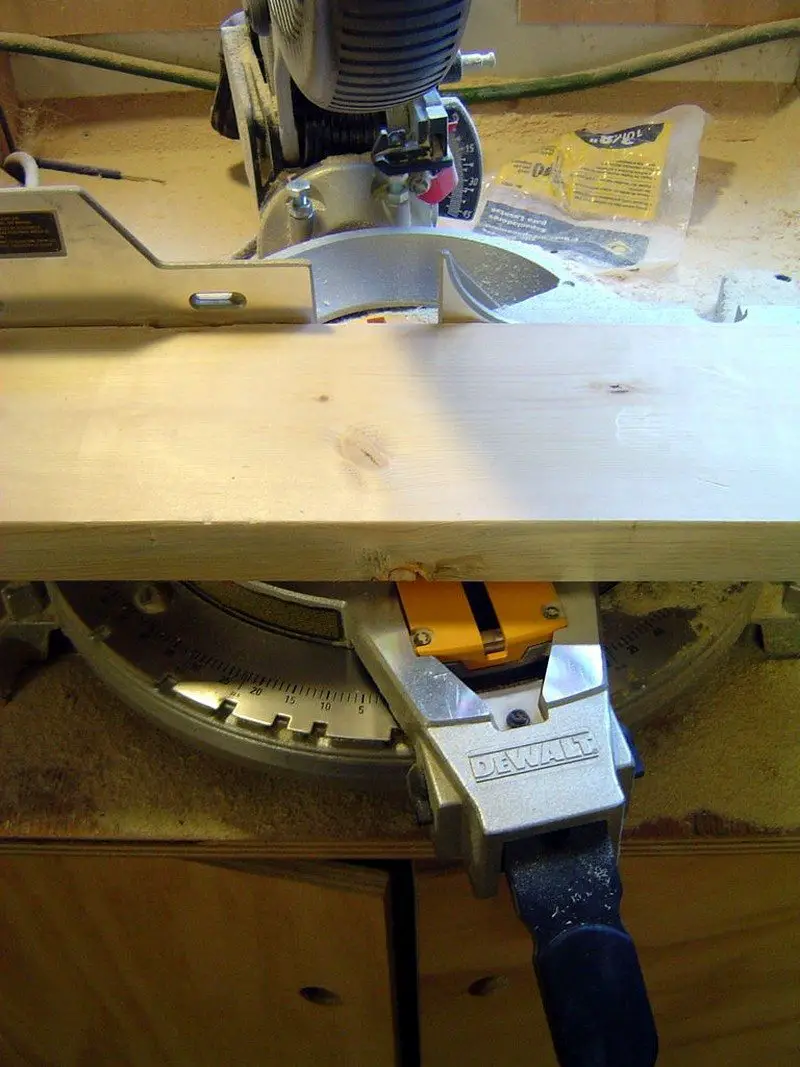
Saw the 2×4 to the following lengths, all with square ends:
2 x 2032 mm, 1 x 1200 mm, 2 x 964 mm, 1 x 362 mm, 1 x 162 mm
Cut six pieces of 1/4″ plywood to 250 x 486 mm, and cut some of the good 5/8″ plywood into six strips 20 x 486 mm. Fill all the holes and imperfections in the lumber with wood filler, and sand. You’re ready to assemble the DIY loft bed frames.
Note: check these dimensions will fit your DIY loft bed mattress! The design could accommodate a bigger mattress (double, queen, king) no problem, but you might like to use 2x6s in place of the 2x4s in the frame. Bonus: you’d get a much wider bookcase! There are slight design changes for the loft bed #2, but from here on I’ll just describe the cloud bed (#1), for simplicity’s sake. The construction is also the same for both. Check the plans for the details.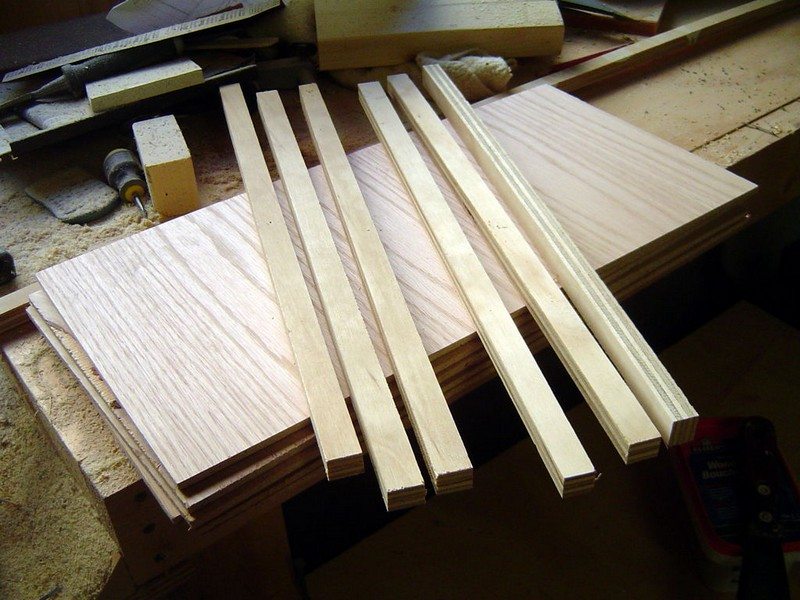
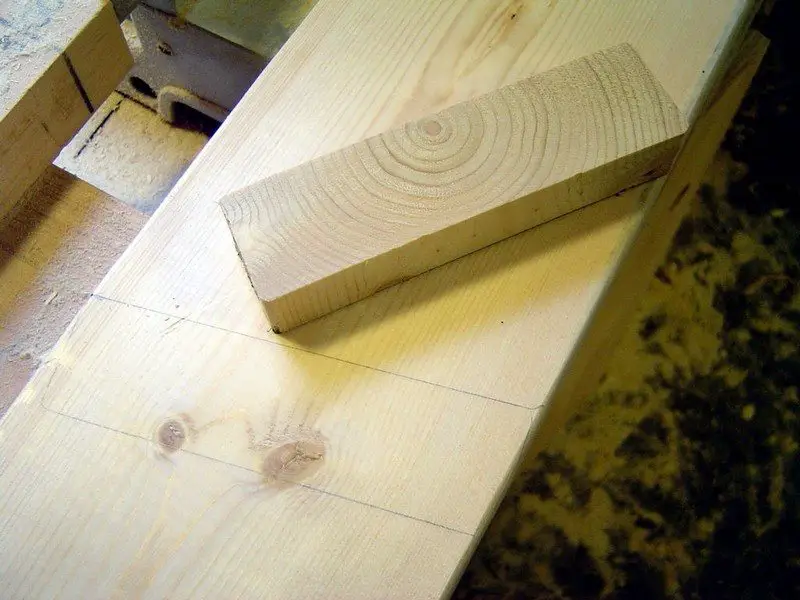
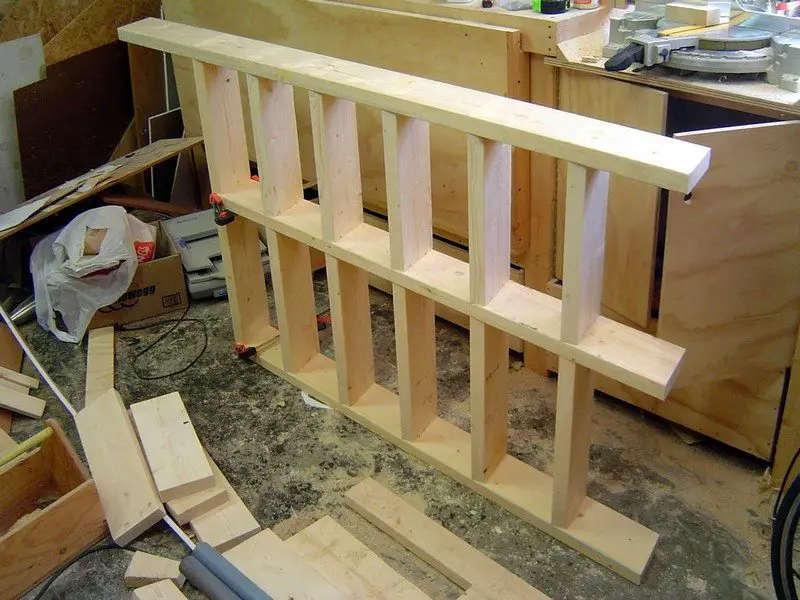
Mark the angled 2×6 boards with the steps/shelves every 250 mm. That’s a good height for a step for a kid, and high enough for most paperback books. Mark them parallel to the bottom angled piece, i.e. at 14º. Drill three holes for each step, and assemble as in the pictures with deck screws, using your handy cordless drill.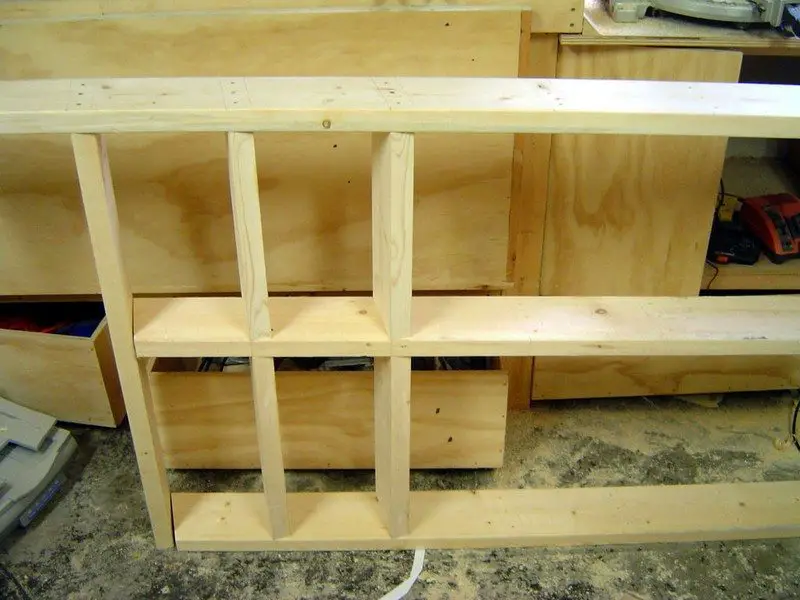
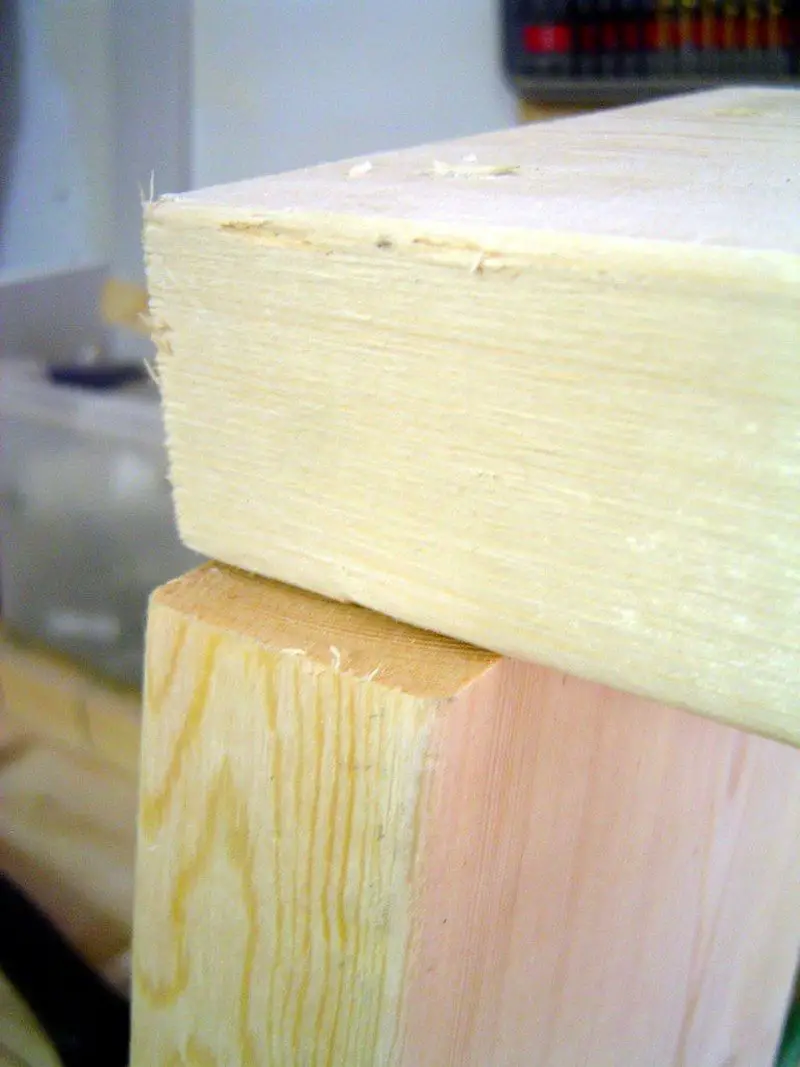
Make cut-outs (using a jigsaw or saw + chisel) for the 2×4 frame in the back of the 2×6, 55 mm deep at its deepest point, at the underside of the top step.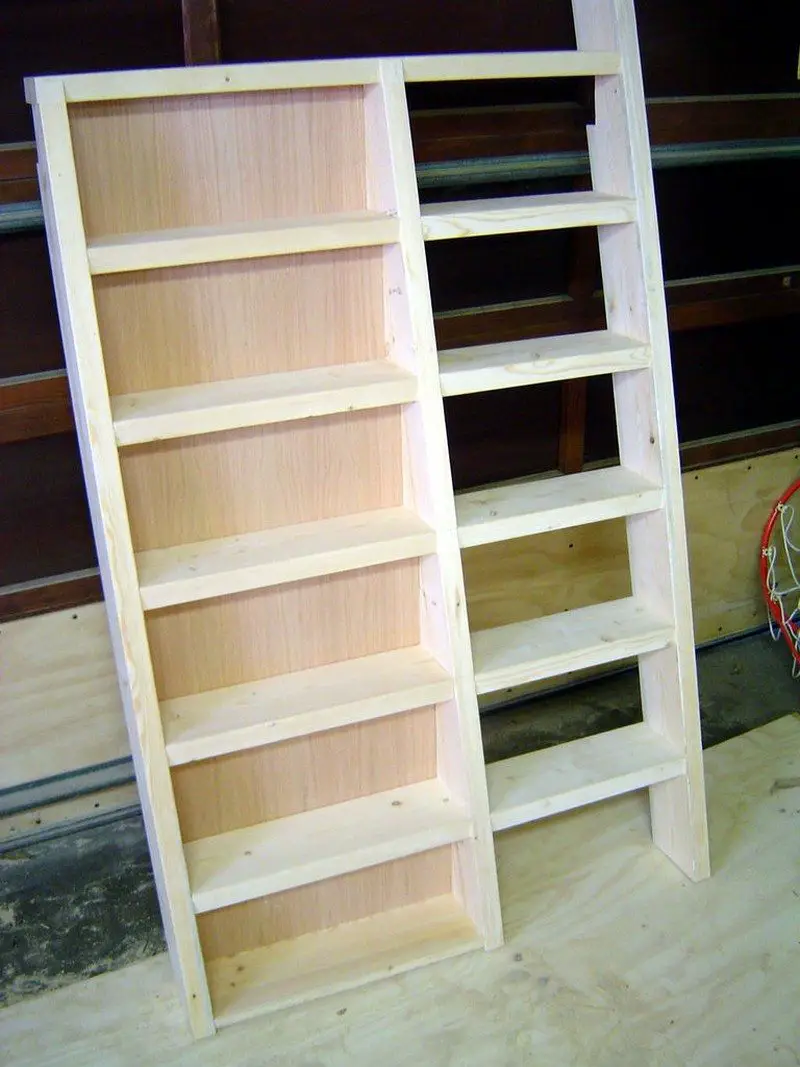
Add the strips of 5/8″ plywood to the underside of the 486 mm long pieces so you can support the backs of the shelves; 55 mm back from the rear of each shelf. Attach with wood glue and brad nailer. The backs of the shelves are made from 1/4″ plywood and can be fixed in place, nailing into the back of each 2×6 and the plywood strip from the front.
Fill the screw holes, nail holes, and any other imperfections with wood filler, and sand smooth.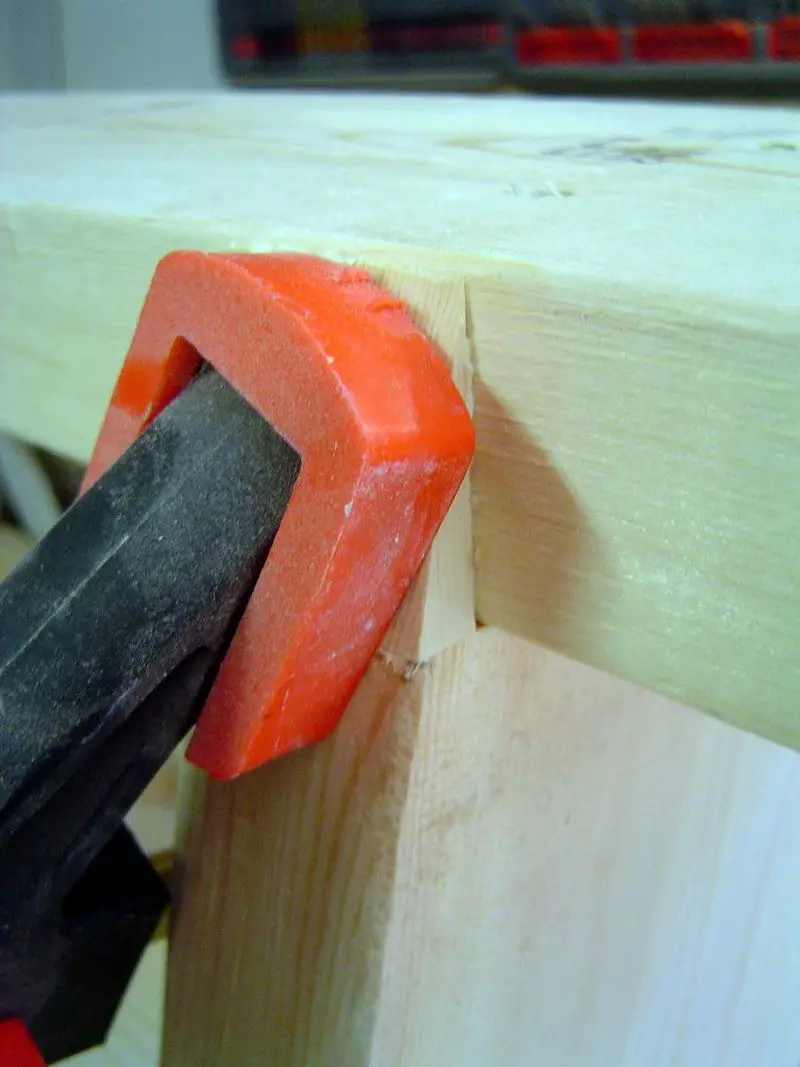
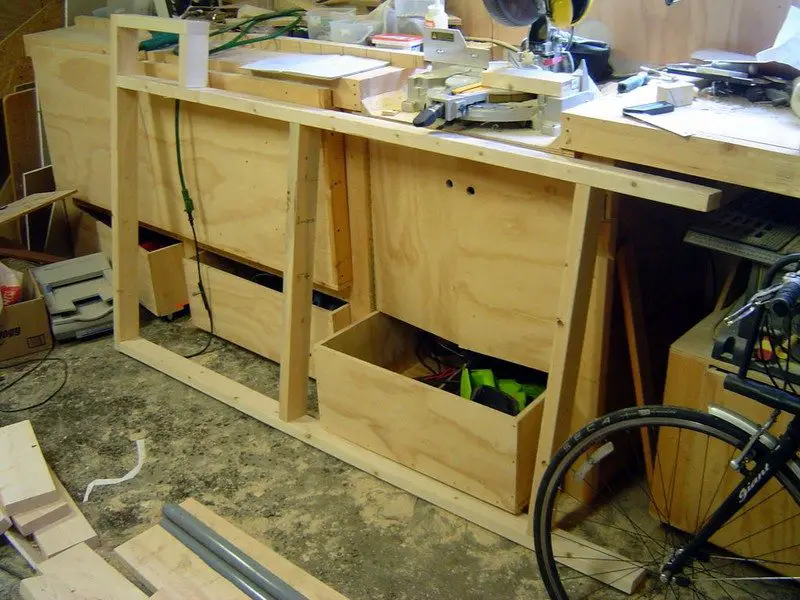
Assemble the 2×4 frame as shown, again with three-deck screws per joint. The positions of the cross-pieces are not critical.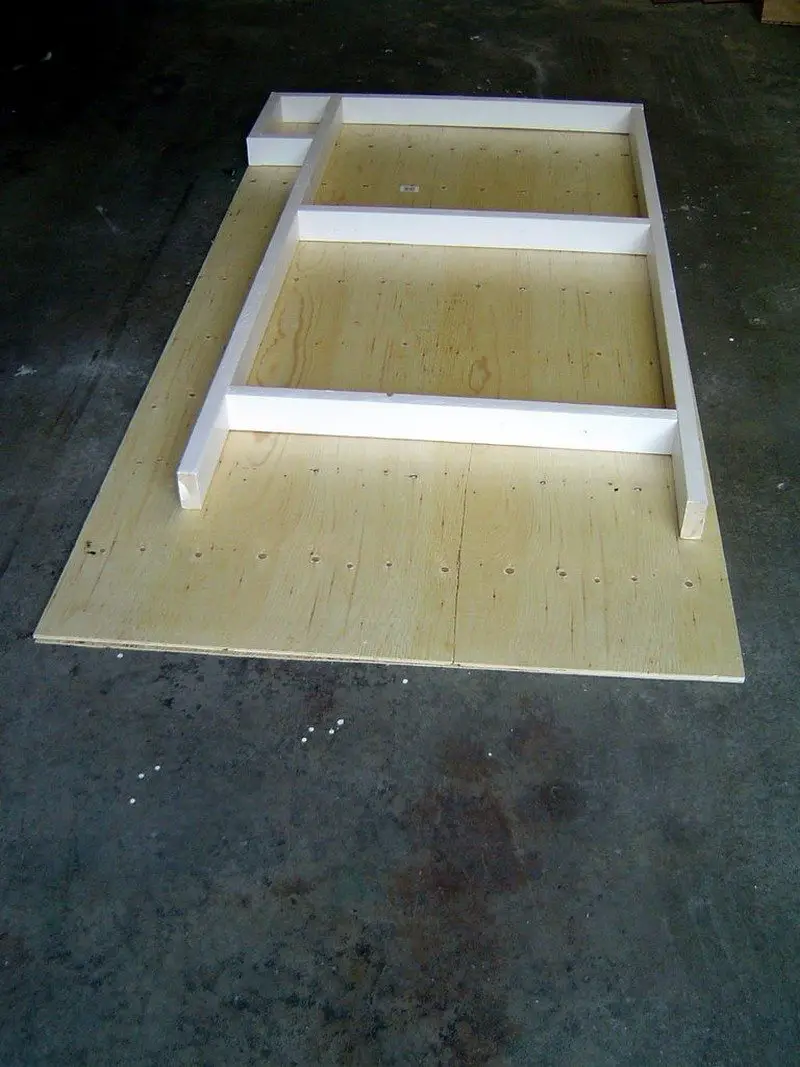
Paint or polyurethane everything. We just polyurethaned this one…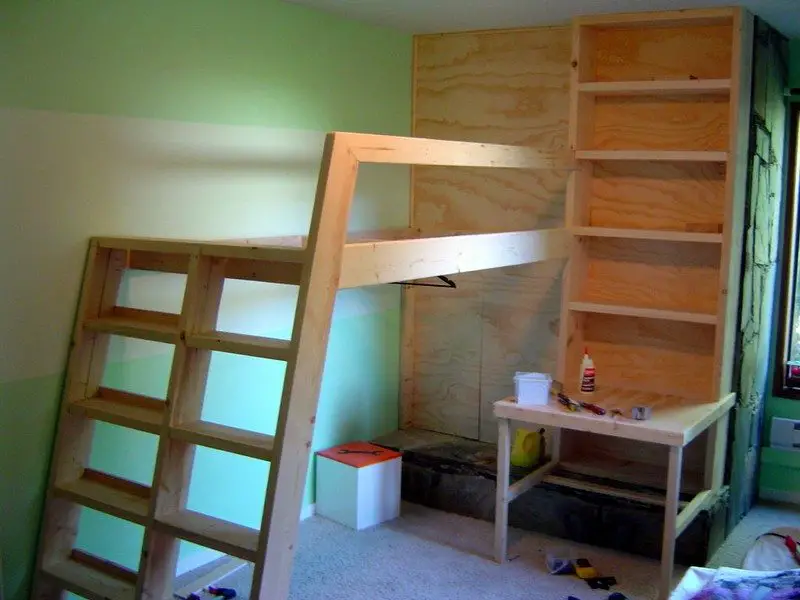
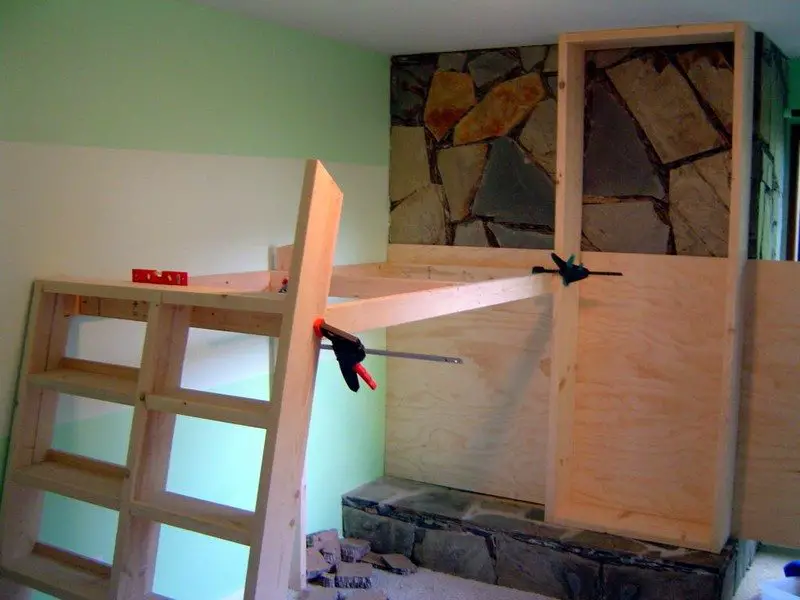
Then install! Get someone to help with this step – I did it myself with the help of a 6′ length of 2×8 and a one-handed clamp, but it was unnecessarily awkward. You’re going to attach the frame to the walls of the room using lag screws.
Mark the studs – you want to attach it twice at the head and twice on the side. Get the frame the right height and level in both directions. Drill a hole through the frame deep into the wall with a long bit, then put in the lag screw (use a washer). Repeat for the other holes. Use angled deck screws to ensure the frame can’t slide out of the brackets you cut for it in the bookcase/ladder.
Measure the plywood base for the mattress and cut to fit. Screw it to the frame.
The bed has a piece of 2×4 that joined up to the other bookcase. Utilitarian, but easy and with a nice miter and rounded edges (I used a round-over bit in my router), it looks good.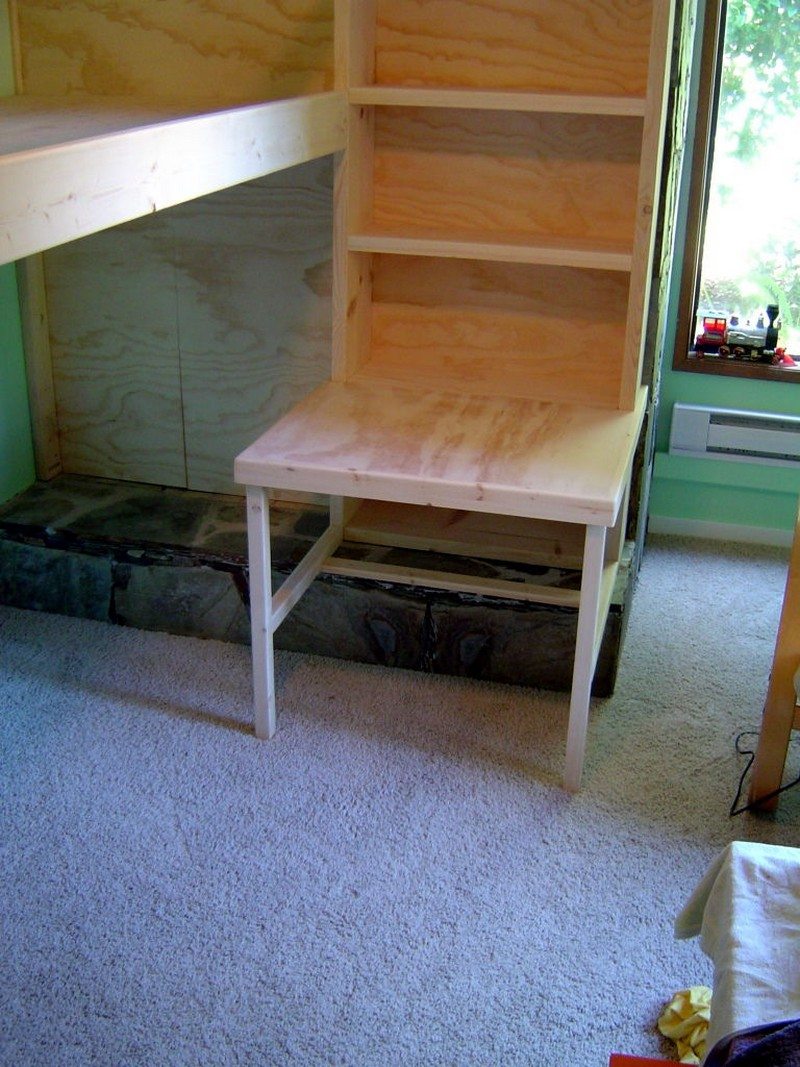
The extra bookcase was made with 2x10s to accommodate bigger books. It’s super easy to make – it went together so quickly that I forgot to take any in-progress photos. All simple butt joints joined with deck screws. The desk was made from a piece of plywood, and some 2×2 for legs/cross braces and 1×3’s for the sides to stiffen it. The 1×3’s are mitered to make it look a bit slicker.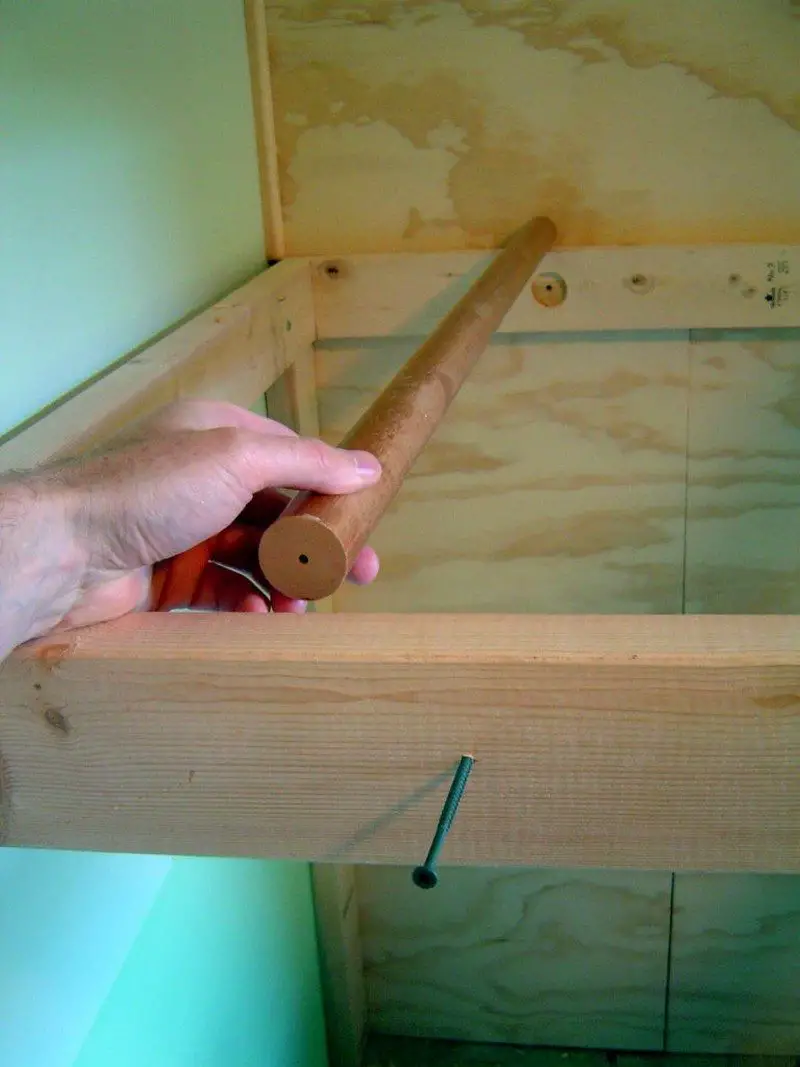
What can you use the space for under the bed? Well, it’s good for general storage, but in the case of my son’s room, he doesn’t have a wardrobe. So I added a clothes rail so he can hang clothes under the bed.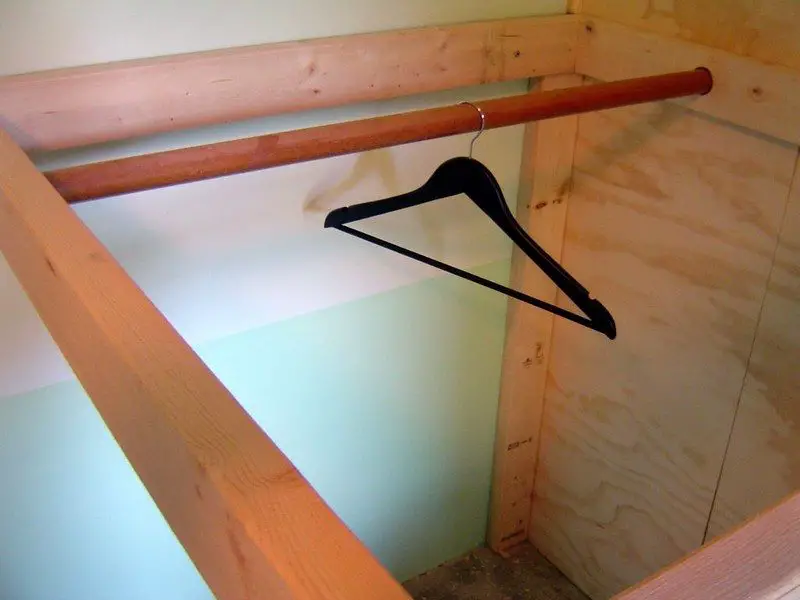
Easy to do with this design – drill a hole for one end, and drive a screw into the other end of a dowel. I used an old curtain rail for the job. I’ll add another one if he needs it.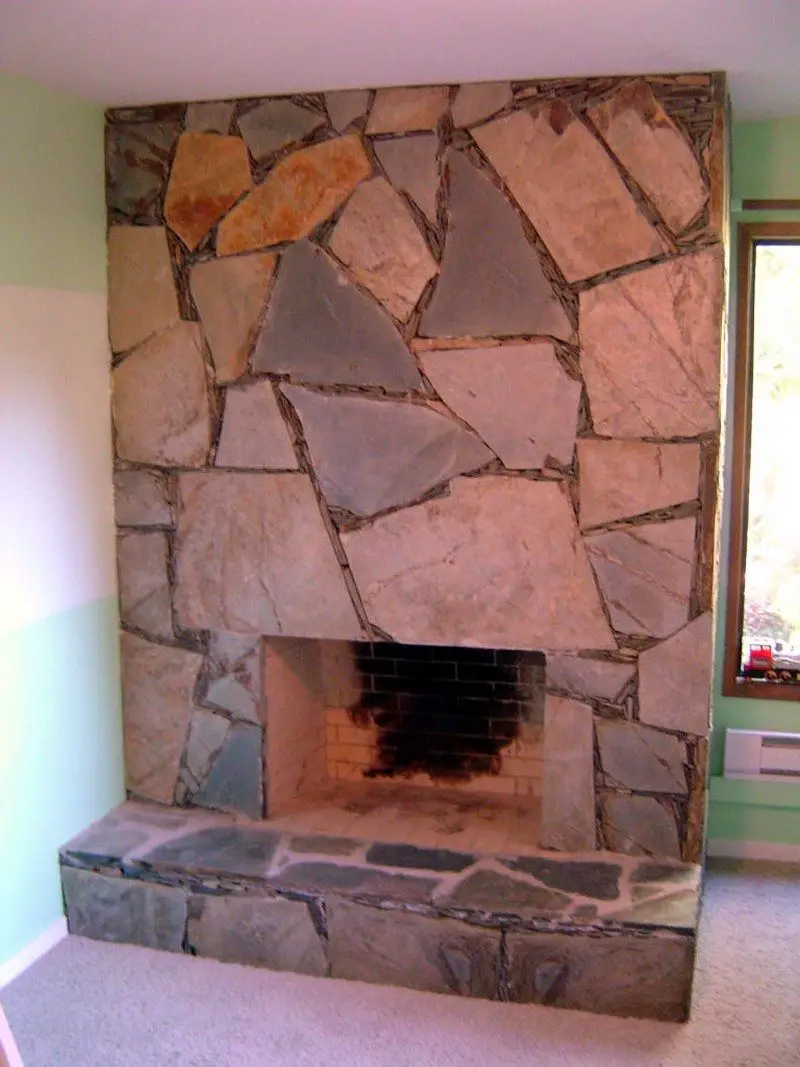
Who doesn’t want a secret space in their room? This one was easy to make because we were covering up an open fireplace (which is perfectly functional, but which we never use – the room is way too small to justify it).
All I had to do was make one of the plywood panels removable. You lift the panel up and over a strip of wood to remove it and reveal the space.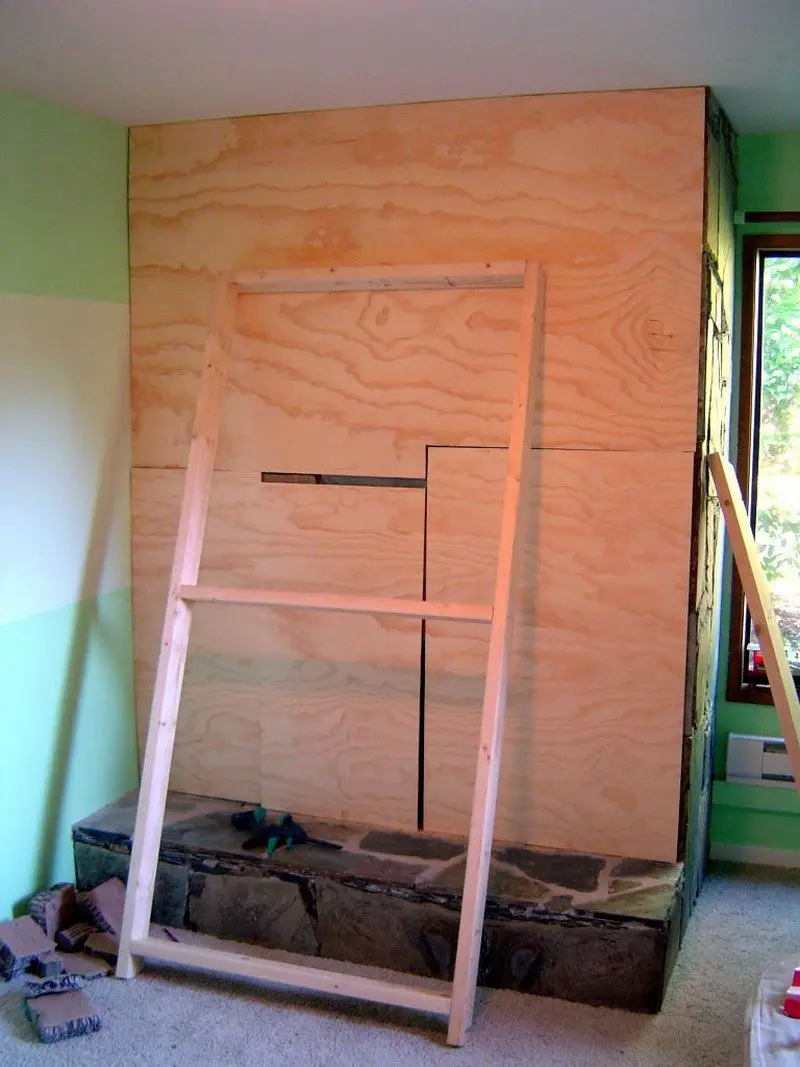

Add bedding, books, and happy occupants… And you’re done!
Building this clever DIY loft bed would only cost you around $150. Even if you’re short on cash to buy new timber, this shouldn’t keep you from building one. There’s always scrap timber you can get for free. You just have to search for them. Craigslist is a good place to start.
Could this DIY loft bed be your next project?
Thanks to makendo for this great tutorial!
DIY Loft Bed Gallery
Click on any image to start the lightbox display. Use your Esc key to close the lightbox. 8-)
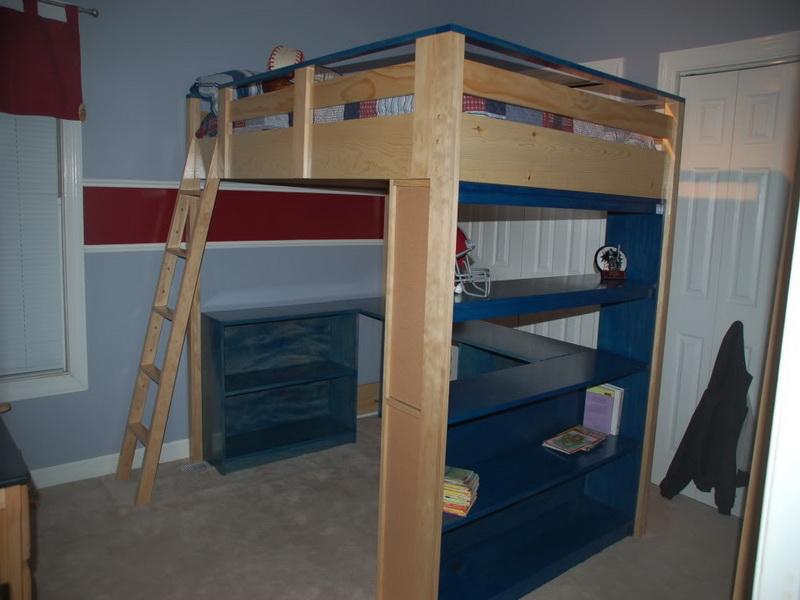
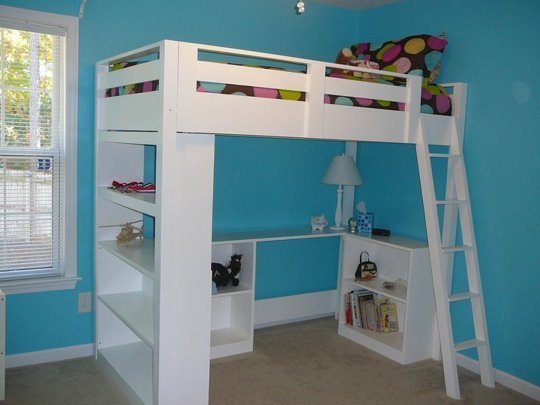
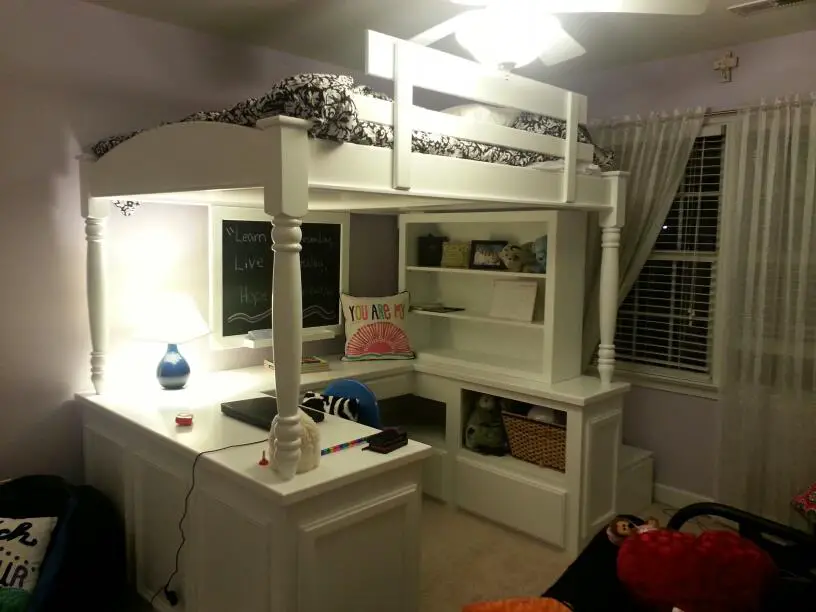

Multi-Functional Design Elements for Your DIY Loft Bed
When space is limited, a DIY loft bed becomes an ideal solution to maximize every inch of a room. By creatively utilizing the area beneath the bed, you can incorporate storage, seating, or workspace that turns a simple sleeping area into a multi-functional piece of furniture. Here are some DIY loft bed ideas that add both functionality and style.
Create a Study or Workspace
The space under a loft bed can be perfect for a small desk or workstation. By adding a compact desk with shelving, you’ll create an organized study area without taking up extra room. DIY loft bed ideas with built-in desks often include small shelves for books and supplies, making it ideal for students or remote workers.
Add Storage Solutions
For rooms short on storage, turning the area beneath your loft bed into a dedicated storage spot is a game-changer. Use shelves, drawers, or even storage bins to keep essentials neatly arranged. These DIY loft bed ideas not only keep belongings organized but also make daily access easier, especially in small bedrooms or studio apartments.
Cozy Seating Area
Another popular option is to use the space under the bed as a lounge area. Adding a loveseat or a couple of floor cushions creates a cozy reading or relaxation nook. These loft bed ideas suit both kids and adults looking to make their bedrooms feel inviting and comfortable without sacrificing floor space.
Compact Closet Solution
For rooms lacking closet space, install a clothing rack, shelves, or drawers below your loft bed to create a wardrobe area. This can help keep clothes organized and within reach, especially if the room doesn’t have a dedicated closet. DIY loft bed ideas with built-in closet solutions allow you to utilize height while saving floor space.
By adding multi-functional elements, your DIY loft bed can offer more than just a place to sleep. It becomes a complete living solution for compact spaces.
Conclusion
Building a DIY loft bed brings together creativity and functionality, transforming your space with a unique touch. A well-designed loft bed maximizes every inch, offering solutions like extra storage or dedicated work areas in compact rooms. With careful planning and the right tools, your DIY loft bed can be both a practical and stylish addition to your home.
We have more bedroom projects for your kids. Check out our boy bedroom design guide!


