
Last Updated on July 2, 2025 by Team Ideas24
This isn’t the first lift-top coffee table we’ve shown you and it probably won’t be the last. But it may well be the least expensive! It’s unique in some ways including the fact that it’s made out of reclaimed shipping pallets that would otherwise end up in a landfill.
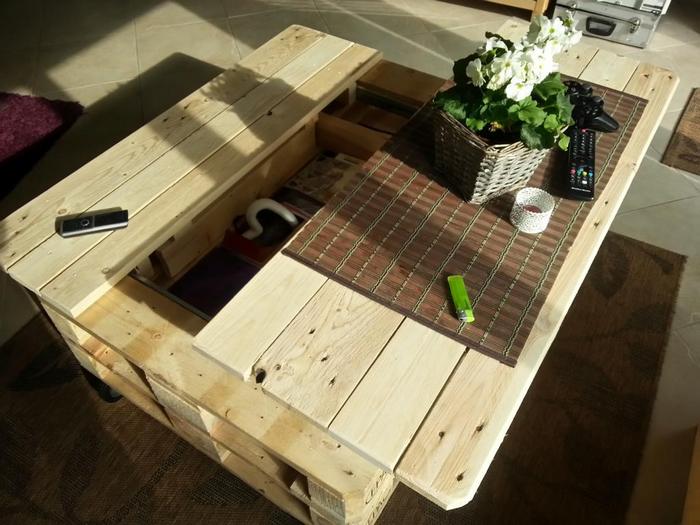
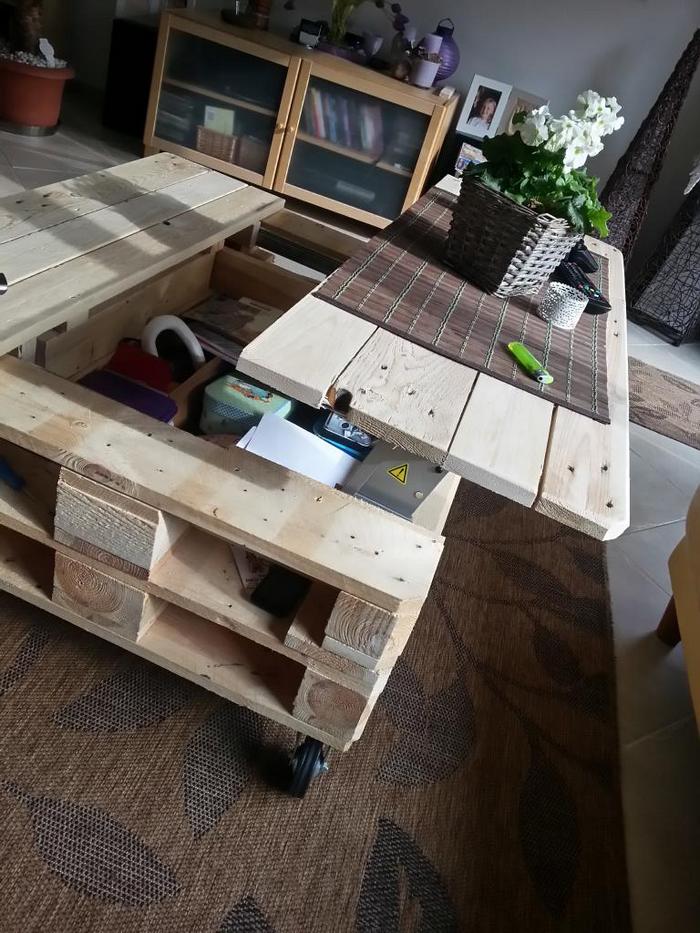
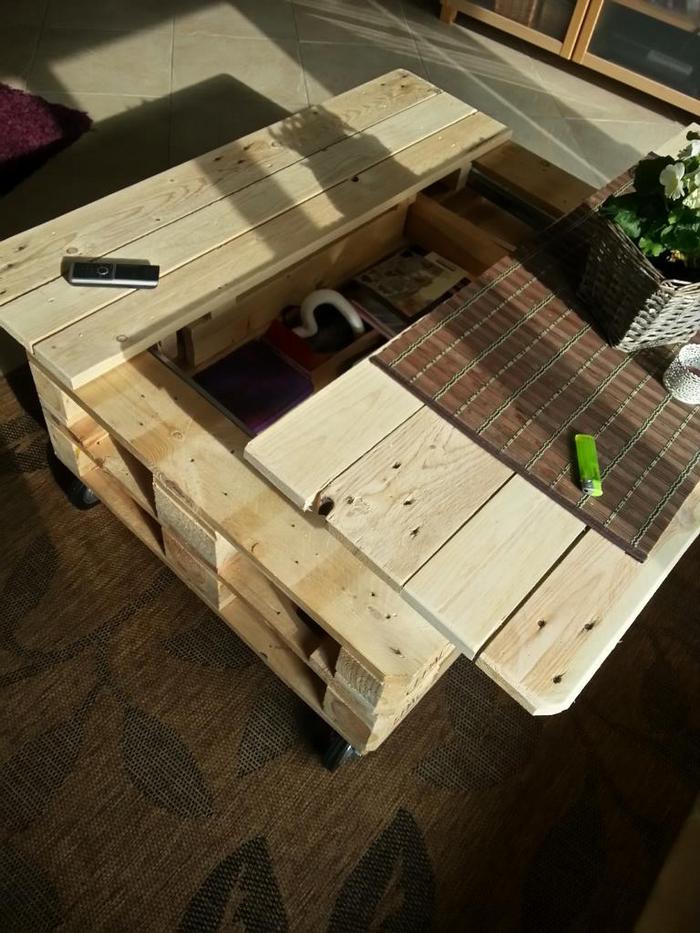
The great benefit of these lift top tables is the mechanism that keeps you from hunching over your laptop, or your food when eating off the coffee table. Another highlight of this design is the huge central storage space and the side storage compartments.
If you’re to build one, what changes would you make to make it more personalized?
BTW, if you want to know which pallets are safe to use, you can get all the facts – and instructions on how to dismantle a pallet, in this post: Pallets – fact, and fiction (or how to tell a safe pallet from a toxic one)…
Contents
Building a DIY Pallet Coffee Table with Lift Top
Materials:
- 2 Pallets
- Wood slats (that matches the pallets, or you can buy a third pallet and disassemble them to use the pieces)
- Heavy-duty Casters
- Heavy duty Cantilever Hinge
- 2 Heavy duty Slides
- Screws
- Thick Steel Straps (for holding table top pieces together)
- Wood Glue
Tools:
- Cordless Screwdriver
- Saw
- Belt sander
- Crow bar
- Drill with 3-4 mm drill bit for pre-drilling (optional)
Steps:
Start with the first (bottom) pallet. The steps needed to be taken here would depend on the kind of pallet that you have. Ultimately, the goal is to have a box-like result where a space is available for storage inside and the bottom is closed.
You want to start by cleaning it up by sanding it or removing unnecessary things found on it. Cut some wood slats, if necessary, to provide the space that you are aiming for.
Now pallets have holes on all four sides, right? Close these with the smaller wood slats or boards.
Then turn it upside down to work on the bottom. You need to close it as well by hammering or screwing wood slats.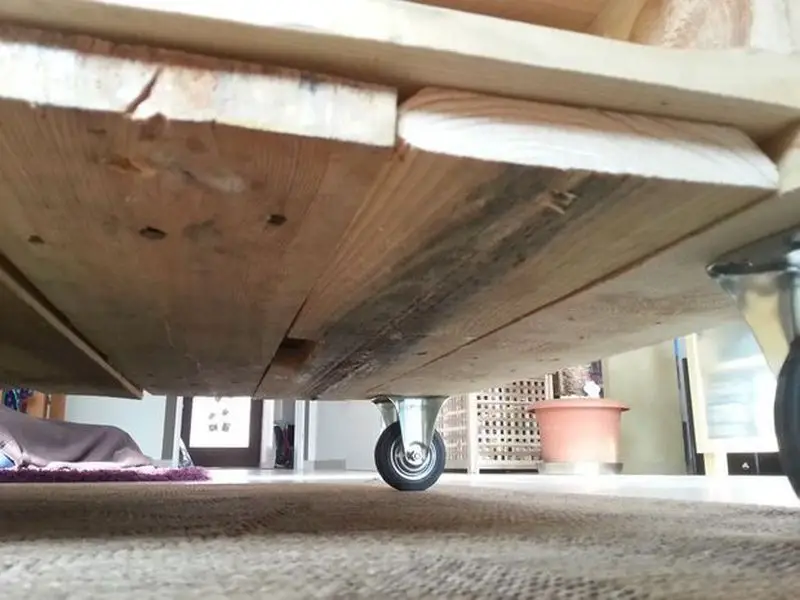
Attach the casters on the corners.
Now we need to disassemble the second pallet, removing the top part of it. Do the same “cleaning” with it.
Attach the second pallet to the first one, and now you have the “body.”
For the table top, join wood slats together with the thick perforated steel straps (you can also use ¾ thick pieces of wood) as show in the picture. Make sure you place these fasteners where it will hold the wood planks steadily together but also where it would not hit any other parts of the table when closed. You might want to put some wood glue at the sides of the wood planks for more strength.
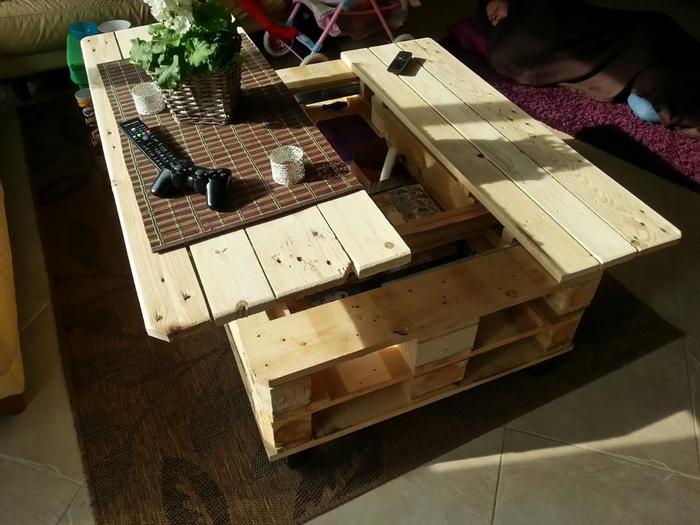
The overall size of the table top should be the same as the dimensions of the body, of course. But you have to divide the table top into two as shown in the picture above. One would have a sliding mechanism only, while the other can be lifted. As an example in the picture, this will serve as an easier access to the things you will be storing inside.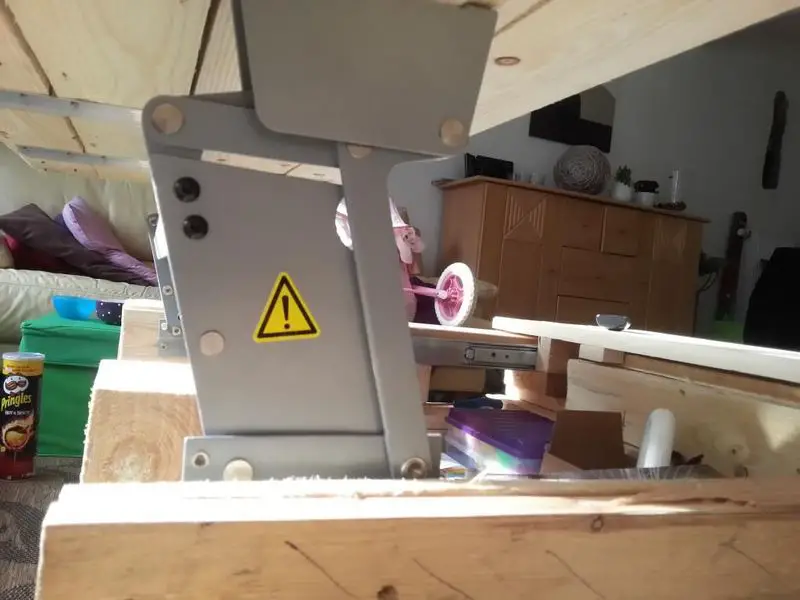
Next, install the sliders and the hinge. You have to do a trial and error to determine the accurate positions of the mechanism before screwing them into place.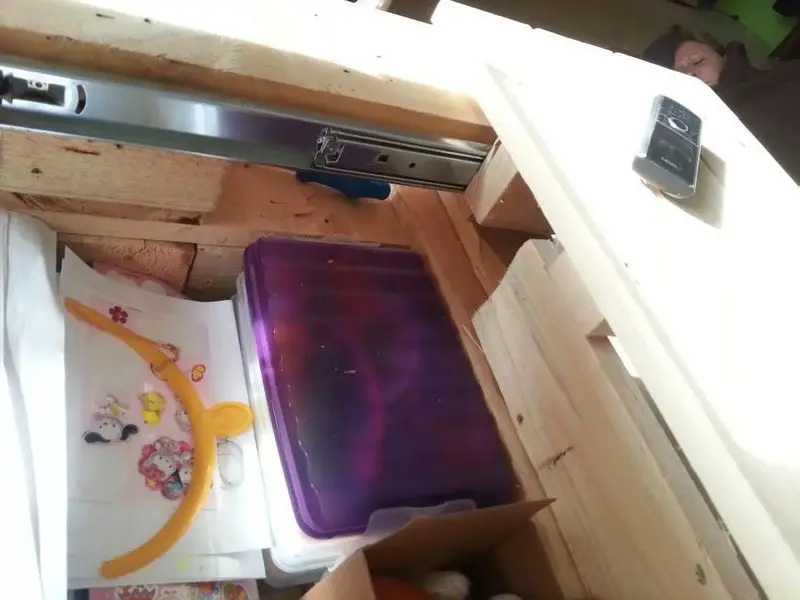
If possible you can install the slider on the pallet itself. But for some, you might need to add wood pieces on the inside of the body where you can attach the sliders and the hinge (lift mechanism). As you can see in this picture, the two mechanisms are installed on different wood surfaces.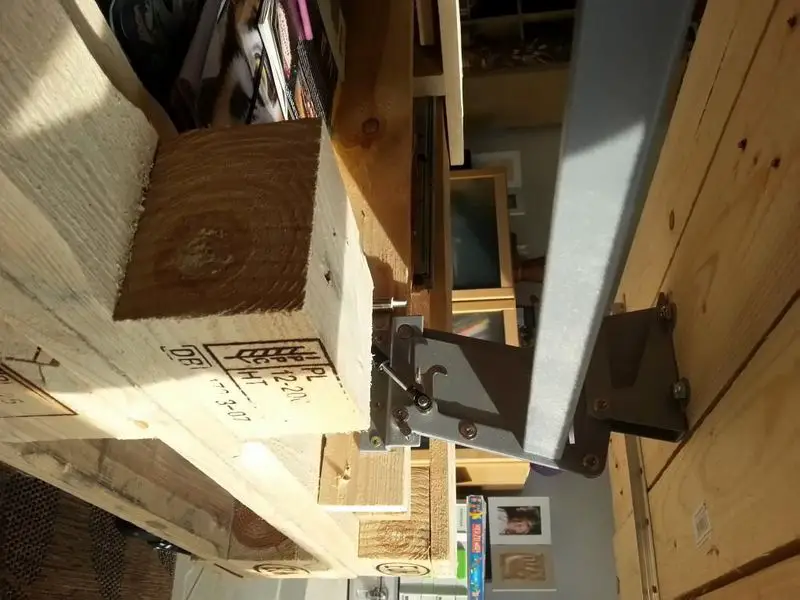
Thanks to dirkdeus for the original idea.
Selecting Safe Pallets
Choosing safe timber keeps your diy pallet coffee table with lift top strong and toxin-free. Two careful checks now save months of repairs later.
Heat-Treated Versus Chemically Treated Identifiers
Look for the “HT” mark on each stringer. That stamp tells you the pallet met only heat. Skip boards stamped “MB.” Methyl bromide lingers in wood and seeps into indoor air. Reject any pallet with blurred codes or a chemical smell because hidden treatments can trigger allergies and warp finishes.
Moisture Checks And Hidden Damage
Dry lumber stays flat. Rap a knuckle against every slat. A bright ring means solid grain. A dull thud warns of internal rot. Dark streaks at nail holes signal mold that sanding can’t erase. Stack suspect pieces aside for outdoor projects so they never reach your living room.
Smooth Disassembly Tips For Reclaimed Boards
Set the pallet on stable blocks. Slide a long pry bar between deck boards and stringers. Lift slowly until nails emerge. Switch to a nail punch to drive stubborn shanks through without tearing fibers. Straight boards reduce filler work and shorten glue-up later.
De-Nailing And Sanding Workflow That Saves Time
Work at bench height to protect your back. Keep a magnetic tray nearby so nail heads never litter the floor. Start sanding with 80-grit to level splinters. Move to 120-grit for a furniture-ready surface. Quick progress happens because you removed fasteners first.
Pre-Finishing Tight Areas Before Assembly
Brush sanding sealer onto faces that will sit inside the storage cavity. Reach every corner now. Closed joints block future access. Scuff lightly after an hour then coat with clear varnish. Early prep locks out moisture swings and keeps panels straight for years.
Upgrading The Lift-Top Hardware For Smoother, Quieter Action
A solid lift transforms pallets into premium furniture. Good hinges and slides protect laptops, plates, and curious fingers.
Choosing Cantilever Hinges And Full-Extension Slides
Match hinge capacity to the finished top plus dinner plates or work gear. Full-extension slides let you reach items at the back without scooting the sofa. Test hardware at the store. Any wobble today becomes a rattle tomorrow.
Precise Placement And Pilot Holes First
Mark centers with a sharp awl. Use a square for alignment. Drill small pilot holes so screws bite straight. Even a slight tilt stresses steel arms with every lift and shortens life span.
Quieting Squeaks With The Right Lubrication
Spray a thin silicone film on slides and hinge pivots. Silicone repels dust and stays clear. Avoid grease because it traps grit and grinds metal. Wipe overspray right away to protect your new finish.
Testing Lift Angles For Ergonomic Height
Rest the tabletop on stacks of scrap until it rises to elbow height while you sit. Adjust hinge arms one mounting hole at a time until the arc feels natural. A comfortable angle keeps your spine straight during movie snacks or remote work.
Reinforcing Weak Corners With Hidden Blocks
Glue 25 mm hardwood cubes inside each corner behind hinge plates. Clamp overnight. Dense blocks spread load so screws never strip. Your diy pallet coffee table with lift top stays wobble-free even after years of daily lifts.
DIY Pallet Coffee Table With Lift Top Gallery
Click on any image to start lightbox display. Use your Esc key to close the lightbox. 8-)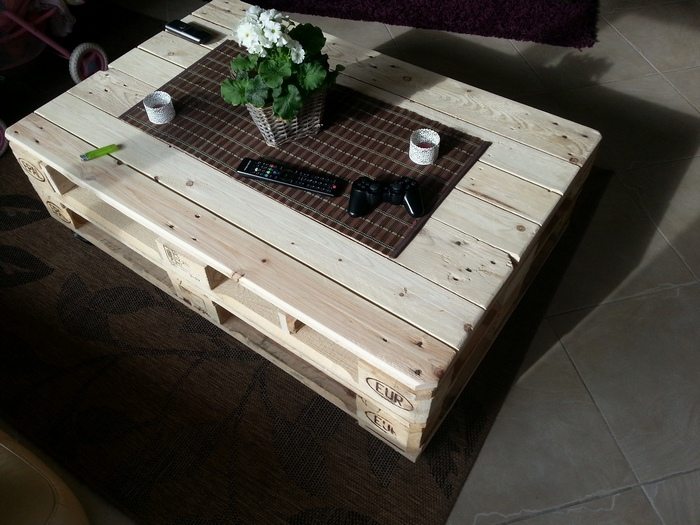

Dividing The Interior
The big hollow inside only helps when gear stays sorted. Custom inserts end the hunt for remotes and chargers.
Planning Compartments For Remotes, Power Banks, And Game Controllers
Trace each gadget on scrap cardboard. Shuffle shapes until edges touch without gaps. Transfer outlines to 6 mm plywood. Cut dividers with a jigsaw and sand edges smooth. Snug walls stop items rattling when the top drops.
Building Removable Trays That Slide Out And Clean Up Fast
This tray section starts with two guiding sentences. Removable trays catch crumbs and let you swap décor with the seasons.
- Cut sides from thin birch ply to keep weight low.
- Join corners with brad nails backed by wood glue for strength without bulky brackets.
- Add half-moon finger pulls so trays lift even when full.
- Finish with food-safe oil because snacks will land here sooner or later.
Integrating Cable Routes And Hidden Power
Drill a 20 mm hole through the rear floor panel. Sand the rim smooth. Feed a surge-protected strip inside and screw it under a crossbeam. Stick adhesive clips along dividers. Cords stay tidy and the lift top closes flush without pinching wires.
Soft Lining Options To Protect Electronics
Spray adhesive onto tray floors and press 3 mm felt into place. Felt cushions screens and mutes clatter. Charcoal gray hides dust so cleanup waits another night of gaming.
Vent Slots That Keep Laptops Cool
Cut narrow slots in the divider under the laptop area. Position them near the rear so warm air rises through the natural chimney formed when the lid opens. Cooler hardware lasts longer and fans stay quiet.
Your diy pallet coffee table with lift top now rests on toxin-free wood, glides without noise, and hides clutter behind custom dividers. Check screw tension each season and mist slides with silicone twice a year. A quick wipe of wax keeps the reclaimed grain glowing. Build it once and enjoy a hardworking centerpiece for decades.
Conclusion
Building a pallet coffee table with a lift top turns waste wood into smart furniture. Careful pallet selection keeps your living room safe and stylish. Quality hinges and slides reward you with smooth daily use. Custom storage inserts stop clutter and protect gadgets. A quick seasonal tune-up keeps the table rolling and rising for years.


