Last Updated on October 31, 2025 by Team Ideas24
This idea is one that you should do to have better control of your room temperature. Some of you live in places that can get unbearably cold, so we suggest these DIY insulated curtains to help maintain heat.
Few people are born with real money management skills. Like driving a car or playing an instrument, the skill of managing money must be learned.
However, budgeting money seems to become increasingly difficult each year for most, if not all, of us. We have our daily expenses plus a handful of bills to pay every month – some of them getting higher!
One of which is our electricity bill. It might be due to climate change – cold places get colder and warm places get warmer – or the energy charges getting more expensive. At least in some countries, both are the case.
It’s a good thing that electronics companies can improve their products which are now more energy efficient. But aside from replacing old appliances with modern ones, it would also be wise to help lessen the work of your home equipment for even lower energy consumption.
Think you could use some of these insulated curtains? :)
Key Takeaways
- Insulated curtains cut heat loss in winter and block summer heat, reducing HVAC run time and utility costs.
- Best results come from ceiling-to-floor panels that overlap the frame, use snug side seals, and include dense or reflective liners.
- Renters can use tension rods and removable magnetic or hook-and-loop seals, and open panels daily to limit condensation and mildew.
Creating DIY Insulated Curtains
Materials:
- 2 sets of Curtains
- Curtain Rods and Mounts
- 4 yards of Velcro (industrial strength)
- 2 1/2 yards of Fabric (valence)
- 2 pcs of 1″ wide, 73″ long Wood Stakes
- 4″ wide, 79″ long Wood
- Batting
- Staples and Screws
- Thread
Tools:
- Sewing Machine
- Hammer
- Staple Gun
- Power Drill
Click on any image to start the lightbox display. Use your Esc key to close the lightbox. 8-)

How to Make a DIY Insulated Curtain
1. Adding Velcro
Adding Velcro to the curtains is the very first step. This Velcro is what will seal the edges to the wall.
2. Layout the curtains
First, lay out your curtains exactly how they will look when hanging. Separate the velcro pieces. You will be using the rough side of the Velcro. Place the soft Velcro pieces on the side for later.
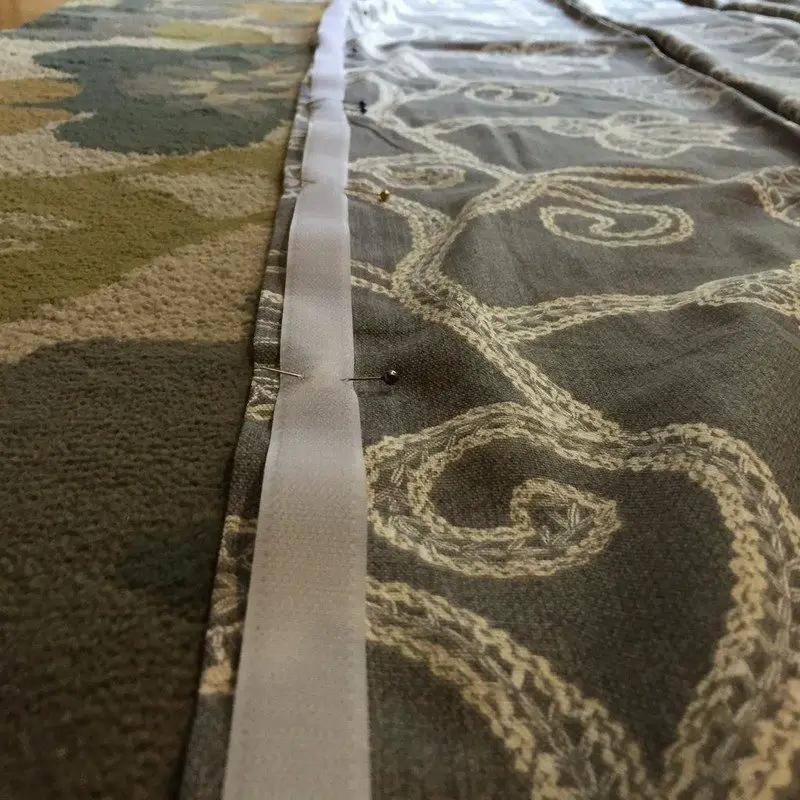
3. Attach the velcro
Now center and pin the two yards of the rough Velcro pieces to the left panel’s outer edge and one on the right panel’s outer edge of the curtains. You are attaching the Velcro to the sides of the curtains that will touch the wall.
*Make sure that you are pinning the Velcro to the right side/front side of the insulated curtain.
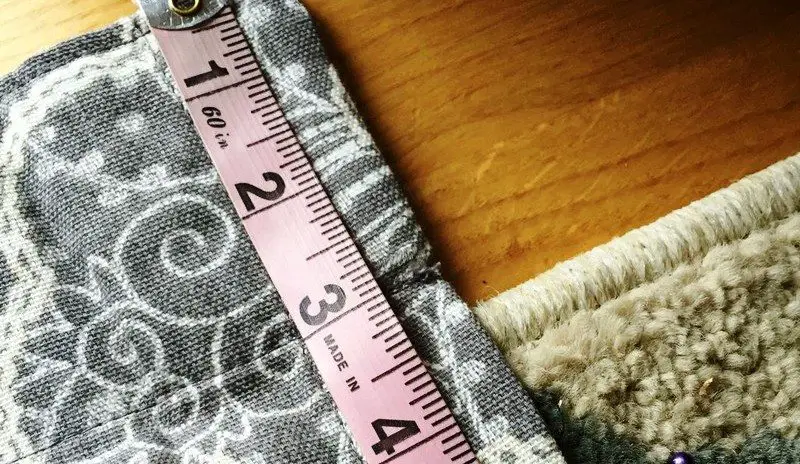
Apply them 3/8″ away from the edge.
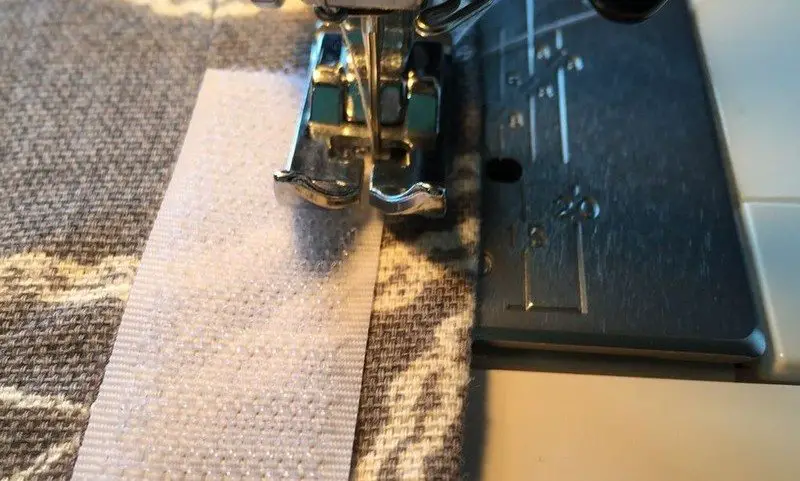
Once it is in place sew along all four edges of the Velcro strips.
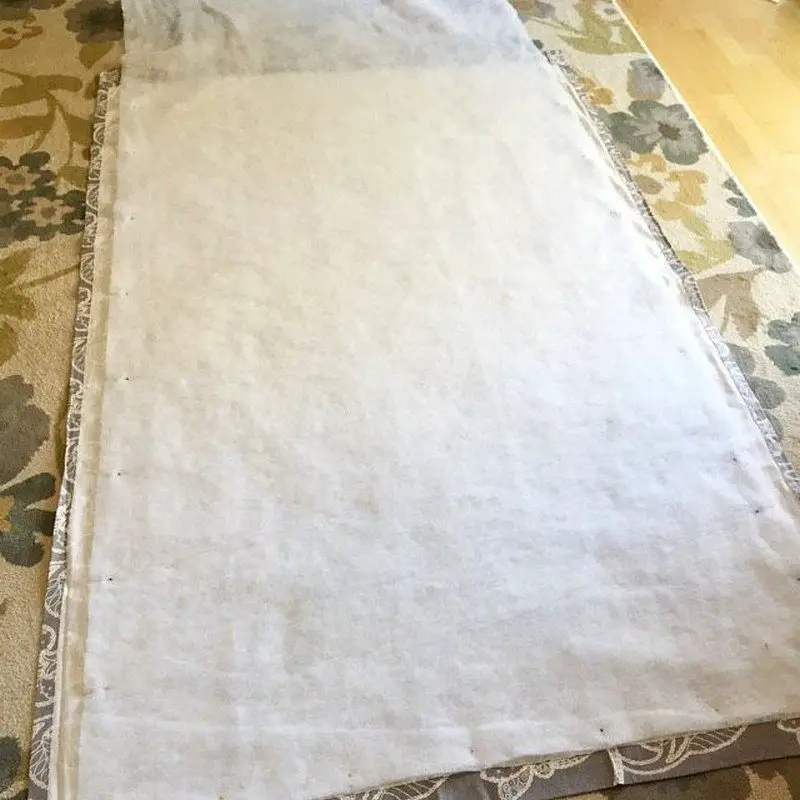
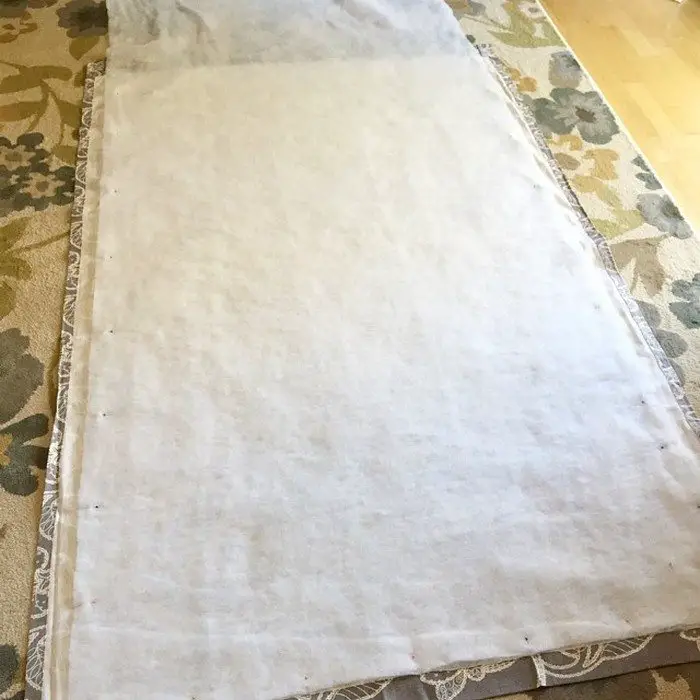
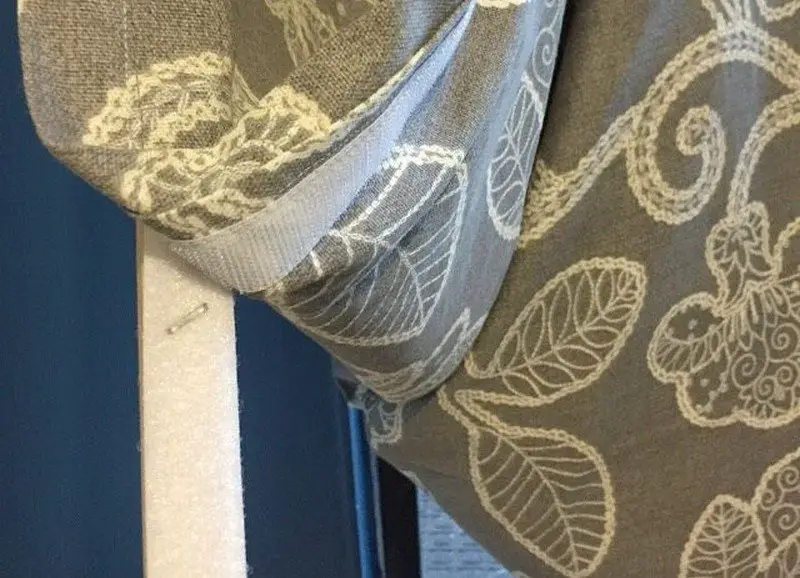
4. Add the batting
After the velcro is attached to the outer edges of the curtain panels you are ready to add the batting. The batting will act as a sort of honeycomb effect to trap air and slow down the heat transfer.
Turn one of the curtain panels that have the velcro on it face down and lay it out flat. Roll the batting onto the fabric and center it within the Curtain.

Pin it down on all four edges. Make sure the batting only goes about 1/2 inch past the loophole area(where the curtain rod goes). You can end the batting 3 inches from the bottom of the curtain.
Sew the batting down on all four edges.
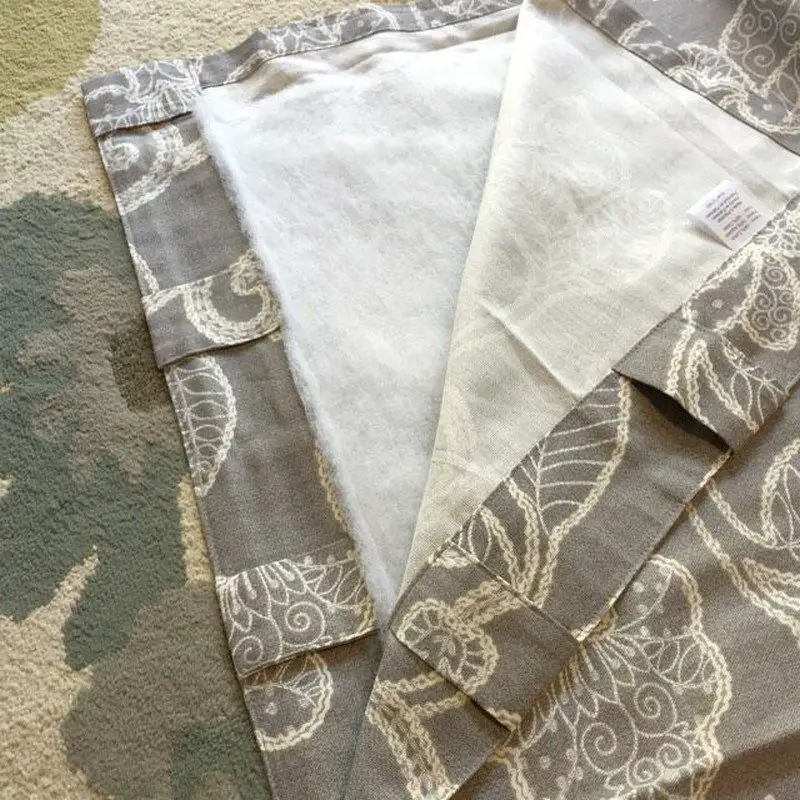
After the batting is attached you will grab your other curtain panel that mirrors this one and does NOT have velcro on it. Place the curtain panel on top of the batting with the wrong side touching the batting. Line up the seams and edges and pin the left side, top, and right side.
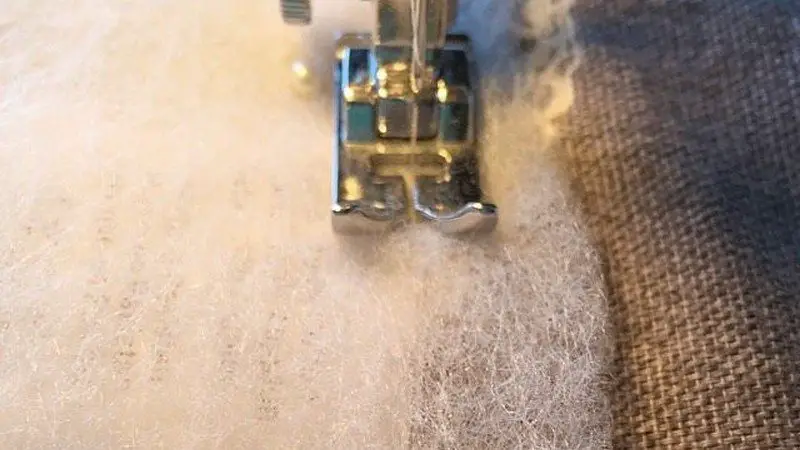
5. Sew the curtain panels together
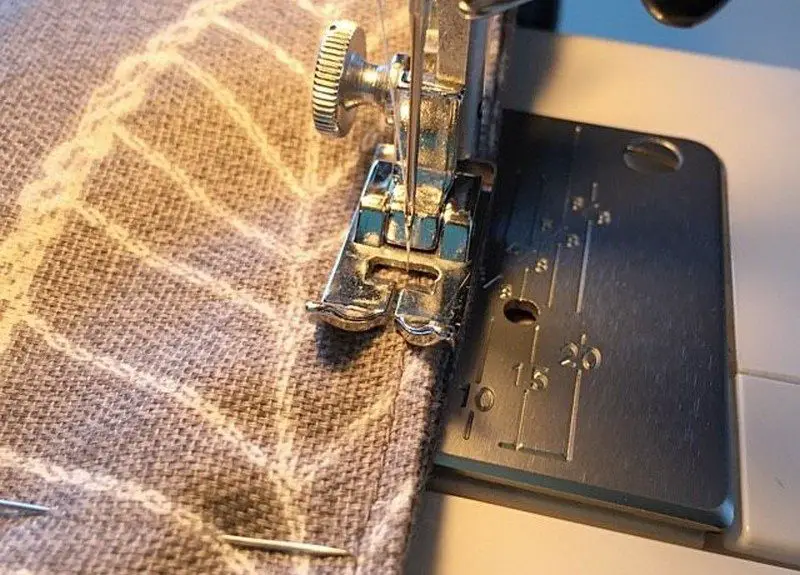
Sewing the curtain panels together. Sew the very top edge 1/4″ away from the edge.
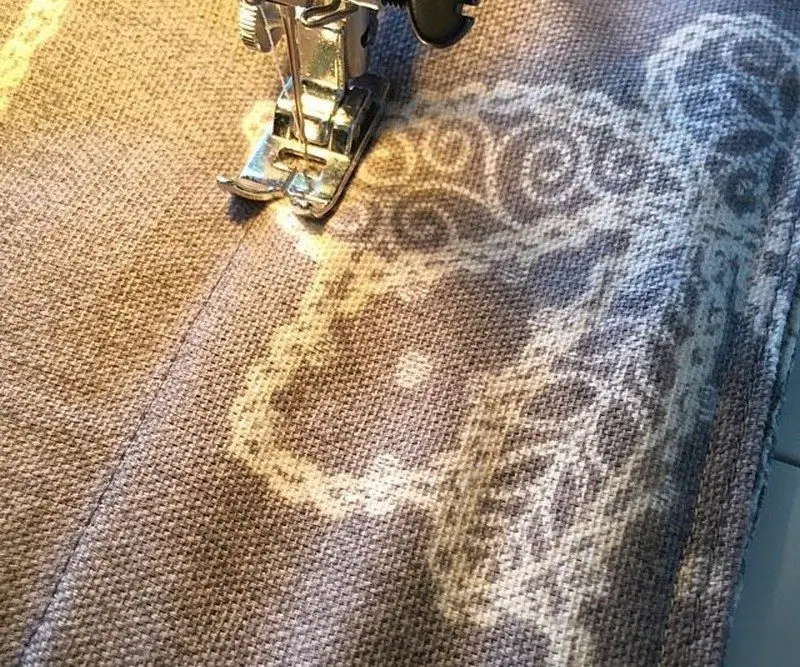
Then sew below on the bottom of the loophole seam line which should be about 2 inches parallel to the top edge. You will be creating the hole for the curtain rod to go in. If you have curtains that have grommet holes don’t fret, simply sew the curtains together right below the grommet line. Cut any excess batting that is above the line. The grommets should line up and work on the curtain rod as they normally would.
Now sew the left edge and the right edge. Be careful on the velcro side. You should be sewing on the 3/8″ seam allowance on the side of the velcro.
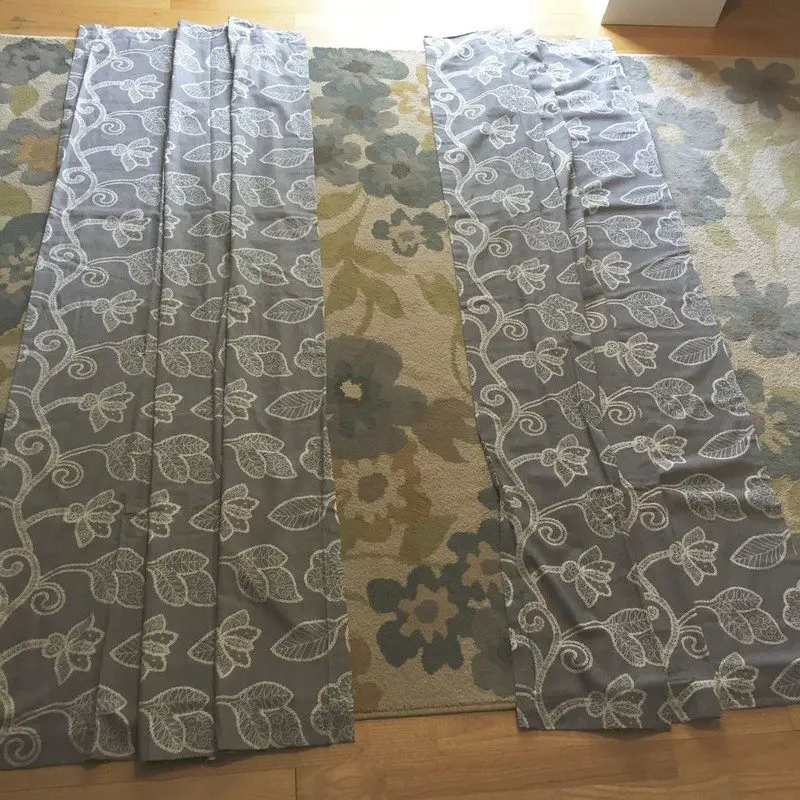
6. Repeat with the 2 panels
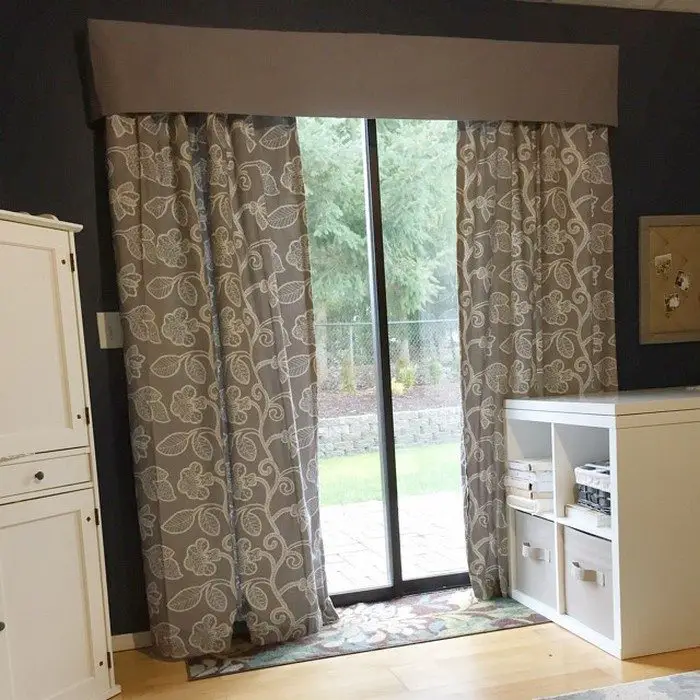
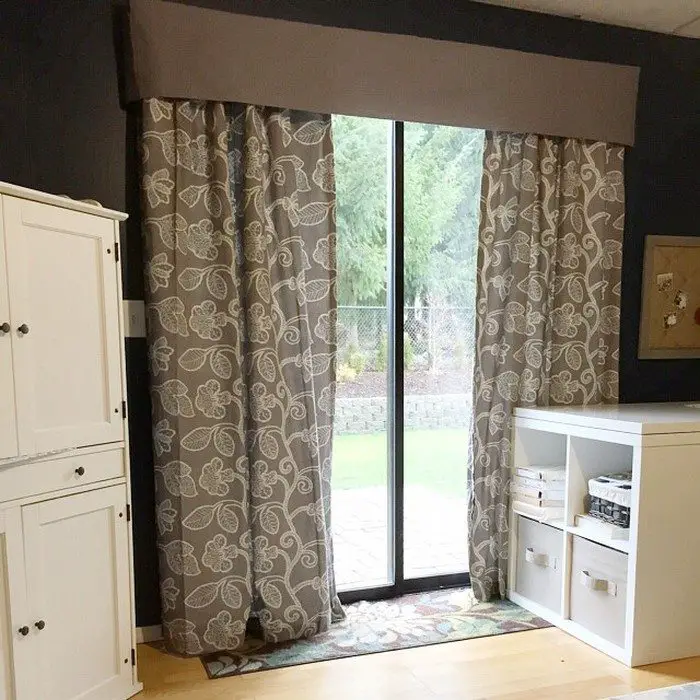
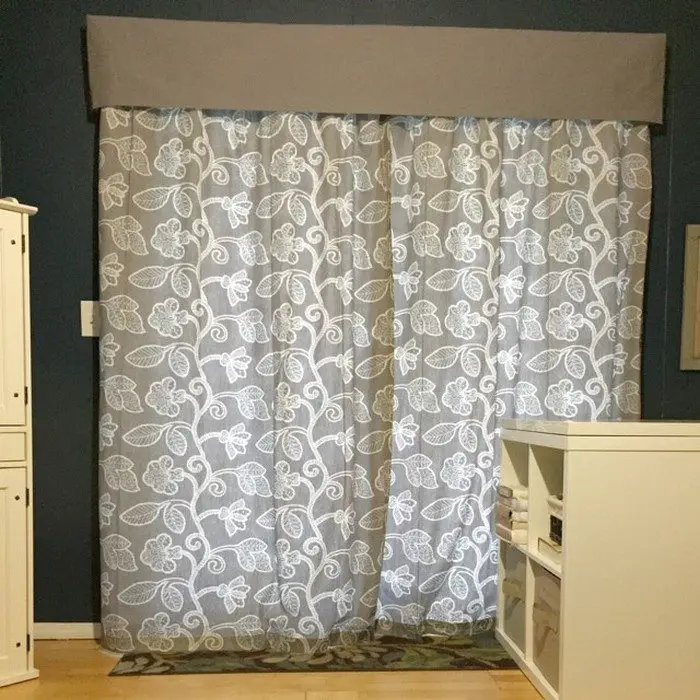
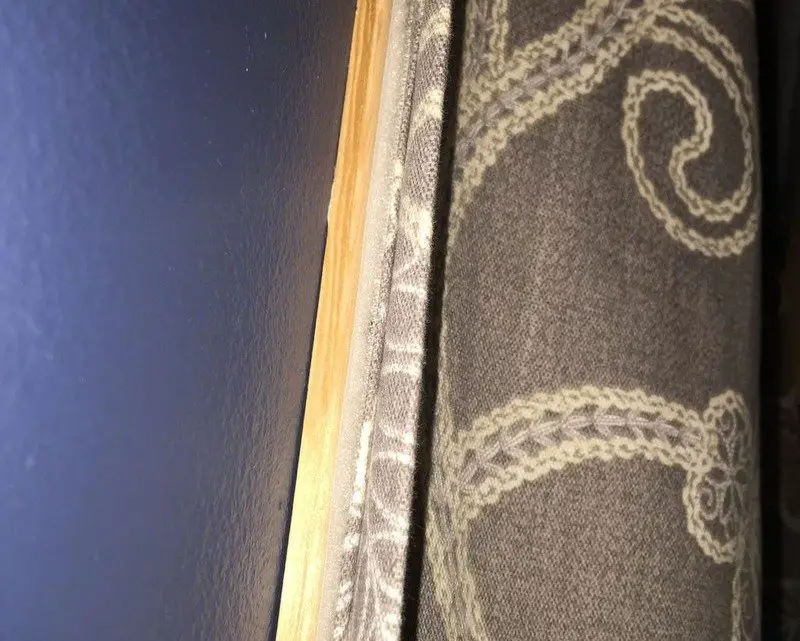
Repeat with the two panels for the other side. When you are finished you should have 2 thicker, two-sided curtain panels. The velcro side of the panels will face the wall and cannot be seen.
*Some curtains are larger than the width of the batting if you make sure they are the same size it would make things a lot easier! If you have the same size then simply sandwich the batting between curtain panels front and back. One of them will have the velcro, one will not. Make sure the curtain panel’s wrong sides are touching the batting.
7. Attach curtains to the wall
The next step is attaching the curtains to the wall. This will seal the curtains lowering your heat loss significantly.
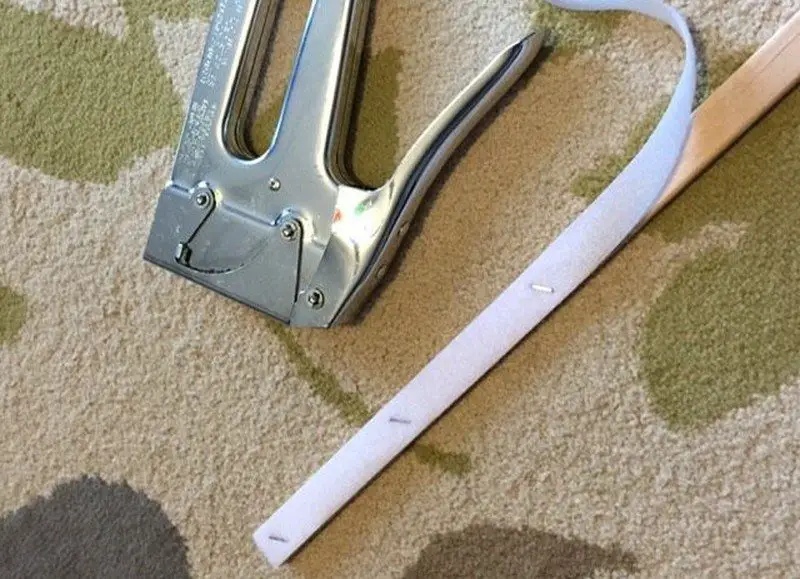
First, you will attach your soft velcro to the 1″ wide wood stake, by using a staple gun. Each staple should be about 4 inches away from the wood. Make sure that the velcro is flat and taut as you go.
After the velcro stakes are done you will attach them to the velcro on the curtain. This will help you get perfect placement.
Place it on the wall exactly where you want the velcro to go. About 1 inch away from the edge would be good. Mark it with a pencil. Remove the wood velcro piece from the curtain and nail it to the wall where you marked the placement.
Now stick the curtain panels to the velcro on the wall and make sure they are exactly where you want them. You should not be able to see the wood velcro pieces when the panels aren’t attached. They should be perfectly hidden all the time.
*This is the best option for sticking the insulated curtains to the wall – easy removal without a ton of holes in the wall was one of them, cheap and effective.
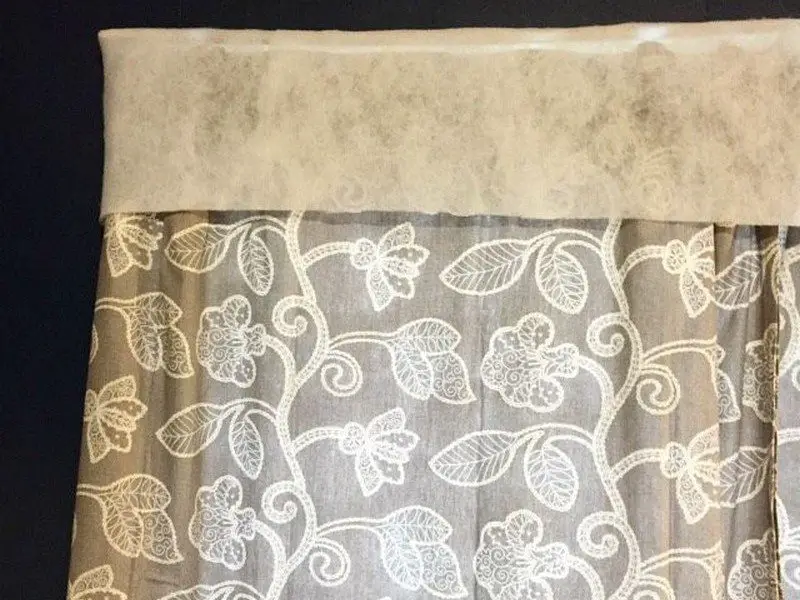
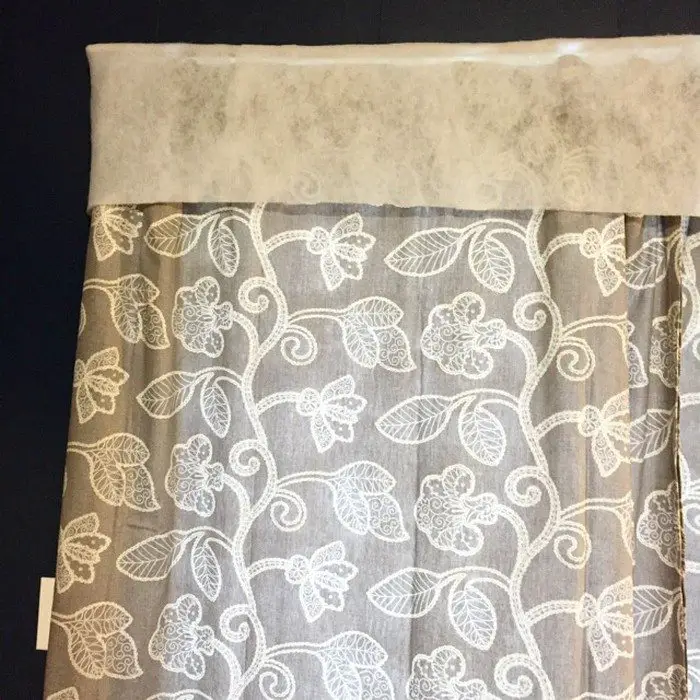
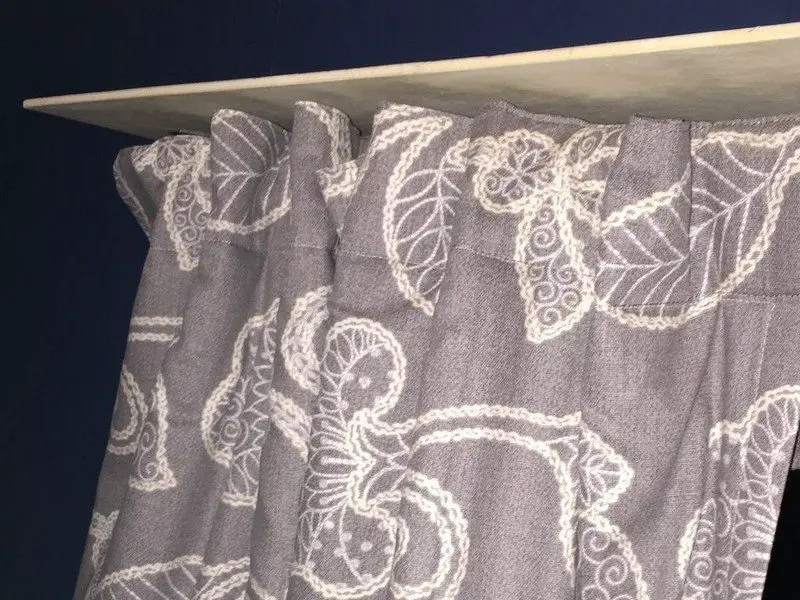
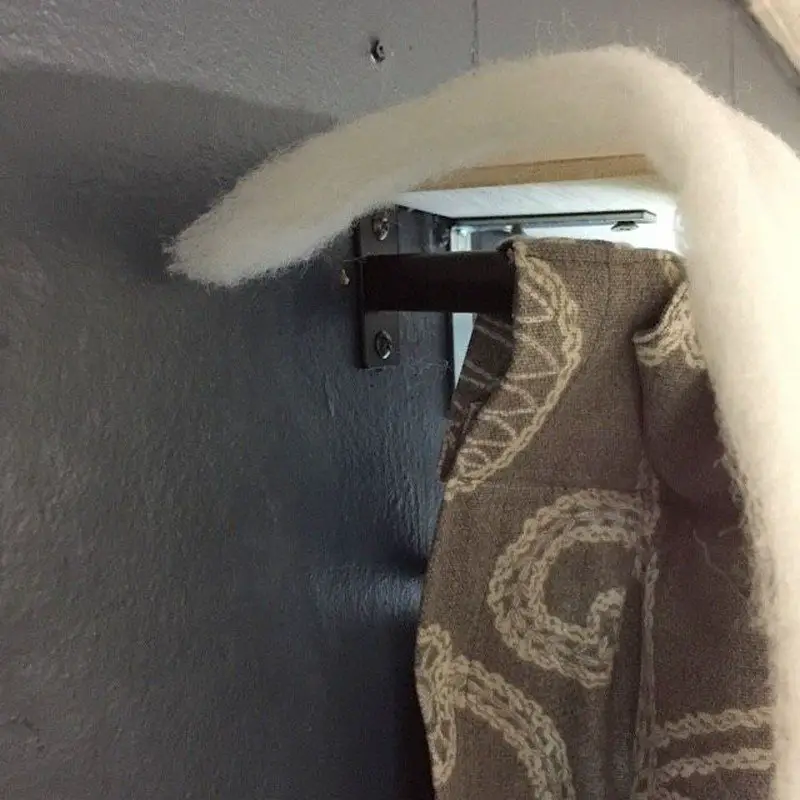
8. Make a curtain valence
Your insulated curtains are finished and sealed nicely to the wall but we still have a gap at the top that drafts will come through. To solve this, make a curtain valence that covers the holes at the top and snugly fits over the curtain.
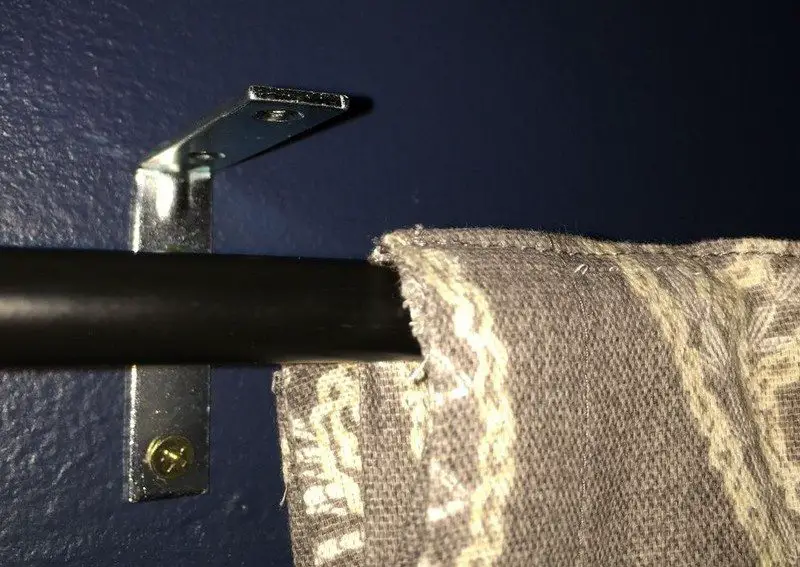
First, you will use brackets and attach them to the wall about 1/2″ above the curtain rod. Cut your wood the same length as the curtain rod but 1″ wider.
The wood in this tutorial measured 4″ wide x 79″ long. Screw your wood down on the brackets.
*You can use very thin wood because it will only have light fabric attached to it. Molding or even thick foam would work just fine also.

Now you will cut out your fabric for the valence. For your length, you measure the side edges and front edge of the wood and add them all together(4″ + 4″ + 79″ = 87″). Then decide how long you want the valence to drape, add the width of the wood, and times that by 2. Here, the valance drapes 12″, so 4″ is added to the width of the wood, multiplied by 2 so that the fabric could be folded in half ((12″ + 4″) x 2 = 32″). Folding makes the fabric thicker and also makes it so you don’t have to hem the edge. Measurements here were 32″ wide x 87″ long.
For the batting measurement, you will use the same 87″ length. The width of the batting will be your desired length plus the width of the wood minus 1 inch(12″ + 4″ -1″ = 15). This batting measured 15″ wide x 87″ long.
9. Attach the batting to the wood
Once you have everything cut out you are ready to attach the batting to the wood. Lay the batting onto the wood with the edge hitting the wall.
You are going to wrap the corners exactly like a present. Staple the batting corner edge and the top back edge next to the wall.
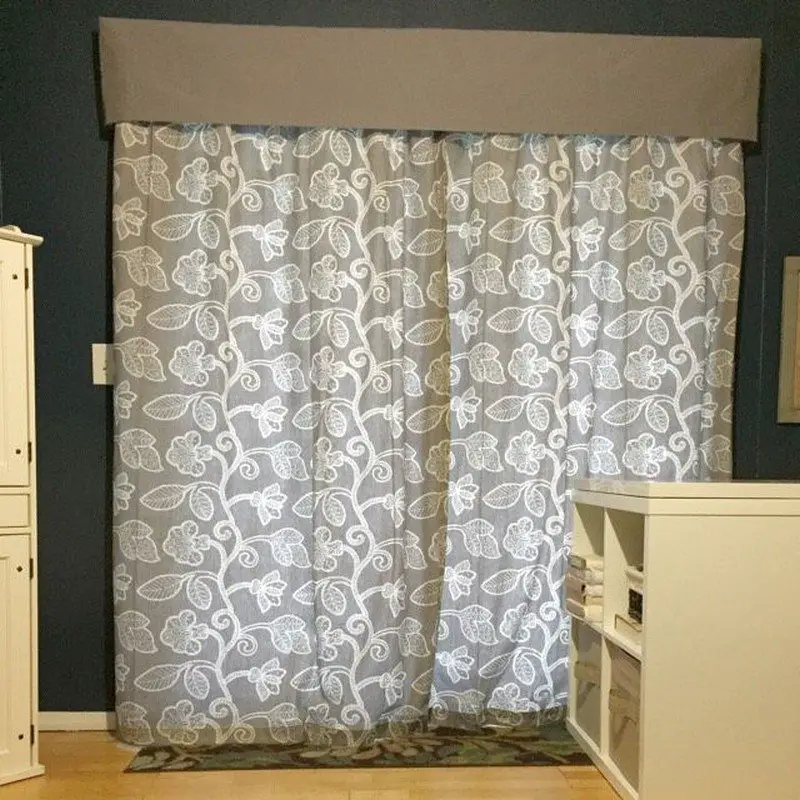
10. Fold and attach the fabric
For the fabric, you need to fold it in half and iron it very well. Attach it the same way you did the batting make sure the raw edges are touching the wall and the fold is hanging.
Conclusion
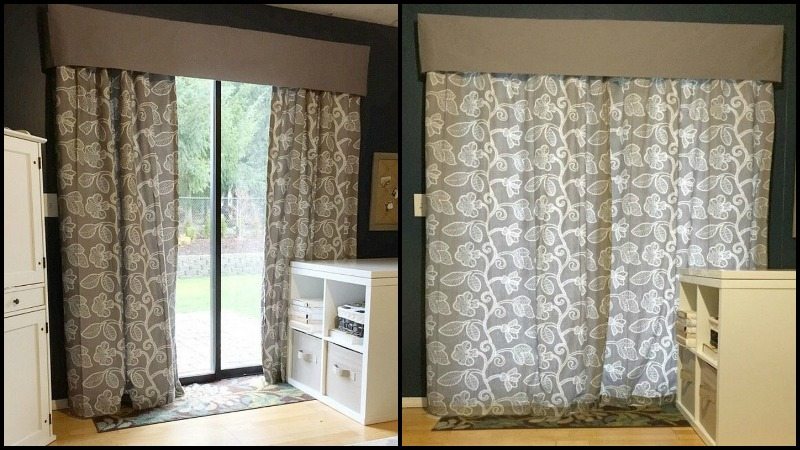
After that, you are done! :) By now if you followed the tutorial you should have two-sided insulated curtains that not only function well but look great too!
These insulated curtains are a great help to your room heaters. You would feel a significant temperature difference by touching the inside of the curtain and comparing it to the outside. Insulated curtains are great for the summer as well. They will keep your room cool on those hot summer days.
Could this be your next weekend project?
If you liked this insulated curtain project, you might also like to view Installing floor insulation and Macrame curtains…
FAQ: DIY Insulated Curtains
- What lining materials work best for DIY insulated curtains?
- Blackout polyester blocks light and adds modest insulation. Fleece or wool felt trap more air and feel warmer. Quilted or radiant-barrier liners like Insul-Bright reflect heat well when sandwiched between face fabric and a backing.
- How should I size and seal curtains for real energy gains?
- Run them ceiling to floor and let the hem “puddle” 2–5 cm to stop drafts. Overlap the frame by at least 10 cm on both sides and above. Add magnetic tape or hook-and-loop on the side edges to tighten the seal.
- How do I prevent condensation and mildew behind insulated curtains?
- Leave a small vent gap at the top so moist air can escape. Open them daily to dry the glass. If humidity stays high, add clear window film and place a desiccant or moisture absorber on the sill.
- Can insulated curtains help in summer as well?
- Yes. They block solar gain and keep rooms cooler during peak sun. Face a light or reflective liner toward the glass and close them before the room heats up.
- What renter-friendly ways can I mount and seal without drilling?
- Use tension rods inside the recess or compression-fit tracks. Stick-on hooks with a lightweight café rod also work. Pair removable magnetic tape with thin steel strips on the jambs to create side seals you can lift off later.