Imagine the soft, cozy glow of a handmade paper lantern transforming a corner of your home or your next gathering into something a little more magical. With a few simple supplies and a couple of clever moves, you can craft a lantern that looks custom and feels uniquely yours. Along the way, you will pick up small tricks that make cuts cleaner, seams neater, and shapes more stable, so your project looks polished without fuss.
Contents
Key Takeaways
- A paper lantern comes together quickly with basic paper, tape or glue, and LED tealights.
- Clean cuts, neat seams, and cardstock rings keep your paper lantern sturdy and polished.
- Personalize your paper lantern with cutouts, color washes, and small trims for a warm, custom glow.
Making a Paper Lantern
Turn simple paper into a glowing paper lantern that lifts any room or gathering. With a few precise cuts and quick assembly, you will create cozy light that feels custom.
Materials and Tools:
- 1 sheet of decorative or solid-color paper (printer paper, cardstock, vellum, or rice paper).
- Ruler and pencil.
- Scissors or a craft knife.
- Cutting mat.
- Double-sided tape or craft glue.
- Hole punch (optional).
- Thin cardstock for top and bottom reinforcement rings (optional).
- String or ribbon for a handle (optional).
- Binder clips or paper clips to hold the seam while drying (optional).
- LED tealights.
Steps:
- Trim your paper to roughly 8.5 by 11 inches if needed and place it in portrait orientation.
- Lightly draw 1 inch margins at the top and bottom, then mark evenly spaced vertical guide lines between the margins.
- Cut along the guide lines to create slits, stopping at each margin so the sheet stays intact.
- Roll the sheet into a cylinder, overlap the short edges slightly, and secure the seam with double-sided tape or a thin line of glue.
- Add cardstock rings to the top and bottom edges if you want the paper lantern to hold a round shape more firmly.
- Punch two small holes at the top and tie on a ribbon or string handle if you plan to hang the paper lantern.
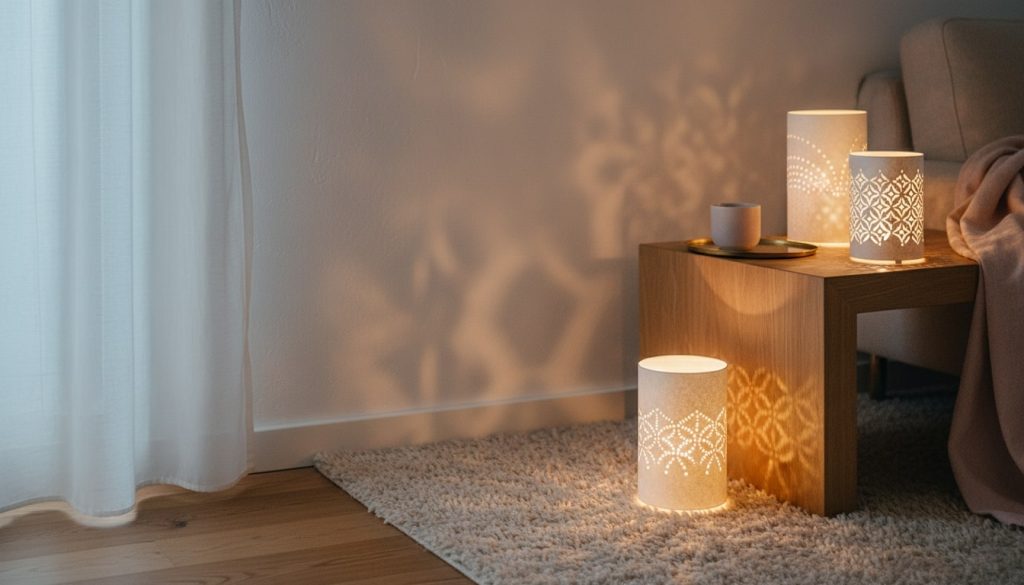
- Set an LED tealight on a stable surface and place the paper lantern over it, ensuring there is comfortable clearance around the light.
- Check the seam and base for stability and adjust the reinforcement rings or handle as needed.

Decoration & Personalization Ideas for Paper Lanterns
Small design choices can turn a paper lantern into a striking accent. Use pattern, color, and texture to shape mood, match events, and create keepsakes that feel personal and considered.
Cutouts and Pattern Play
Cutouts turn a plain paper lantern into an illuminated pattern that feels intricate without demanding advanced skills. Sketch a simple motif, trace with a ruler for clean geometry, or use craft punches for repeating borders.
Keep a narrow uncut margin near edges to preserve strength, and alternate wide and narrow slits to create rhythm across the surface. Back select cutouts with vellum or tissue to soften hotspots and blend light. Symmetry reads classic, while staggered placement feels organic and playful.
If you plan to hang the paper lantern, concentrate denser patterns toward the upper third to keep the base sturdy. Test by placing an LED tealight inside, then adjust spacing wherever hotspots or shadowy gaps appear. Always keep blades sharp.
- Use a light pencil grid on the inside so guide lines never show on the finished paper lantern.
- Pair large geometric windows with tiny dot punches to create depth without weakening the structure.
- Round sharp inner corners with a small hole punch to prevent tearing during handling.
- Tape your template to a cutting mat and rotate the paper rather than your knife for cleaner arcs.
Color Treatments and Finishes
Color sets the mood of your paper lantern, from soft blush to bold festival energy. For gentle diffusion, brush a diluted watercolor wash, working from light to dark to avoid tide marks.
An ombre that fades vertically emphasizes height, while horizontal bands feel calm and architectural. Dry brush acrylic for texture that catches light without warping thin papers. Metallic accents look luxe when used as fine stripes or dot constellations rather than heavy blocks.
Edge seams with washi tape to hide joins and add a crisp frame. On vellum, alcohol markers blend smoothly and keep colors luminous, but test for bleed. Seal chalky finishes with a light mist of workable fixative and allow full drying time before forming your lantern.
- Mix a single color with three water ratios to build smooth gradients without harsh transitions.
- Layer metallic gel pen details after assembly so lines align across the seam.
- Use painter’s tape to mask clean bands and remove it slowly while the paper is still slightly damp.
- Keep the paper lantern base pale if you plan to cluster lanterns so the group reads cohesive.
Seasonal and Themed Motifs
Themes help your paper lantern tell a little story that fits the occasion. For spring, layer soft florals or leaf silhouettes for a garden mood.
For winter, pair snowflake cutouts with frosted vellum for a crisp glow. Birthdays and weddings suit geometric fans, scallops, or art deco rays that feel celebratory without clutter. If you lean whimsical, try tiny stars trailing upward so light appears to float.
Stencils keep shapes consistent, while a simple circle punch becomes moons, berries, or ornaments with clever placement. Stick to a limited palette and repeat a few elements so the design reads intentional.
When mixing motifs, keep the densest pattern at the top half to preserve strength near the base. Anchor everything with repetition.
- Trace motifs onto the inside of the paper lantern so pencil marks stay hidden once the lantern is assembled.
- Alternate one hero motif with small filler shapes to create balance and easy repetition.
- Use glitter only on small accents so surfaces do not curl or shed.
- Test your theme under warm and cool LEDs to ensure colors read as intended.

Embellishments and Edging Details
Thoughtful finishing touches give your paper lantern a tailored look. Wrap seams with narrow ribbon or washi to disguise joins and introduce texture. Add cardstock rings inside the top and bottom to keep edges crisp, then attach a handle so hanging feels secure.
Tassels or small charms add movement, but keep them short so they do not brush the LED. Lightweight beads can anchor bases on breezy patios.
Eyelets reinforce punched holes and create a neat hardware detail. Lace or scalloped edging softens the silhouette for romantic settings.
If your lantern clusters with others, repeat one trim across the set for cohesion. Always balance weight around the seam so the cylinder hangs straight and the base sits flat and level.
- Tie tassels to an interior ring so knots stay hidden and the exterior remains tidy.
- Choose acid free tape or glue to prevent discoloration along edges over time.
- Keep hanging loops short to reduce spinning near vents or fans.
- Mirror the trim color to the motif color to make the whole paper lantern feel intentional.
Troubleshooting Your Paper Lantern
Even simple projects hiccup. Use these quick fixes to rescue a paper lantern that tears, warps, slumps, or shows messy seams, so your finished light looks neat, sturdy, and illuminated.
Paper Tearing While Cutting
If the paper snags or tears as you cut, support it on a sharp mat and use a fresh blade. Work in steady pulls, using a metal ruler to guide the knife and keep pressure even, preventing catching at corners.
Switch to slightly heavier paper for the body of the paper lantern and reserve delicate sheets for window panels. Round inner corners with a small hole punch, which redirects stress and keeps cuts from running when you shape the cylinder.
Uneven Slits Or Warping
Wavy or uneven slits make the paper lantern twist and throw odd shadows. Lightly draw a pencil grid on the inside, then slice along the guides. Keep uncut margins equal at the top and bottom to maintain structure.
If the sheet bows after cutting, relax the fibers with a gentle back curl and install thin cardstock rings at the ends. The rings act like braces, reduce warp, and help the cylinder sit round once the seam is closed.
Lantern Collapsing Or Losing Shape
A lantern that collapses usually needs firmer edges or a cleaner seam. Add inner rings made from thin cardstock, align the seam with clips while glue cures, and ensure the overlap is modest rather than bulky.
Paper weight shapes structure and durability, so use standard printer weight for classic slotted designs and step up to light cardstock for large formats. Avoid heavy decorations near the base, which can pull the paper lantern inward and distort the circle. Check that the base sits flat before you install lighting.
Adhesive Seams That Will Not Hold
If tape peels or glue pops, clean edges first and remove any paint dust or glitter. Apply a thin, continuous strip of double sided tape or a light bead of craft glue for better contact.
Hold the seam with binder clips until fully dry and avoid test fitting over the LED until the join is set. In humid rooms, choose a stronger tape and reinforce the inside with a narrow paper strip. Press along the seam with a bone folder to lock fibers together.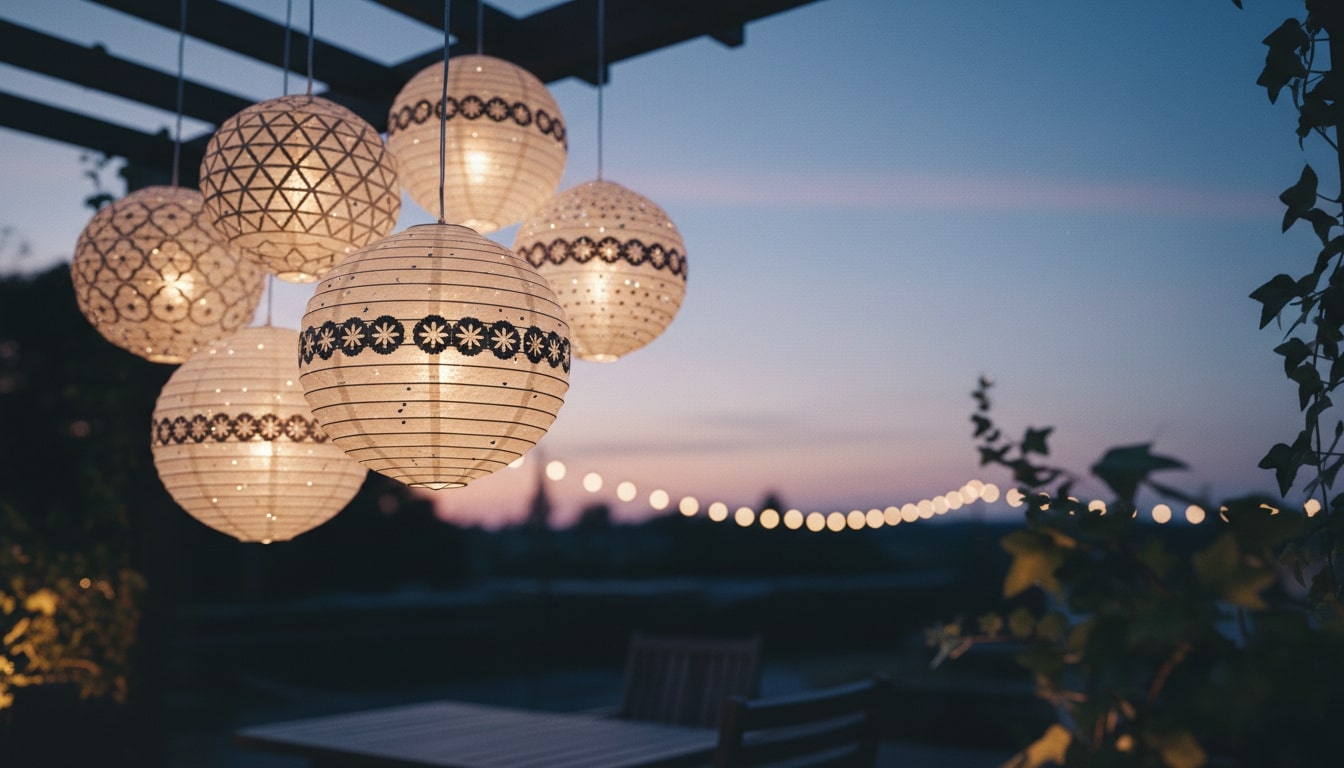
Hotspots Or Dim Lighting
Uneven glow happens when the light sits too close to one area. Center an LED tealight on a stable base and raise the lantern slightly with discreet feet so the pool of light spreads more evenly.
For a softer look, back dense cutouts with vellum or tissue that diffuses bright points. If the paper lantern looks dull, switch to a warm white LED or add a second tealight for larger pieces while keeping ventilation clear.
Conclusion
Making a paper lantern rewards patience with a glow that feels welcoming and handmade. As you practice, your paper lantern shapes turn cleaner, seams sit flatter, and patterns read with more intent. Build a tiny test before a set so color, translucency, and light placement feel right. Gather a few LED tealights, invite a friend to craft, and watch your space shift from ordinary to inviting.
We have more creative DIY lanterns for you to create. Check out the pressed flowers lantern project next!
FAQ: Crafting a Paper Lantern
- How Do I Make A Paper Lantern Durable For Reuse And Storage?
- Reinforce the paper lantern with slim cardstock rings at the top and base, then add a discreet inner sleeve of vellum or thin acetate to resist dents. Use double sided tape for seams, since it flexes in humidity. Store upright in a box with tissue, include silica gel, and avoid weight on the crown.
- Is It Safe To Hang A Paper Lantern From A Ceiling Fixture?
- Keep the paper lantern at least a foot from any warm surface and never attach it to a bulb holder. Hang from a removable adhesive hook with clear line, and center an LED tealight inside on a lightweight disc. Check air movement from vents, and test stability before leaving the room.
- Can I Use A Paper Lantern Outdoors?
- Yes, but protect the paper lantern from moisture and gusts. Slip it over a clear glass hurricane or jar, add small pebble weights to the base, and use rechargeable LED tealights. Mist with archival protective spray, let it cure, and bring lanterns inside after use to preserve color and shape.
- How Can I Add Photos Or Text To A Paper Lantern?
- Print photos or lettering on vellum or translucent sticker paper, trim with a small bleed, and mount inside the paper lantern so edges remain hidden. Use 300 dpi images for crisp light transmission, seal ink with a light fixative, and test color under warm and cool LEDs before assembly.
- What Are Eco-Friendly Ways To Make A Paper Lantern?
- Choose recycled or FSC certified paper, plant based glues, and refillable or rechargeable LEDs to cut waste. Avoid glitter that sheds microplastic. Design the paper lantern for disassembly with tape instead of heavy glue, and store flat. When retiring pieces, compost plain paper and recycle clean acetate sleeves.