Last Updated on October 8, 2025 by Team Ideas24
Halloween brings a chance to create scenes that feel handcrafted, not store-bought. You’ll get fast projects that fit small spaces and tight budgets. We’ll upcycle materials, protect surfaces, and keep installs renter-safe. Layer lighting with sound for night impact and great photos.
Contents
Why Kids Should Make Halloween Decorations?
Making Halloween decorations gives kids real design practice. They sketch, cut, and assemble while building fine-motor control and spatial awareness. Simple patterns and basic circuits introduce STEM ideas without pressure. Turning an idea into a finished prop builds creative confidence they carry into schoolwork.
Co-making decorations strengthens family connection. Planning, crafting, and staging become shared rituals that spark conversation and laughter. Kids feel seen when their work goes on the wall or window. Those moments create pride and memories that outlast a single spooky night.
Buying Halloween Decoration Supplies from Discount School Supply
Save time and money on Halloween decoration supplies with educator-grade materials. Discount School Supply carries bulk essentials and consistent colors. Expect fast shipping, reliable stock, and durability proven in classrooms.
Educator-Grade Quality and Bulk Value
Classroom use demands washable paints, tough papers, and adhesives that actually hold. The store’s Colorations line and classroom value packs keep colors consistent across projects and stretch budgets for groups and workshops.
Seasonal Curation and Lesson-Ready Ideas
Seasonal hubs and activity guides make it easy to move from cart to craft table. You’ll find Halloween project pages, quick how-tos, and inspiration you can scale for families or classrooms.
Materials You Can Find for Halloween Decoration Crafts
Here’s a shopping list for Halloween decoration crafts using classroom staples that hold up to kid use. Stock these first to cover projects, then add specialty kits for themed builds.
- Foam shapes and collage accents, including Halloween assortments
- Wiggly eyes, pom poms, and pipe cleaners for creature builds
- Construction paper and cardstock in bulk classroom packs
- Washable tempera and paint sticks for quick coverage
- Felt, yarn, and fabric squares for soft props
- Glue sticks, washable school glue, and low-mess glitter glue
- Craft sticks, scissors, trays, and bins for easy setup and cleanup
Selection moves fast. Shopping early at Discount School Supply ensure your kids have the right supplies for the coming Halloween projects. Add value packs now so last-minute activities still look cohesive.
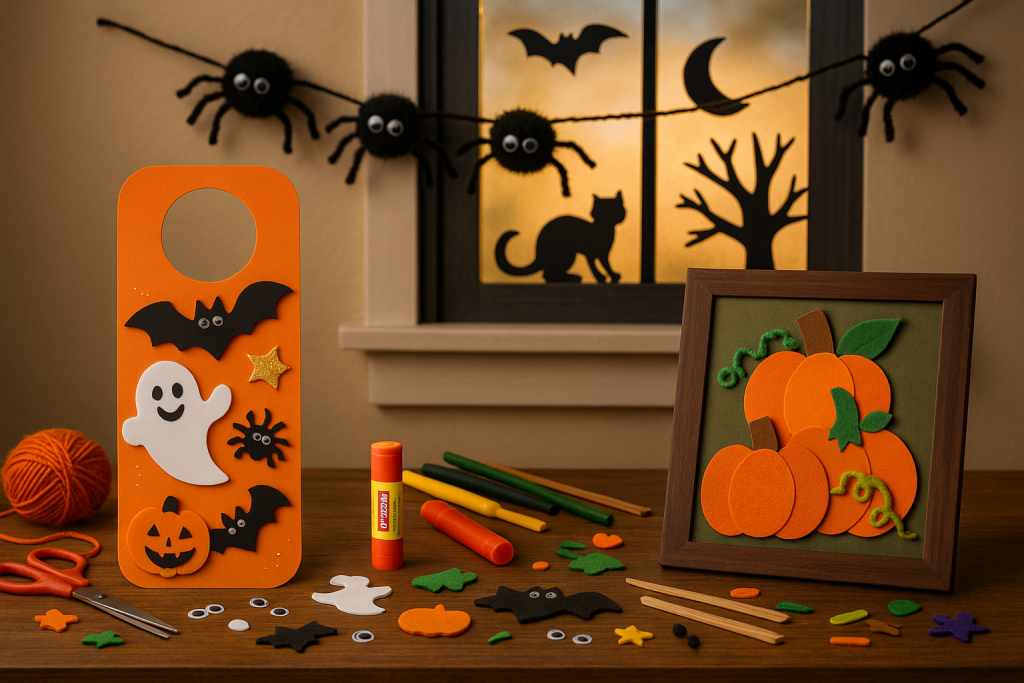
Foam-Shape Door Hangers
Kids can make a door hanger that looks polished and lasts the season. This project uses foam shapes to build layered scenes on sturdy cardstock. Cleanup is easy, and results photograph well. It’s a Halloween decoration that welcomes guests warmly.
Materials and Tools
- Halloween foam shapes and collage accents
- Heavyweight cardstock for the hanger base
- Wiggly eyes, small pom poms, pipe cleaners
- Glue stick or washable school glue, low-mess glitter glue
- Paint sticks or washable tempera and a brush
- Scissors, pencil, ruler, hole punch
- Craft sticks for reinforcement, yarn or ribbon
- Tray or bin for easy setup and cleanup
Instructions
- Measure and cut a 4″ × 10″ rectangle from heavyweight cardstock.
- Mark a 1.5″ circle centered 1″ from the top. Punch or carefully cut the hole.
- Notch a small slit from the edge to the hole for doorknob fit if you like.
- Color the base with paint sticks or a thin tempera wash. Let dry fully.
- Test-layout foam shapes to find balance. Keep three to five focal pieces.
- Glue shapes in place. Layer accents for depth. Press flat for ten seconds.
- Add wiggly eyes, trimmed pipe-cleaner accents, and tiny pom poms.
- Outline edges and details with glitter glue. Air-dry until smudge-safe.
- Flip over and glue a craft stick across the bottom for stiffness.
- Thread yarn or ribbon through the hole. Hang and snap a photo

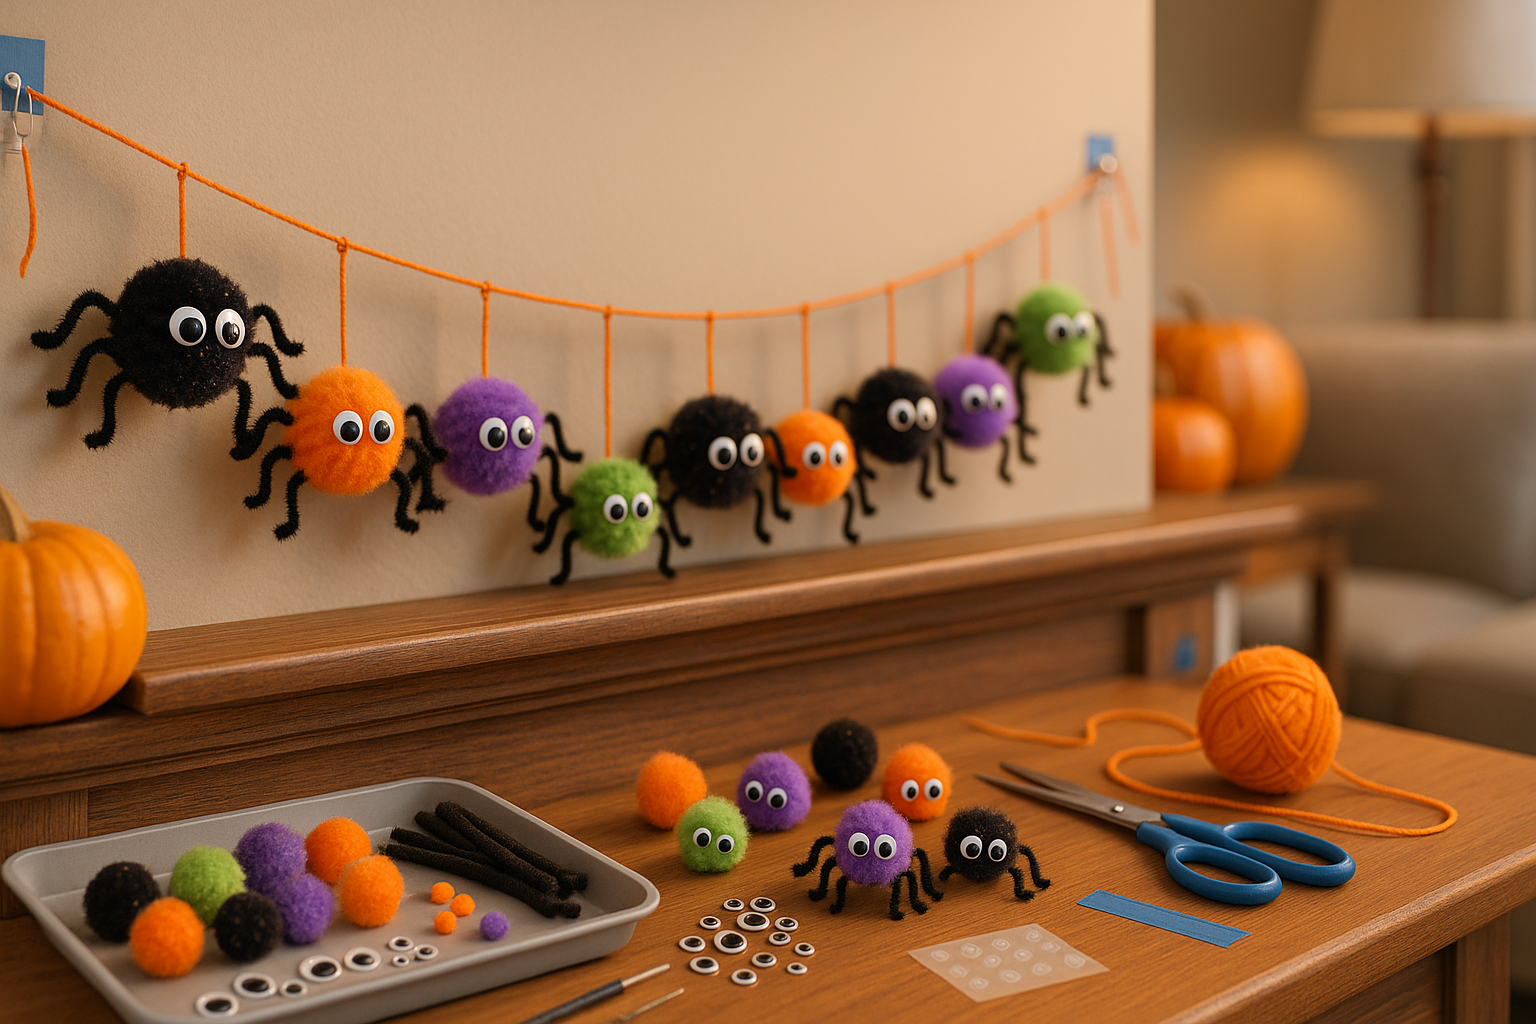
Pom-Pom Spider Garland
Kids love building friendly spiders that dangle above the porch or mantel. This quick garland uses pom poms, pipe cleaners, and bright eyes. Assembly teaches symmetry and spacing. It’s a playful Halloween decoration that stores flat and survives enthusiastic parties.
Materials and Tools
- Pom poms, mixed sizes and colors
- Pipe cleaners (chenille stems), black plus accents
- Wiggly eyes
- Washable school glue or glue dots; optional low-temp glue gun with adult help
- Yarn or baker’s twine for the garland
- Thin thread or extra yarn for spider loops
- Scissors, ruler or tape measure
- Removable hooks or mini clothespins
- Painter’s tape for spacing marks, tray or bin for setup
Instructions
- Measure your hanging span and cut yarn 10–12 feet, leaving extra for ties.
- Plan spider count and spacing. Mark gentle ticks on the table with painter’s tape.
- Make bodies. Glue wiggly eyes to pom poms and let them set.
- Add legs. Cut four pipe cleaners in half. Twist pairs at the center of each pom to form eight legs.
- Shape feet by bending leg tips into small Ls so spiders face forward and grip.
- Tie a short loop of thread or thin yarn around each spider’s middle for hanging.
- String spiders onto the main yarn in your planned order. Alternate sizes and colors for rhythm.
- Lock spacing with tiny glue dots behind loops. Add a touch of glitter glue for sparkle.
- Tie the large end loops for mounting. Hang on removable hooks or clip to a railing. Fluff legs.
Paint-Stick Window Silhouettes
Kids can turn windows into bold story frames using cardstock silhouettes and paint sticks. High contrast shapes read well from the street and photograph cleanly. This Halloween decoration builds fast, peels off without residue, and stores flat for next year.
Materials and Tools
- Black cardstock or construction paper
- Orange or white cardstock for “lit” backers
- Paint sticks or washable tempera and a small brush
- Pencil and simple printed templates (bats, cats, moons, trees)
- Scissors; craft knife and cutting mat with adult help
- Clear tape or removable adhesive dots/strips
- Ruler, wipes, and glass cleaner
- Optional mini LED string for backlighting
Instructions
- Clean the interior glass so tape grips and edges look crisp.
- Sketch or print simple shapes. Trace outlines onto black cardstock.
- Stack sheets to cut duplicates quickly. Keep curves smooth and corners sharp.
- Add paint-stick details like brick lines, shingles, or window panes. Let dry.
- Back some cutouts with orange or white paper to create a “lit window” effect.
- Dry-fit on the window to check scale and sightlines. Step outside to confirm.
- Mount pieces with tiny tape loops at corners and centers. Press flat.
- Bridge gaps with thin paper strips as faux mullions for a unified scene.
- Optional: tuck a mini LED string behind curtains for glow, keeping cords safe.
- Snap dusk photos and store silhouettes flat in a labeled folder after the season.

Felt Pumpkin Patches
Kids build a harvest scene with layered felt pumpkins, leaves, and yarn vines. This flat art piece hangs on doors or frames and packs away cleanly. It’s a tactile Halloween decoration that encourages color matching, cutting skills, and balanced composition.
Materials and Tools
- Felt sheets in orange, green, and brown
- Yarn for curling vines
- Foam shapes and collage accents for details
- Wiggly eyes and small pom poms, optional
- Construction paper or heavyweight cardstock backing
- Glue sticks or washable school glue, low-mess glitter glue
- Paint sticks for highlights and faux stitching
- Pipe cleaners for a simple border, optional
- Craft sticks for stiffness, scissors, pencil, ruler
- Hole punch, ribbon or yarn hanger, tray or bin
Instructions
- Cut a 9″ × 12″ backing from cardstock.
- Draw and cut felt pumpkins in two sizes plus stems and leaves.
- Layer pieces for dimension and glue with thin, even coverage.
- Twist short yarn lengths into vines and tack in gentle curves.
- Add foam accents, wiggly eyes, or pom-pom “blossoms” for character.
- Use paint sticks to add stitching lines or soft shadow edges.
- Glue a craft stick along the top and bottom on the back for stiffness.
- Optional border: run a pipe cleaner around edges and secure at corners.
- Punch two top holes. Thread ribbon or yarn and hang at child height.
- Press flat under a book for ten minutes to set, then photograph.

Conclusion
Thoughtful planning turns simple supplies into projects kids feel proud to show off. You’ll strengthen skills, build traditions, and create scenes that photograph well without big budgets. Safety checks and renter-safe mounts keep the fun going all night. Cleanup and labeled storage make next year faster, with templates ready to reuse. Halloween decoration craft becomes a family ritual that sparks creativity long after the candy’s gone.
We have more fun crafting projects for kids. Check out our Pikachu Amigurumi project next!