Last Updated on October 8, 2025 by Team Ideas24
You’ll plan, carve, and finish with purpose. The techniques are approachable if you work step by step. By the end, you’ll have a Celtic knot walking stick that looks refined and feels sturdy.
Contents
Crafting a Celtic Knot Walking Stick
Start with a straight, seasoned stick and a clear knot design. Keep each action simple and repeatable so you can illustrate every step cleanly for readers and DIYers at home.
Materials and Tools
- Straight hardwood stick or 1–1.25″ dowel, 36–54″ long
- Pencil and fine-tip marker
- Masking tape and a paper strip for wrap templates
- Flexible ruler or tape measure
- Craft knife or V-tool and small gouge
- Sandpaper 120–400 grit and sanding block
- Wood dye or stain, optional gilding or liming wax
- Finish: tung oil, varnish, or hardwax oil
- Ferrule or rubber tip, optional wrist cord
- Clamps and scrap blocks
- Safety glasses, dust mask, and gloves
Steps
- Cut the stick to your preferred length and remove the bark. Trim rough knots so the surface is safe to handle.
- Straighten the stick gently with heat and clamps until it’s true. Let the wood cool completely before moving on.
- Mark a centerline and add registration marks at both ends. Use a flexible ruler or tape to keep the line accurate.
- Wrap masking tape in even spirals to set guide paths. Keep the spacing consistent along the taper.
- Transfer a simple Celtic knot using a paper wrap template. Align the ends so the pattern closes cleanly.
- Score all layout lines lightly with a craft knife. Work slowly to avoid slips across the grain.
- Carve shallow V-grooves along the scored lines. Make two light passes instead of one deep cut.
- Finish-sand the stick, then tint the grooves for contrast. Apply a thin seal coat and let it dry.
- Fit a ferrule and wrist cord, then check balance and grip. Touch up any scuffs and add a final coat.

Choosing Wood and Hardware
Choose materials that carve cleanly, resist weather, and feel balanced in hand. Smart wood and hardware choices save hours later. You’ll get crisper knots, longer service life, and safer hikes.
Best Wood Species for Carving and Durability
Straight-grained hickory, ash, and oak hold detail and survive hard use. Maple carves cleanly once tools are sharp. Poplar is beginner friendly and finishes well. Avoid twisty grain and punky spots.
Air-dried stock feels nicer than kiln-dried. Reject blanks with deep checks. Pick pieces with minimal knots so cuts stay predictable and intersections remain crisp. Black locust is extremely durable.
Harvested Sticks vs Dowel Blanks
Harvested sticks have character and tapered profiles that feel lively. Dry them slowly in a rack for months. Dowel blanks are uniform and easy to square for layout. Pick diameters between one and one-quarter inches. Maintain straightness within a quarter inch over the entire length. You’ll save time aligning grids. Avoid bark inclusions and insect holes that complicate carving on curved surfaces.
Moisture Content and Seasoning
Moisture content affects stability, weight, and tool control. Aim for twelve percent or lower for indoor carving. Let fresh-cut sticks season before layout. Use stickers and airflow to prevent mold. Weigh blanks monthly until readings stabilize. You’ll reduce warping after carving. Finish only when the moisture is stable. Rushing invites checks that split crossings and ruin the knot’s rhythm under stress.
Hardware Essentials That Matter
Ferrules and rubber tips protect the end and add traction. Choose brass or stainless ferrules for durability. Rubber tips grip stone and tile, making them useful for indoor use. A wrist lanyard prevents drops. Leather wraps improve comfort and hide seams.
Epoxy hardware after finishing. Replace worn tips quickly. Carry spares on long hikes. Simple hardware upgrades extend service life without changing your carving.
Weatherproof Choices and Corrosion Control
Outdoors beats gear constantly, so corrosion resistance matters. Stainless fasteners avoid rust stains around bands. Brass looks classic and polishes easily. Seal exposed end grain with thin epoxy. Finish the whole stick with oil or varnish. Renew yearly. Store upright in a dry corner. You’ll prevent moisture wicking that softens fibers and causes failure when support matters most.
Sustainable and Ethical Sourcing
Responsible sourcing keeps trails healthy and projects an ethical image. Use storm-fallen limbs where legal. Ask landowners before cutting. Commercial blanks with certification simplify compliance. Favor regional species to reduce transport footprints.
Save offcuts for test cuts and finish trials. Reuse hardware on replacements. Durable choices reduce waste. You’re crafting something lasting, so align your choices with that value every time you make one.
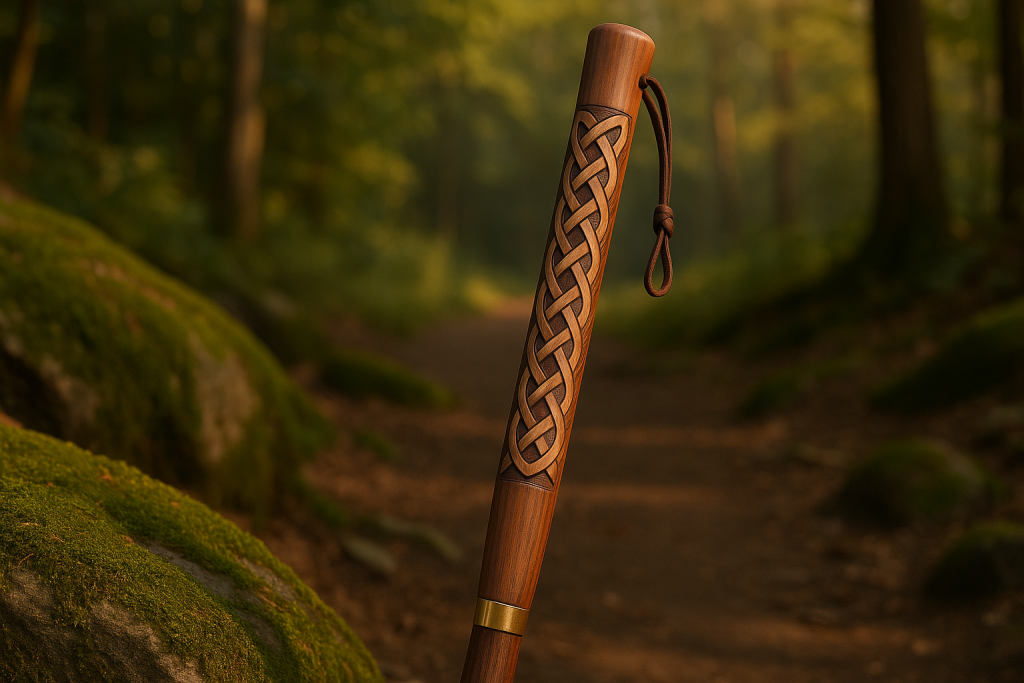
Planning the Knot Design
Plan a design that reads clearly at arm’s length and survives weather, scuffs, and sweat. Keep strand widths consistent. Build guides that taper around the intersection so that the edges remain believable.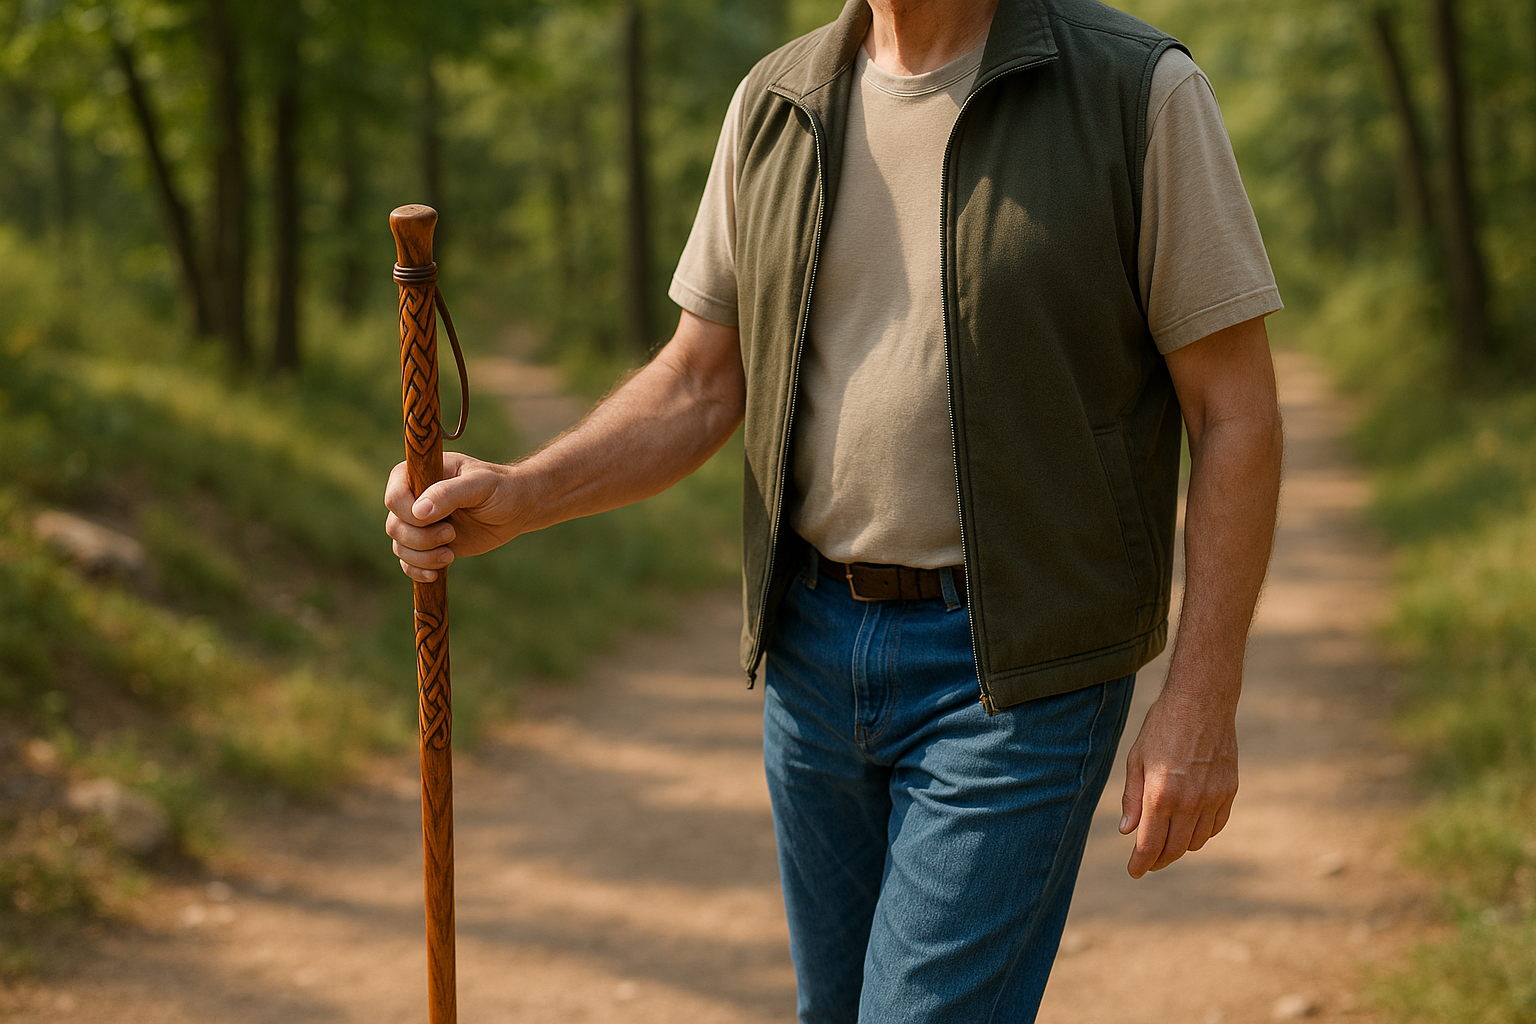
Over–Under Logic and Flow
A Celtic knot alternates over and under at every crossing to create woven logic. Map the sequence with small arrows during layout. Keep that alternation unbroken for visual rhythm. If a section forces two overs, reroute before carving begins. Consistent alternation makes intersections easy to carve and shade. View the pattern under raking light to spot confusion early and fix.
Scaling a Pattern to a Taper
Scale the knot so the strand widths look equal along the entire stick. Taper squeezes spacing, so widen strands slightly near the tip. Test by wrapping a paper print and checking closures. Redraw until overlaps meet without creeping. Avoid hairline widths that chip. Space strands generously around tight curves. Your carving will feel calmer, cleaner, and much easier to sand. Smoothly.
Grids, Spirals, and Reference Lines
Guides keep lines honest on a round surface. Use a straight centerline, then wrap masking tape in even spirals to form the tracks. Trace edges to create clean rails. Add circumferential bands where crossings land. These references prevent drift while rotating the stick. When tape lifts, replace it immediately. Registration marks at the ends help you reestablish alignment after moving clamps or templates.
Closing the Loop and Hiding Seams
A knot that fails to close looks amateurish. Plan the start and finish beneath a grip or decorative band. Hide seams where hands naturally rest. Adjust repeats so the final crossing locks under that band. Test wraps until the overlap vanishes. Photograph the layout from several angles. You’ll catch mismatches and correct them before any knife touches the wood. There.
Complexity Versus Readability
Complex patterns impress up close yet can look messy at a distance. Start with two or three strands, then add accents later. Let negative space breathe. Keep crossings large enough to carve safely without chips. Reduce intersections near the tip where the taper tightens. View at arm’s length. If your eye struggles to follow paths, simplify until the flow feels natural.
Layout Tools That Improve Accuracy
Use mechanical pencils for crisp lines and fine-tip markers sparingly. Carbon paper transfers designs without bruising fibers. Clear vinyl stencils help align repeats. Flexible rulers and tailor’s tape follow curves. A craft knife scores cleanly and guides the V-tool later. Keep erasers soft to avoid polishing the surface. Photograph each step so you can retrace decisions if something shifts unexpectedly.
Shaping the Stick for Comfort and Balance
Shape the blank so it fits your hand, supports your stride, and plants confidently. Focus on length, taper, and grip. Small changes improve control, reduce fatigue, and enhance trail safety.
Height and Length Sizing
Ideal length reaches your wrist crease when standing straight with arms relaxed. Hiking on steep trails may require slightly longer. Urban use often feels better shorter. Cut the tip square before measuring. Check height indoors, wearing your regular shoes. Err on the long side, then trim during testing. You’ll dial the balance exactly as the ferrule and grip join the stick.
Grip Ergonomics and Hot-Spot Prevention
Shape the grip to your hand, not an abstract profile. Round corners and ease shoulders so hot spots disappear. Add a shallow palm swell if you like control. Keep the top flared slightly to stop slips. Test with gloves on. Sand by hand around the knot area to keep the edges crisp and comfortable during long walks across mixed terrain. Too.
Taper and Weight Distribution
A gentle taper reduces swing weight and improves planting accuracy. Thin the lower third slightly more than the upper. Maintain enough wall thickness near the tip for strength. Balance should sit near the top third. That position eases wrist load during climbs. Remove small shavings, then reassess the balance. Repeat until the stick feels lively without whippy vibration or unwanted flex.
Straightening Warps and Keeping Alignment
Minor warps bend layout lines and upset balance. Warm the blank gently with a heat gun, then clamp it over padded blocks. Correct a little at a time. Let the stick cool before checking. Repeat until the centerline tracks true. Avoid overbending. Micro adjustments preserve fibers. A straight stick carries loads predictably and keeps your knot’s crossings square, clean, and consistent.
Surface Texture for Confident Grip
A silky grip feels great, but can slip when wet. Add micro texture by sanding across the grain lightly or wrapping a short leather section. Burnishing can polish nearby strands for contrast. Keep transitions gentle so gloves don’t catch. Avoid aggressive checkering near carved lines. You’re aiming for confident handling in rain and sweat without distracting the knot’s details. Visually.
Real-World Testing and Final Tweaks
Take the stick for a real walk before declaring it done. Try pavement, dirt, and stairs. Listen for chatter and feel for hotspots. Shift the weight by trimming the tip slightly. Add or remove grip material. Rotate the seam under your hand until it vanishes. Note changes, then commit. Final tweaks now prevent regrets after finishing, especially when revisions are painful. Later.
Conclusion
Choosing the right wood and hardware sets up crisp lines and lasting durability. A careful layout keeps the interlace readable, and steady carving effectively sells the woven look. Thoughtful shaping and balance make every step feel secure. Finish it well, test it on real ground, and keep it oiled so it ages with grace. You’ll carry a celtic knot walking stick that’s trail-ready and personal, a piece you’ll be proud to use.
For a different kind of woodworking projects, read our article on 5 woodwork projects for beginners!