Last Updated on November 28, 2025 by Team Ideas24
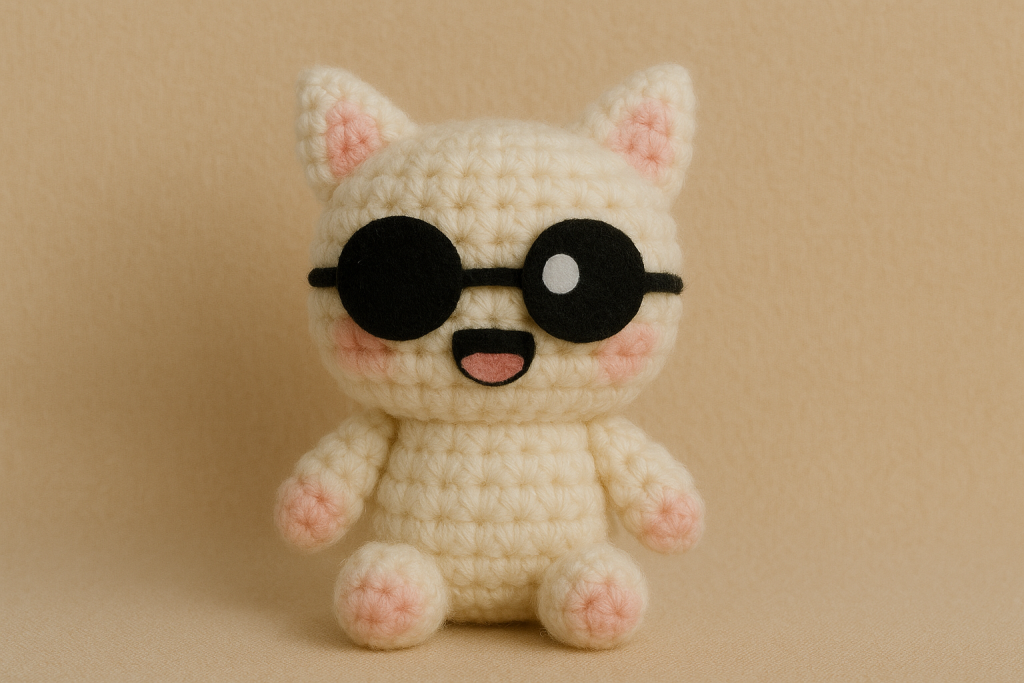
Gojo Cat turns heads even in yarn form. This guide walks you through clear rounds and simple felt accents. You’ll join legs, shape the head, and add cute glasses with zero hassle. Materials stay minimal, so beginners feel confident from the first stitch. Follow each panel and you’ll finish a plush that looks store‑bought.
Contents
Key Takeaway
- The Gojo Cat plush is a beginner-friendly project that combines simple crochet shapes with felt accents to recreate the popular Jujutsu Kaisen meme.
- The pattern uses a continuous construction method where the legs are crocheted first and joined directly into the body and head to minimize sewing.
- Character details like the signature blindfold glasses and mouth are crafted from glued felt pieces rather than complex embroidery, making the finishing process quick and easy.
Gojo Cat: The Feline Meme Cursed With Infinite Charm
Gojo Cat started as pure fan fun. Artists mashed Satoru Gojo’s blindfold, silver hair, and smug grin onto an oversized kitten body. The result felt so right that it spread across social feeds like a grade‑A cursed technique. Gojo’s trademark confidence turned into playful mischief, making the mash‑up instantly shareable and prime for merch.
The meme snowballed from sticker packs to plush toys, stream overlays, and now crochet patterns. Fans love how it softens Gojo’s god‑tier power while keeping that cool attitude. The cat form also skips heavy lore, so even casual viewers get the joke.
Crochet creators picked it up because the big head and small limbs translate into beginner‑friendly shapes. That’s why Gojo Cat remains the cutest way to flaunt your Jujutsu Kaisen pride.
Legs

Step 1 – Magic Ring with 8 sc
Form a magic ring. Work eight single crochets into the loop. Pull the tail to tighten the center.
Step 2 – Round 2 Increases (12 st)
Make one single crochet in the first stitch. Work an increase in the next stitch. Repeat the single‑crochet/increase pair once more to reach twelve stitches. You now have a flat little disc.
Step 3 – Round 3 Straight (12 st)
Single crochet in every stitch around. The sides start to rise, turning the disc into a tiny cylinder.
Step 4 – Round 4 Straight and Fasten Off (12 st)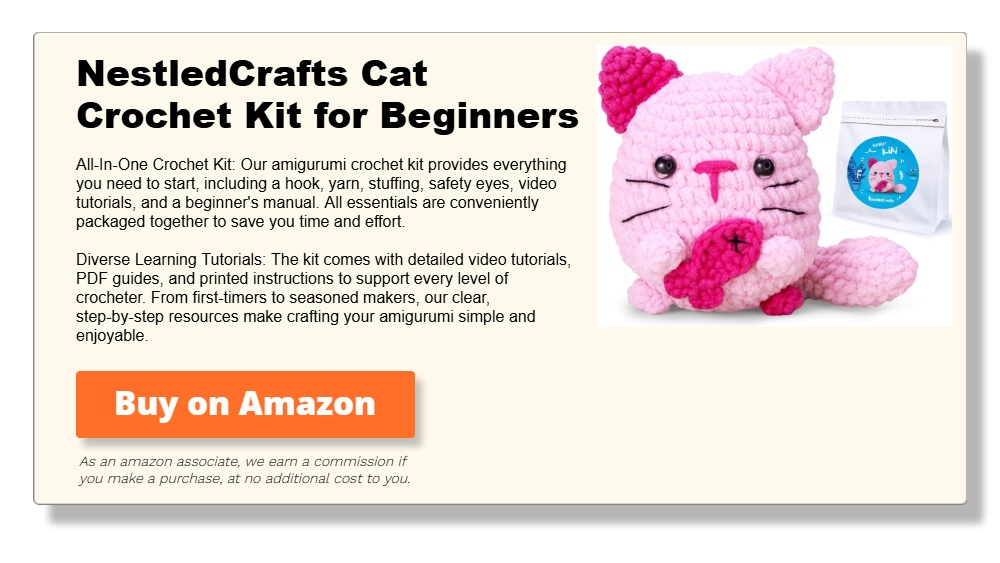
Work another round of single crochet. Slip‑stitch to close and fasten off for the first leg. Leave a long tail if you prefer sewing later. Crochet a second leg without fastening off to continue straight into the body.
Follow these four frames as you work; match your piece to each photo before moving on. You now have two identical legs ready to join into Gojo Cat’s body.
Body

Step 1 – Leg Join and 30 sc
Chain three. Slip‑stitch into the first leg. Work single crochet around both legs and through the three chains for a total of thirty stitches.
Step 2 – Round 2 Increases (32 st)
Crochet fourteen single crochets. Place one increase in the next stitch. Repeat the sequence once more to finish with thirty‑two stitches.
Step 3 – Round 3 Straight (32 st)
Work one single crochet in every stitch to build height without widening.
Step 4 – Round 4 Increases (34 st)
Crochet fifteen stitches. Make one increase in the next stitch. Repeat this once more for thirty‑four stitches.
Step 5 – Round 5 Straight (34 st)
Single crochet all the way around to lock the new girth.
Step 6 – Round 6 Straight (34 st)
Work another plain round. This firms the belly and keeps the cylinder even.
Step 7 – Round 7 Decreases (32 st)
Crochet fifteen stitches. Make one decrease in the next two stitches together. Repeat the sequence once more to taper to thirty‑two stitches.
Step 8 – Round 8 Straight (32 st)
Single crochet around to secure the new shape. The torso is now ready for the next set of shaping rounds.
Step 9 – Round 9 Decreases (28 st)
Work six single crochets, then one decrease. Repeat this six‑and‑decrease set four times to slim the torso to twenty‑eight stitches.
Step 10 – Round 10 Straight (28 st)
Single crochet in every stitch. This secures the narrower waist.
Step 11 – Round 11 Decreases (24 st)
Crochet five stitches, then decrease once. Repeat the five‑and‑decrease set four times to reach twenty‑four stitches.
Step 12 – Round 12 Decreases (20 st)
Work four stitches, then decrease. Repeat the four‑and‑decrease set four times to taper the neck to twenty stitches.
Step 13 – Round 13 Increases (24 st)
Crochet four stitches, then increase in the next stitch. Repeat the four‑and‑increase set four times to widen gently to twenty‑four stitches.
Step 14 – Round 14 Increases (28 st)
Work five stitches, then increase. Repeat the five‑and‑increase set four times to expand to twenty‑eight stitches.
Step 15 – Round 15 Increases (35 st)
Crochet three stitches, then increase. Repeat this three‑and‑increase pattern seven times to grow the head base to thirty‑five stitches.
Step 16 – Round 16 Straight (35 st)
Single crochet all the way around to firm the new head circumference. The plush now has a defined waist and a growing head ready for final shaping.
Step 17 – Increases to 40 st Crochet six stitches, increase in the next. Repeat five times. Head widens to forty stitches.
Step 18 – Straight (40 st) Single crochet around to lock the width.
Step 19 – Decreases to 35 st Work six stitches, then one decrease. Repeat five times. Shape starts to narrow.
Step 20 – Decreases to 30 st Crochet four stitches, then decrease. Repeat five times. Add five more single crochets to keep the seam centered.
Step 21 – Decreases to 22 st Work two stitches, then decrease. Repeat seven times. Finish with one more decrease.
Step 22 – Decreases to 14 st Single crochet once, then decrease. Repeat seven times. Neck closes sharply.
Step 23 – Decreases to 7 st Make seven decreases in a row.
Step 24 – Final Decreases and Fasten Off Work seven more decreases to seal the crown. Pull the yarn tail through the last loop and weave it inside the head to hide. The body‑and‑head piece is complete and ready for ears, arms, and facial details.
Ears

Step 1 – Magic Ring (4 st)
Work four single crochets into a magic ring and pull the tail snug to close the center.
Step 2 – Round 2 Increases (6 st)
Single crochet in the first stitch. Increase in the next. Repeat once more to finish with six stitches.
Step 3 – Round 3 Increases (8 st)
Crochet two stitches, then increase. Repeat once to reach eight stitches.
Step 4 – Round 4 Increases (10 st)
Work three stitches, then increase. Repeat once to climb to ten stitches.
Step 5 – Round 5 Increases (12 st)
Crochet four stitches, then increase. Repeat once to top out at twelve stitches.
Step 6 – Round 6 Straight (12 st)
Single crochet in every stitch to build height without widening.
Step 7 – Round 7 Straight (12 st) and Fasten Off
Work another plain round, slip‑stitch to close, and leave a long tail for sewing. Make a second ear. Align each ear on the head’s crown and whip‑stitch in place so they sit evenly.
Arms

Step 1 – Magic Ring (6 st)
Work six single crochets into a magic ring and pull the tail tight to close the hole.
Step 2 – Round 2 Increases (9 st)
Single crochet in the first stitch, then increase in the next. Repeat the pattern two more times to reach nine stitches.
Step 3 – Round 3 Straight (9 st)
Single crochet in every stitch. This keeps the tube narrow.
Step 4 – Round 4 Straight (9 st)
Work another plain round to add height.
Step 5 – Round 5 Straight and Fasten Off (9 st)
Crochet one more round, slip‑stitch to close, and leave a long tail for sewing. Make two identical arms. Lightly stuff if you want a firmer shape. Stitch each arm at the shoulder seam where the body meets the head, keeping them level on both sides.
Making and Attaching the Glasses and Face Details
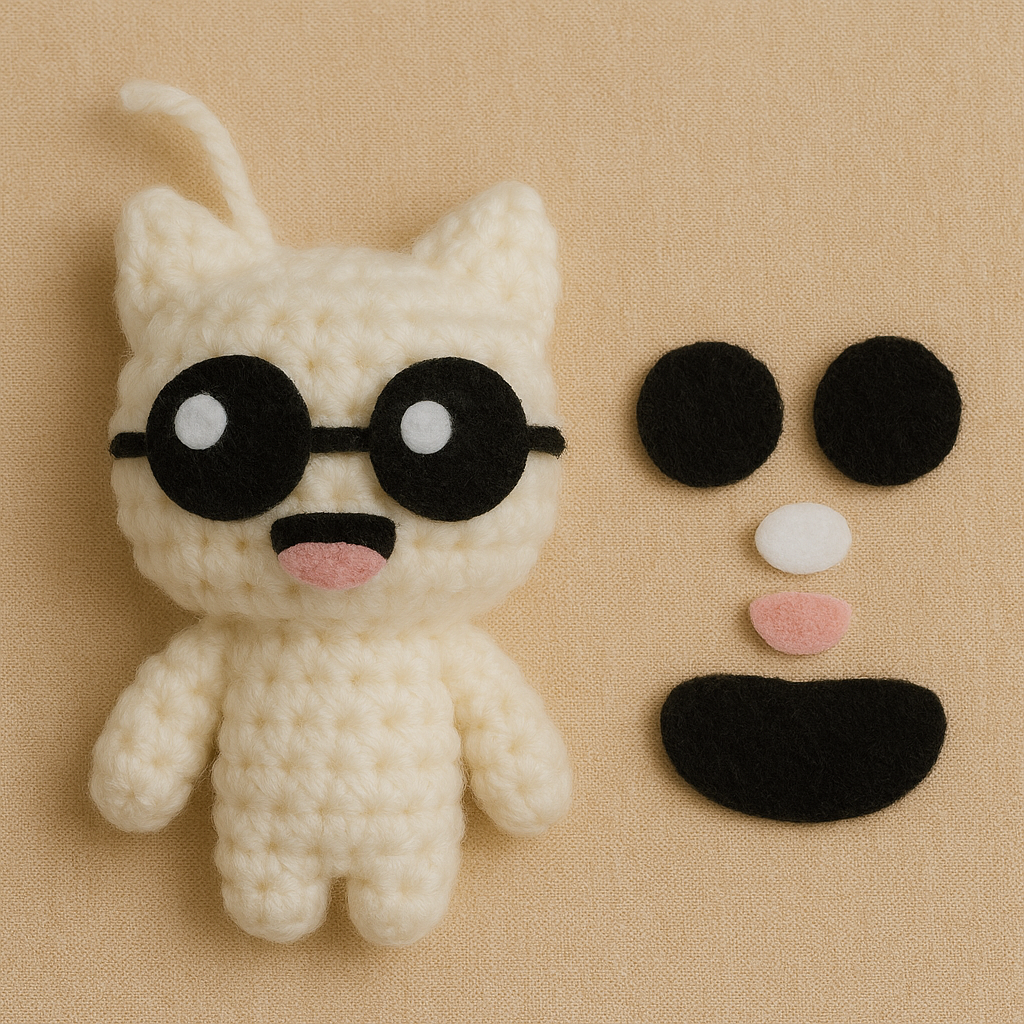
Step 1 – Felt Pieces
Cut two equal circles from black felt for the lenses. Cut two small ovals from white felt for light reflections. Cut one small pink oval for the tongue. Cut one slightly larger black oval for the mouth base.
Step 2 – Assemble the Lenses
Glue one white oval near the top edge of each black circle. Let the glue set. These highlights give the “glassy” look.
Step 3 – Assemble the Mouth
Glue the pink oval on top of the black oval, keeping the black border visible. Press flat until secure.
Step 4 – Stitch the Frame Line
Thread black yarn on a tapestry needle. Run one horizontal back‑stitch across the mid‑face, just below the head’s center. This line acts as the bridge and arms of Gojo’s glasses.
Step 5 – Attach the Lenses
Place each black felt lens on either side of the bridge line. Glue in place. Hold for a few seconds so the felt bonds well with the yarn surface.
Step 6 – Attach the Mouth
Center the layered mouth slightly below the glasses. Glue and press flat.
Step 7 – Add Blush
Dip a clean makeup brush in pink blush or soft pastel powder. Dab lightly on:
- cheeks under each lens
- tips of both ears
- ends of each arm
- fronts of both legs

Fast‑Track Your Plush With the Piccassio Crochet Kit
Grab the Piccassio Crochet Kit and skip chasing down separate tools. The bundle comes loaded with 20 yarn colors, nine ergonomic hooks, stitch markers, needles, a row counter, and a zip‑top organizer bag that feeds yarn smoothly for amigurumi work. An easy “Crochet for Beginners” book guides first-timers through the basics, while the bag keeps every piece organized on the couch or on the go.
Conclusion
Finishing a Gojo Cat crochet plush proves that simple stitches can create striking character details. You practiced tight rounds for structure and clean shaping. Felt accents and blush brought the playful expression to life without complex embroidery. Consistent hook tension kept every piece proportional for easy assembly. Display your new plush or gift it to a fellow fan as proof of your growing amigurumi skills.
We have more fun crochet projects for you. Check out our crochet gift ideas article next!
A meme creator is someone who crafts humorous, relatable, or satirical content using images, videos, or GIFs combined with clever captions. With tools like meme generators, photo editors, and apps like Canva or Photoshop, creators can quickly produce viral content.
Meme creators often draw inspiration from pop culture, current events, or internet trends, turning everyday moments into widely shared jokes. Their work fuels social media platforms like Instagram, Reddit, and Twitter, engaging audiences through laughter and shared experiences.
Whether it’s a reaction meme, a dank remix, or a wholesome post, meme creators play a key role in shaping online culture.
FAQ: Gojo Cat Crochet Plush
- What yarn weight and hook size should I use for this pattern?
- While the article mentions a general kit, for the best results with this specific pattern, it is recommended to use Worsted Weight (Category 4) yarn paired with a 3.5mm (E-4) or 4.0mm (G-6) crochet hook. Using a hook slightly smaller than the yarn label suggests helps create tight stitches that prevent the stuffing from showing through.
- How big will the finished Gojo Cat be?
- If you use standard worsted weight yarn and a 3.5mm hook, your finished Gojo Cat will stand approximately 4 to 5 inches (10–12 cm) tall. If you want a larger “jumbo” version, you can switch to bulky velvet yarn and a 6.0mm hook, which will double the size.
- Can I wash the finished plushie?
- Because the pattern instructs you to use glue to attach the felt glasses and mouth, machine washing is not recommended. The felt can peel off or become damaged in a washing machine. It is best to spot-clean the plush with a damp cloth. If you want it to be washable, you should sew the felt pieces on with a needle and thread instead of using glue.
- What specific yarn colors do I need to buy?
- You will primarily need White yarn (or a very pale silver/grey) for the entire body, head, limbs, and ears to match Gojo’s hair and the cat meme aesthetic. The black and pink details are created using felt, so you do not strictly need black yarn unless you prefer to embroider the glasses instead of using felt.
- Can I use safety eyes instead of the felt glasses?
- Yes, but it will change the look. The felt glasses are key to the “Gojo” character design. However, if you are making this for a small child and want to avoid glued parts, you can insert 8mm or 9mm black safety eyes between Rounds 13 and 14 of the head before you finish stuffing and closing the body. Note that this will make him look like a regular white cat rather than the specific meme character.