Last Updated on October 8, 2025 by Team Ideas24
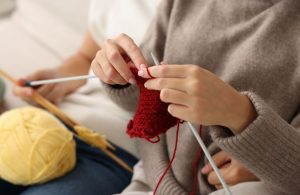
DIY potholders upgrade any kitchen fast. You choose fabrics that match your style. Cotton, insulated batting, and tight quilting keep hands safe. A simple square becomes a practical gift and a scrap-buster project. Let’s stitch potholders that look good and last.
Contents
Sewing Your DIY Potholders Like a Pro
Sewing DIY potholders turns fabric scraps into heat-shielding kitchen gear. Follow this straightforward plan and finish a safe, stylish pair in under an afternoon.
Materials
- Two 8″ × 8″ cotton squares for the front and back
- One 8″ × 8″ Insul-Bright or two layers of cotton batting
- One 8″ × 8″ cotton muslin for lining
- One 2″ × 6″ cotton strip for the hanging loop
- Cotton thread to match or contrast
Tools
- Sewing machine with a walking foot
- Quilting ruler and rotary cutter or sharp fabric scissors
- Pins or fabric clips
- Iron and pressing board
Steps
- Cut all fabric and batting squares to equal size for a neat stack.
- Layer pieces in this order: back fabric right side down, batting, lining, front fabric right side up.
- Pin or clip the stack tightly. Quilt straight lines across the square every two inches to lock layers and add grip.
- Trim edges even. Fold the loop strip lengthwise, press, stitch along the open edge, then fold it into a U.
- Place the loop’s raw ends at one corner on the front side, pointing inward. Tack them with a short stitch.
- Bind the perimeter with double-fold bias tape, mitring each corner for a crisp frame.
- Give the potholder a final press so seams lie flat and you’re ready to grab that hot pan.
Choosing the Best Fabric for Heat Protection
Cotton and wool shield hands from hot skillets when stitched into DIY potholders. Pick sturdy weaves and smart inner layers so heat stays out and style stays in.
Cotton Canvas Holds Up Under Daily Use
Dense cotton canvas resists scorch marks and frays less than light quilting cotton. Its tight weave blocks steam and gives quilting stitches more bite. Pre-wash the yardage to remove sizing. Dry on high to force any shrinking before you cut squares. A colorfast print masks ketchup spots and still looks fresh after dozens of laundry cycles.
Denim Gives Extra Padding Without Bulk
Old jeans find new life as potholder fronts. Midweight denim adds grip on cast-iron handles while keeping total thickness machine-friendly. Clip away heavy seams and press the fabric flat. The twill weave stretches just enough to wrap around curved edges when you bind later.
Insulated Batting Reflects Radiant Heat
Insul-Bright batting uses a thin metalized layer that pushes heat back toward the pan. Sandwich one sheet between two cotton pads. Quilting every two inches locks fibers so they do not bunch in the wash. Check that the silver side faces the hottest surface when you assemble the stack.
Recycled Wool Boosts Eco Credentials
Felted wool blankets trap air pockets that slow heat transfer. Run the blanket through a hot wash and tumble dry to shrink and thicken the fiber. Cut an eight-inch square and pair it with a cotton outer shell. The wool adds spring without making the potholder stiff.
Thread and Color Choices Complete the Barrier
Match cotton thread to the shell fabric for balanced shrink and even tension. Dark or patterned prints hide burns better than pastels. Hold a pressed sample over a steaming kettle for five seconds. If your fingertips feel only mild warmth you have the right combination of layers for safe, daily cooking.
Personalizing DIY Potholders for Gifts
Handmade kitchen gear turns everyday safety into a thoughtful keepsake. Add names, color themes, and handy extras that make each gift feel tailored to its new home.
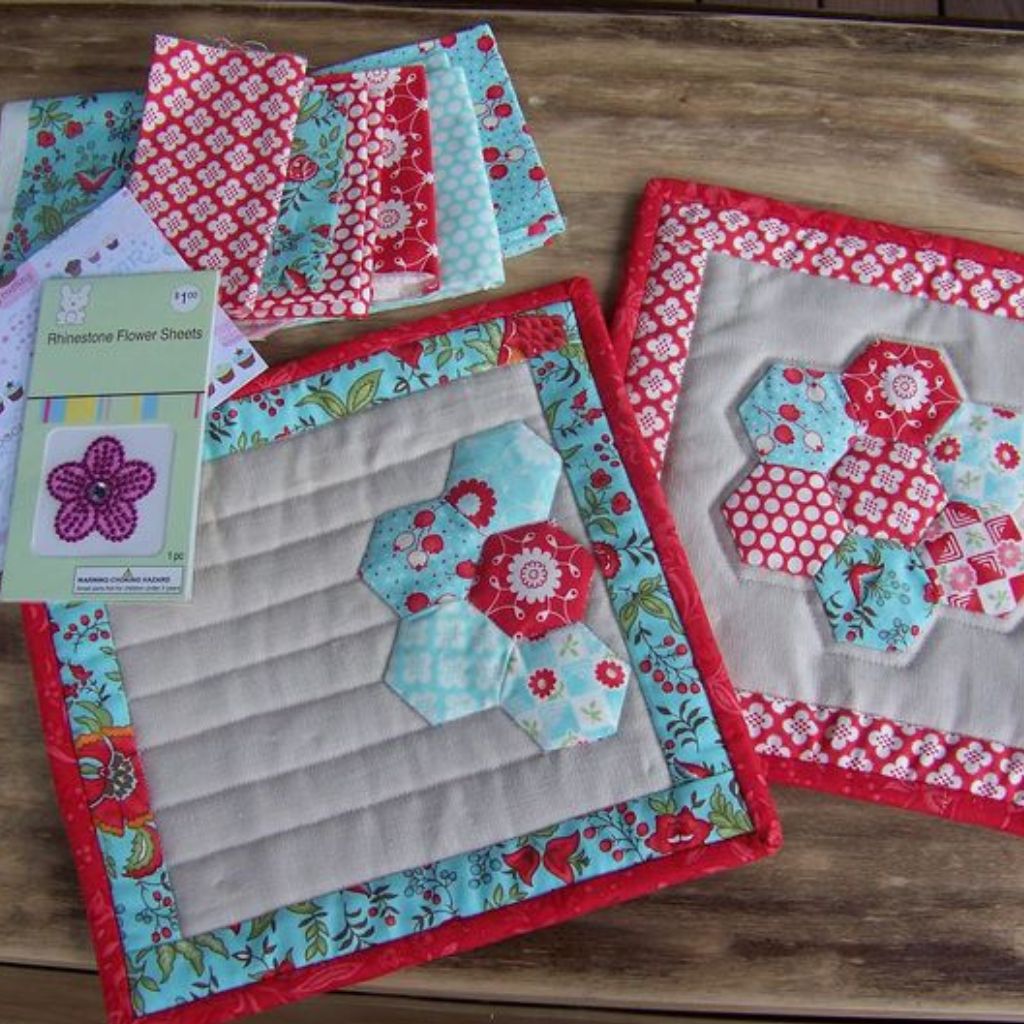
Patchwork Fronts Use Up Charming Scraps
Sew nine small squares into a simple grid. Keep seams at a scant quarter inch so bulk stays low. Alternate solids and prints for balance. Press every joint open for a flat surface that quilts with no ridges.
Appliqué Adds Instant Character
Fuse small shapes like teacups, herbs, or tiny animals onto a solid base. Zigzag around the edges with matching thread. The quick graphic lifts a plain square without extra thickness.
Monogramming Shows You Planned Ahead
Draw an initial on water-soluble stabilizer. Stitch with a dense satin setting. Rinse the film away and let the thread dry flat. Center the letter so quilting lines frame it neatly.
Pockets Turn Protection Into Storage
Cut a rectangle two inches shorter than the main body. Hem the top edge, then baste its sides onto the front panel. After final quilting the slot holds tea bags or a recipe card.
Gift-Ready Presentation Seals the Memory
Braid cotton twine for a hanging loop and stitch it into one corner. Pair two matching squares with a long mitt for a set. Slide wooden spoons under a ribbon and add a handwritten washing tip on cardstock. Recipients remember the care each time they reach for the stovetop.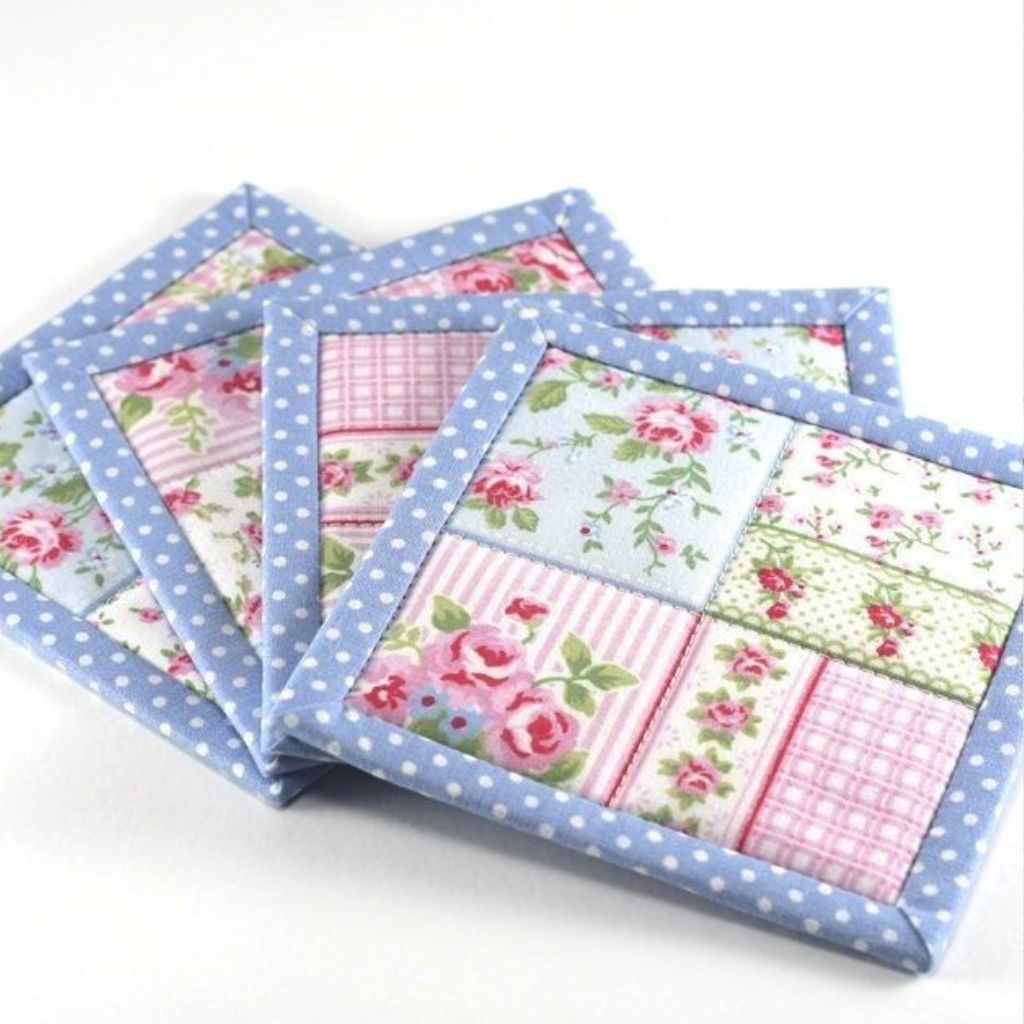
Binding Edges Like a Pro
Clean binding keeps layers tight and withstands tugging from daily cooking. Master a few techniques and your DIY potholders will look store-bought but feel handmade.
Bias Tape Bends Smoothly Around Corners
Cut two-inch strips on the forty-five-degree grain and join ends with diagonal seams. Press the tape in half lengthwise. The bias edge flexes over curves without puckers.
Starting Seam Placement Hides Final Join
Open one fold and match its raw edge to the potholder back. Begin stitching halfway along a side. This spot keeps the overlap invisible once the tape flips over.
Miter Corners for a Sharp Finish
Stop stitching a quarter inch before each corner. Fold the tape up at a right angle, then down along the next edge, forming a neat triangle. Resume sewing from the fold line. The result is a crisp point that lays flat after pressing.
Top-Stitch Locks Layers and Adds Style
Flip the binding over to the front, covering the previous seam by a hair. Clip every inch so the edge does not drift. Top-stitch close to the fold with a short straight stitch. Use contrasting thread for a decorative outline or matching thread for a subtle frame.
Hand-Finish for Invisible Stitches
If you prefer a seam-free look, ladder-stitch the binding by hand. Slide the needle through the binding fold then catch just a few lining threads. Pull snug every half inch. The stitches disappear, and the edge feels smooth against your fingers when lifting hot pans.
Care and Maintenance Tips
Handmade heat gear lasts when you treat it right. Simple habits keep DIY potholders clean, soft, and safe without eating time you could spend cooking.
Washing Without Warping
Toss potholders into cold or warm water on a gentle cycle. Hot washes can tighten cotton layers unevenly and twist binding. Slip them in a mesh laundry bag so loops do not tangle. Use mild detergent that leaves no heavy scent because fragrance oils may scorch later under heat. Skip bleach because chlorine weakens cotton fibers and dulls bright prints.
Fighting Stains Fast
Tomato sauce and oil splatters set quickly. Dab the spot with liquid dish soap while the fabric is still warm. Rub gently with your fingers, never a stiff brush, to avoid fraying quilt stitches. Rinse under cool water and repeat until the color lightens. Let the potholder soak in a mix of baking soda and water for an hour if marks remain.
Drying for Shape and Loft
Lay potholders flat on a towel, press them into shape, and air-dry. A hot dryer can over-shrink batting and wrinkle quilting lines. If you need speed, tumble on low with two clean tennis balls. The balls fluff batting so thickness returns without hard creases. Pull them out while still slightly damp, smooth edges by hand, and finish drying on a rack.
Storing to Prevent Odors
Hang potholders from a hook so air can flow on both sides. Stacking damp pads in a drawer encourages mildew. Sprinkle a pinch of baking soda inside a nearby jar if your kitchen runs humid. Replace soda monthly to keep smells down.
Inspecting Seams for Safety
Check binding and loops every few weeks. Tug gently. If stitches pop or fabric thins, reinforce at once with a zigzag pass. Replace potholders that feel thin enough for heat to seep through in three seconds. Better safe than a blistered palm.
Touch-Up Press for a Crisp Look
Steam iron on medium when edges curl. Place a pressing cloth over any vinyl appliqué to avoid melting. Quick pressing keeps gifts looking new long after the holiday bows go to recycling.
Simple Quilting Patterns That Add Grip
Smart quilting locks layers tight, adds texture against slippery pans, and shows off your style. Choose patterns that match your skill level and kitchen vibe.
Straight-Line Grids for Beginners
Mark parallel lines two inches apart using a heat-erasable pen. Stitch across the square, rotate, and cross again to form a checkerboard. The grid stops batting from bunching and leaves a subtle raised grip. Use a walking foot so layers feed evenly without puckers.
Diagonal Diamonds Boost Flex
Turn the square forty-five degrees and sew lines corner to corner. Repeat on the opposing diagonal to finish diamond shapes. Diagonals spread tension evenly, letting the potholder bend around a skillet handle without stiff creases.
Echo Quilting Frames a Feature Print
Outline a central motif like a coffee cup or initial. Sew concentric lines that follow its silhouette at half-inch intervals. Echoing keeps focus on the fabric art while adding soft ridges your fingers can trust.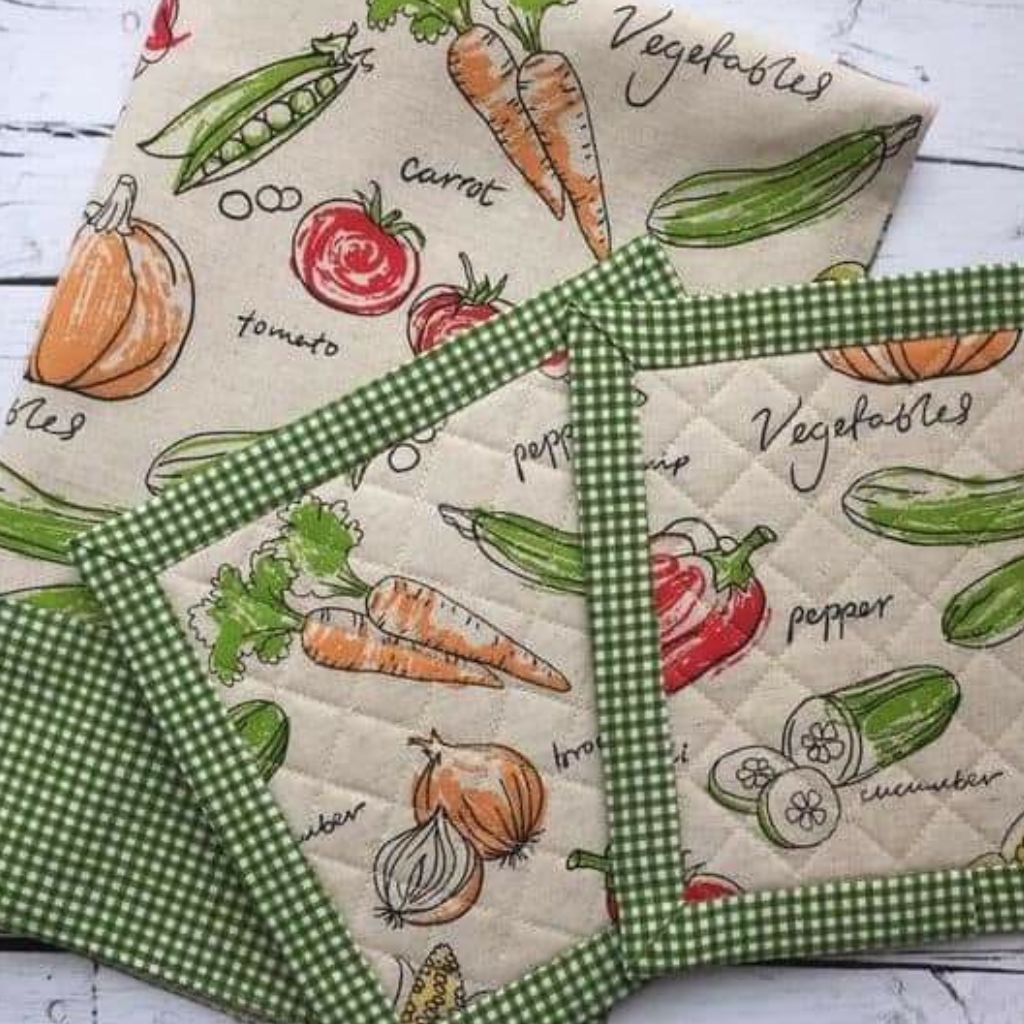
Free-Motion Waves Offer Organic Texture
Drop the feed dogs and guide the sandwich in smooth curves. Aim for wave peaks about one inch apart. The random flow masks minor wobbles and delivers an ocean-like surface that grips metal. Practice on scraps first to dial in stitch length.
Crosshatch with Contrast Thread
Use a bold thread color and sew diagonal lines both ways at one-inch spacing. The tight crosshatch stiffens thin cotton fronts. It also makes stains less noticeable because eyes land on the dynamic X pattern instead of spots.
Spiral Starts at the Center
Begin inside, stitch a tight circle, and slowly expand outward. Maintain even spacing so the spiral looks intentional. This design locks batting firmly from middle to edge, perfect for heavy use. It showcases variegated thread like a tiny galaxy on your countertop.
Combining Patterns for Custom Grip
Mix a straight grid on the palm zone with decorative waves near the loop. The dual texture offers solid traction where you need it and flair where you can see it. Sketch the plan on paper first to balance sections.
Finishing Stitches Matter
Set stitch length to 2.5 mm for strength without bulk. Back-stitch only at the very start and end of each continuous line. Snip loose tails close so nothing snags on oven racks. Steam-press the finished quilting flat before binding to lock the texture in place.
Conclusion
Sewing your own potholders turns scraps into reliable kitchen safety. The project builds skill as you master sturdy fabrics, smart quilting, and crisp binding. Personal touches like monograms and braided loops transform each square into a gift people will use every day. Routine washing and quick seam checks keep heat protection strong.
A good sewing machine helps in sewing potholders. Check out our buying guide on the top sewing machines!